Two or three colors of embroidery thread to match fabrics and bobbins to match
1 ½ yards of dark 100% cotton fabric
1 ½ yards if light 100% cotton fabric
2 yards of Battilizer (a combination quilt batting and stabilizer), or enough low loft quilt batting and poly-mesh or no-show backing to cut 12 12” squares depending on backing width
6” square or larger hoop (if using a larger hoop you will need additional Battilizer or low loft quilt batting and stabilizer to accommodate 12 hoopings
Spray Adhesive
Scotch Tape
Embroidery Machine
Sewing Machine with a walking foot or walking foot attachment
3.Cut 12 8” squares of light fabric for block backs
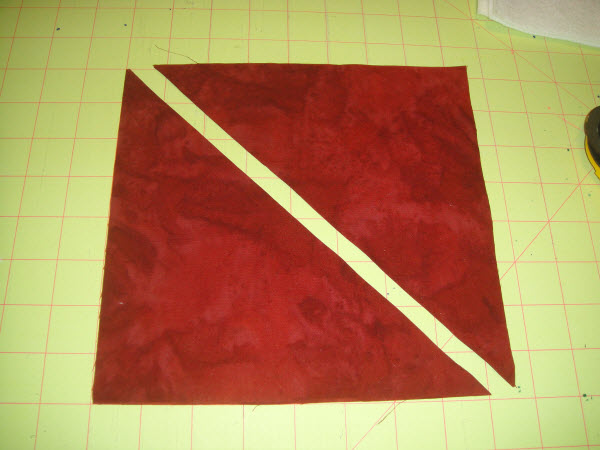
4.Cut 6 8” squares of dark fabric and then cut those diagonally to give you 12 triangles
5.Cut 3 ½ yards of 2” strips of the dark fabric on the lengthwise grain of your fabric for sashing
6.Cut 3 ½ yards 2.5” strips of the dark fabric on the lengthwise grain of your fabric for binding
7.Cut 12 12” squares of Battilizer or if you are using a larger hoop cut the batting so it extends at least an inch on all sides of your hoop. If using low loft quilt batting and stabilizer cut 12” or larger squares of each of those.
(Click Image to Enlarge)
Piecing the Quilt Block in the Hoop
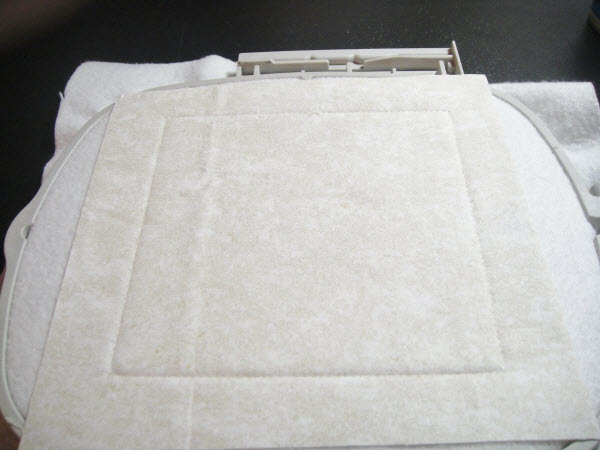
Step 1.
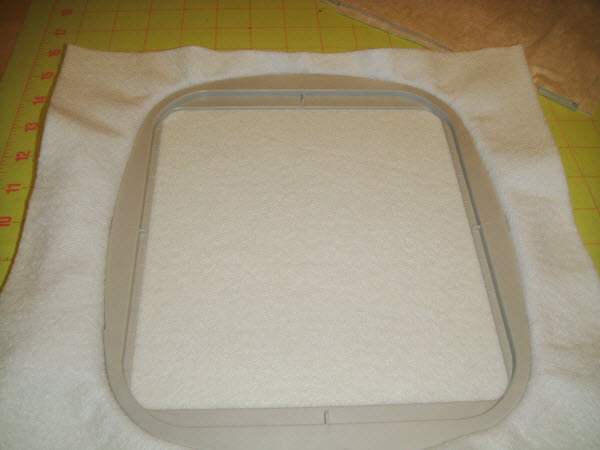
Hoop the Battilizer tautly in the hoop. If using low loft batting and stabilizer combination, place the stabilizer in the hoop first and have the low loft batting on top.
(Click Image to Enlarge)
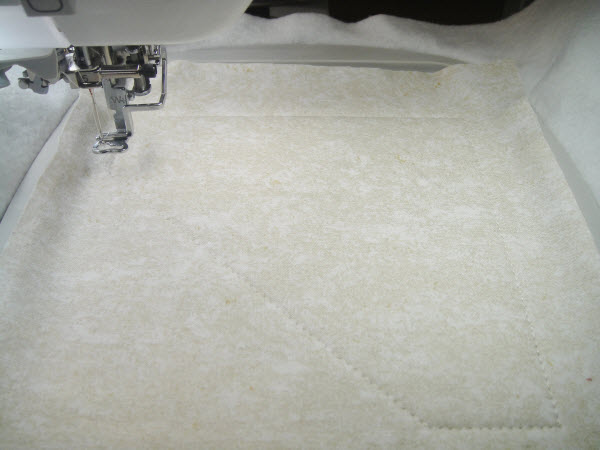
Step 2, 3 and 4:
2.With neutral thread on the top and in the bobbin run the first color sequence which is the outline of the block.
3.Remove the hoop from the machine and lightly spray the batting with temporary adhesive spray.
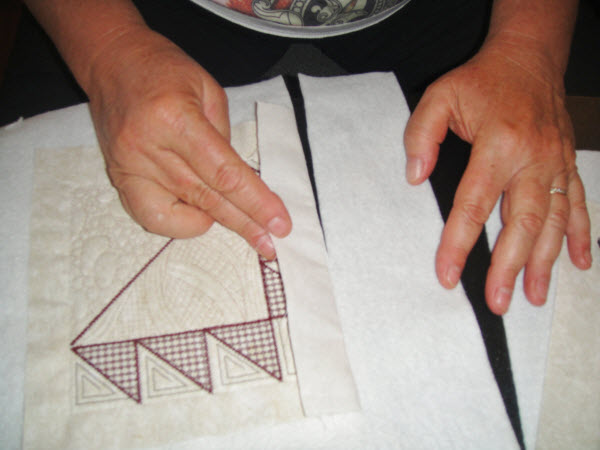
4.Place a square of the light fabric on top, covering all outline edges by at least ½”. Smooth the fabrics with your fingers.
(Click Image to Enlarge)
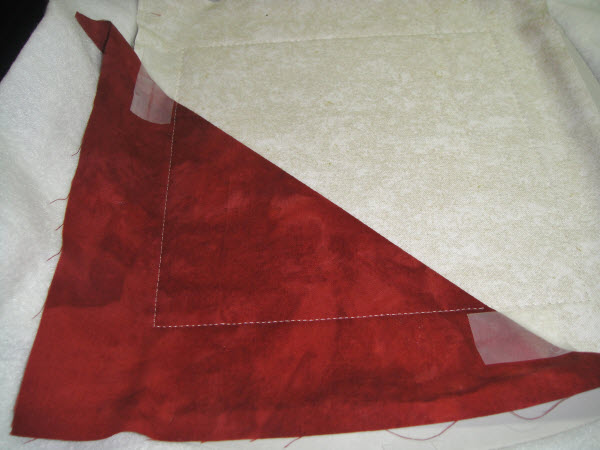
Step 5:
Return the hoop to the machine, place water soluble thread in the top only and stitch the second color sequence which is the tack down line for the light fabric.
(Click Image to Enlarge)
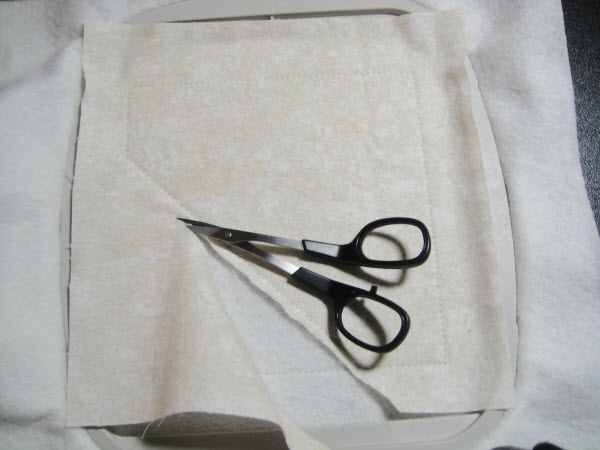
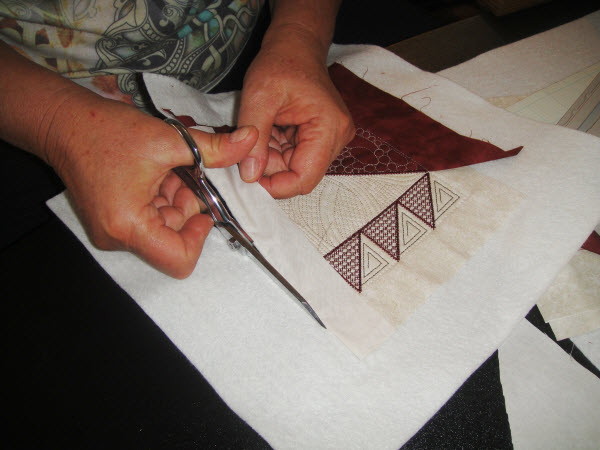
Step 6:
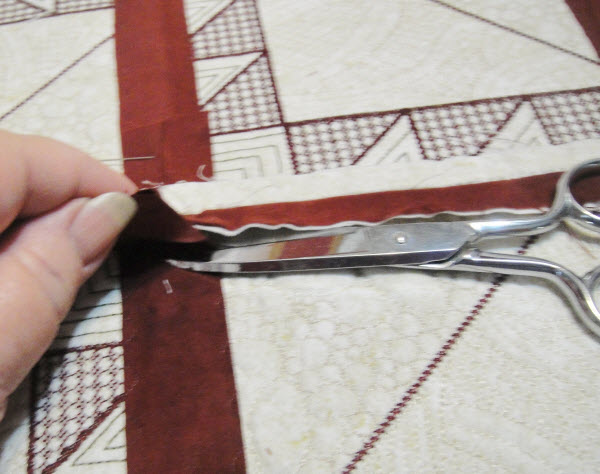
Trim the lower fabric triangle leaving a scant ¼” seam allowance.
(Click Image to Enlarge)
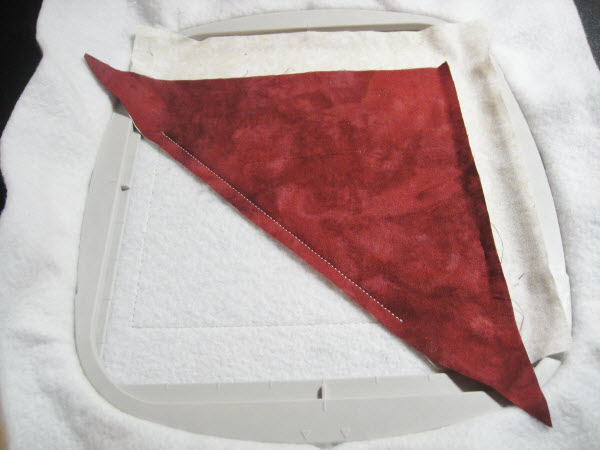
Step 7:
Place a dark fabric triangle face down on the light fabric lining up at your ¼” seam allowance.
(Click Image to Enlarge)
Step 8:
Run step 3 of the color sequence in neutral thread top and bobbin to stitch the fabrics together.
(Click Image to Enlarge)
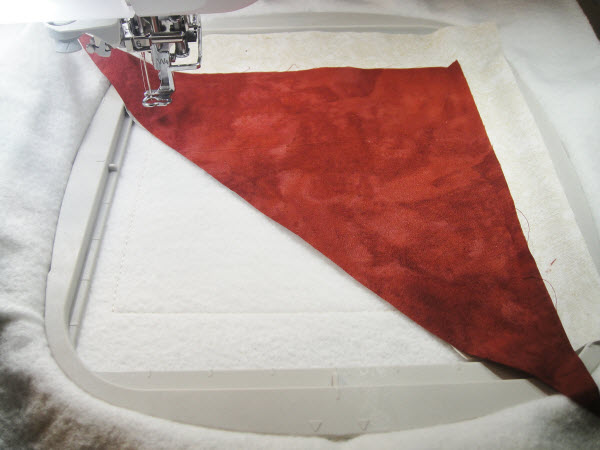
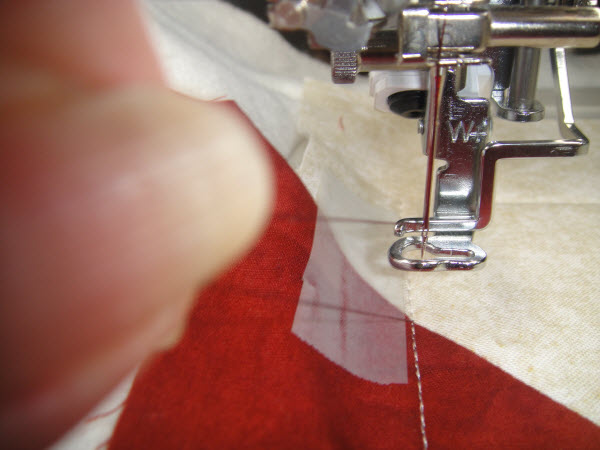
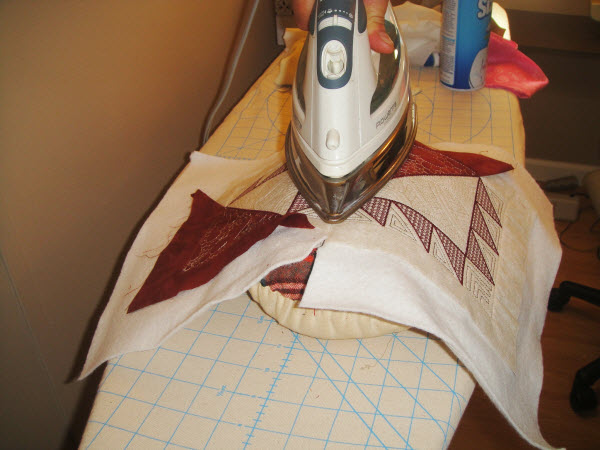
Step 9:
Flip the dark fabric to cover the outlines on the quilt block. Important – place a small piece of Scotch tape outside the stitching lines on both the top and bottom edges of the triangle. This will keep those edges from being flipped up by the presser foot of your machine. Put water soluble thread in the top only and stitch color sequence # 4, which is a tack down of the lower triangle.
(Click Image to Enlarge)
Step 10 and 11:
10.Remove the hoop from the machine and turn over. Spray batting lightly with adhesive spray and smooth the backing fabric over the outlines of the block making sure that the fabric exceeds the outlines by ½” on all sides.
11.Continuing with water soluble thread in the top only stitch the tack down line for the backing of the block. After this tack down line is sewn check the back of your block again to make sure there are no puckers or pleats in the block back.
(Click Image to Enlarge)
Quilting the Quilt Block In The Hoop
Step 12:
For all of the quilting in the hoop you will want to use the same color thread in the top and bobbin. You will also want to bring the bobbin thread to the top of the quilt block before you begin stitching. Turn off the trimmers of the machine. Proceed as follows:
Change the top and bobbin thread to burgundy, or color to match your dark triangle. To bring the bobbin thread to the top of the quilt:
a)Thread your top thread through the presser foot.
b)Hold the thread slight to the right side of the presser foot
c)Press the needle up button on your machine twice
d)The bobbin thread should come to the top of the quilt block
e)You may need tweezers to get a grasp on the bobbin thread, pull it out until you have enough length to hold the two threads together
f)Stitch a few stitches of the quilt design, stop the machine and trim off the tails of the thread. Complete sewing the triangles.
(Click Image to Enlarge)
Step 13, 14, 15 and 16:
13. Place the color thread you have chosen for the quilting in the light center of the quilt block in both the top and bottom. Follow the above procedure for bringing the thread to the top of the quilt.
14.Place the color thread you have chosen for the quilting of the dark fabric in the top and bobbin of the machine. Bring the bobbin thread to the top and stitch. In the sample the same color was used for quilting both of these sections of the quilt block.
15.Place the color thread you have chosen for the detail stitching between the embroidered triangles. Bring the bobbin thread to the top and stitch.
16.On the last color change place the thread that matches your embroidered triangles on the top and in the bobbin. Bring the bobbin thread up and stitch the last color sequence.
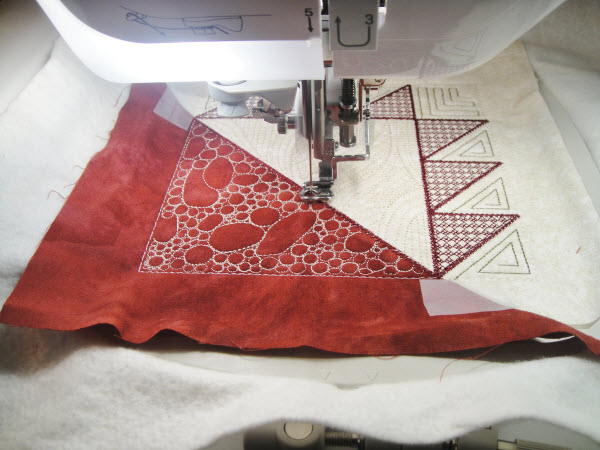
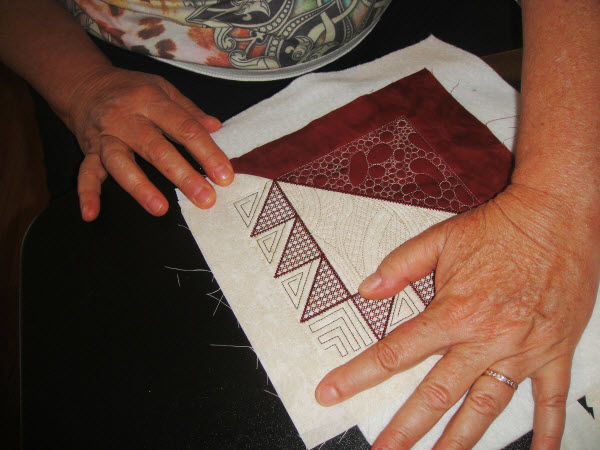
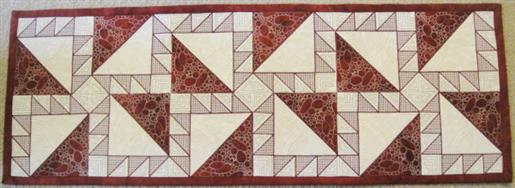
Piece, quilt and embroider 12 quilt squares.
(Click Image to Enlarge)
Assemble the Table Runner
Trimming the quilt blocks:
Step 1 and 2:
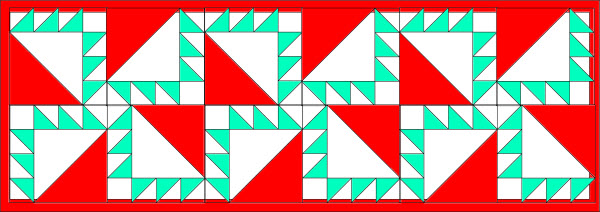
1.Though you haven’t trimmed off any of the edges yet, layout your completed squares on a table or quilt board in this arrangement. (Fig 13)
2.Once you know in which direction each square is going to lay in your quilt use a pin or make a small mark on all edges that are going to be on the outside edge of the quilt.
(Click Image to Enlarge)
Step 3 and 4:
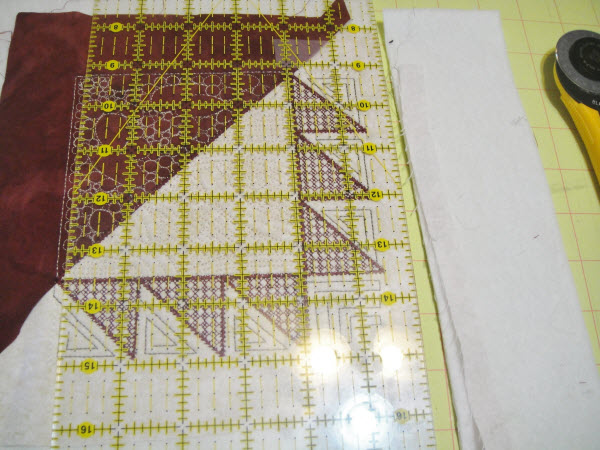
3.The outside edges of the blocks are to be trimmed with the batting or Battilizer in place. Simply line up a half inch mark on your ruler with the outside basting lines of the embroidered block and trim through all three layers.
4.The first and last squares of the quilt block will have these 1/2” edges cut on two sides. One for the side edge and one for the top and bottom of the table runner edges.
(Click Image to Enlarge)
Step 5:
The batting will be removed from inside the quilt blocks on all edges where quilt blocks will be sewn together. Do this by:
a.Fold back the excess fabric on the back side of the block and finger press.
(Click Image to Enlarge)
b.Fold back the excess fabric on the front of the block and cut the batting as close as possible to the seam line.
(Click Image to Enlarge)
c.The side of your block will now look like this.
(Click Image to Enlarge)
d.Unfold the bottom excess fabric so that smooth the edge top and bottom fabrics with the batting removed together again.
(Click Image to Enlarge)
Joining the Quilt Blocks:
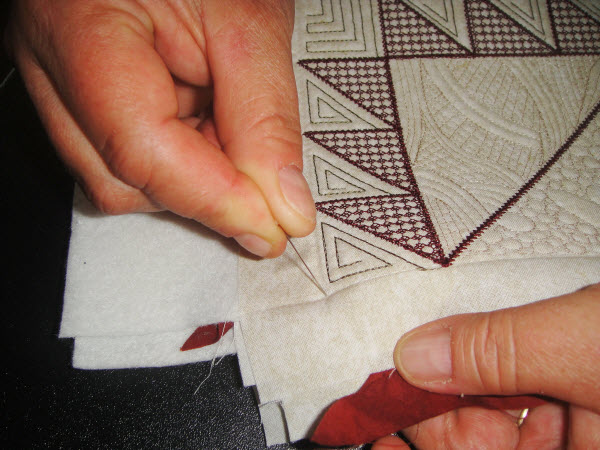
Step 1:
Accurate pinning is critical to the joining of the quilt blocks to ensure that the points of the inside triangles and the matching of lines is perfect. An excellent way to ensure perfect matching up of points is to lay two quilt blocks right sides together:
a.Place a straight pin vertically in the exact corner of the outside basting stitch of the block.
(Click Image to Enlarge)
b.Place the straight pin through the exact corner of the bottom block.
(Click Image to Enlarge)
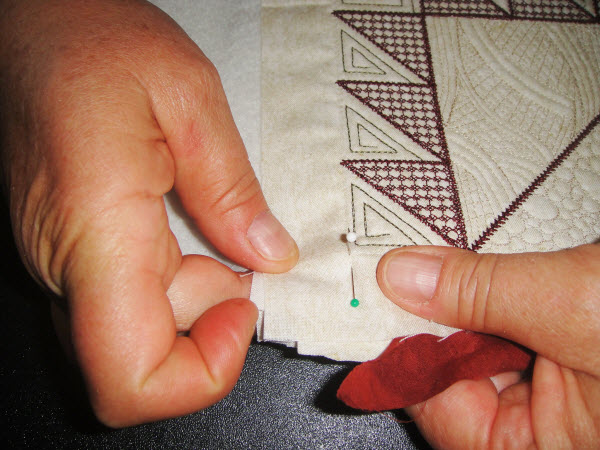
c.Holding the pin straight vertically, place a second straight pin horizontally through all layers of the two blocks.
(Click Image to Enlarge)
d.Repeat this procedure for each point across the seam where it is important that two points match up. In this picture the point of the embroidered triangle has been lined up and pinned to the detail stitching across the dark triangle on the bottom block.
(Click Image to Enlarge)
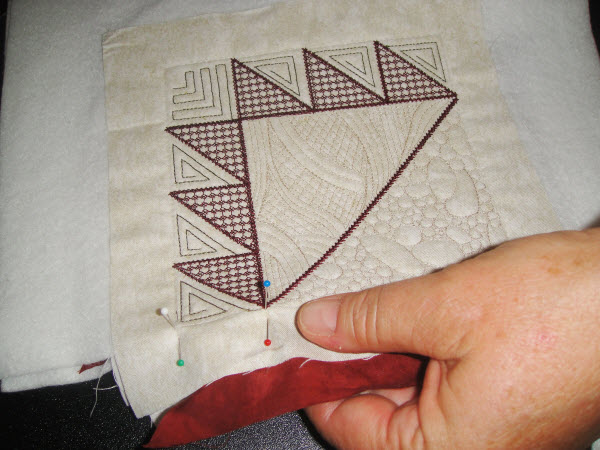
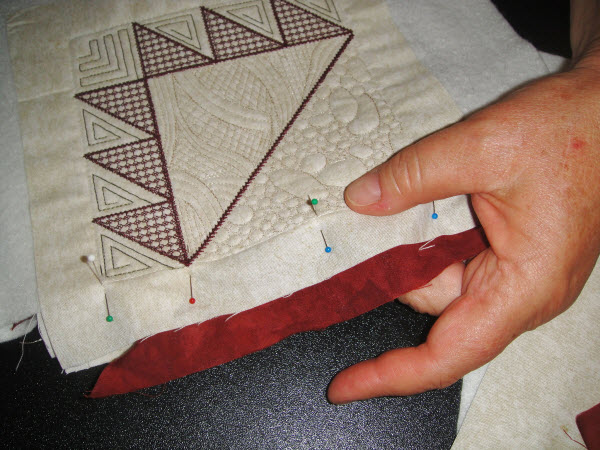
e.Place these sets of pins all across the quilt block where matching is important, to insure block bastings lines are lined up in the middle and at both corners of the block.
(Click Image to Enlarge)
Step 2:
Attach or engage your walking foot to your sewing machine. Using neutral regular sewing thread, baste the two blocks together with a stitch length of approximately 3.5mm. Sew right on the water soluble basting line of the block.
(Click Image to Enlarge)
Step 3 and 4:
3)Open up the two joined blocks and inspect that everything is lined up correctly.
4)If everything is lined up, stitch the seam again with the 3.5mm length stitch exactly over the first. If things didn’t line up correctly take out that first basting stitch and pin and sew again.
(Click Image to Enlarge)
Step 5, 6 and 7:
5)Steam iron the seam just made flat and then press it open. The use of a pressing ham is useful to allow the steam to penetrate the fabric and get the seam as flat as possible.
6)Trim the seam to 3/8”
7)Continue sewing 6 blocks that make one length of the table runner per Figure 13. Then sew together the 6 blocks that make the other length of the table runner. Do not sew the long seam down the center yet.
(Click Image to Enlarge)
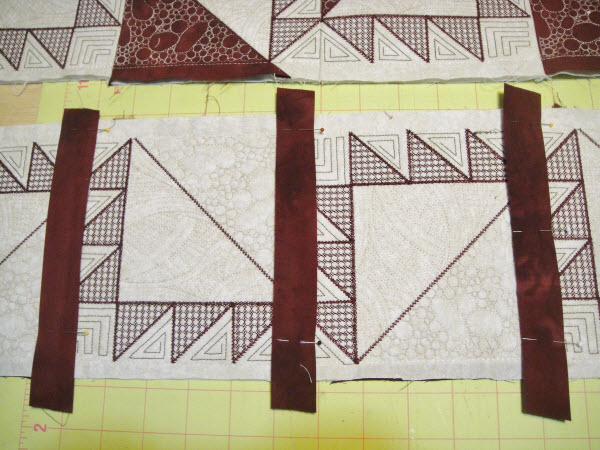
Sashing the Quilt Blocks
Step 8 and 9:
8)Fold the long edges in to meet in the center of a 2” strip of dark fabric to make the sashing. Press.
9)Place the sashing over the seams on the back of the quilt, between the quilt blocks, and place a pin about ¾” from each edge.
(Click Image to Enlarge)
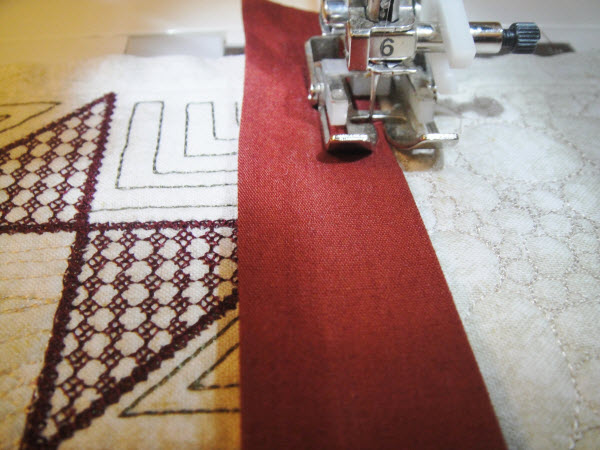
Step 10:
Load invisible thread into your sewing machine – have the walking foot on – and stitch each side of the sashing with a Serpentine Stitch. A Serpentine Stitch just curves back and forth as it sews. Sewn with the invisible thread it will not interfere with the quilting on the front of the quilt, whereas a straight stitch would be seen. Start and stop the Serpentine stitch about ¾” from the edges of the block. Remove the pins as you sew, do not sew over pins.
(Click Image to Enlarge)
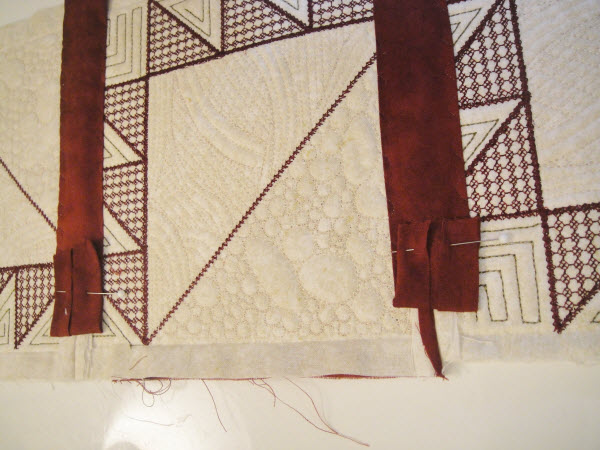
Step 11:
Pin back the inside edges of the sashing.
(Click Image to Enlarge)
Step 12 and 13:
12) With regular sewing thread sew the long center back seam, using the same pinning and sewing techniques you used to join the blocks into strips. Press as you did between the blocks and trim the seam to 3/8”.
13)Trim the excess sashing from the underneath the center seam. Just leave enough of the sashing to be caught by the sashing that will go down the center back.
(Click Image to Enlarge)
Step 14:
Apply sashing to the center back seam, invisible thread and Serpentine stitch down each side of the back sashing.
Award winning Digitizer, Embroidery Educator, Author and a Consultant to the Industry, Pat Williams has 30 years of experience in the embroidery industry. Pat has won multiple awards for her digitizing expertise including the 2007 Impressions Awards Grand Championship, Best of Show as well as the 1st and 2nd Place Awards. Pat’s love of digitizing has afforded her the opportunity to write numerous articles for Impressions magazine in the United States and Images Magazine in Europe. In 2001 Pat was named “Embroidery Educator of the Year.” For many years Pat taught digitizing seminars at the ISS Shows in Long Beach, CA and for Compucon software. She now resides in Tucson, AZ.