These Talavera painted icons are embroidered and quilted in the hoop and then painted with Intense Ink Pencils®. This is a great way to bring out the fabric artist in you. Read on to make your Intense Ink pencils colorfast on your fabric.
Painting quilted blocks with Inktense Ink Pencils® is so much fun. The trick is making them colorfast so that you can wash your projects. Please read the article on “Tips for Painting Embroidery with Intense Ink Pens” for an explanation of the techniques. There are many videos on youtube about coloring in sections of fabric with these pencils. Watch as many of those as you can.
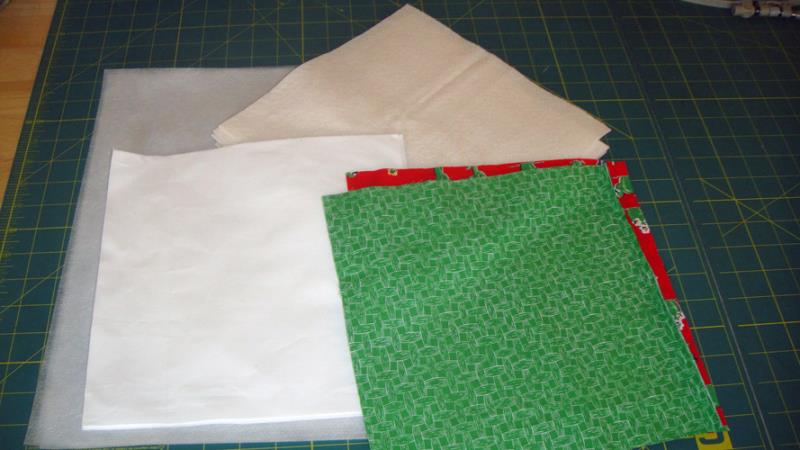
Step 1:
For each block, you will need a 10” square of the PFD Kona Cloth, a 10” square of print material for the backing and a 10” square of the low loft batting as well as a tautly hooped stabilizer in your embroidery hoop.
(Click Image to Enlarge)
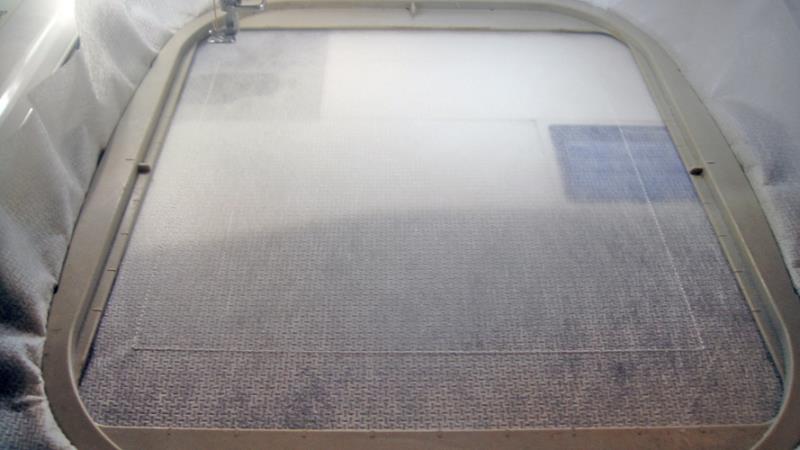
Step 2:
Run the 1st color stop (CS) in white as a placement line for your batting and fabric.
(Click Image to Enlarge)
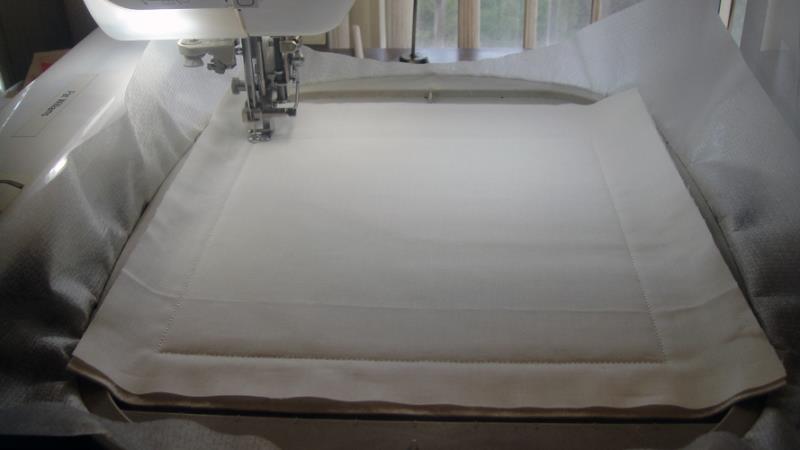
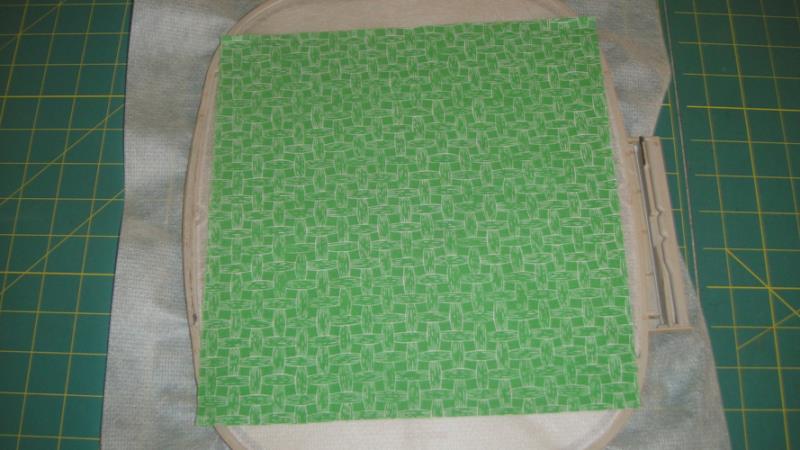
Step 3:
Spray adhesive on a square of batting and position over the placement lines so that the batting exceeds the placement lines by ½” on all sides. Spray adhesive on the white fabric and align with the batting. Run CS 2 in white to tack down the fabrics.
(Click Image to Enlarge)
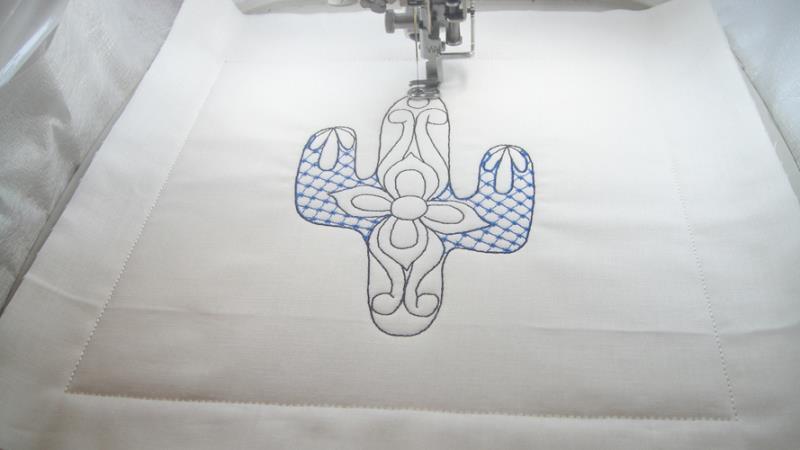
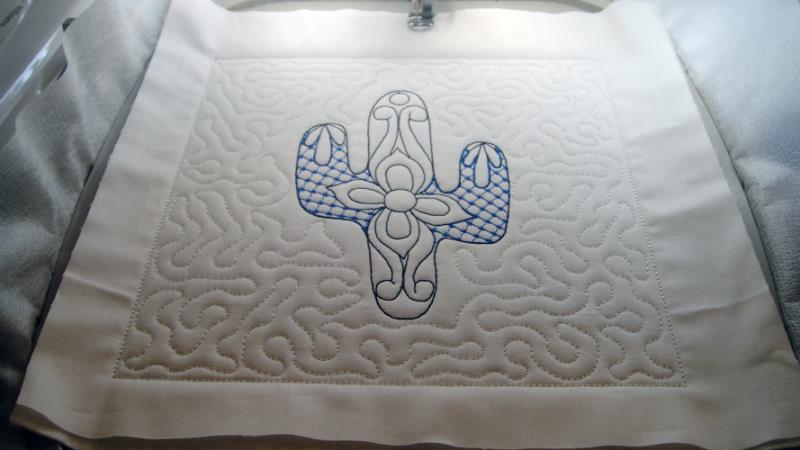
Step 4:
Some of the designs have a blue color change and then a black color change, one design just has the black color stop. Run those color changes in the suggested colors and stop after the black stitches are sewn.
(Click Image to Enlarge)
Step 5:
Remove the hoop from the machine, do not unhoop, lay the hoop face down on a flat surface, spray adhesive on the wrong side of a backing square and align it with your front fabrics right side up.
(Click Image to Enlarge)
Step 6:
Return the hoop to the machine run the next to last CS in white to tack the fabrics together. Run the last CS in white to quilt the block.
(Click Image to Enlarge)
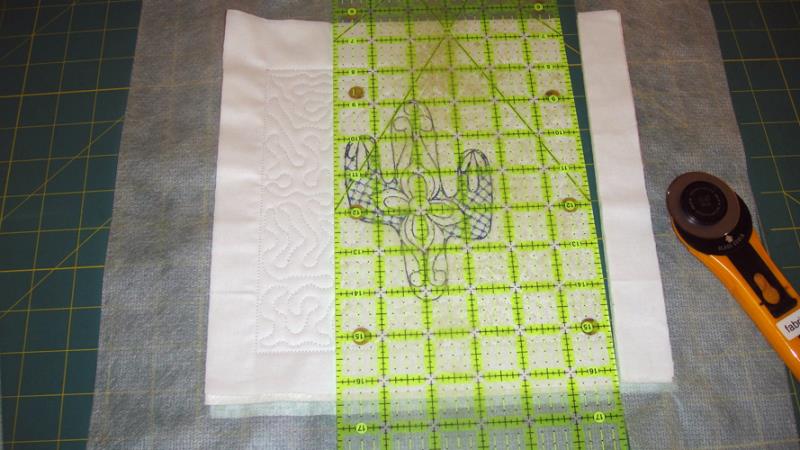
Step 7:
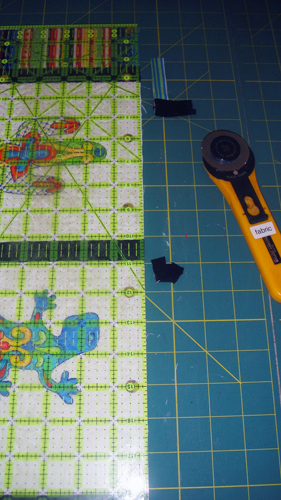
Remove the block from the hoop. Lay the ¼” mark along the tack down stitches and trim each side to a ¼” seam allowance.
(Click Image to Enlarge)
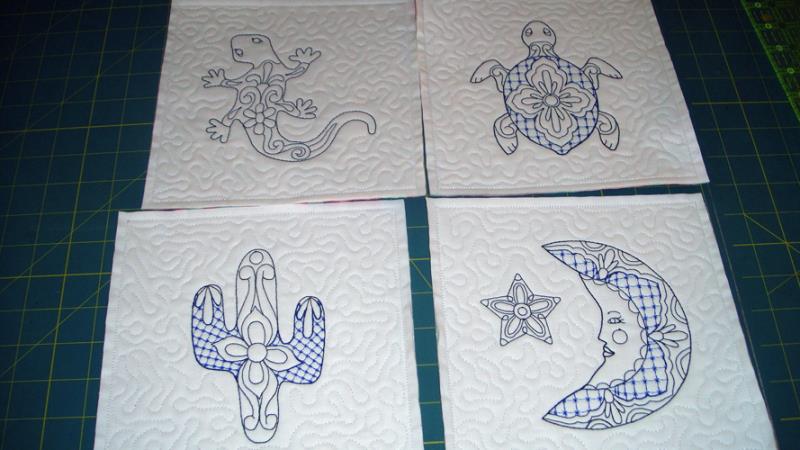
Step 8:
Complete all four blocks following the Steps 2 through 7.
(Click Image to Enlarge)
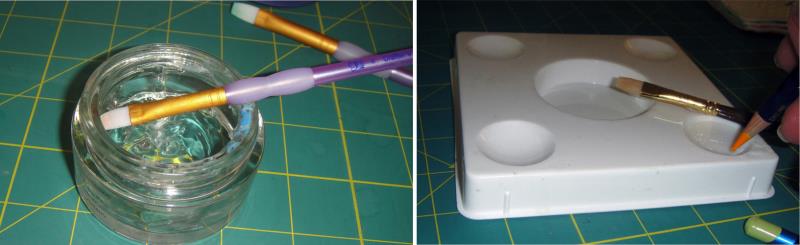
Step 9:
Pour a little clear Aloe Vera gel in a small container and a little fabric medium into a water color pallet.
(Click Image to Enlarge)
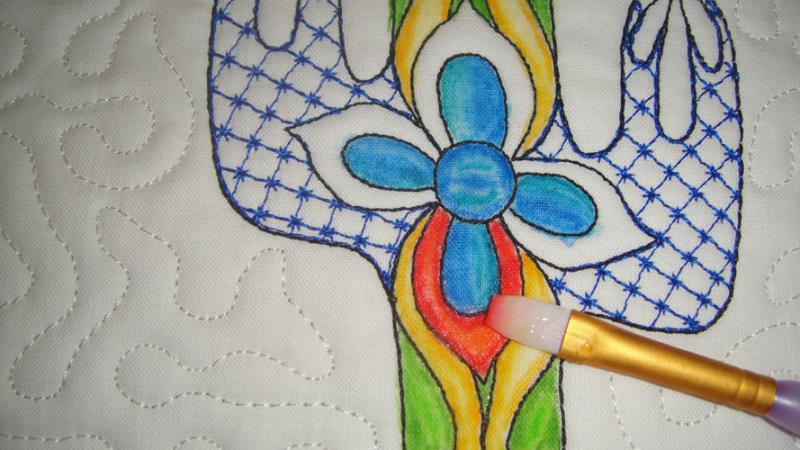
Step 10:
With a paint brush dampen small sections of the design with fabric medium; outline the dampened area or apply the pencil to a bottom of the section; then dampen a clean brush the with the Aloe Vera gel and drag the color across the rest of the section to fill it in with color. Dry your painted areas with a hair dryer before moving on the next color. See the article mentioned in the preface of this project for more tips on painting with the Inktense Ink Pencils®.
(Click Image to Enlarge)
Step 11:
The mesh type areas sewn with the blue thread should have golden yellow dots in the centers of the squares. There was not a reasonable way to digitize those in to show you were they are. They can be made either by applying a little of the fabric medium in the center of the squares and then colored with the pencil, or dip the pencil directly into the fabric medium and marking the dot directly on the fabric. Once the pencil has been dipped into the medium and all of your dots made, let the pencil dry and then sharpen it again before using on another area.
(Click Image to Enlarge)
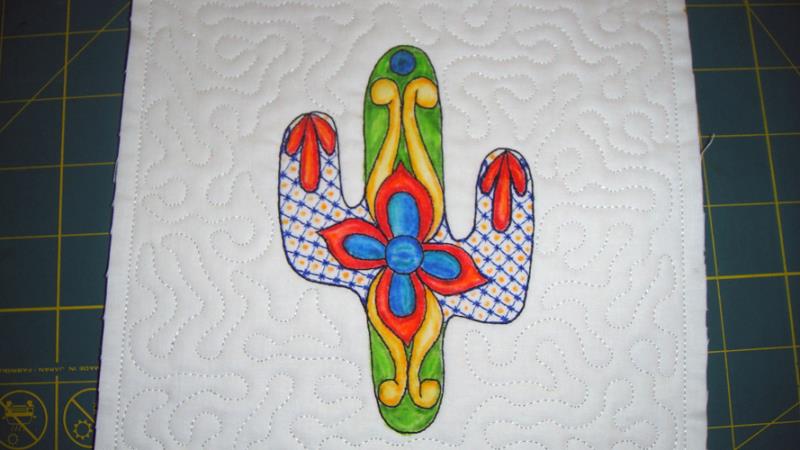
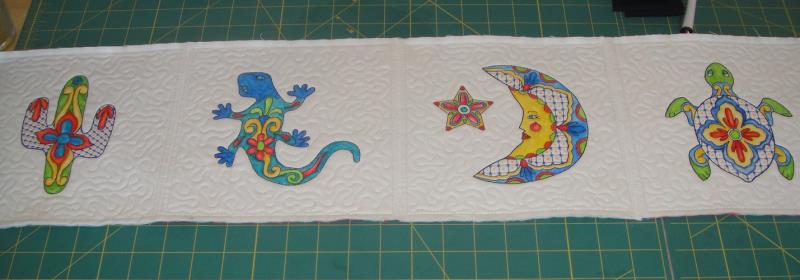
Step 12:
Complete the painting of all four of the blocks.
(Click Image to Enlarge)
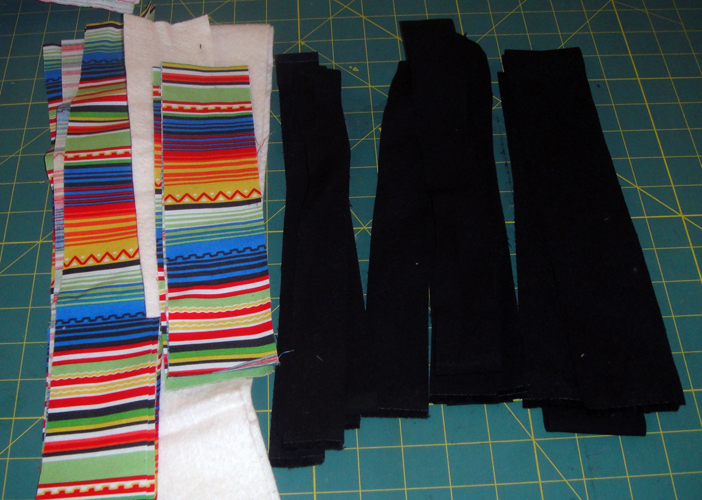
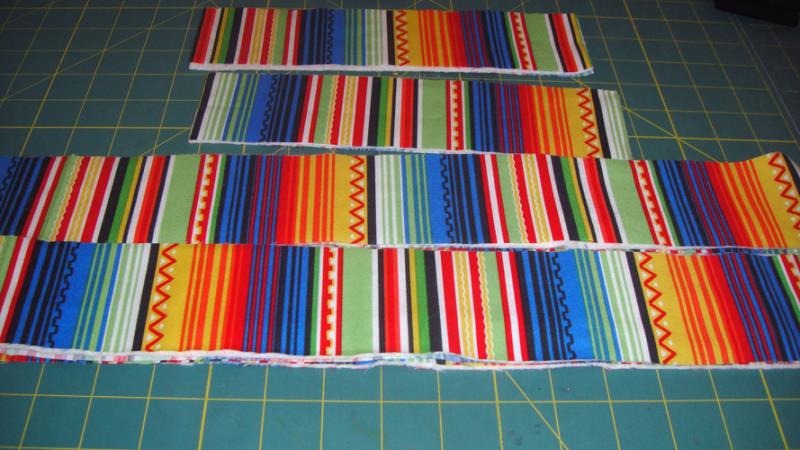
Step 13:
Cut 5 strips of the striped fabric 2 ½” wide across the width of the material. Sub cut into 4 38” long strips and 4 10” long strips. Cut 2 38” x 2 ½” strips and 4 10” x 2 ½” strips for the borders. Cut 2 38” x 21/2 strips and 2 10” x 2 ½” strips of batting. Cut 4 1 ½” and 4 1 ¼” strips across the width of the black fabric for sashing. Cut 3 2 ½” strips of black for the binding.
(Click Image to Enlarge)
Step 14:
Make quilt sandwiches for the borders by spraying one side of the batting with spray adhesive, align a corresponding strip of fabric with the batting. Spray the other side of the batting strip with adhesive and align a second corresponding strip of fabric to complete a border. Repeat to form four border strips for the table runner.
(Click Image to Enlarge)
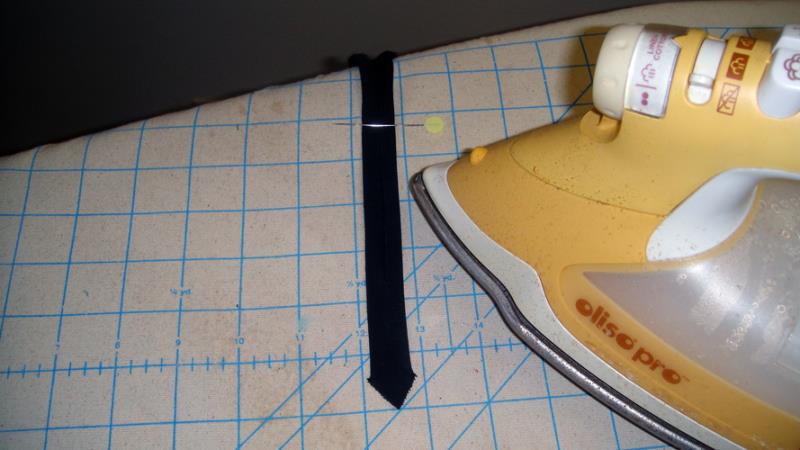
Step 15:
Keep the two sizes of sashing strips in separate piles. The narrower strips will be applied to the back of the table runner. The wider sashing will go on the front of the table runner. The long edges of each sashing strip need to be ironed in to meet in the center of the strips. An easy way to do this is to spray the strip with Magic Sizing®, cut a V at the bottom of the strip. Place a straight pen as show into your ironing board cover. Fold the edges of the strip into the center and press, then feed the strip underneath the pin on the ironing board. This will help you fold the sides of the strips in evenly. Pull out a few inches of the sashing strip pressing as you go.
(Click Image to Enlarge)
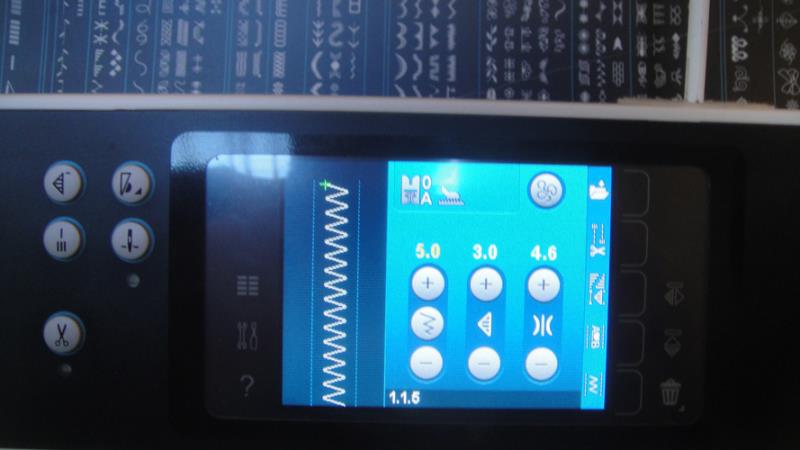
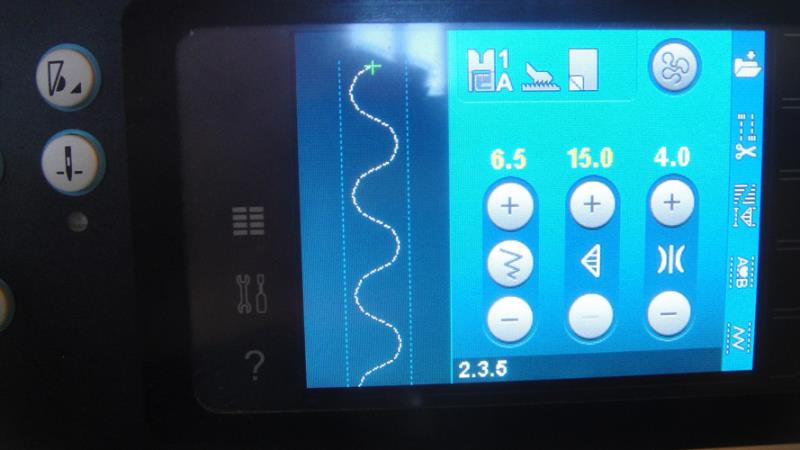
Step 16:
Set up your sewing machine with white thread. Choose a wide zigzag stitch such as this one set at 5mm wide and 3mm in spacing. It doesn’t have to be these exact measurements, but a wide zigzag not packed too tightly together.
(Click Image to Enlarge)
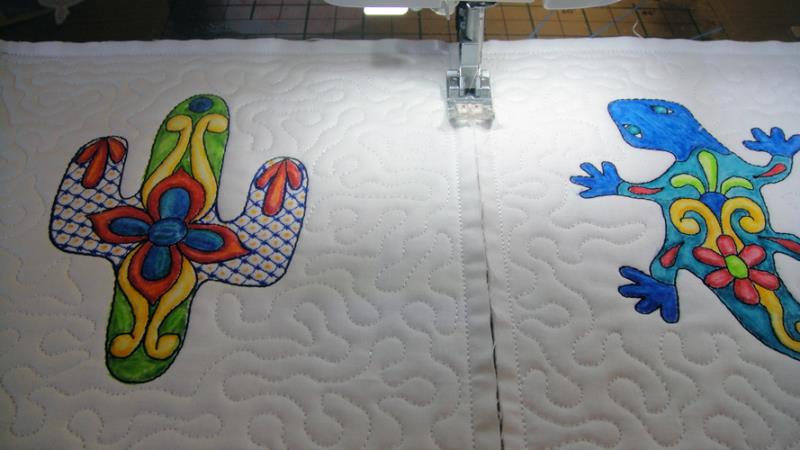
Step 17:
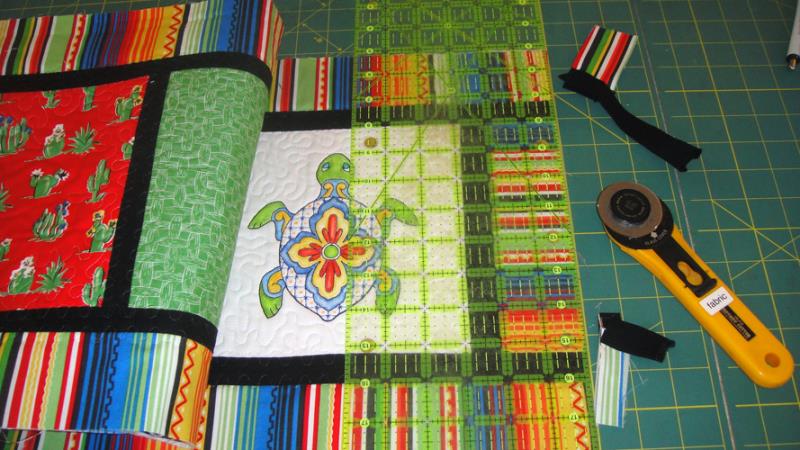
Butt the first two blocks of the table runner together, align the tops and bottoms, the sides should be touching but without overlaps or gaps and zigzag the two blocks together.
(Click Image to Enlarge)
Step 18:
Join all four of the blocks together as in Step 17.
(Click Image to Enlarge)
Step 19:
Attach the two 10” borders to the ends of the blocks in the same manner except for the top and bottom of each side border should extend above and below the painted blocks by about 1”.
(Click Image to Enlarge)
Step 20:
Switch the top thread and bobbin to invisible thread. Tip – wind the bobbin slowly when winding with invisible thread. Choose a serpentine stitch if you have one on your sewing machine. You can use a straight stitch, but the stitching of the sashing strips is less noticeable with a serpentine stitch.
(Click Image to Enlarge)
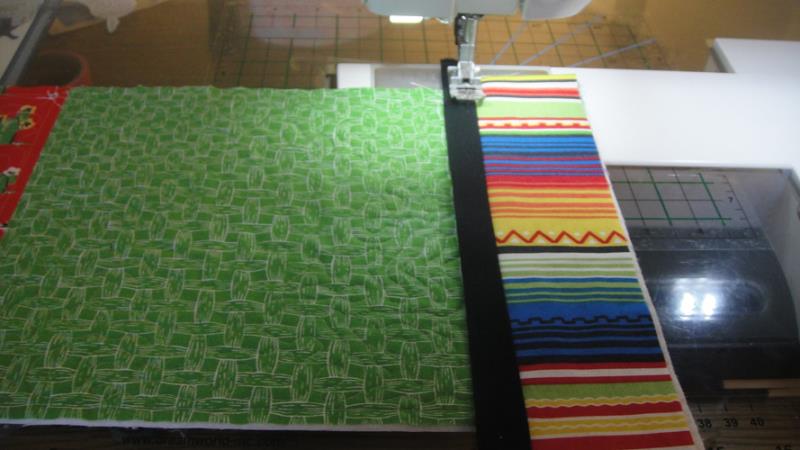
Step 21:
Center a narrow sashing strip over each of the zigzag seams and stitch down both sides with the serpentine stitch. Have the sashing strip extend about ½” above and below the end of each block.
(Click Image to Enlarge)
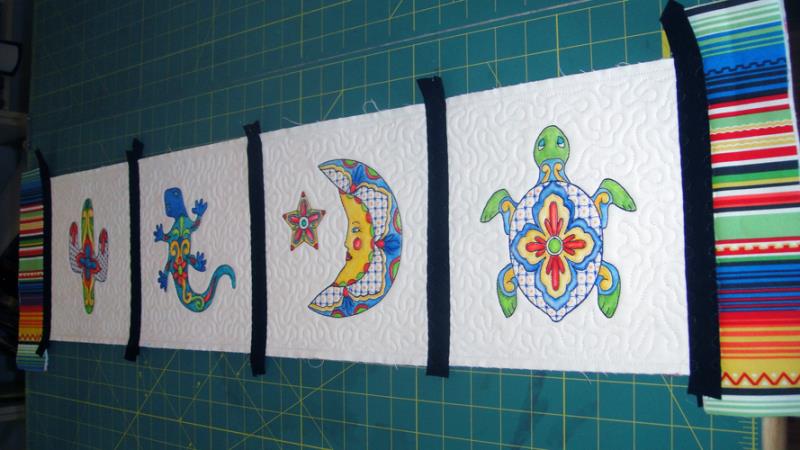
Step 22:
Turn the table runner to the right side. Stitch a wider sashing stitch over all of the zigzag seam lines as you did the narrow ones on the back.
(Click Image to Enlarge)
Step 23:
(Click Image to Enlarge)
Trim the excess end borders and sashing strips on the top and bottom edges of the table runner.
Step 24:
(Click Image to Enlarge)
Butt the top and bottom borders to the table runner as we did for the side borders un Step 19. Zigzag stitch them to the table runner. You can use the invisible thread already loaded into the machine.
Step 25:
(Click Image to Enlarge)
Apply the narrow sashing strips down the zigzag stitching lines which join the borders to the table runners on the back of the table runner. Then turn the table runner right side up and apply the corresponding wider sashing strips to the front of the table runner.
Step 26:
Trim the excess sashing and border strips from the ends of the table runner.
(Click Image to Enlarge)
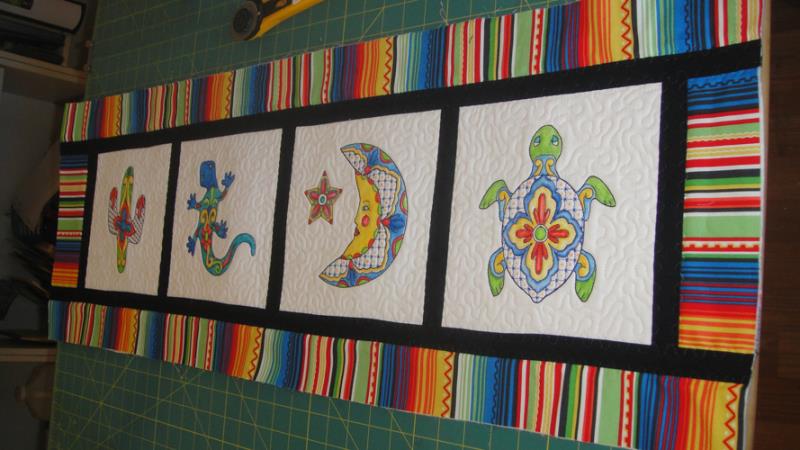
Step 27:
The table runner is now ready for you to apply the binding with your preferred method. We would normally say you are done now, but we want to do a couple of more things to this project.
(Click Image to Enlarge)
Step 28:
After you are sure they last block was painted 24 hours ago, throw the completed project into the dryer set on high for 50 minutes. Sorry I forgot to take a picture of this.
Step 29:
Now we can say your project is complete! However I wanted to run one more test to the color fastness of the project.
(Click Image to Enlarge)
Step 30:
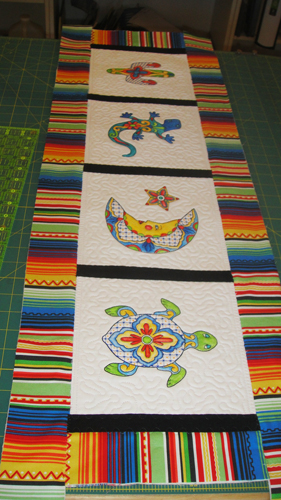
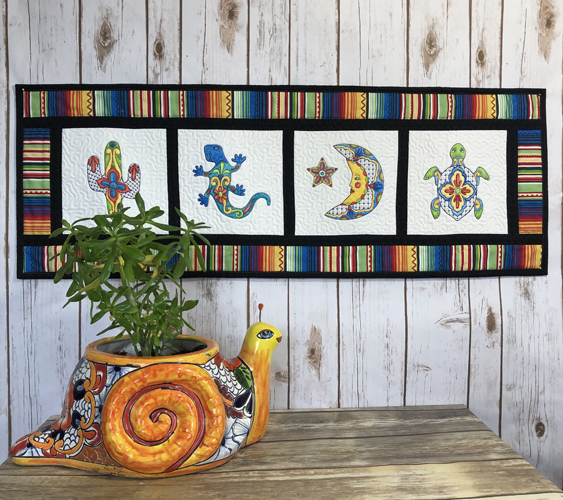
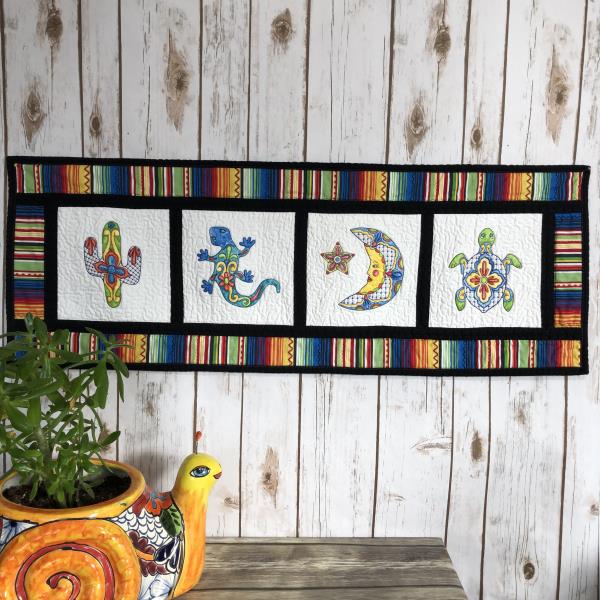
I washed the project in a regular washer with a couple of bath towels thrown in with regular detergent and softener added and then dried it again. Though I can see some minor areas, such around the lizards neck where there was some loss of color, I liked it almost better, as it gave it a more artistic look. I designed this to be a table runner, but hung it on the wall for you to be able to get a better picture of the whole project. But as you can see it will make a great wall hanging too!
Award winning Digitizer, Embroidery Educator, Author and a Consultant to the Industry, Pat Williams has 30 years of experience in the embroidery industry. Pat has won multiple awards for her digitizing expertise including the 2007 Impressions Awards Grand Championship, Best of Show as well as the 1st and 2nd Place Awards. Pat’s love of digitizing has afforded her the opportunity to write numerous articles for Impressions magazine in the United States and Images Magazine in Europe. In 2001 Pat was named “Embroidery Educator of the Year.” For many years Pat taught digitizing seminars at the ISS Shows in Long Beach, CA and for Compucon software. She now resides in Tucson, AZ.