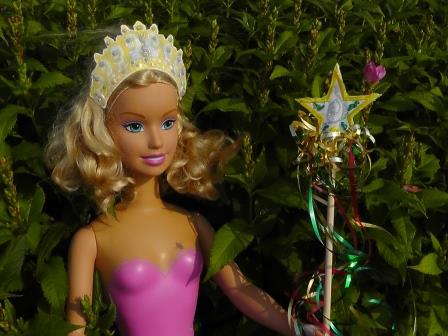
Create sparkly adorable “Princess Accessories” of a wand and crown to go with a purchased (or hand crafted) dress for your sweet princesses dress-up playtime.
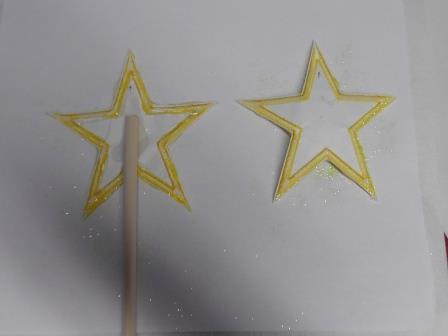
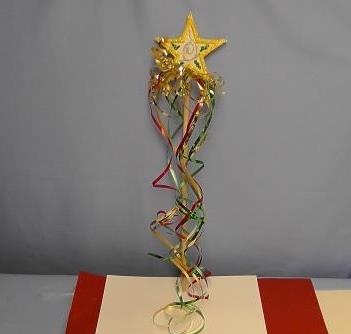
Two stars are embroidered, cut out, decorated with glitter and then glued together with the dowel sandwiched in between. To finish the sparkly wand, lengths of ribbon are cut, tied on and curled.
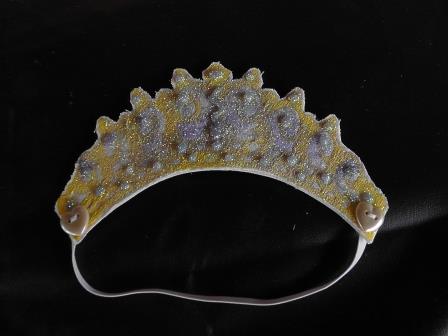
To create the crown, for this project the crown in stitched in a single color, glittered, and then an elastic band fixed with a button at each side.
Use clean sheets of paper for each color of glitter used. Shake off the excess glitter and return the remainder back into the glitter bottle as recommended by the manufacturer. Protect all work surfaces when working with glitter; this stuff gets all over. If possible, work outside on a non-windy day for easy cleanup.
Step 1:
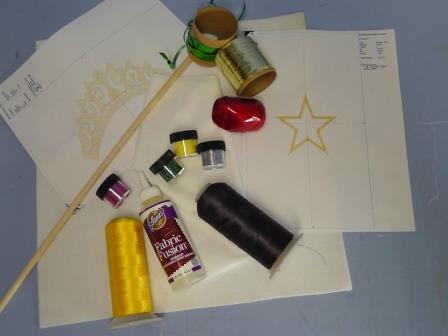
Gather the supplies needed for the project. Read through the instructions before beginning.
Step 2:
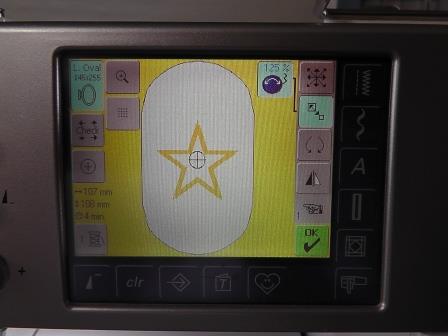
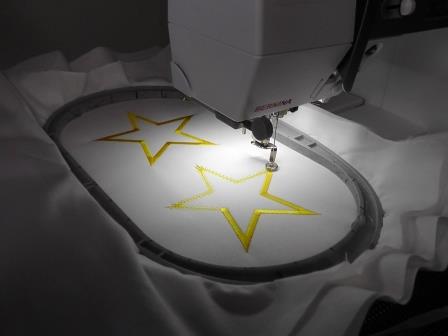
Begin by embroidering two stars from design ATG460_H. Load the design in the machine. Increase the size by 25%.
Step 3:
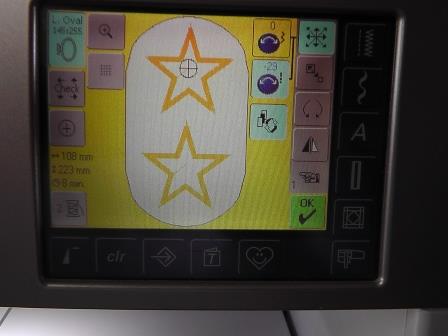
If the hoop area allows, load a second star and increase its size.
Step 4:
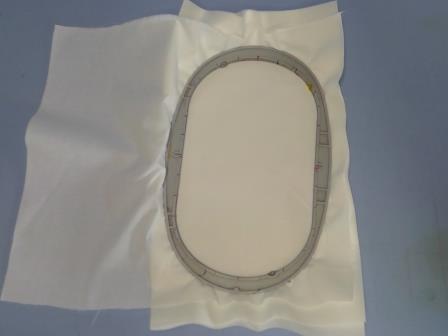
Hoop one layer of white cotton fabric with two layers of the cutaway stabilizer.
Step 5:
Stitch the designs using the gold embroidery thread.
Step 6:
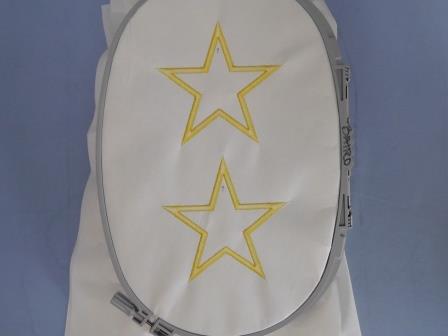
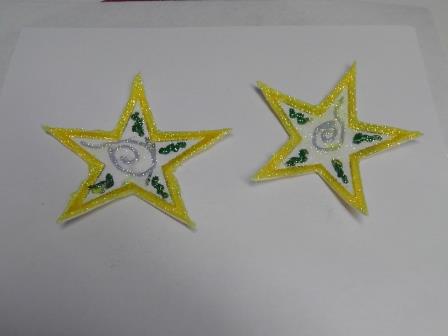
Before removing the designs from the hoop, flip the hoop over and mark the top of each star with an arrow. These will be aligned when putting the wand together.
Step 7:
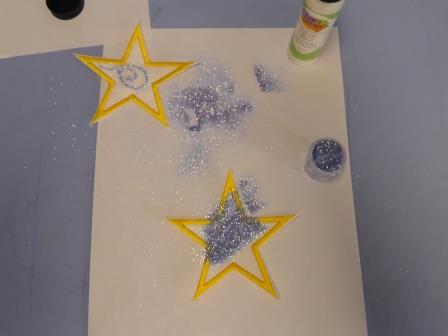
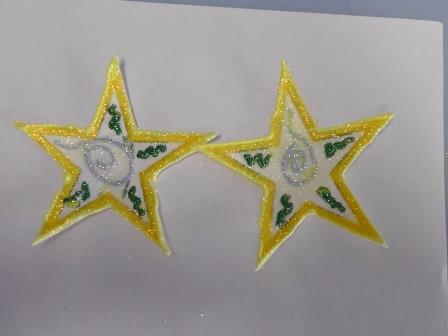
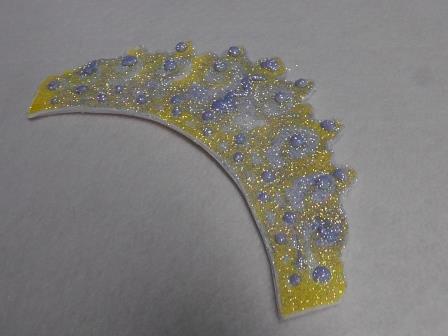
Cut out each star close to the stitching line. Use the glitter glue to draw a spiral design in the middle of the star. Sprinkle blue glitter over the glue following the instruction on the glue bottle. Tap off the excess glitter and return the remainder to the glitter bottle. Allow the glue to dry.
Step 8:
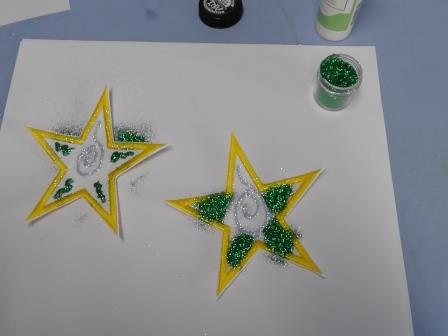
Draw squiggly lines in the pointed areas of the star with the glitter glue. Sprinkle the glue with the green glitter; shake off the excess and return it to the bottle; allow the glue to dry.
Step 9:
Trace along the outside of each star with the glitter glue, sprinkle with gold glitter, shake off the excess and return to the bottle. Set the stars aside and allow the glue to dry thoroughly.
Step 10:
While the glue on the stars is drying, stitch the crown. Hoop one layer of the white cotton fabric with two layers of the cutaway stabilizer. Load design ATG9850. Stitch the design. For this project, the entire crown was stitched with the gold thread. Cut out the crown close to the outside stitching.
Step 11:
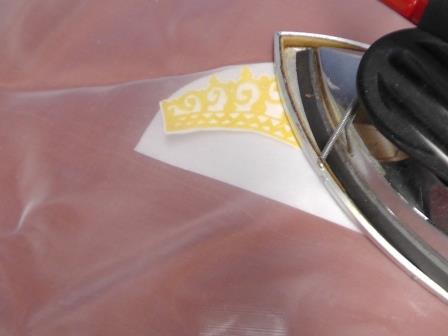
Press the crown to the craft stabilizer. The back side of the crown should be to the fusible side of the stabilizer. Use a press cloth to protect the iron. Let the crown cool then cut the excess craft stabilizer from around the outside of the crown.
Step 12:
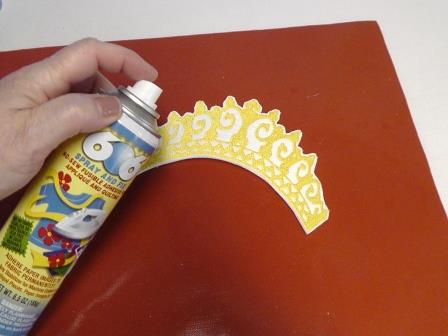
Read and follow the instructions on the spray adhesive. Spray the front of the crown lightly with the spray adhesive.
Step 13:
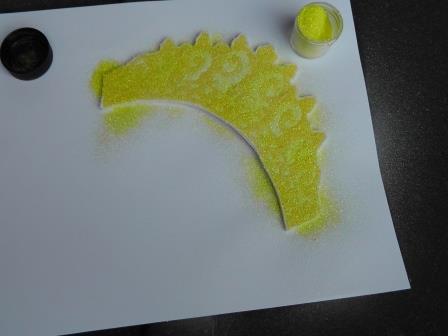
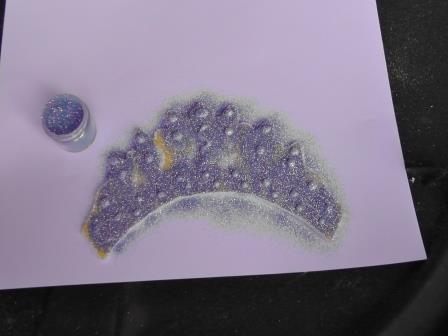
Sprinkle gold glitter on the crown, shake off the excess and return it to the glitter bottle. Let dry.
Step 14:
Place dots of glitter glue to resemble “jewels” in areas of the crown. Sprinkle blue glitter over the glue dots, shake off the excess glitter and return it to the glitter bottle. Let the glue dry.
Step 15:
Continue to add glue and glitter until the desired amount of sparkle is achieved. Let the glue dry thoroughly.
Step 16:
After the glue is dry on the stars, it is time to assemble the wand.
Step 17:
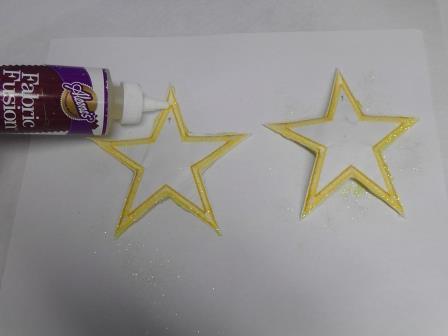
Apply the fabric glue around the edges on the back side of the stars.
Step 18:
Apply glue in the center of one of the stars. Lay one end of the dowel in the center of the glue. Matching the arrows at the top, align the star edges, pressing them together sandwiching the dowel between the stars. Allow the glue to dry thoroughly.
Step 19:
(Click Image to Enlarge)
Cut long lengths of ribbon to tie onto the dowel below the star. Cut smaller lengths of ribbon and tie on with the first ribbon lengths. Use a scissors to curl the ribbons as desired.
Step 20:
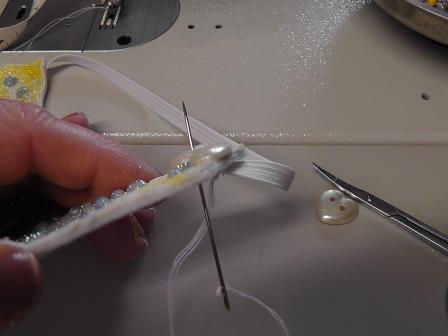
After the glue has dried on the crown, it is time to finish assembling it. Place the crown on the wearer and cut a piece of elastic long enough that it will hold the crown on the wearer’s head. Use a hand needle and thread to stitch the elastic on the inside of each end of the crown while at the same time sewing on the button. Repeat for the other side.
Step 21:
The crown is finished.
Step 22:
Your princess now has accessories to enjoy during playtime with their purchased dress.
Ramona Baird has been in the embroidery industry for over 23 years. She and her husband owned a commercial and retail embroidery store in Arizona for many years. She is an experienced digitizer having been mentored by award-winners Pat Williams and Lindee Goodall. Ramona is a contributor to “Creative Machine Embroidery” magazine having 5 covers to her credit. Ramona has worked for Wilcom America and served many years as Education Director for the American Sewing Guild. With a degree in fashion design, she is able to design and execute patterns which Pat Williams says are “out of the box” in creativity and application. Ramona likes to challenge the boundaries of embroidery and bring new and exciting designs, ideas, and projects to EmbroideryDesigns.com. She wants embroiderers of all levels to increase their skills and enjoyment in using their embroidery machine for gift-making and personal pleasure.