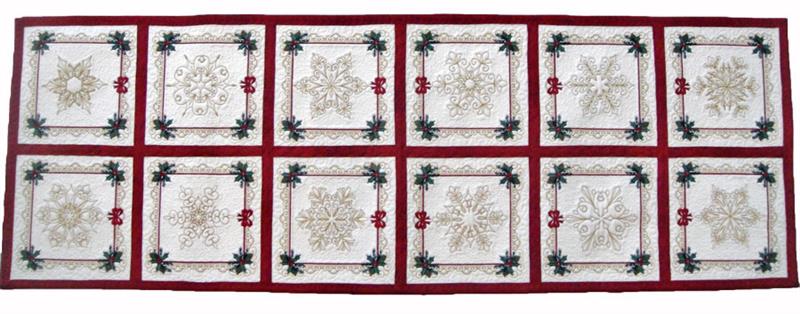
This lovely Christmas Snowflake Table Runner is worth every bit of the 18 hours it takes to make it. The embroidery time is approximately 1.25 hours for each square and then I allowed three hours for putting it together. It may not take you quite that long to assemble it, but time was allowed for those that aren’t familiar with the process. Each block is exquisitely detailed with a unique snowflake bordered by embroidered lace with pine cones and holly accents in the corners. The back of the block is then applied and beautiful stippled quilting is stitched around the snowflake and border.
Step 1:
(Click Image to Enlarge)
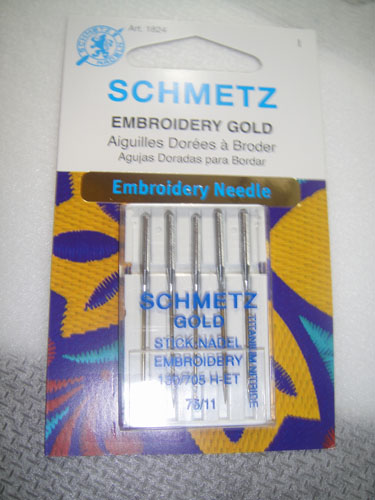
As you will be stitching through layers of fabric and batting it is recommended that you start this project with a fresh needle in your embroidery machine. A Schmetz® Embroidery Gold size 11 needle is recommended.
Step 2:
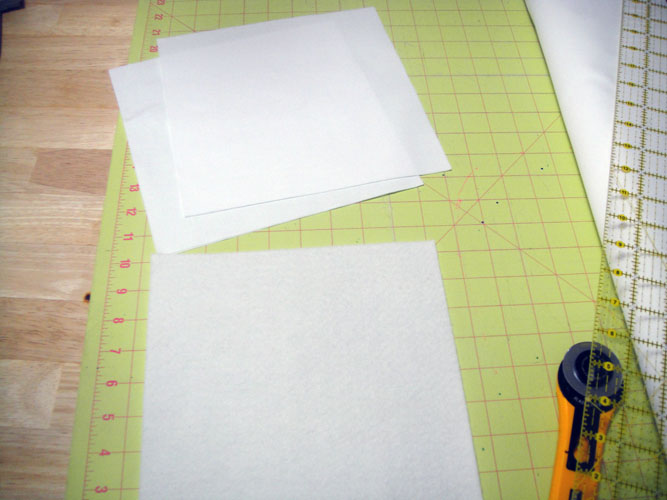
Cut 24 9” squares from the white Kona cloth; cut 12 9” squares from the Battilizer® or” low loft batting; cut 12” pieces of poly-mesh stabilizer the size needed to fit your 7” x 12” or larger hoop.
(Click Image to Enlarge)
Step 3:
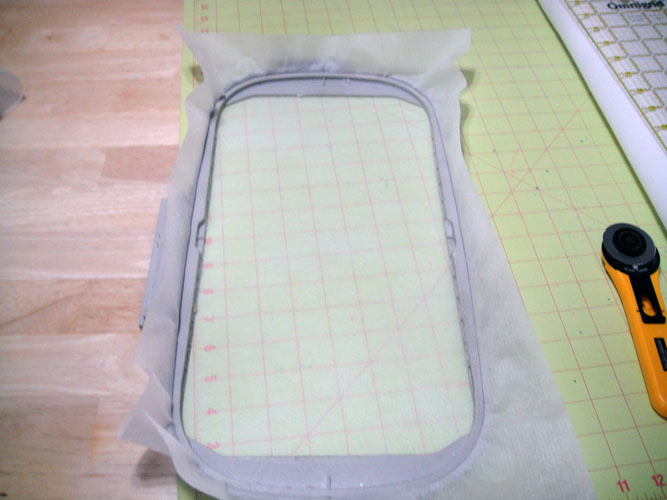
Hoop your 7”x 12” hoop with poly-mesh stabilizer; be sure the stabilizer is taut.
(Click Image to Enlarge)
Step 4:
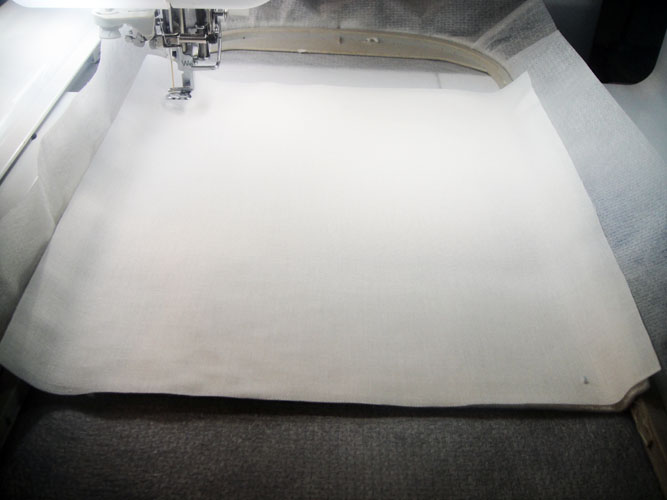
Run the 1st color sequence in white thread which is the outline for the quilt block.
(Click Image to Enlarge)
Step 5:
Spray adhesive spray on the back of a Battilizer® square and place over the outlines. The Battilizer® should exceed the outlines by at least ½” on all sides.
(Click Image to Enlarge)
Step 6:
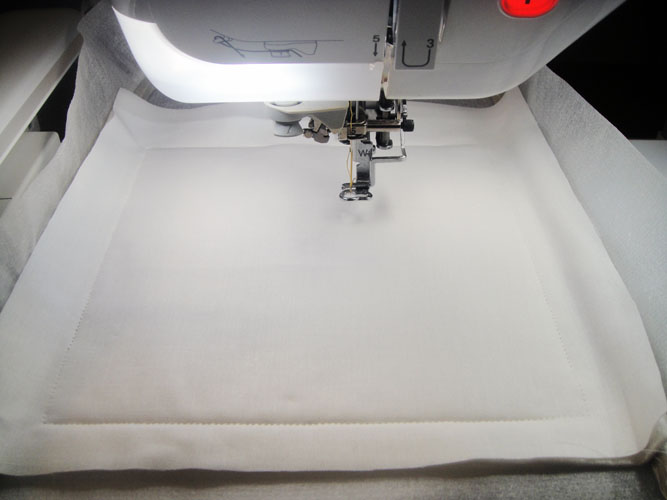
Spray adhesive spray on the back of a white Kona cloth square and place over the Battilizer®. Finger press along the inside side edges of the fabric to insure that it is all well adhered to the stabilizer. If it is not firmly pressed down it can flag when the next thread is run and make the thread break. Run color sequence # 2 with water soluble thread in the top of your machine.
(Click Image to Enlarge)
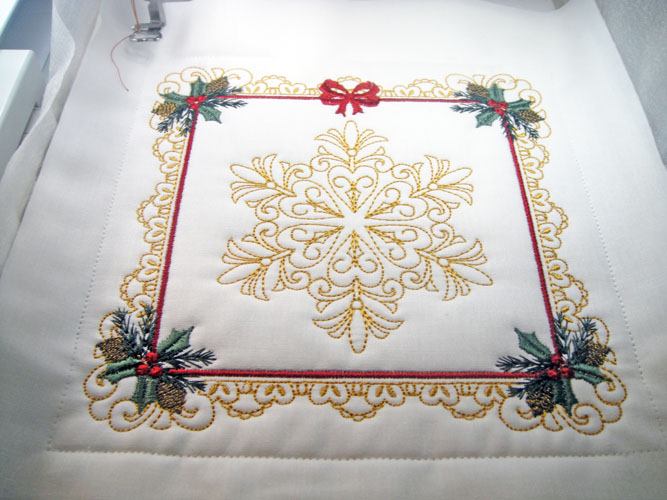
Step 7:
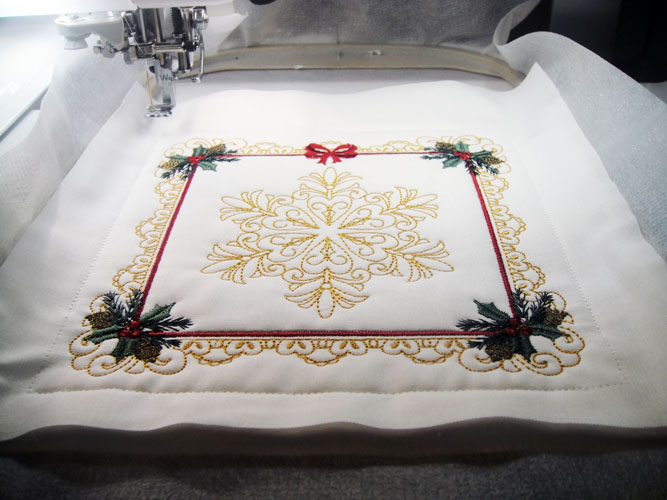
Follow the color chart through color sequence # 9. This color sequence is the same in all 12 blocks. This will complete the embroidery portion of the quilt block.
(Click Image to Enlarge)
Step 8:
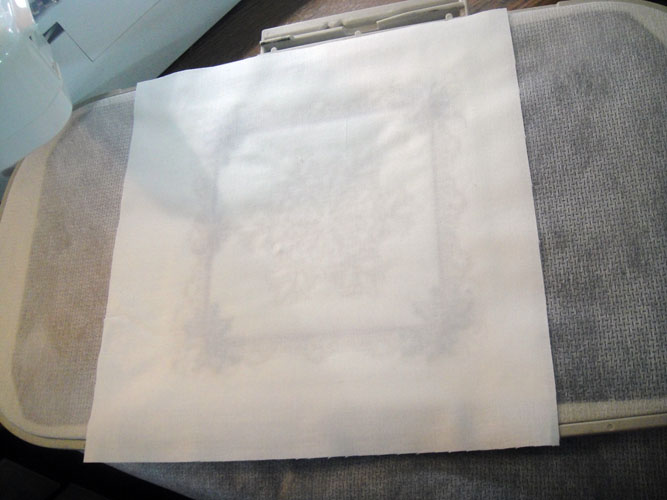
Remove the hoop from the machine; do not unhoop. Spray a square of Kona cloth with adhesive spray and place over the outlines on the back side of the hoop.
(Click Image to Enlarge)
Step 9:
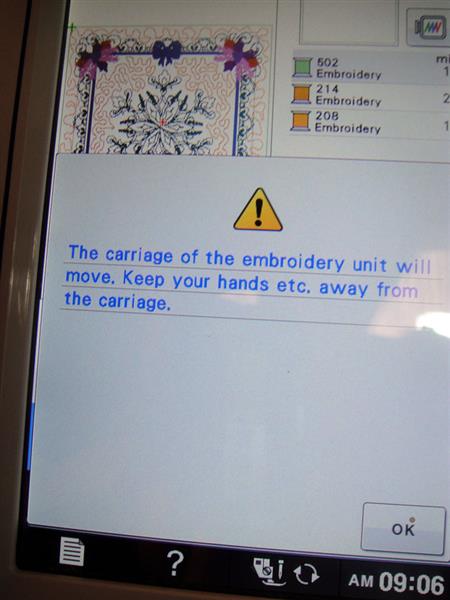
The water soluble thread needed in the top of your machine for color sequence # 10 can be loaded on your machine now. If you change it before you put the hoop back into the machine everything will work as normal. If you wait until after you put the hoop back into the machine to change the top thread you may get a message on the screen when you active the automatic needle threader that says the carriage of the machine will move. If you get that message just press OK on the screen. All that will happen is that the machine will move to the center of the hoop; thread the needle; and then move back to the starting position for the stitching. This is done just to keep the needle threader from hitting the hoop. Either way is fine, just wanted to let you know what is happening if you had not encountered that before.
(Click Image to Enlarge)
Step 10:
Run color sequence # 10 to tack down the quilt block back.
(Click Image to Enlarge)
Step 11:
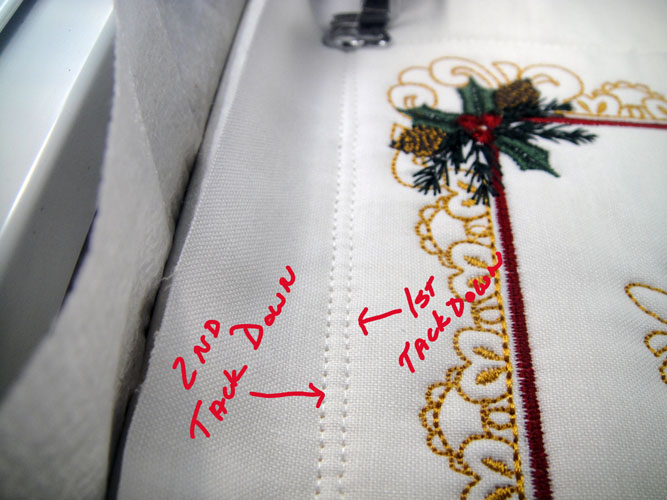
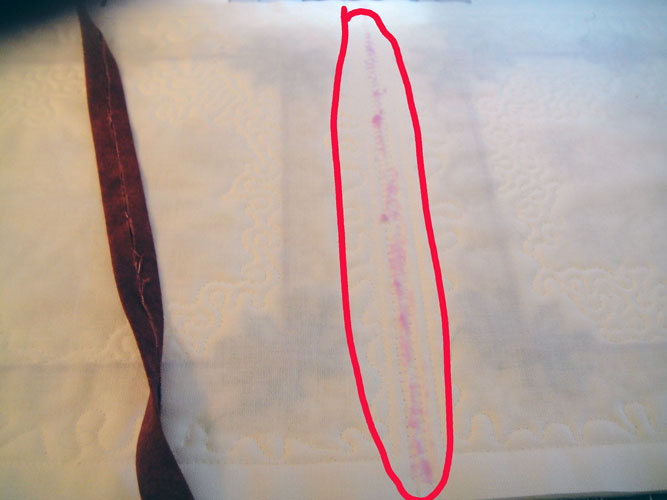
This is a good time to explain why we use water soluble thread for color sequences 2 and 10. You will note that these two sets of tack down do not line up when they are stitched out though both are exactly in the same position in the digitized file. When all of the embroidery takes place over the fabric and batting it pulls the fabric to the insides of the block. When we trim our blocks all measurements will be taken from the outside tack down lines stitched in color sequence #10. When the table runner is washed both of these sets of tack down stitches will dissolve and your block will have retained it’s square shape.
(Click Image to Enlarge)
Step 12:
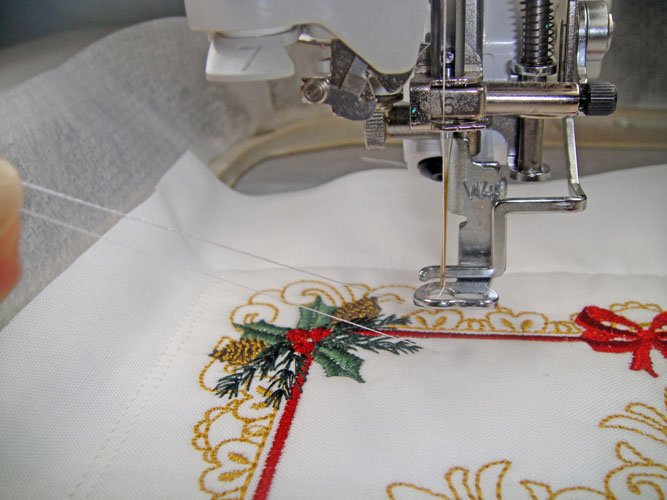
Load white thread in the top of your embroidery machine, assuming you already have white thread in the bobbin. The next two or three color sequences will all be sewn in white thread. The separate sections of the quilting are reflected as separate color changes in for each section of quilting so that the machine will stop so that you are able to bring the bobbin thread to the top of the quilt to keep the back of the quilt blocks very neat. To bring the bobbin thread to the top feed the top thread through the presser foot; push the needle up button twice; pull the bobbin thread out to the same length as the tail of the top thread; while holding onto both the two and bobbin thread tails stitch a few stitches; stop the machine and trim off the thread tails, complete that section of quilting. Then repeat the bringing of the thread to the top for the remaining quilting sections of the design.
(Click Image to Enlarge)
Step 13:
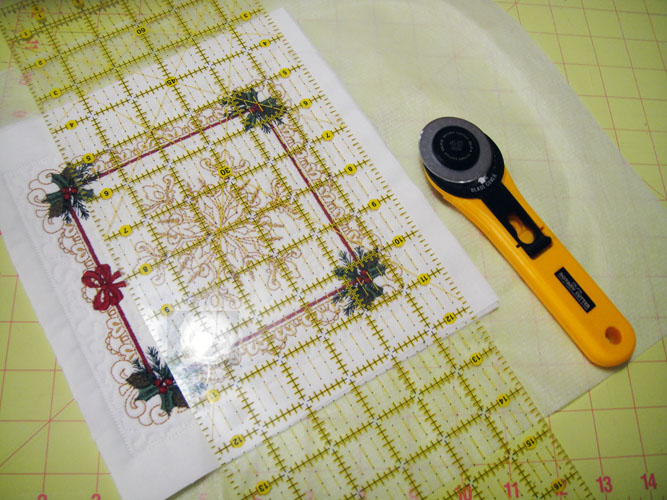
Remove the design from the hoop. Trim all edges to ½” from the outside water soluble thread outline.
(Click Image to Enlarge)
Step 14:
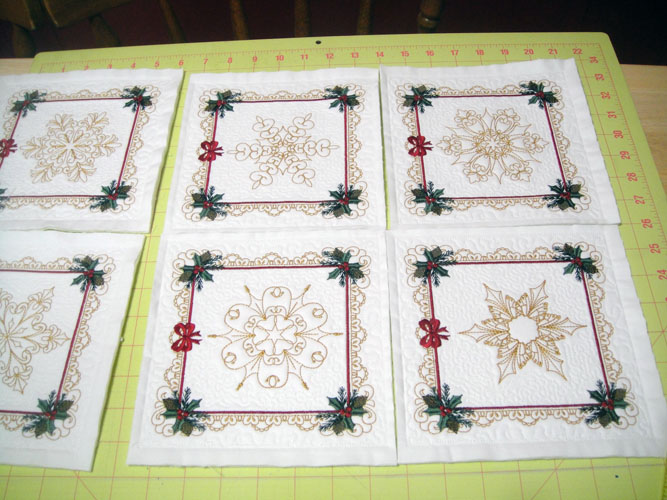
Complete the remaining 11 Timeless Snowflake Quilt Blocks following steps 3-13 above. Lay the quilt squares out in the manner you would like them to be in the table runner. In the sample, the bows at the top of the blocks are facing in one direction on 6 rows. The bows are facing in the opposite direction at the other end of the table runner. You will want to determine your layout at this point as the blocks position in the table runner will determine how the block is secondarily trimmed.
(Click Image to Enlarge)
Step 15:
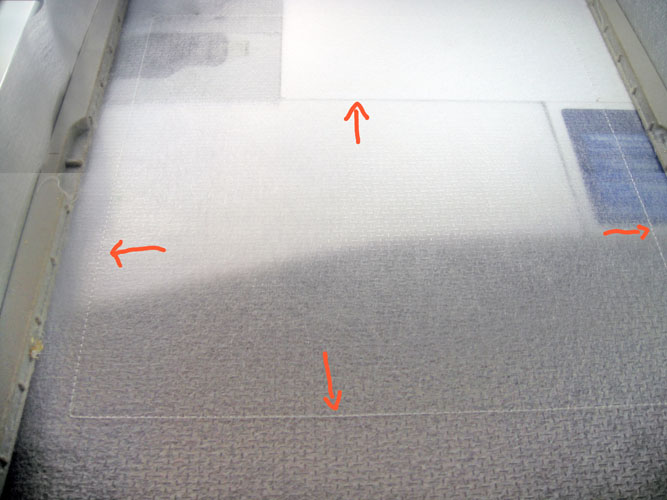
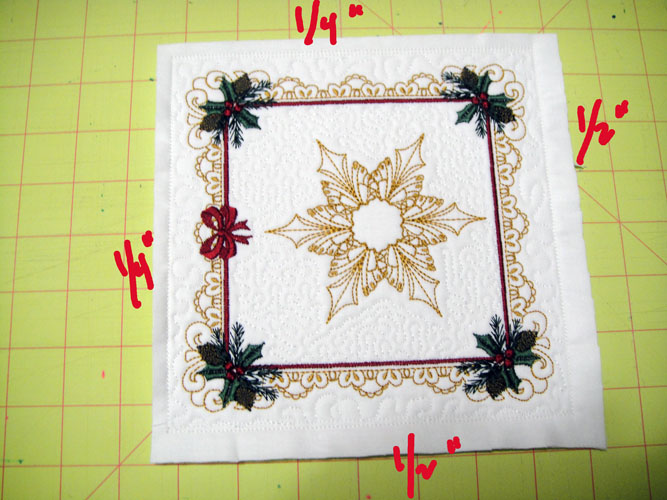
The overall plan for the trimming of the quilt blocks is that the ½” border on the outsides and ends of the table runner will remain at ½”. The inside edges of the blocks where the blocks will be joined together need to be trimmed to ¼”. In this picture, which is to be an end block, the top of the block and the inside edge of the block are trimmed to ¼”. The bottom of the block, which will be at the end of the table runner and the right hand edge of the block are left at ½” to support the binding of the table runner.
(Click Image to Enlarge)
Step 16:
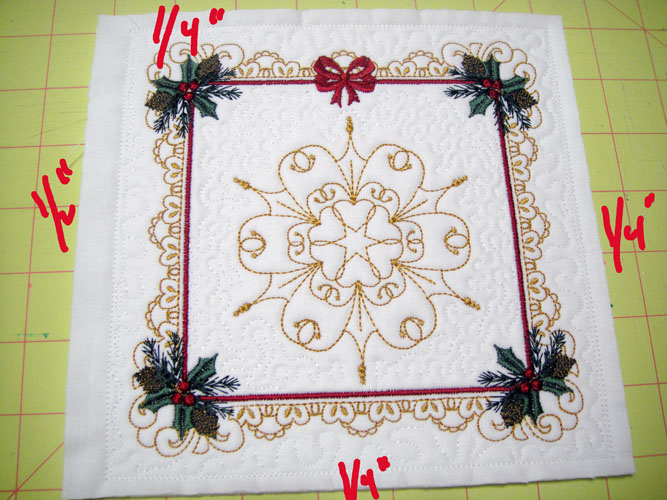
Blocks that are not on the ends of the quilt will be trimmed like this one in which the outside edge is left at ½”; the inner edges are all trimmed to ¼”.
(Click Image to Enlarge)
Step 17:
After you trim each block place it back into position in your layout to insure that you maintain the proper trims on all blocks.
(Click Image to Enlarge)
Step 18:
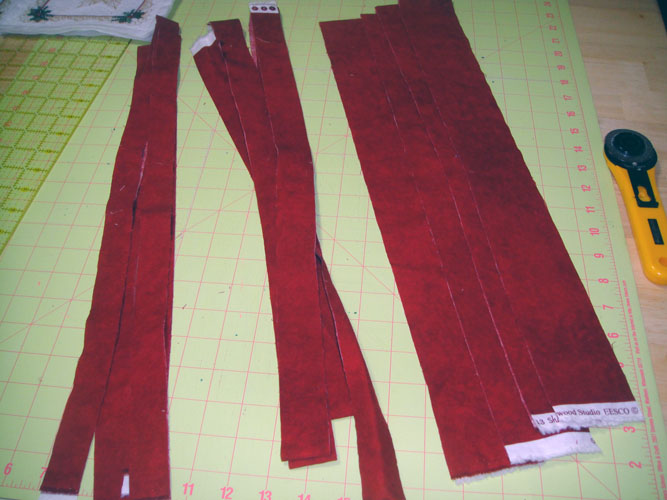
Before we start to assemble the blocks cut and prepare
your sashing. Cut strips across the width of your folded fabric. Cut 4 1”
strips for sashing on the back of the blocks; cut 4 strips 1 ¼” wide for the
sashing on the front of the blocks; cut 4 strips 2.5” wide for the binding of
the table runner.
(Click Image to Enlarge)
Step 19:
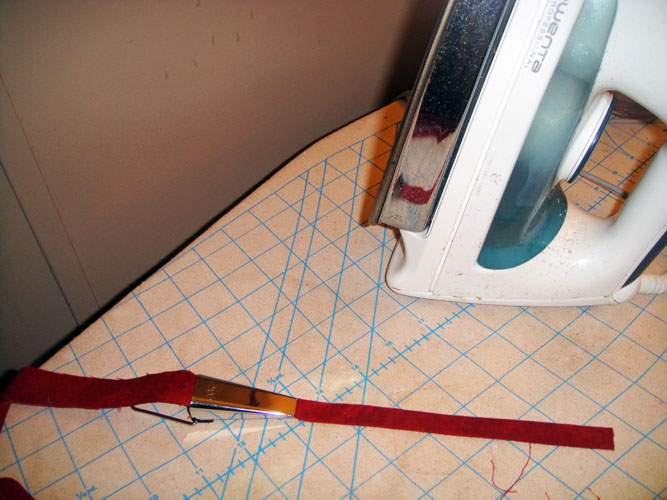
Either using a bias tape makers or by simply folding the lengthwise sashing strips edges in to meet in the center press all the edges of your sashing strips into the center. Keep your 1” strips and 1 ¼” strips separated as the narrower strips go on the back of the table runner and the 1 ¼” strips go on the front of the table runner. I do not press my widest strips for the binding.
(Click Image to Enlarge)
Step 20:
Load regular white sewing thread into your normal sewing machine. Attach your walking foot if you have one. Choose a wide zigzag stitch.
(Click Image to Enlarge)
Step 21:
Take two side by side quilted blocks and align the ¼” inside edges and butt together. Do not overlap, just butt them together. Zigzag over the butted edges to join the two blocks. Do this to all sets of two blocks.
(Click Image to Enlarge)
Step 22:
Load invisible thread in the top and bobbin of your embroidery machine. Optional – place a fine line of fabric glue over the zigzag stitch on the back of two of the joined quilt blocks.
(Click Image to Enlarge)
Step 23:
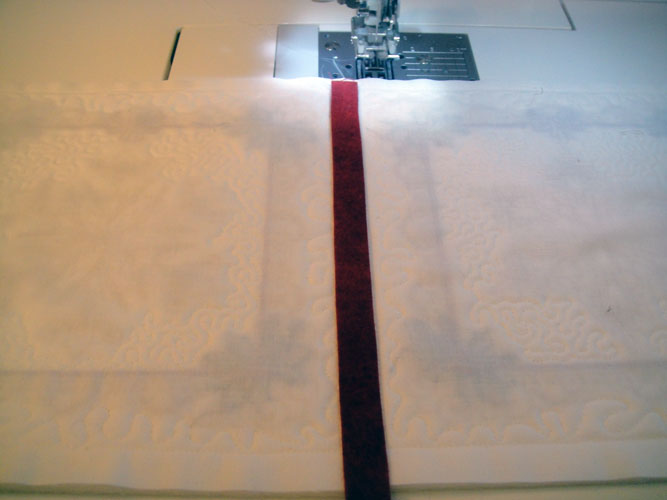
Place the narrowest sashing strip over the zigzag glue line. Measure a couple of spots from your sashing to the outer edge to insure you have the sashing straight between the two blocks.
(Click Image to Enlarge)
Step 24:
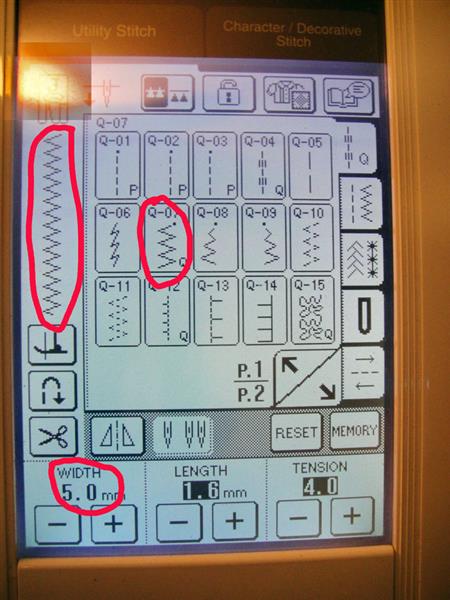
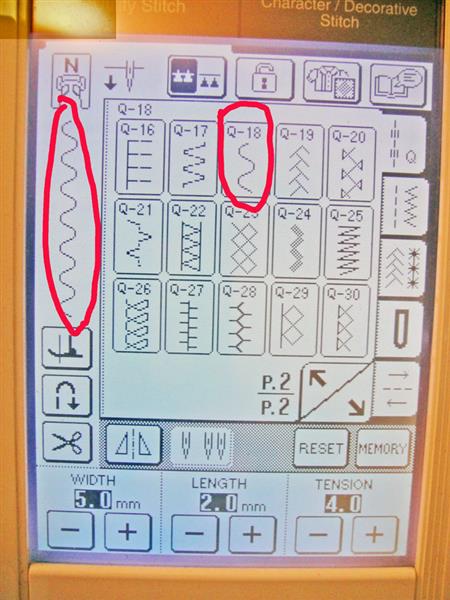
Select a Serpentine stitch on your sewing machine. If you do not have a Serpentine stitch find a simple decorative stitch that is not a straight line. Using a curving stitch helps hide the top stitching in the quilt block.
(Click Image to Enlarge)
Step 25:
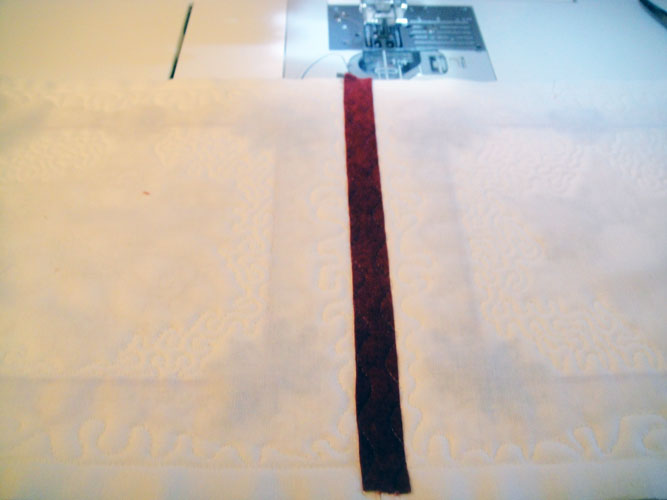
Stitch down both sides of the sashing strip with the Serpentine stitch and invisible thread. Note the ends of the sashing strips need to be just over the water soluble tack down lines on the block, they do not need to go edge to edge of the block. Apply the sashing to the six sets of two blocks that are joined together.
(Click Image to Enlarge)
Step 26:
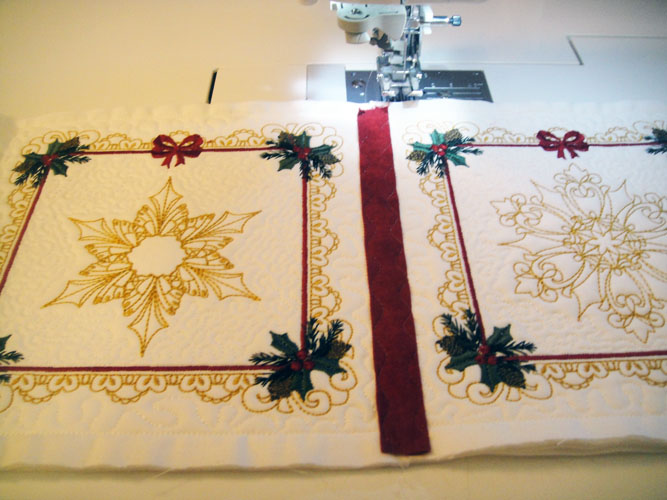
Apply the sashing made from the 1 ¼” strips to the front of the six sets of quilt blocks in the same manner.
(Click Image to Enlarge)
Step 27:
We will now join the six sets of blocks to make the table runner. Organize your sets of blocks again to make sure the end blocks will be in the proper position, i.e., the ½” seam allowances are at each end of the table runner. Align and butt the ¼ “ seam allowances together and zigzag with regular white thread two sets of blocks together.
(Click Image to Enlarge)
Step 28:
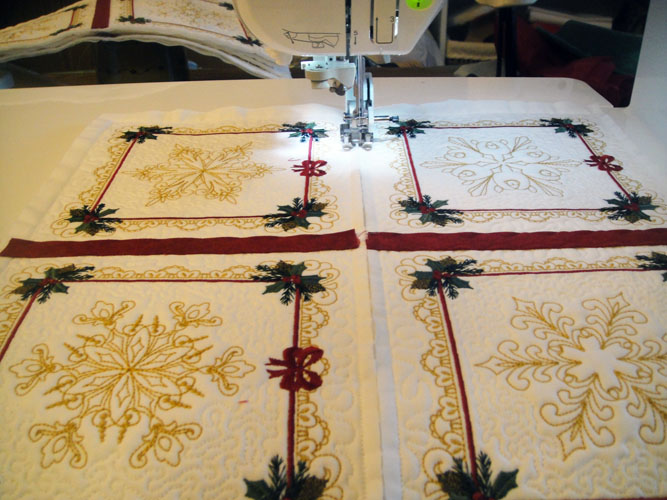
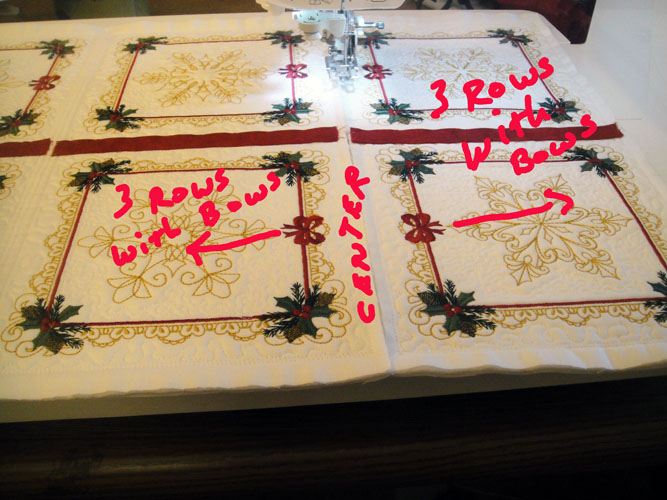
If you want your table runner to appear as in the sample, join 3 rows with the bows towards the inner center on each end of the table runner, so in the center you will have bows turned in each direction
(Click Image to Enlarge)
Step 29:
After all of the sets of blocks are joined together apply the narrowest sashing to the back of the table runner; using the fabric glue to hold it in place and invisible thread and the serpentine stitch; stitch both long edges of the sashing in place.
(Click Image to Enlarge)
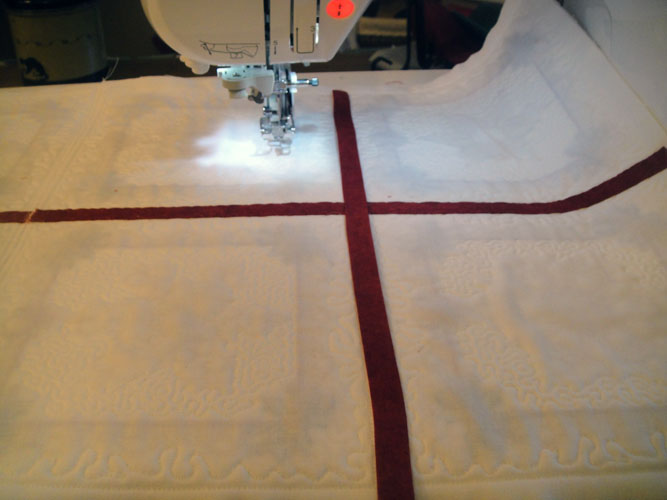
Step 30:
Apply the slightly wider sashing strips over the joining zigzag stitches on the front of the table runner.
(Click Image to Enlarge)
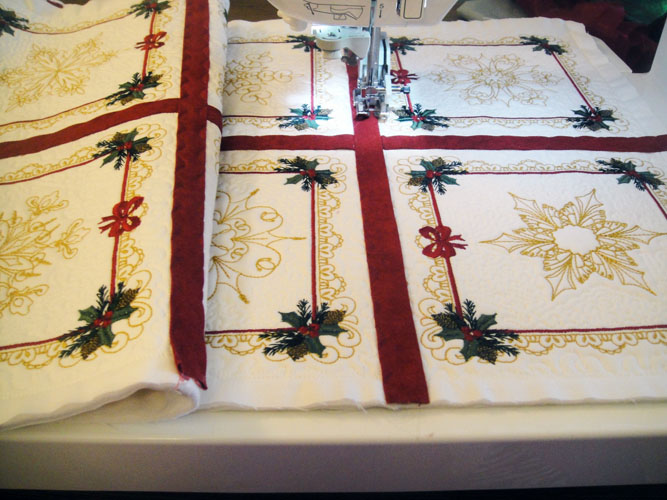
Step 31:
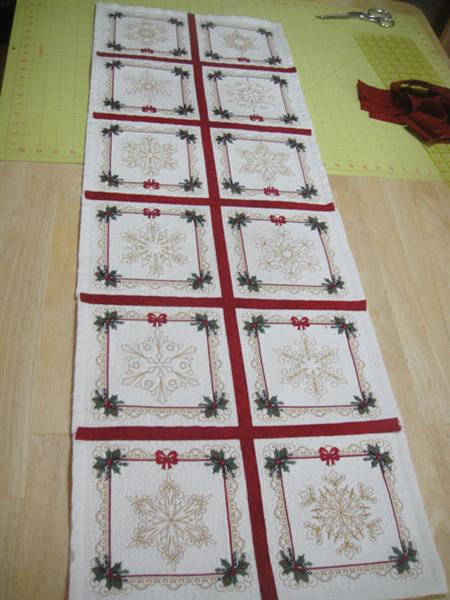
The front of your table runner will now look like this.
(Click Image to Enlarge)
Step 32:
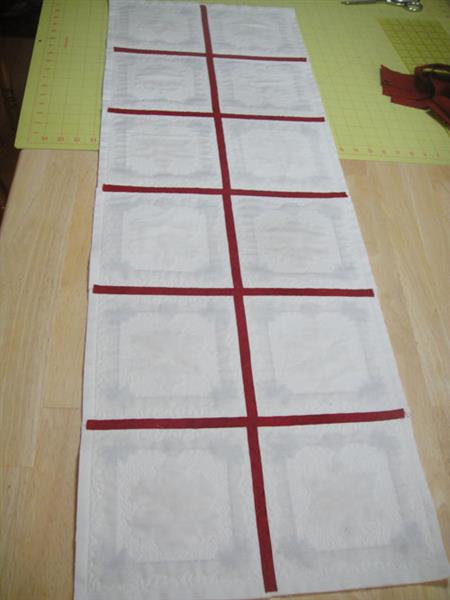
The back of your table runner will now look like this.
(Click Image to Enlarge)
Step 33:
Apply binding in your favorite method. See our article “Binding and In the Hoop Quilt Project” if you need instructions on this.
(Click Image to Enlarge)
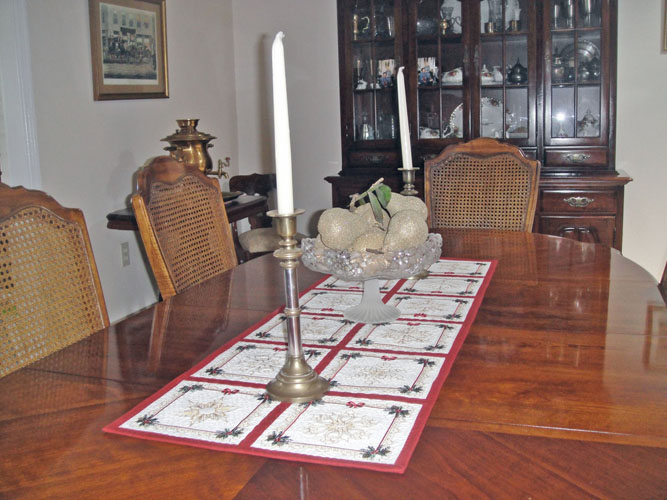
Step 34:
Adding some brass candlesticks and metallic objects like the pears in this crystal dish will set off the colors in your Timeless Snowflake table runner. Enjoy!
Award winning Digitizer, Embroidery Educator, Author and a Consultant to the Industry, Pat Williams has 30 years of experience in the embroidery industry. Pat has won multiple awards for her digitizing expertise including the 2007 Impressions Awards Grand Championship, Best of Show as well as the 1st and 2nd Place Awards. Pat’s love of digitizing has afforded her the opportunity to write numerous articles for Impressions magazine in the United States and Images Magazine in Europe. In 2001 Pat was named “Embroidery Educator of the Year.” For many years Pat taught digitizing seminars at the ISS Shows in Long Beach, CA and for Compucon software. She now resides in Tucson, AZ.