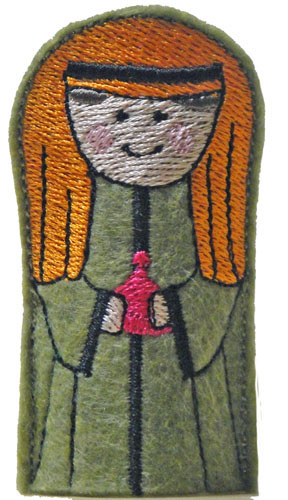
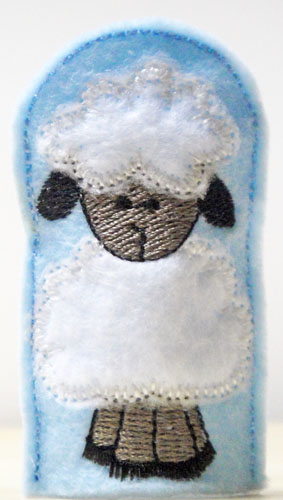
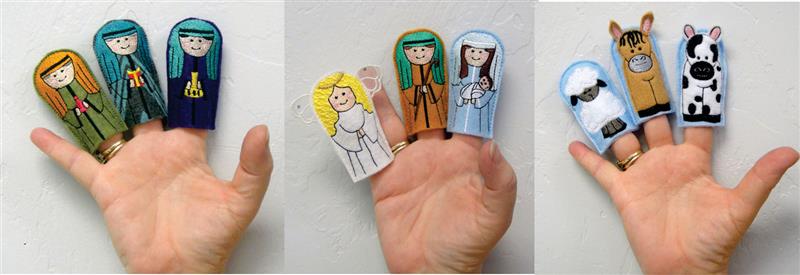
These little finger puppets are quick to make, about 20 to 22 minutes apiece. Joseph, Mary, the three wise men and the body of the angel are all made in the same manner. The angel’s wings are made separately of organza. The three animals all have applique bodies. The colors are up to you of course. A patterned piece of felt was used for the body of wise man #1 in the samples. Feel free to further adorn with crystals, yarn or bits of lace if desired. Though I couldn’t use her exact artwork to fit the configuration needed for these little puppets, the artwork was heavily inspired by the artwork of Trina Clark at digiscrapkits.com. I want to publicly thank her for allowing me to alter her artwork in order to make these finger puppets.
Step 1:
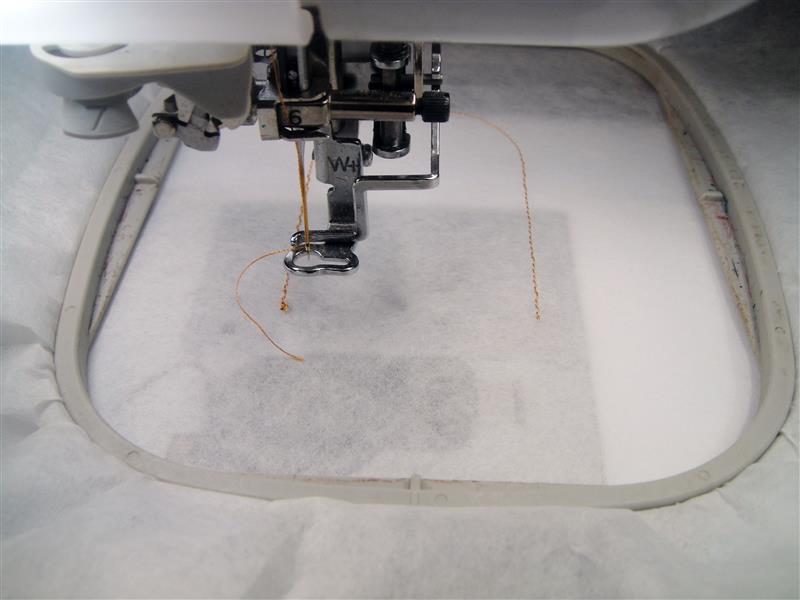
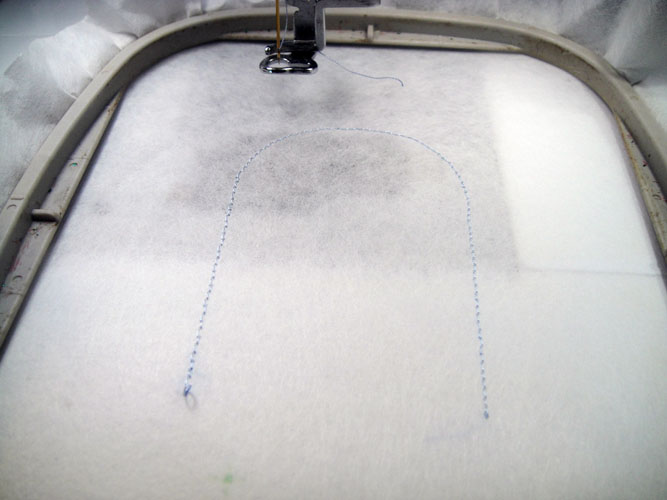
Load design NFP01, which is Joseph, into your embroidery machine. Hoop tear away stabilizer in your embroidery hoop. Run the 1st color sequence which is a placement line for the felt. This may be stitched with any color thread as it will be cut away.
(Click Image to Enlarge)
Step 2:
(Click Image to Enlarge)
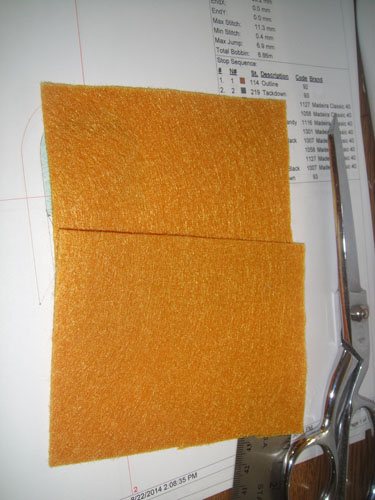
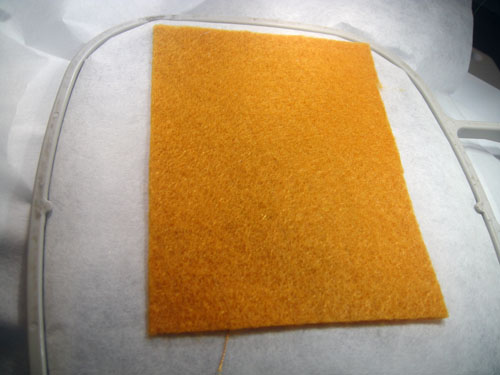
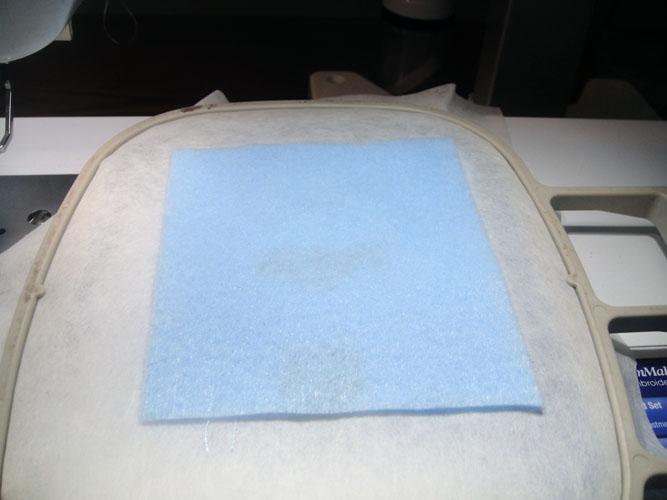
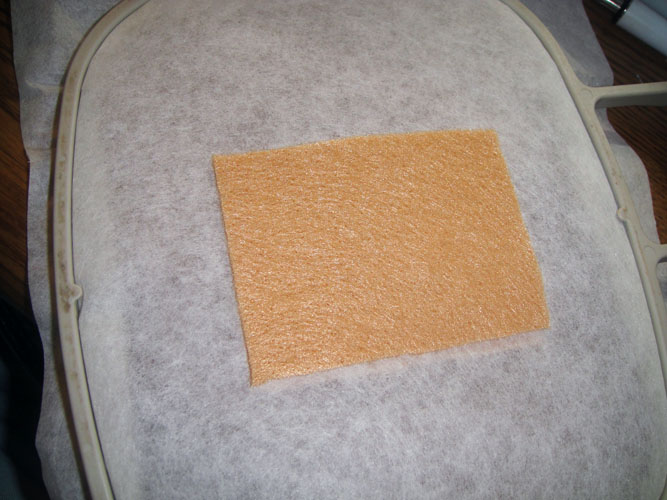
Cut two rectangles of autumn gold felt 3.5” tall by 3” wide. If mine look a little larger in the pictures it is because I just cut three inches off the end of the sheet of felt and then cut that in half.
Step 3:
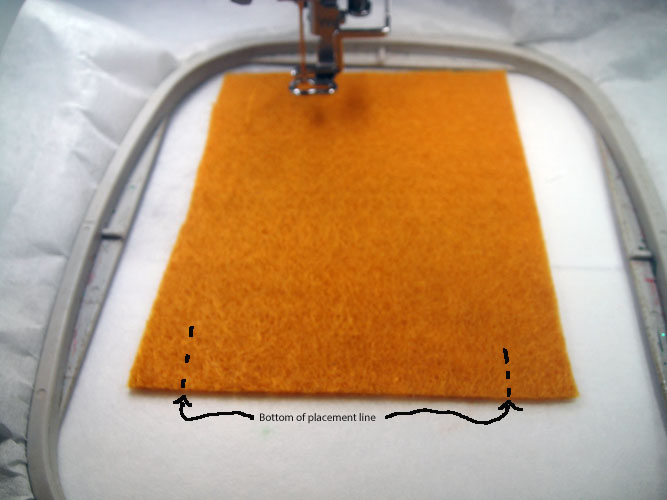
Spray the back side of a piece of felt with adhesive spray and place over the placement line. Align a straight bottom edge with the ends of the embroidered placement lines.
(Click Image to Enlarge)
Step 4:
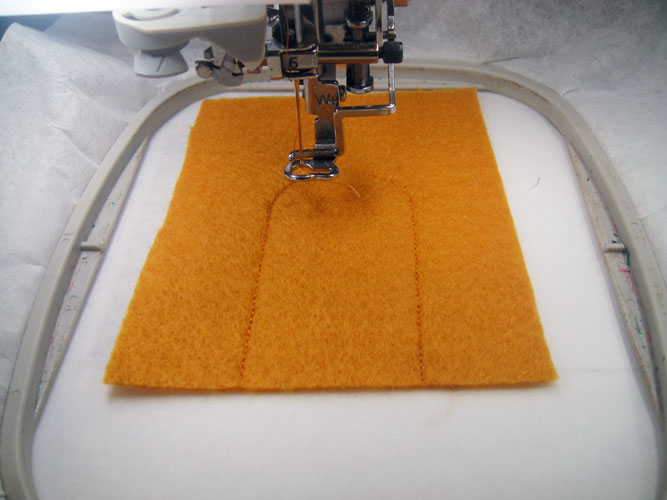
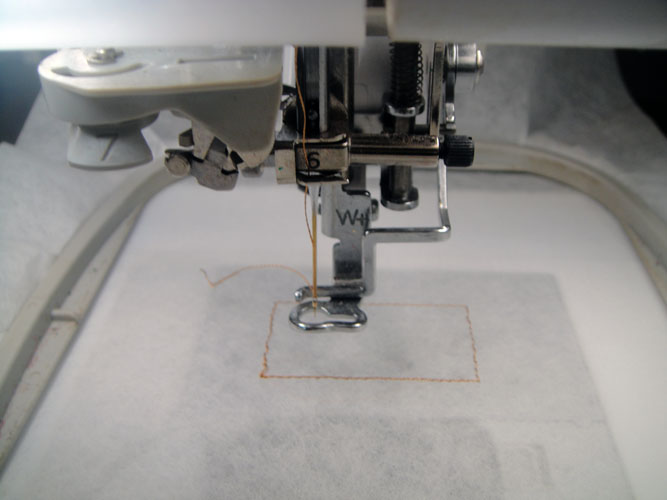
Run the second color sequence in a color that matches your felt. This is the tack down line for the felt.
(Click Image to Enlarge)
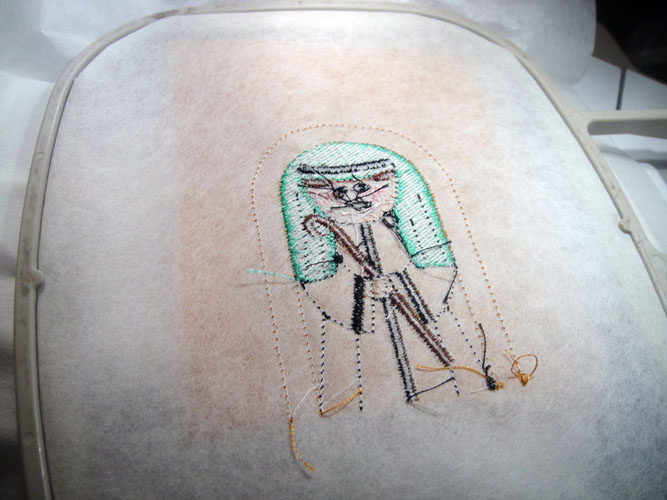
Step 5:
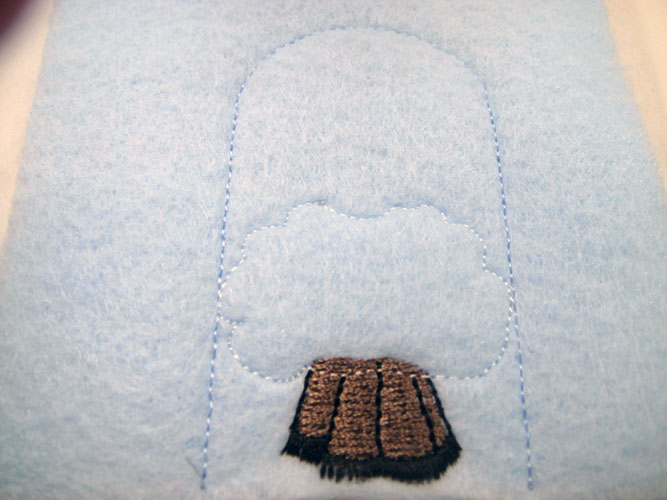
Follow the color chart to complete the embroidery on the puppet through the next to last color sequence.
(Click Image to Enlarge)
Step 6:
Remove the hoop from the machine. Do not unhoop. Turn the hoop over.
(Click Image to Enlarge)
Step 7:
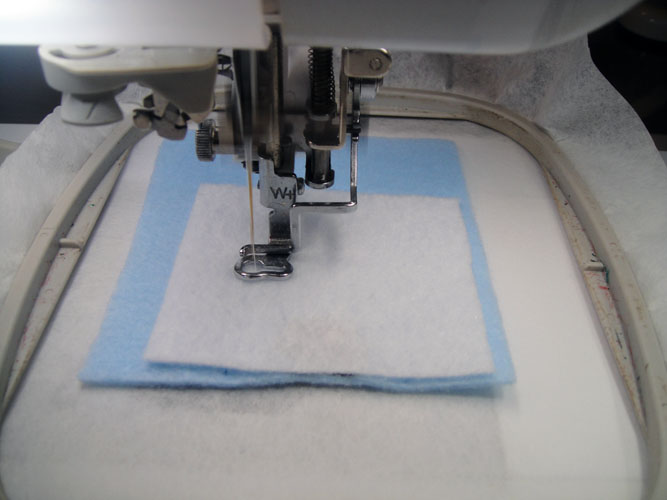
Spray the two side and top edges of the second rectangle of felt with adhesive spray. Align the bottom edge with the original placement line; place the felt over the embroidery on the back of the hoop.
Step 8:
Run the final color sequence in a color that matches the felt.
(Click Image to Enlarge)
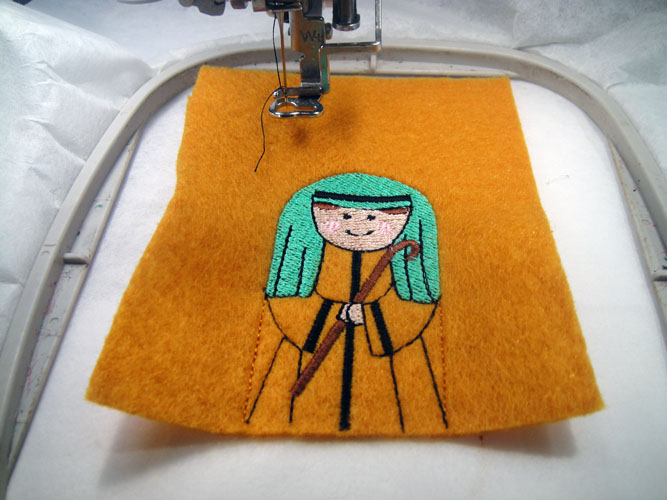
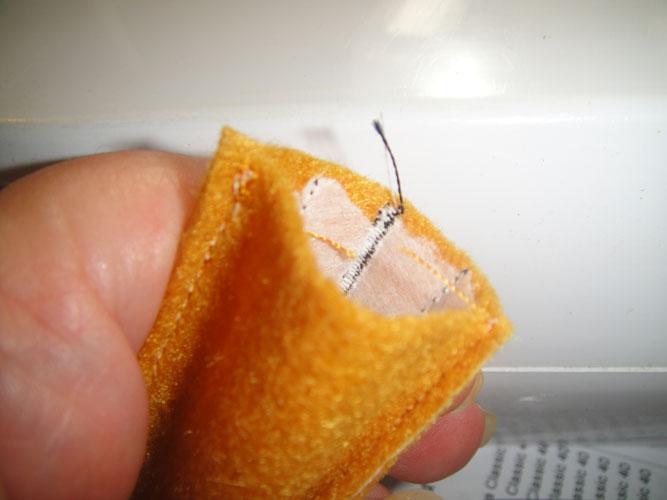
Step 9:
Remove the puppet from the hoop. Trim through all three layers a scant 1/8” around the puppet outline.
(Click Image to Enlarge)
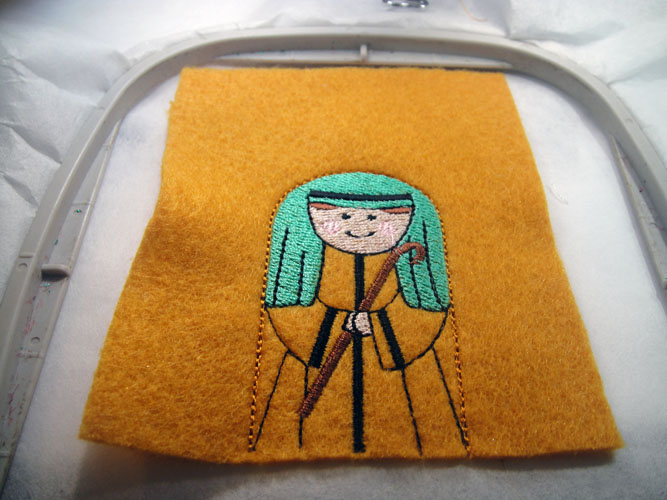
Step 10:
Trim any thread tails from the bottom edge of the puppet. Leave the tear away stabilizer inside to give the puppet a little extra body.
(Click Image to Enlarge)
Step 11:
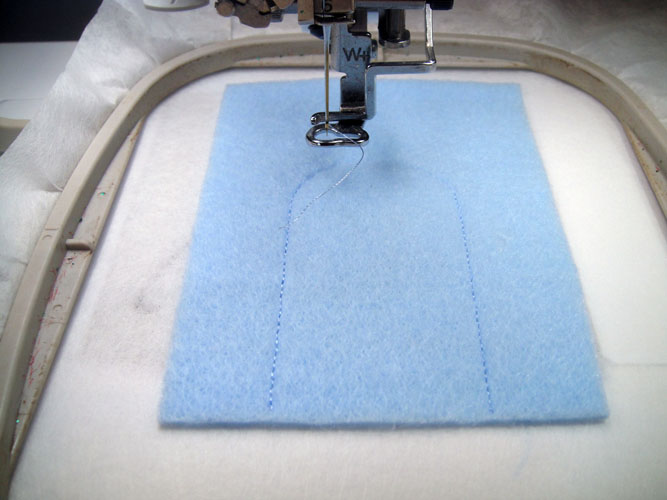
To make Mary and baby Jesus, load NFP02, use light blue felt squares for the body and back. Follow the color chart as in steps 1 through 10 above. Use matching light blue thread for the 1st two and last color sequence.
(Click Image to Enlarge)
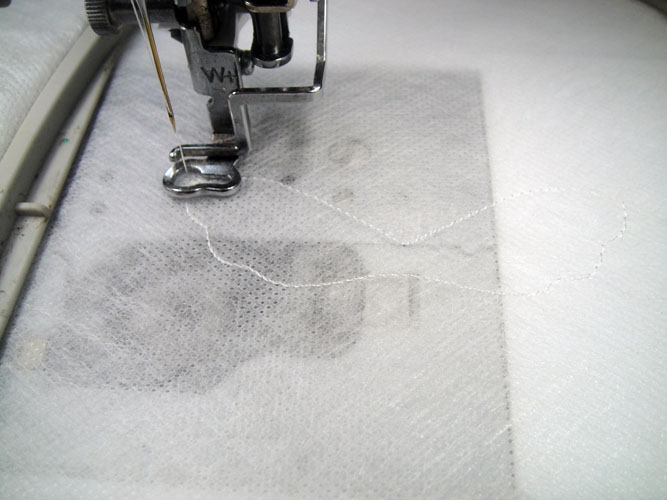
Step 12:
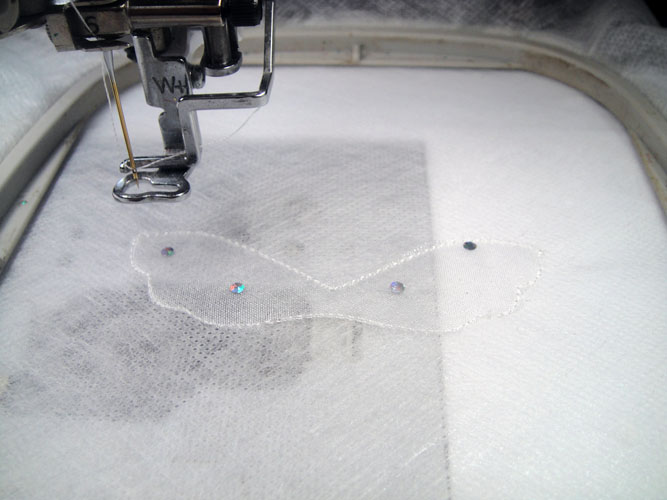
Load design NFP03A to make the Angel’s wings. Hoop a single layer of fibrous water soluble stabilizer. Run the first color sequence is white to stitch the outline of the wings.
(Click Image to Enlarge)
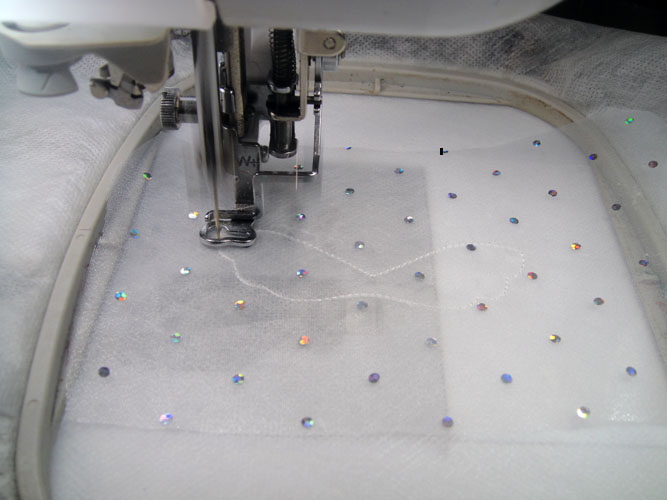
Step 13:
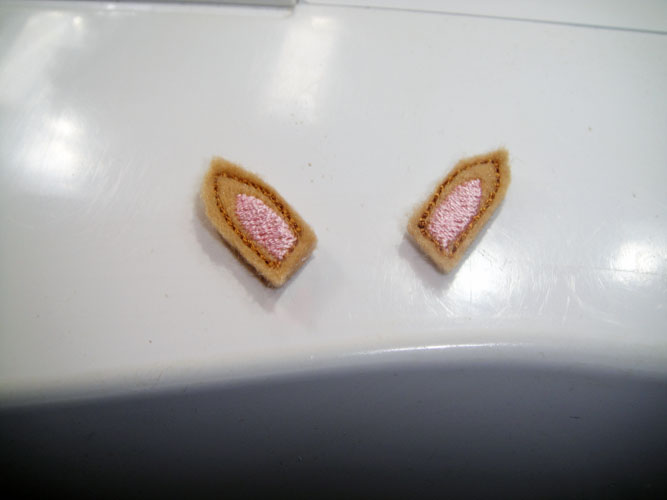
Spray a 5” wide by 3” deep scrap of organza over the outline; run the 2nd color sequence in white to tack down the organza. Note: The organza used in the sample has little painted bling dots on the fabric. These are soft and can be stitched through. These are not crystals hot fixed to the fabric. If you want to add crystals do so after the wings are completed.
(Click Image to Enlarge)
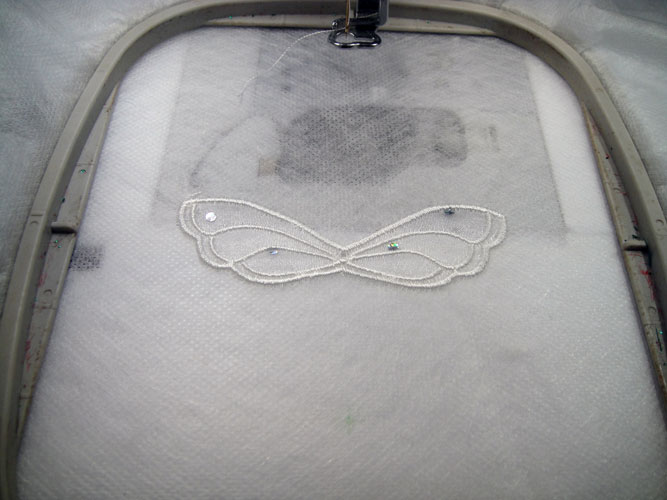
Step 14:
Remove the hoop from the machine. Do not unhoop. Trim the organza with small sharp scissors right up next to the tack down line. Return the hoop to the machine.
(Click Image to Enlarge)
Step 15:
Run the final color sequence in white to complete the wings.
(Click Image to Enlarge)
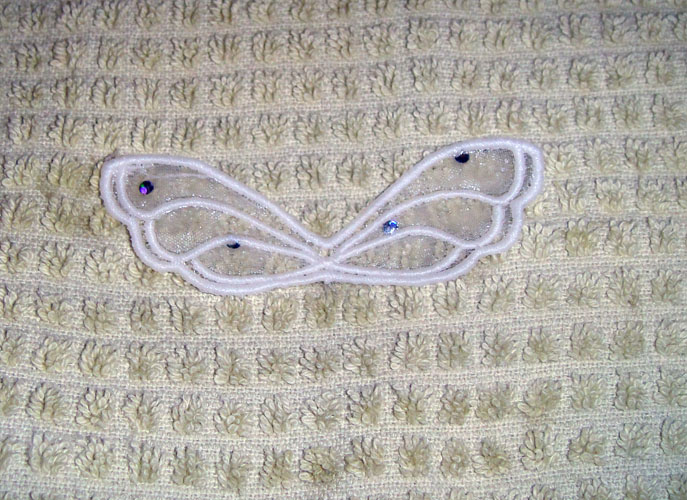
Step 16:
Trim the water soluble stabilizer roughly around the wings; hold under running hot water to remove the stabilizer; lay on a cotton towel to dry.
(Click Image to Enlarge)
Step 17:
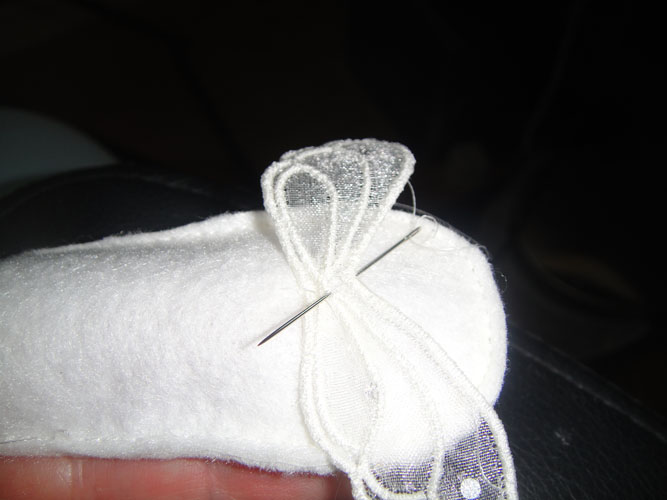
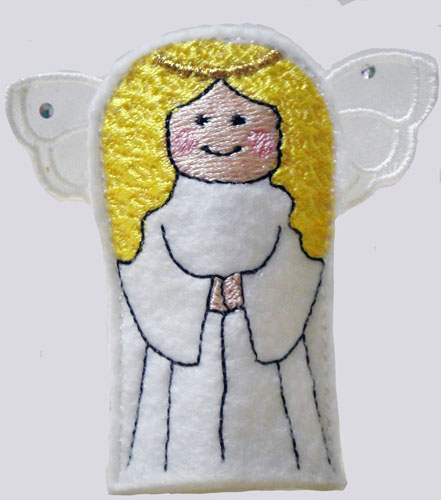
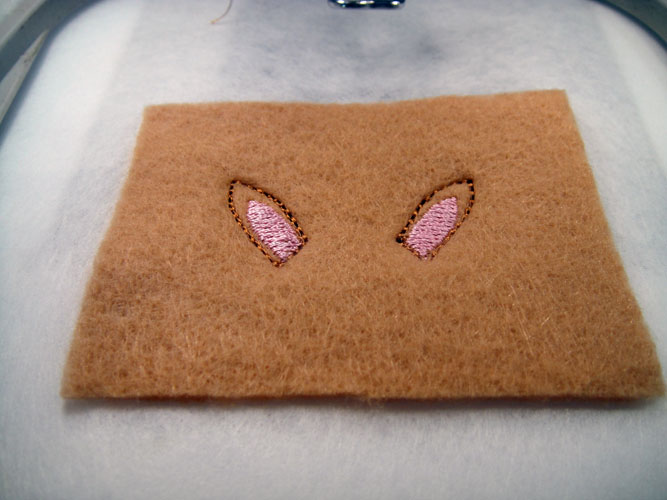
Load NFP03B to sew the angel body. Load tear away stabilizer in your hoop and follow steps 1-10 using white felt for the body. Use white thread for the 1st two and final color sequences. In the sample metallic gold thread was used for color sequence 6 for her halo, but you may use any gold thread you wish to use. Slip your finger inside the body and make a few hand stitches to stitch the wings to the back of the body.
(Click Image to Enlarge)
Step 18:
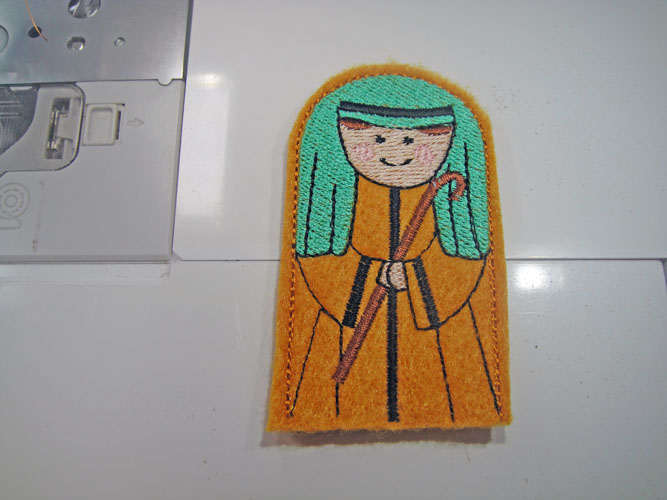
Your finished angel will look like this.
Step 19:
Load design NFP04 into your machine for the 1st Wise Man. He is made in the same manner as in the steps 1 – 10 outlined above. In an effort to change it up a bit a patterned felt piece was used for the front and the back, however you may use plain felt or see what other interesting choices your fabric store carries.
(Click Image to Enlarge)
Step 20:
(Click Image to Enlarge)
Your 1st Wise Man will look like this when he is completed.
Step 21:
(Click Image to Enlarge)
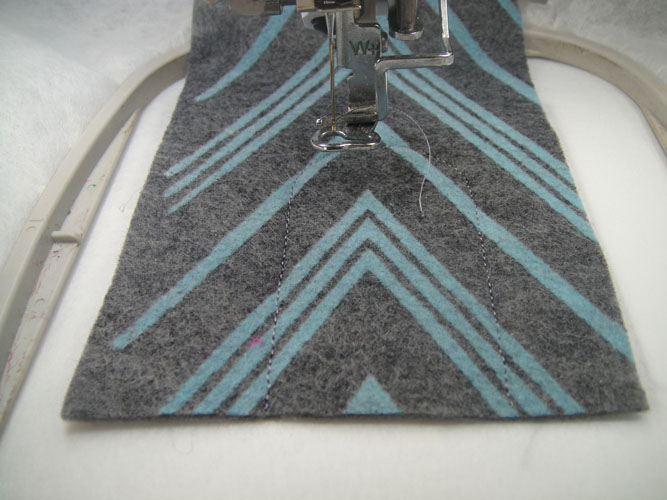
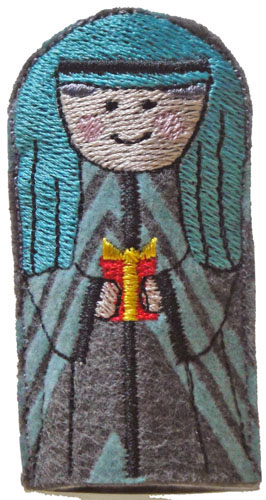
Load design NFP05 into your machine for the 2nd Wise Man. Purple felt was used as the felt for the front and back. Follow the color chart through color sequence 10 and stop there to put the back felt on the design. Purple thread matching the felt was used for the 1st two and last color sequences.
Step 22:
(Click Image to Enlarge)
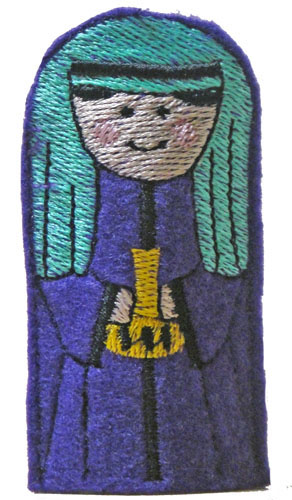
Load design NFP06 into your machine for the 2nd Wise Man. Olive felt was used as the felt for the front and back. Follow the color chart through color sequence 10 and stop there to put the back felt on the design. Olive thread matching the felt was used for the 1st two and last color sequences.
Step 23:
Load design NFP07 into your machine for the lamb. Stitch the outline in light blue.
(Click Image to Enlarge)
Step 24:
Spray a rectangle of light blue felt and place over the outline. Run the next color sequence in light blue which is the tack down line.
(Click Image to Enlarge)
Step 25:
Following the color chart stitch the legs in taupe and then the hoofs in black. The 5th color sequence is an outline again. Stitch it in white for the outline of the body.
(Click Image to Enlarge)
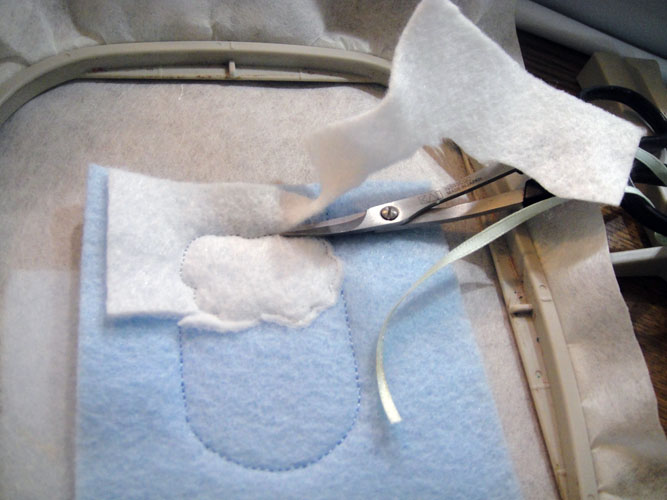
Step 26:
Spray a square of white felt approximately 2.5” x 2/5” with adhesive and place over the body outline. Stitch the 6th color sequence in white to tack down the body.
(Click Image to Enlarge)
Step 27:
Remove the hoop from the machine; do not unhoop. Trim the excess felt from around the body tack down stitches.
(Click Image to Enlarge)
Step 28:
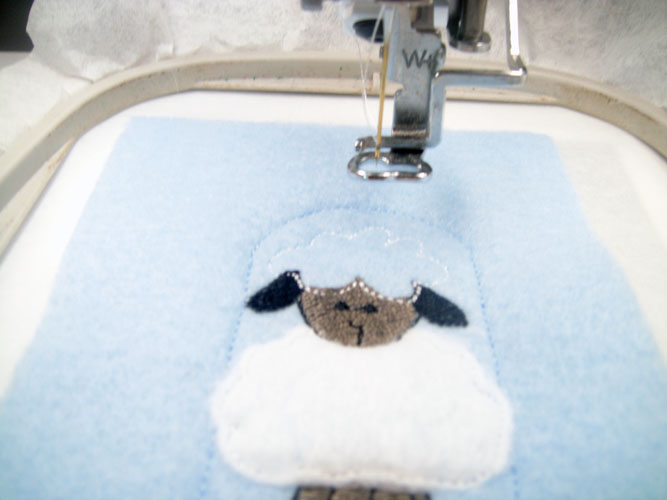
Stitch color sequence #7 in taupe for the lambs face; stitch color sequence #8 in black for his ears and face details; stitch color sequence #9 in white which is the outline for the top of the head.
(Click Image to Enlarge)
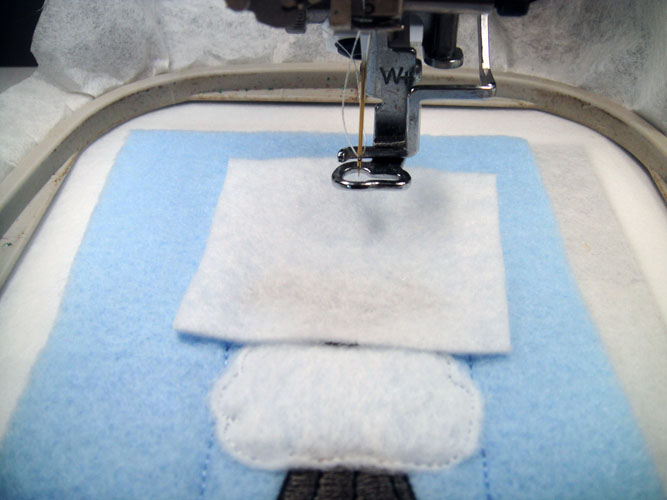
Step 29:
Stitch color sequence # 10 in white to tack down the top of the head. Trim in the same manner as you did the body. Return the hoop to the machine and stitch color sequence #11 in white to complete the top of the head.
(Click Image to Enlarge)
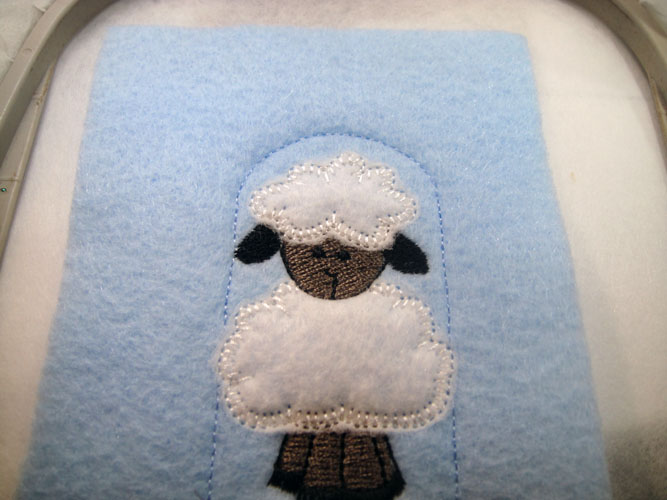
Step 30:
Remove the hoop from the machine and place the back felt as you have for the other puppets. Change the thread to light blue and stitch the final seam with color sequence # 12.
(Click Image to Enlarge)
Step 31:
(Click Image to Enlarge)
Trim a scan 1/8th inch from the outline stitches as with the other puppets.
Step 32:
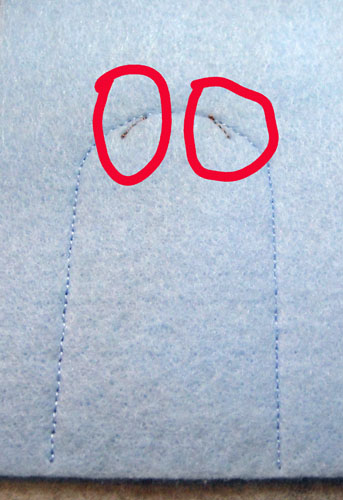
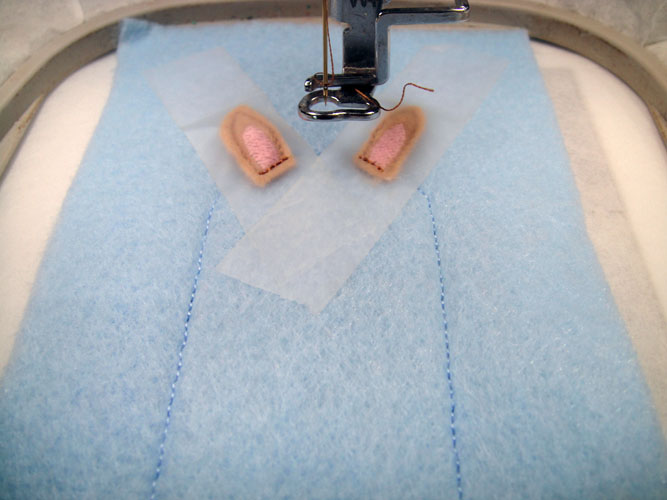
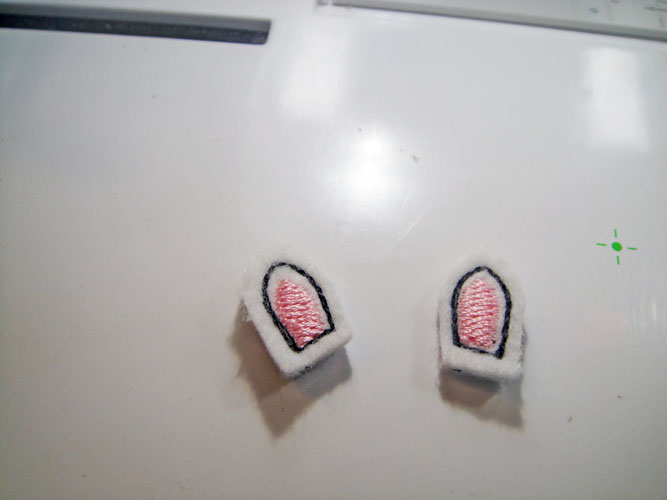
Load design NFP08A to make the donkey’s ears. Hoop tear away backing and stitch the first outline.
(Click Image to Enlarge)
Step 33:
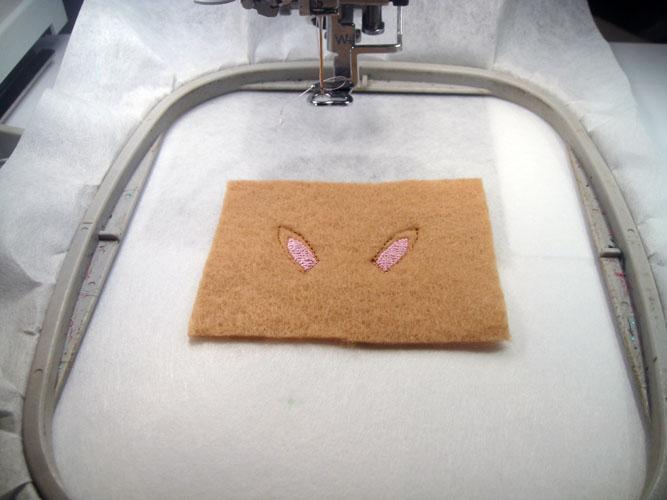
Spray a 2” x 3” rectangle of fabric and place over the outline; stitch the 2nd color sequence is a color to match the felt to outline the ears; stitch the 3rd color sequence in pink for the center of the ears.
(Click Image to Enlarge)
Step 34:
Remove the hoop from the machine; do not unhoop; spray a 2nd rectangle of felt and place over the outlines on the back of the hoop.
(Click Image to Enlarge)
Step 35:
Return the hoop to the machine and stitch the last color sequence in the same color to match the felt to tack down the back of the ears.
(Click Image to Enlarge)
Step 36:
Trim approximately 1/8th from around the ears; set aside for now.
(Click Image to Enlarge)
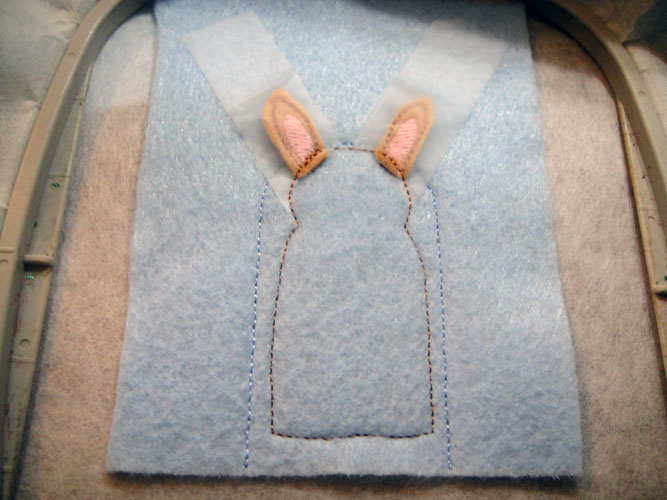
Step 37:
Load design NFP08B into your machine to make the donkey’s body; Hoop tear away stabilizer; the 1st color sequence is the outline; place light blue felt with adhesive spray and stitch the inner outline with light blue thread.
(Click Image to Enlarge)
Step 38:
(Click Image to Enlarge)
Change thread colors to a color that will match your donkey felt. Stitch color sequence 3 which is two lines for the placement of the ears.
Step 39:
Lay the two ears over the placement lines – have the bottom of the ear approximately 1/8th” over the placement line; hold the two ears securely in place with scotch tape; stitch color sequence 4 to attach the ears to the background fabric; leave the scotch tape in place for right now.
(Click Image to Enlarge)
Step 40:
Run color sequence #5 to outline the donkey’s body; remove the scotch tape from inside the body but leave it over the ears that are outside the body.
(Click Image to Enlarge)
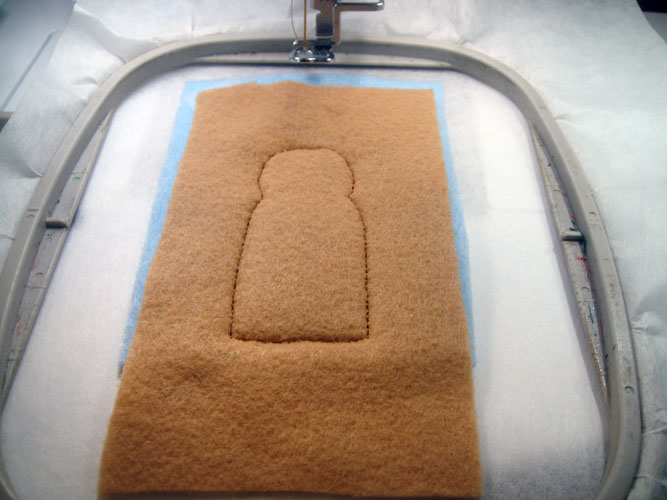
Step 41:
Spray a rectangle of body felt and place over the outline, run color sequence # 6 to tack down the body in a color to match the felt.
(Click Image to Enlarge)
Step 42:
Trim the body felt as close as possible to the tack down stitches; run color sequence #7 in smoke for the nose and color sequence #8 in black to complete the detail on the donkey.
(Click Image to Enlarge)
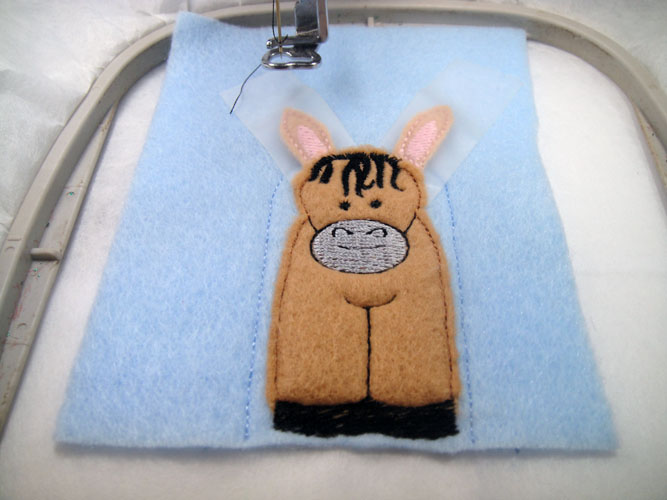
Step 43:
Attach the back fabric behind the hoop as we have for the other puppets. On the front remove the tape from the ears. Fold the ears as far as possible over the donkey’s face and tape down securely; run color sequence #9 in the light blue thread to secure the felt back to the front.
Step 44:
(Click Image to Enlarge)
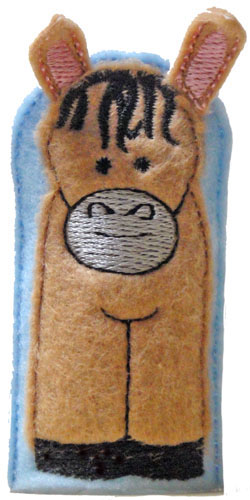
Remove the donkey from the hoop and trim the light blue fabric approximately 1/8th” from the tack down line
Step 45:
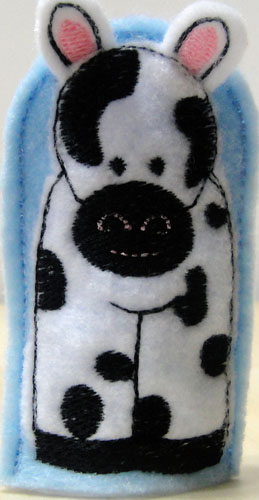
Load NFP09A to make the cow’s ears. These are made following steps 32 through 36 as for the donkey’s ears, but black thread was used for the outlines.
(Click Image to Enlarge)
Step 46:
(Click Image to Enlarge)
Load NFP09B to complete the cow following the same methods as steps 37 through 44 for making the donkey using the cow’s color chart for embroidery the details of the cow.
Step 47:
Congratulations your Nativity Finger Puppet set is complete. Give yourself a hand!
Award winning Digitizer, Embroidery Educator, Author and a Consultant to the Industry, Pat Williams has 30 years of experience in the embroidery industry. Pat has won multiple awards for her digitizing expertise including the 2007 Impressions Awards Grand Championship, Best of Show as well as the 1st and 2nd Place Awards. Pat’s love of digitizing has afforded her the opportunity to write numerous articles for Impressions magazine in the United States and Images Magazine in Europe. In 2001 Pat was named “Embroidery Educator of the Year.” For many years Pat taught digitizing seminars at the ISS Shows in Long Beach, CA and for Compucon software. She now resides in Tucson, AZ.