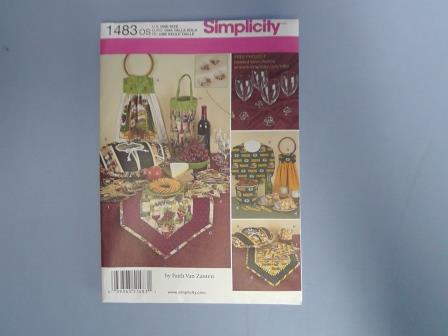
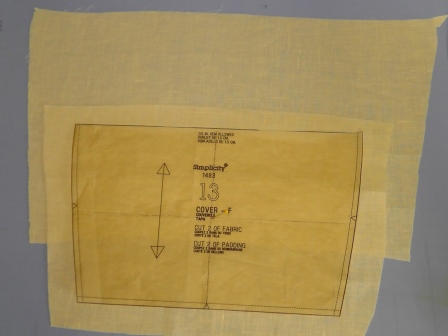
Fabric basket pattern (Simplicity 1483 View F was used for this project)
2- Pieces of linen (or cotton) fabric 2” larger all the way around than pattern piece 14 (for embroidering design on outside of basket)
2- Pieces of quilting cotton fabric 2” larger all the way around than pattern piece 14 (for basket lining)
2- Pieces of quilt batting 2” larger all the way around than pattern piece 14
2- Pieces of quilting cotton 2” larger all the way around than pattern piece 13 (for bottom outer fabric and lining)
2- Pieces of quilt batting 2” larger all the way around than pattern piece 13
12- Pieces of various fabrics 12” x 2” (to be cut down after pattern piece is drawn-these will be sewn to the left and right of the embroidery designs)
4- Pieces of various fabrics 6” x 3” (these will be sewn to the top and bottom of the embroidery designs)
1- Bias strip of fabric 1 ½” x 20” (to cover side seams)
1- Bias strip of fabric 2 ¼” x (to cover raw edge of top of basket)
1- Piece of fabric for basket napkin liner 16” x 16”
Sewing thread to coordinate with fabrics
Embroidery threads for the design as listed (to coordinate with the fabrics)
Two pieces of tearaway stabilizer
A piece of paper to create a pattern piece
Sewing thread to coordinate with fabric lining
2 sheets shrink acrylic (to make buttons that go over side seams -Aleene’s Shrink Art plastic was used in the project)
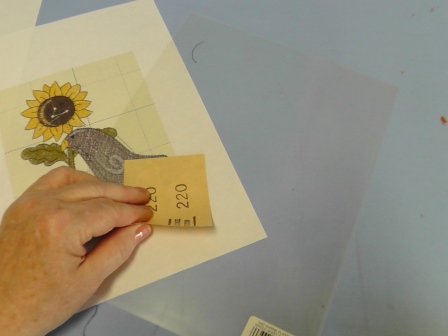
Small piece of 220 grit sandpaper (to scuff up plastic sheets)
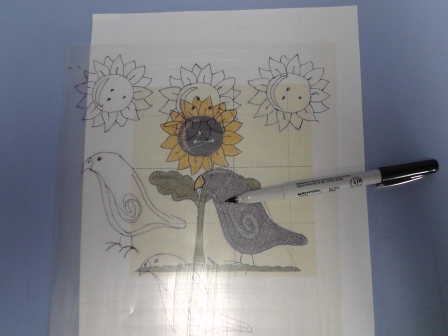
Fine line sharpie marker (Sharpie was used for the project)
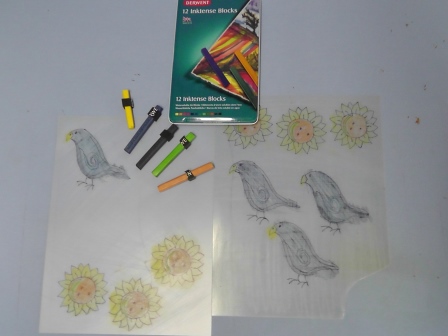
Paint, crayons or color pencils to color acrylic sheet designs (follow product instructions for acrylic sheets -“Inktense” paint sticks were used for this project)
Small holed paper punch (1/8”)
Oven to bake acrylic designs (it is recommended that a separate oven not used for food be used)
Satin acrylic sealing spray (to seal buttons at side seams)
Using a commercial pattern as a base, the fabric is cut larger than the pattern piece and the embroidery design centered and sewn on the fabric. The embroidered fabric is backed with a lining fabric and batting sandwiched in between. Fabrics coordinating with the design are cut and sewn in a “quilt-as-you-go” technique to create a basket front and basket back. The bottom of the basket is quilted then the sides of the basket are sewn together and trimmed with a binding. The bottom of the basket is quilted and sewn to the sides then the basket is completed with a contrast binding around the top. To finish the basket, acrylic buttons are made by tracing over the printed template of the embroidery designs onto shrink art plastic, painted, baked, and tied on to each side of the basket using embroidery floss.
The techniques used to create this “Prim Basket” are so easy and can be used to create themed fabric baskets for any holiday or event. Use themed embroidery designs and fabrics to create these baskets for baby or wedding showers, Christmas, Halloween, or any other celebration.
Step 1:
Purchase the pattern. Review all the pattern instructions and read through these instructions before beginning.
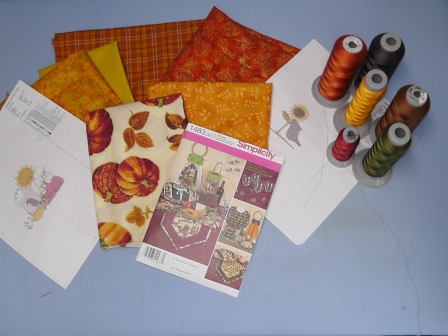
Step 2:
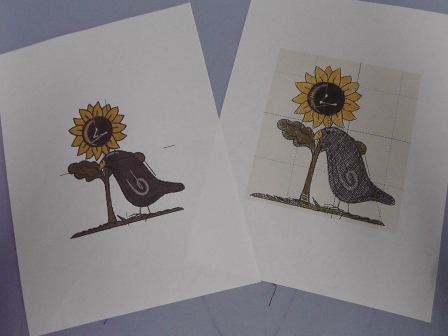
Print out paper templates of the designs and select the fabrics for the project (design for basket side 2 "Sunflower Crow" JB1209037A is enlarged 120%). This is a great “stash-busting” project to use up scraps of fabrics related to the embroidery theme. Choose threads for the embroidery designs to coordinate with the fabrics.
Step 3:
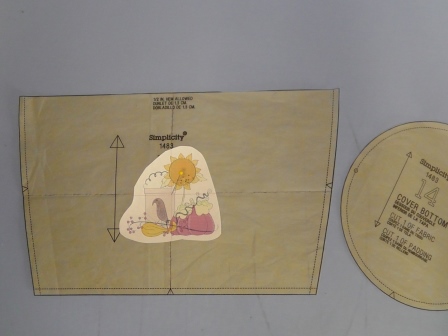
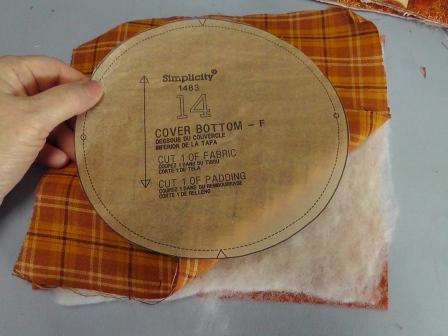
Cut out pattern pieces 13 (cover) and 14 (cover bottom) along the cutting line. Fold and find the center of pattern piece 13. Cut out around the printed embroidery template and center the design on the pattern to be sure you like the location. Remove the paper embroidery template.
Step 4:
Cut two pieces of plain linen (or cotton) fabric at least 2” larger all the way around than pattern piece 13. One will be for the basket side 1 and the other for basket side 2. Beginning with basket side 1, pin the pattern piece on the fabric. Locate the center of the pattern piece and transfer it to the fabric; remove the pattern piece.
Step 5:
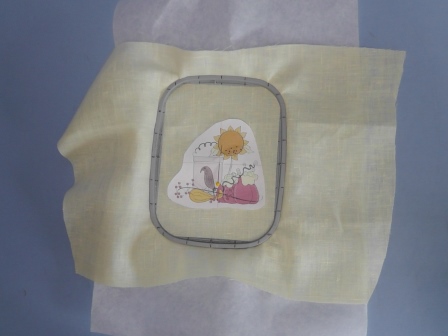
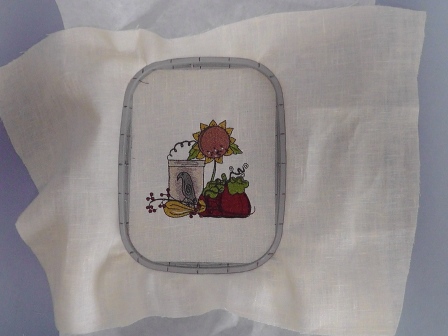
Center the paper template on the fabric. Hoop the fabric with the stabilizer.
Step 6:
Load design “Sunflower Crow” (JB1209018A) in the machine at actual size. Align the needle to the center of the paper template.
Step 7:
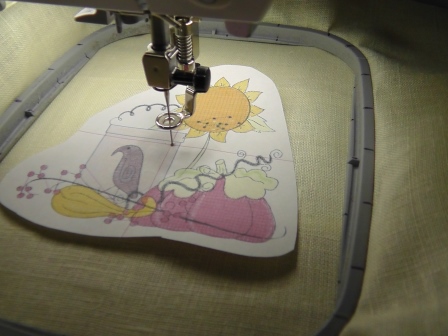
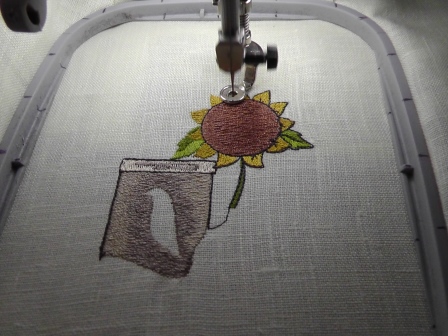
Stitch the design following the color sequence.
Step 8:
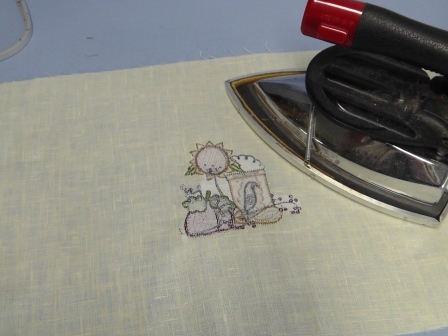
Trim the jump stitches as you stitch. Remove the completed design from the machine.
Step 9:
Remove the fabric from the hoop and remove the stabilizer; press the fabric well.
Step 10:
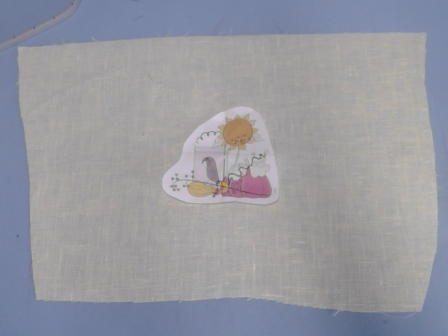
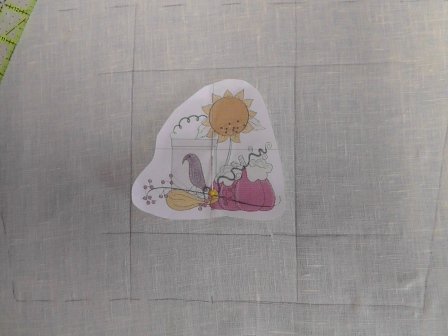
Align the paper template over the stitched design.
Step 11:
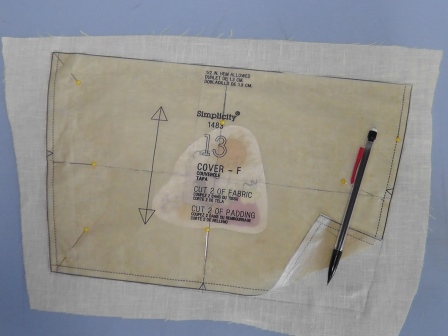
Place the paper pattern piece over the fabric and paper template, centering and aligning the pattern piece to the center markings on the paper template. Trace around the cutting line of the pattern onto the fabric with pencil.
Step 12:
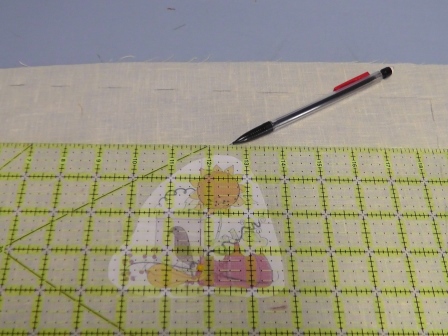
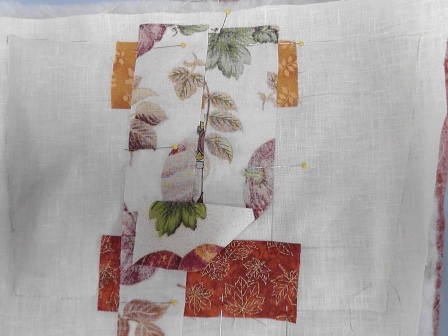
Now draw alignment lines for the fabrics around the paper template. Align a ruler with the center of the paper template and draw a horizontal line on the fabric 2 ½” above the horizontal center line of the paper template.
Step 13:
Draw a second line below the paper template 2 ½” from the center horizontal line of the paper template.
Step 14:
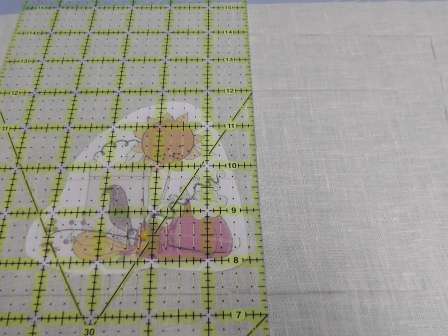
Draw a vertical line 2 ½” from the center vertical line of the paper template on the right side of the paper template.
Step 15:
Draw a vertical line 2 ½” from the center vertical line of the paper template on the fabric to the left side of the paper template.
Step 16:
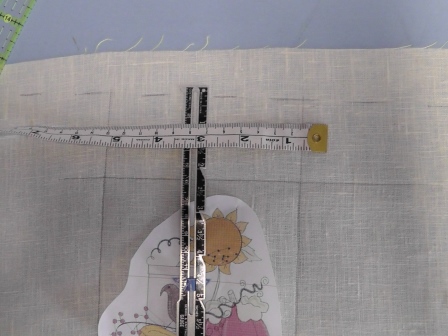
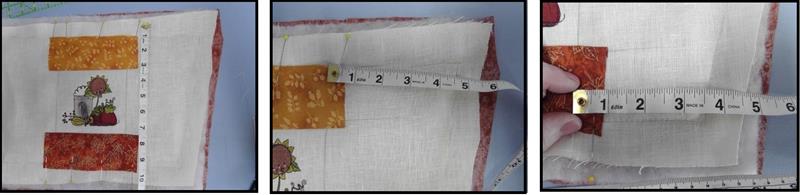
Measure the area at the top of the template; add 1” to this measurement both horizontally and vertically.
Step 17:
Cut two pieces of fabric this measurement; one to be sewn above the embroidered design, and one to be sewn below the embroidered design.
Step 18:
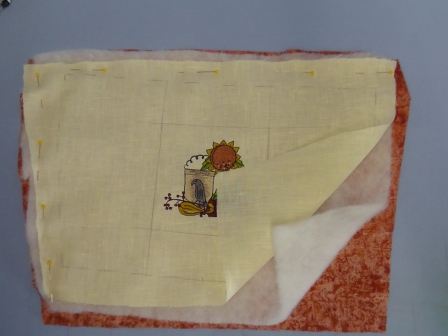
Layer the fabrics for the “quilt-as-you-go technique”. Cut and place the lining fabric right side down on the table. Cut and place the batting on top of the lining fabric then place the embroidered fabric on top of the batting. Pin the pieces together.
Step 19:
Baste the three pieces together along the pencil line, removing the pins as you sew. (Note: white thread was used so the stitching lines would show up in the photos, but you should use thread that will coordinate with the lining fabric for all the sewing steps; the stitching will show on the lining fabric.)
Step 20:
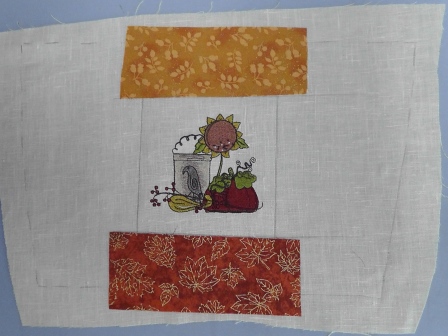
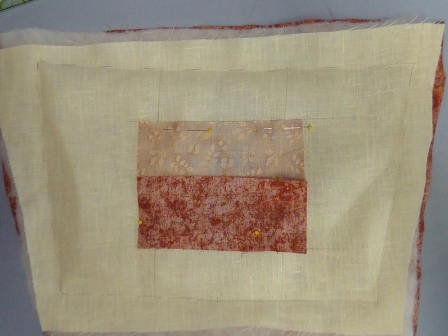
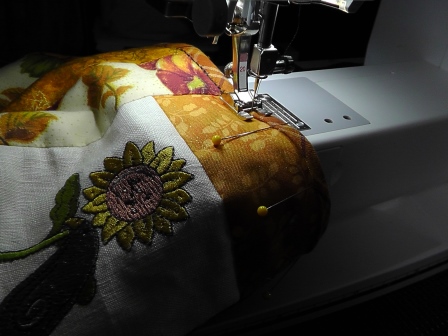
The fabric scraps will now be sewn to the basket front to complete it. Place the cut fabric at the top and bottom of the embroidery design matching the long cut edge of the fabrics to the marked lines.
Step 21:
Flip the fabrics toward the embroidery design and pin in place keeping the cut edge of the fabrics centered on the squares and the cut edge of the fabric aligned to the pencil marking.
Step 22:
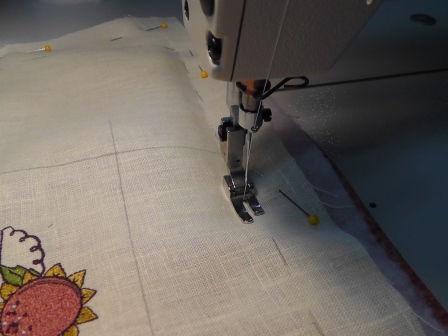
Sew down the fabrics using a ¼” seam allowance. Begin and end the stitching about ¼” beyond the vertical pencil line.
Step 23:
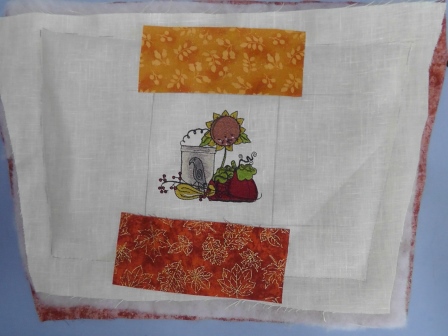
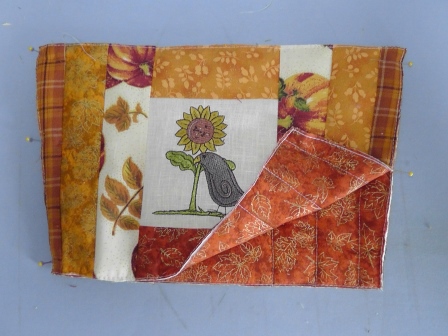
Flip the fabrics away from the embroidery design along the stitched line, press and pin the unsewn edges in place.
Step 24:
Measure the remaining areas for the fabrics to be cut; divide that measurement in thirds and add seam allowances to the measurements.
(Click Image to Enlarge)
Step 25:
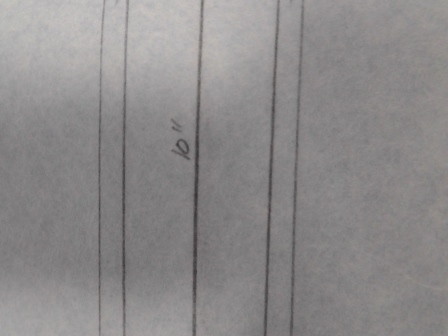
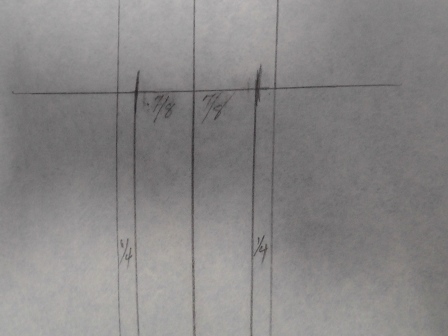
To create a pattern piece for this particular section, mark a line lengthwise on a paper 10” long.
Step 26:
At the top, square a line 7/8” on each side of that line.
Step 27:
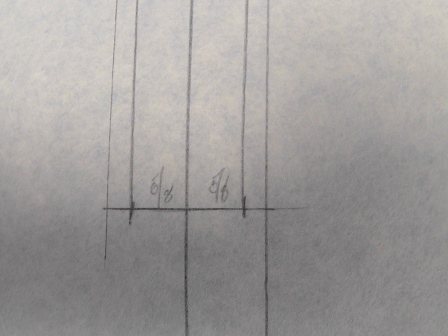
At the bottom of the vertical line, square a line 5/8” on each side of the vertical line.
Step 28:
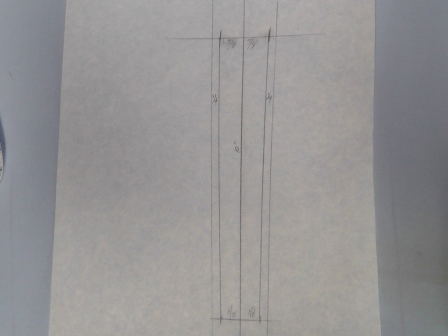
Connect the top and bottom marks by drawing lines. Add ¼” seam allowances on each side of the last vertical lines drawn.
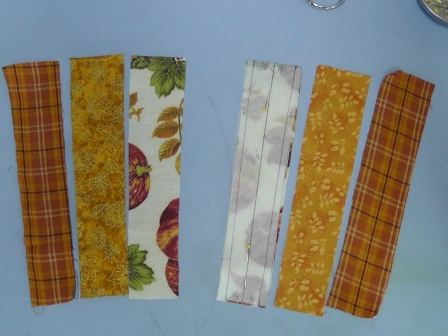
Step 29:
Cut out the pattern piece and cut 6 pieces of fabric from this pattern piece: 3 to be sewn to the right side of the embroidery design and 3 to be sewn to the left side of the embroidery design.
Step 30:
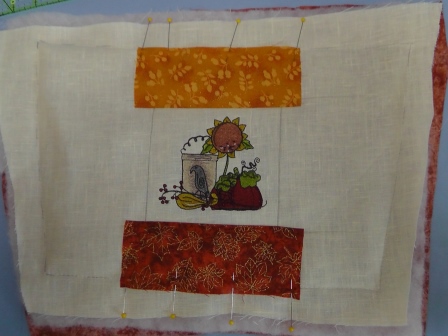
Beginning with the fabrics chosen to be on the immediate left and right of the embroidery design, align the fabric pieces as shown, matching the cut edge of the fabric strip to the drawn line having the top of the strip (the wider side) at the top of the embroidered fabric piece.
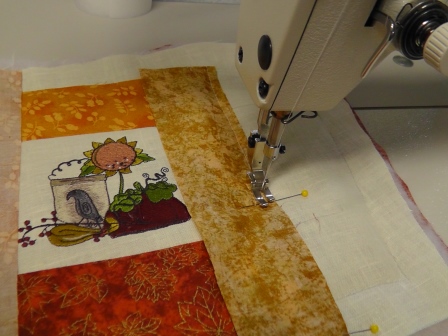
Step 31:
Stitch the strips on using a ¼” seam allowance.
Step 32:
Trim the horizontal fabric pieces even with the seam allowances of the pieces just sewn.
Step 33:
Flip the pattern pieces right side up and press.
Step 34:
Align the middle side strips with the strips just sewn, with the fabrics right sides together and raw edges matching; pin in place.
Step 35:
Sew the strips down using a ¼” seam allowance.
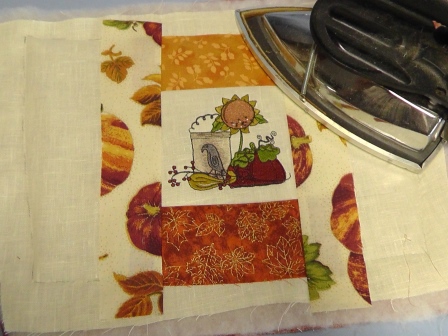
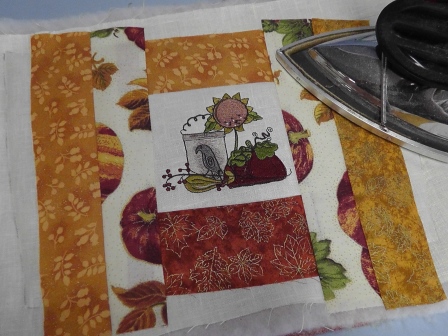
Step 36:
Flip the strips right side up and press.
Step 37:
Repeat the steps of aligning and sewing the strips for the last two pieces.
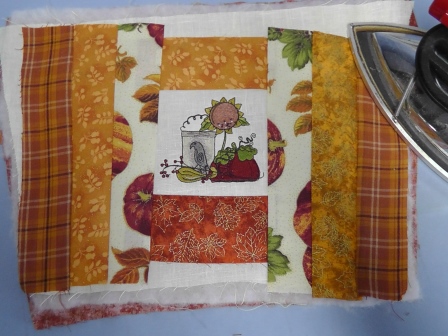
Step 38:
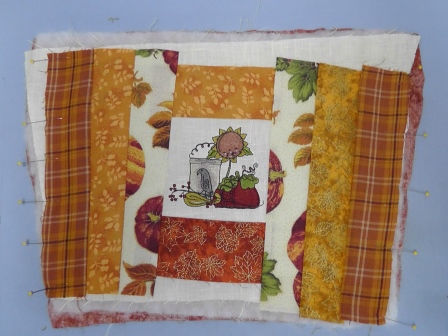
Flip the strips to the right side and press.
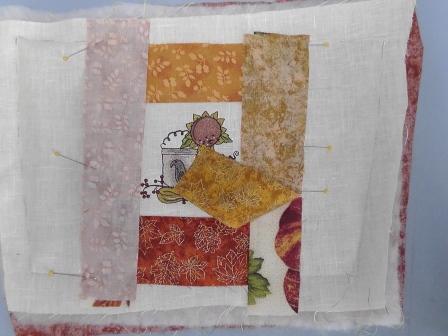
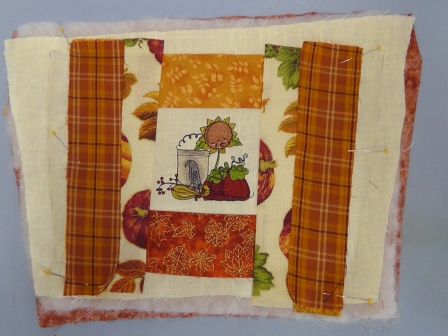
Step 39:
Pin the last strips in place along the unsewn edges.
Step 40:
Flip the fabric over and locate the outer most stitching line. The outside edges of the fabric strips will be tacked down around the edges by stitching over this outer most stitching line.
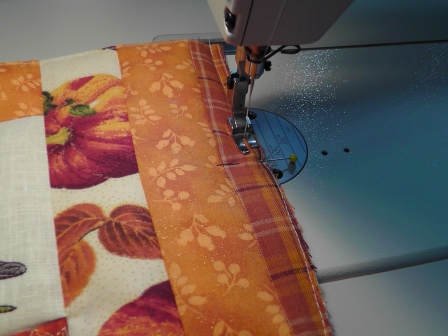
Step 41:
At the sewing machine, stitch over the outer most stitching line.
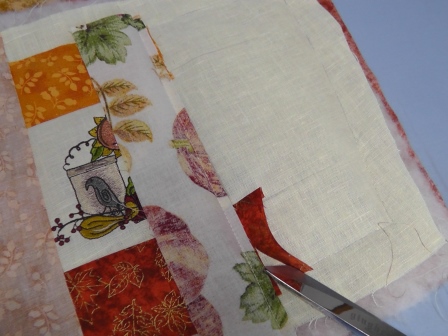
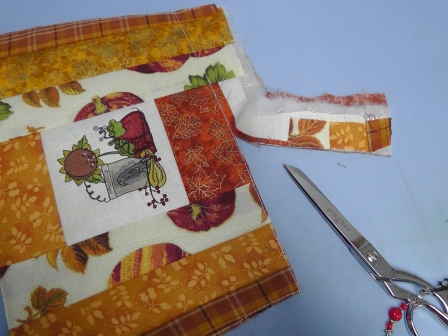
Step 42:
From the right side, trim the fabrics and batting close to the stitching line around all the edges.
Step 43:
Set aside basket side 1 until basket side 2 is completed.
Step 44:
Basket side 2. Repeat the steps of cutting the fabrics, embroidering design “Sunflower Crow” (JB1209037A) enlarged 120%, layering the fabrics, cutting the quilting fabrics and quilting them on as was done on basket side 1. Stitch around the outside and cut out basket side 2.
Step 45:
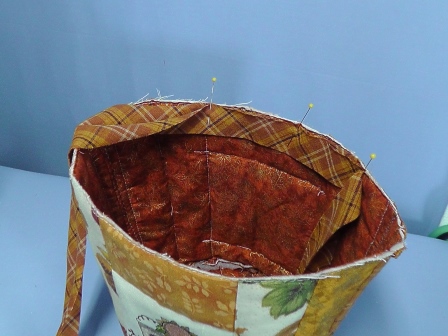
With wrong sides together align basket sides 1 and 2 together at the side seams. Pin the sides together.
Step 46:
Stitch the sides together using a ¼” seam allowance; press the seam allowances open.
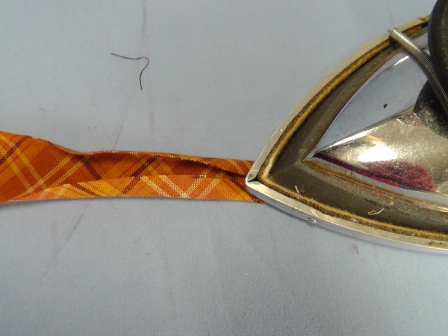
Step 47:
Cut a bias strip of fabric 1 ½” x 20” bias cut plaid strip. Press in ¼” along each long side. Cut the strip in half to create two pieces.
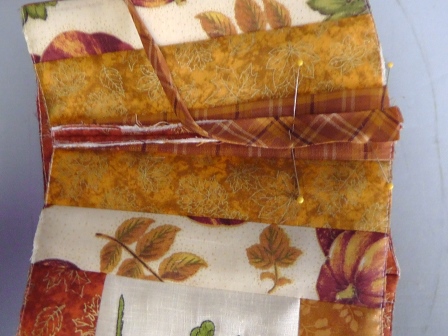
Step 48:
Center and pin one strip over each of the seams just sewn.
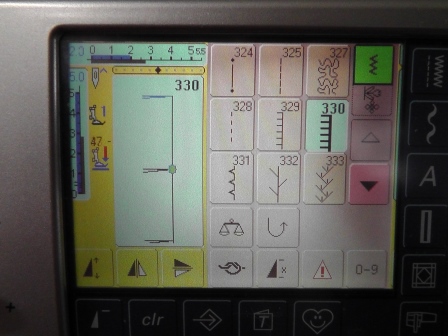
Step 49:
Set up the machine for a blanket stitch (test to see what width and length should be set for your machine).
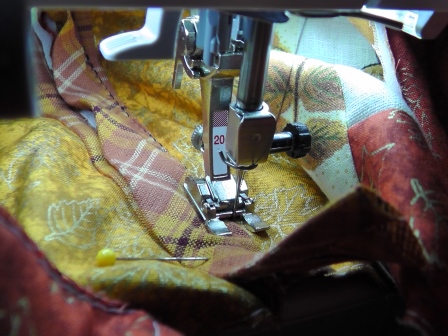
Step 50:
Stitch along each side of the bias strips with the blanket stitch using the charcoal colored embroidery thread used for stitching the embroidery design outlines.
Step 51:
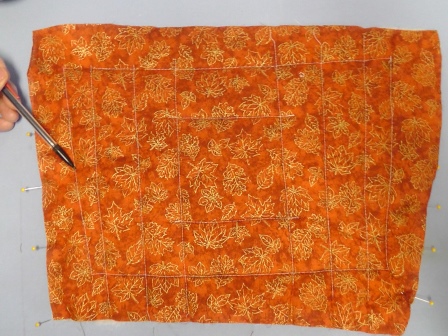
Prepare the bottom of the bucket. Cut a piece of lining fabric, batting and outside fabric larger than pattern piece 14. Layer the fabrics together and pin together.
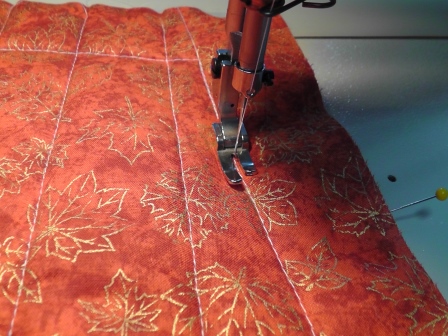
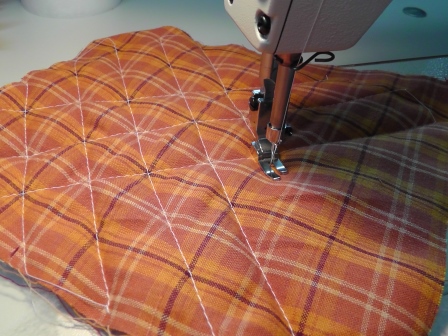
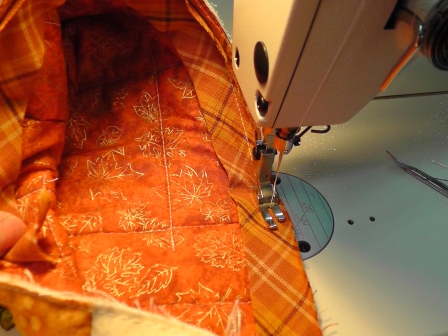
Step 52:
Using coordinating thread, quilt the area as desired (Note: white thread was used for the sample so it would show up in the photos.)
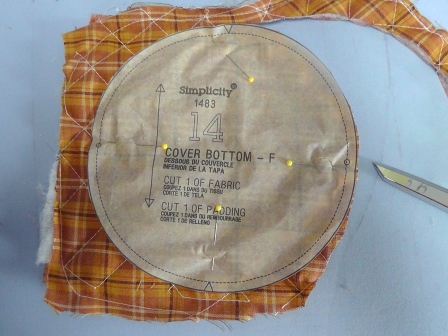
Step 53:
Center the pattern over the quilted bottom piece and cut out.
Step 54:
Sew the bottom to the sides matching dots and side seams, using a ¼” seam allowance as shown in the pattern instructions.
Step 55:
Cut a piece of bias fabric 2 ¼” wide and the circumference of the basket top plus about 6 inches for overlap. Fold the bias piece in half lengthwise and press. Meeting the cut edges together, pin the bias binding to the inside of the basket top.
Step 56:
Sew the binding onto the basket top using a ¼” seam allowance and overlapping the ends.
Step 57:
Fold the binding to the right side and pin in place. Stitch the binding in place using the same thread and stitch settings that were used for the side seam binding pieces.
Step 58:
Create the buttons. Print a copy of embroidery design “Sunflower Crow” (JB1209037A) as it was enlarged 120%.
Step 59:
Follow the instructions for the shrink plastic sheets you purchase. I’ll show you what I did. Sand the plastic sheet lightly using 220 grid sand paper.
Step 60:
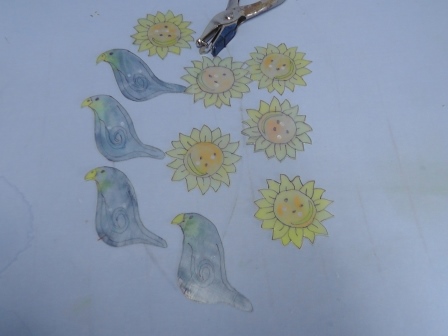
Trace four sunflowers and two crows using the fine tip marker.
Step 61:
Color or paint the designs as desired. I used these paint crayons to lightly color the areas of the designs.
Step 62:
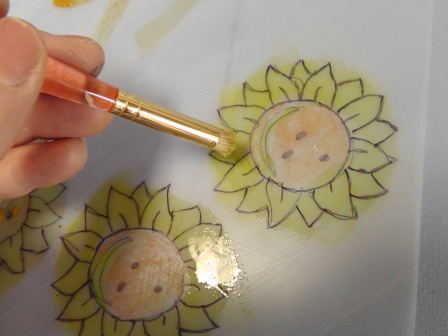
A very small amount of water was added to the brush and then brushed over each color (let dry in between colors.)
Step 63:
Cut out each design scant past the outer drawn line.
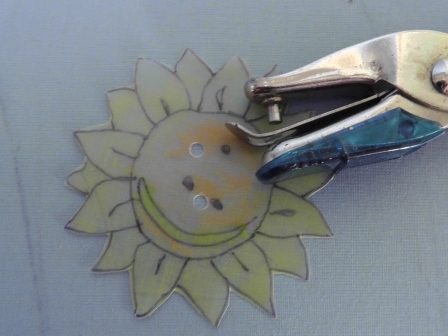
Step 64:
Punch two holes in each design spaced about ¼” apart (like the holes in a button).
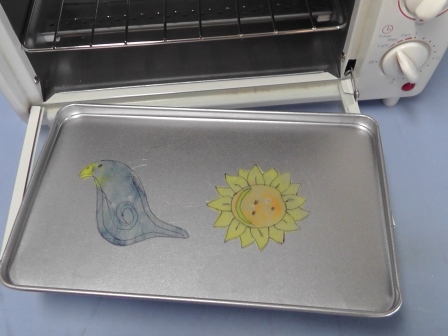
Step 65:
Follow the product instructions for baking. Place the designs on a tray.
Step 66:
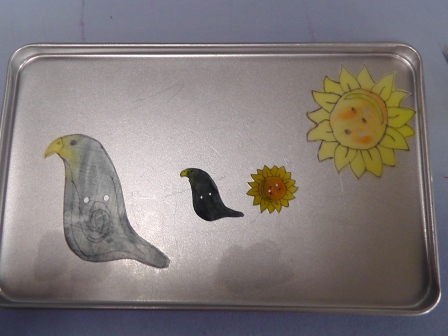
Heat the designs for the amount of time and at the temperature indicated in the product instructions. The pieces will curl up before they flatten out again.
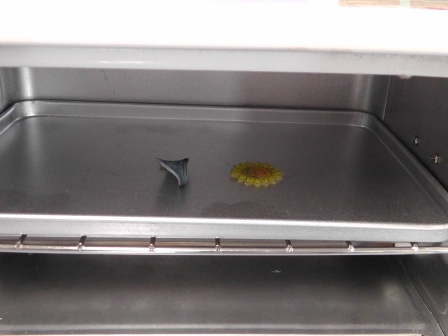
Step 67:
The product shrinks about 60% as you can see.
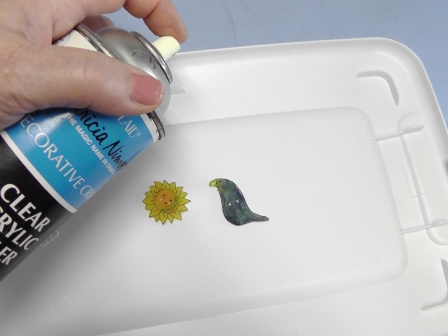
Step 68:
Spray lightly with the clear acrylic spray following the product instructions.
Step 69:
Space the buttons along each side seam. Use the embroidery floss to tie the button on. Tie a knot in the front and clip leaving about 1/8” thread tails.
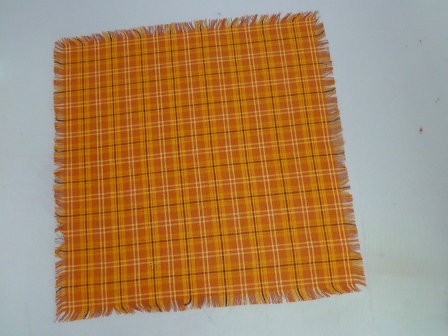
Step 70:
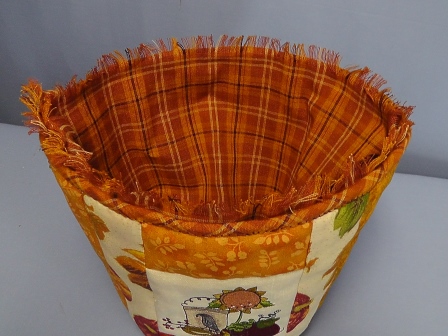
Cut fabric 16” square for the napkin. Fringe along all edges about ¾”.
Step 71:
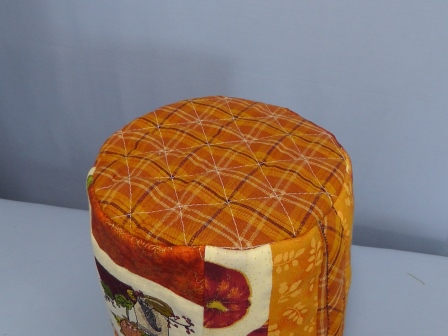
Place the fringed napkin in the Prim Basket so the fringed edges peek beyond the bias binding at the top.
Step 72:
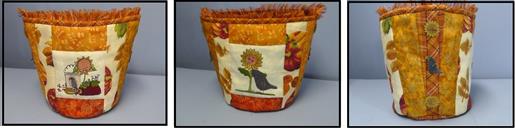
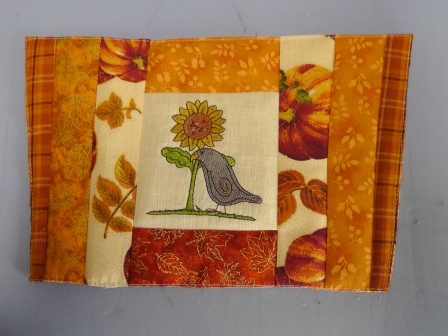
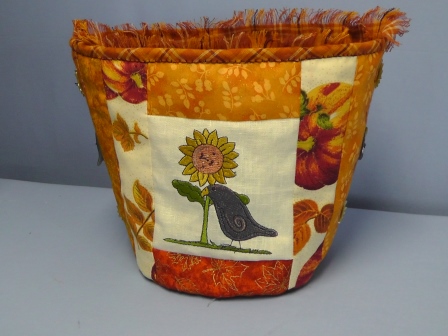
Finished basket side 2.
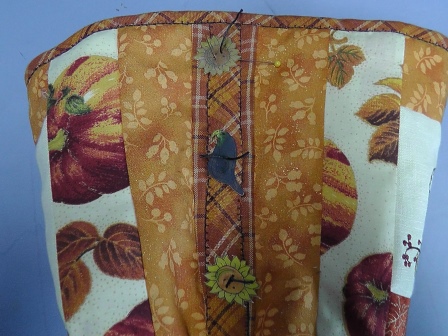
Step 73:
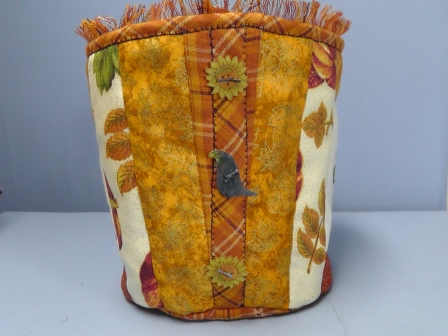
Finished side of the basket with the buttons (the other side seam is identical).
Step 74:
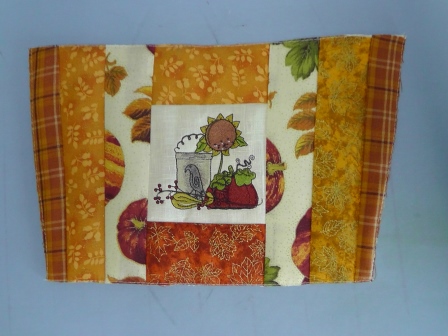
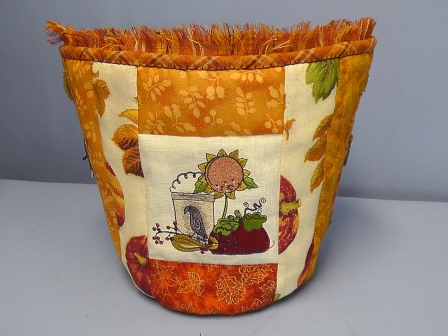
Finished basked side 1. Fill with artificial flowers, fresh bread, sewing notions, anything to make your new basket useful.
Ramona Baird has been in the embroidery industry for over 23 years. She and her husband owned a commercial and retail embroidery store in Arizona for many years. She is an experienced digitizer having been mentored by award-winners Pat Williams and Lindee Goodall. Ramona is a contributor to “Creative Machine Embroidery” magazine having 5 covers to her credit. Ramona has worked for Wilcom America and served many years as Education Director for the American Sewing Guild. With a degree in fashion design, she is able to design and execute patterns which Pat Williams says are “out of the box” in creativity and application. Ramona likes to challenge the boundaries of embroidery and bring new and exciting designs, ideas, and projects to EmbroideryDesigns.com. She wants embroiderers of all levels to increase their skills and enjoyment in using their embroidery machine for gift-making and personal pleasure.