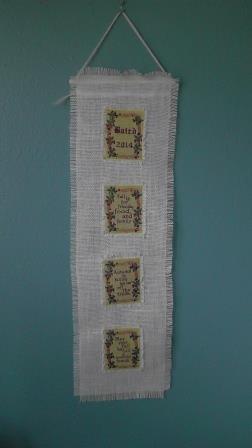
Create a new Fall Mini-Wall Hanging to decorate a small area of a wall that needs some interest and color. Add a name and year to personalize the sentiments in the embroidery.
Project Preview Video
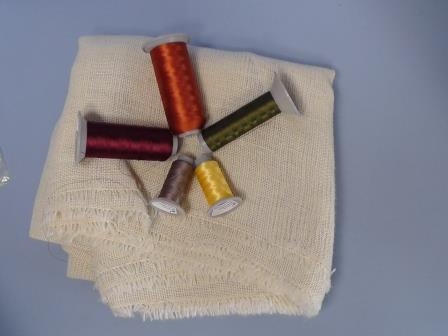
Materials
1 yard cream color burlap fabric (this allows enough fabric for testing as well)
Tearaway stabilizer
Embroidery thread
¼” wooden dowel (7” length)
Sewing thread to match burlap color
Optional: Embroidery software to add personalized text to the “Berries and Wheat Frame”
This Mini-Wall Hanging is easy for a beginning embroiderer to complete, yet offers a fast project for an advanced embroider to stitch. Add text for a family name and year to create a fall wall hanging for your home or to give as a gift.
Note: Many burlap fabrics have a coating on them. Pressing of the fabric requires a press cloth be used to prevent the substance from getting on the bottom of the iron. When pressing, use the lowest setting possible on the iron.
Step 1:
Gather the supplies needed. Use thread colors as listed by the digitizer, or choose colors found in the home décor.
Step 2:
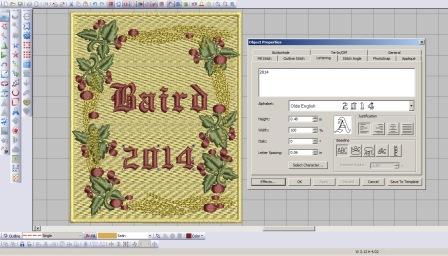
In embroidery software (or optionally at the machine), add personalized lettering of a name and date to the “Berries and Wheat Frame” design. Choose a font that will complement the frame design, and in a size that will stitch clearly and fit within the embroidery design area. In this project, the Old English font was chosen in size .48mm. Be sure to save the design; “Save as” a stitch file in the format needed for the machine.
Step 3:
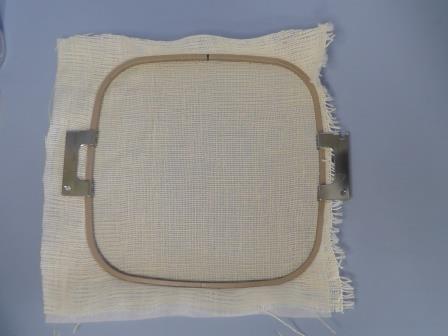
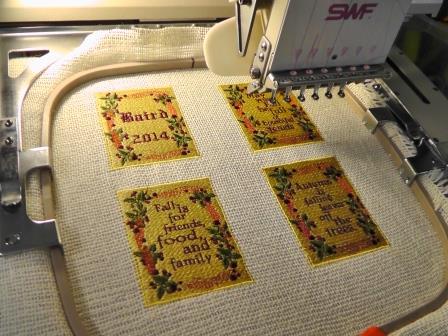
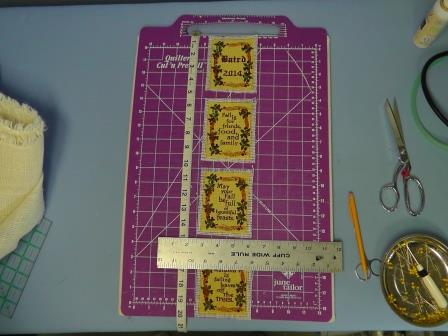
If you have a hoop large enough, all the designs may be ganged up in one hoop; if not, cut fabric, hoop with stabilizer and stitch each design individually. Cut a piece of the burlap larger than the hoop. Hoop the burlap with two pieces of tearaway stabilizer. Be sure the grainline is squared up in the hoop.
Step 4:
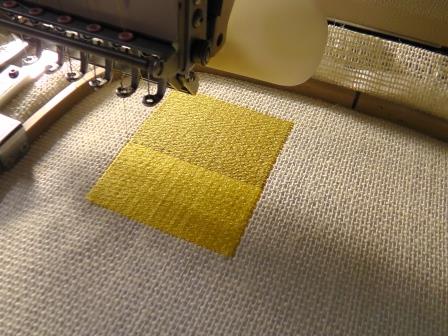
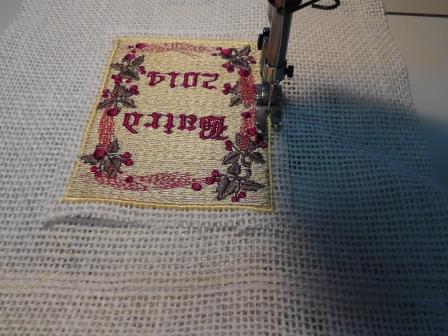
Load the personalized frame design “Berries and Wheat Frame”. If ganging up all the designs in one frame, move the design to the upper left and stitch following the color sequence. Note how the second color blends into the background fill.
Step 5:
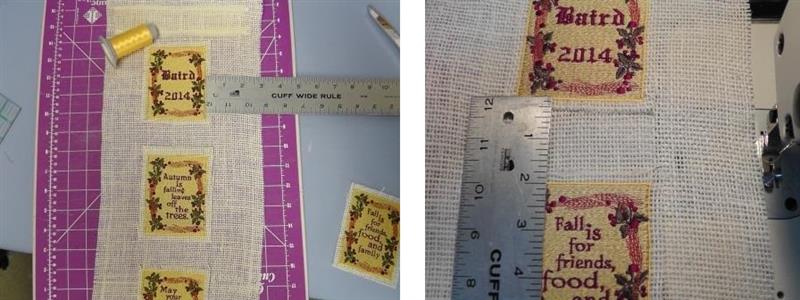
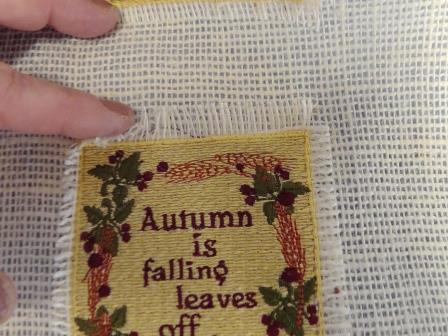
Continue loading the designs (“May Your Fall Be Full”, “Autumn is Falling Leaves”, “Fall is for...”), aligning in the hoop, and stitching following the color sequence. Be sure to leave at least 1 ¼” between each frame as shown.
Step 6:
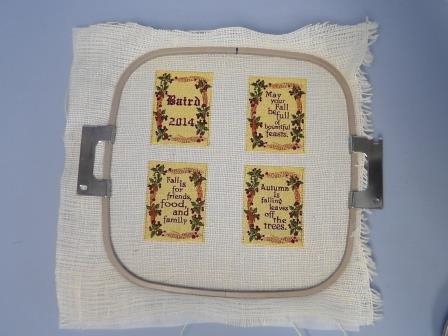
Check the stitching and trim any jump stitches. Remove the fabric from the hoop, and remove the excess stabilizer from the back of each design.
Step 7:
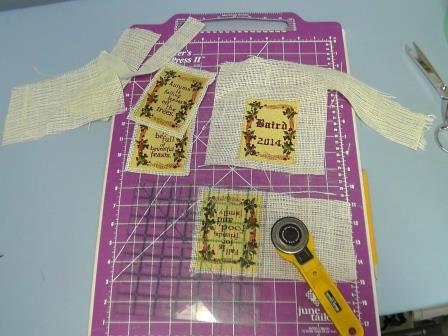
Using the rotary cutter, ruler and mat, measure and cut the burlap leaving ½” around each edge of the frame as shown.
Step 8:
Determine the layout of the frames as you’d like. Measure the length and width of burlap to be cut. Add extra for the top and bottom. For the project, the burlap for the base to sew on the frames was cut 28” long and 8” wide. Cut this base fabric along the lines of the fibers so the edges can be easily frayed as the last steps in the project.
Step 9:
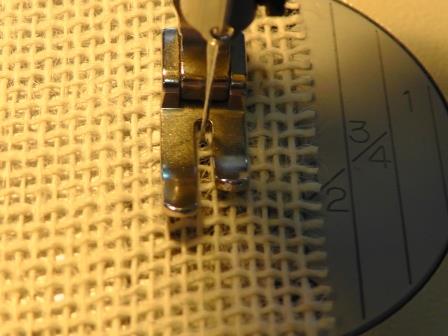
To prevent the edges of the base fabric from fraying further than planned, run a line of stay stitching 5/8” from the edge using a 2.0 mm stitch length. Do this along all four sides.
Step 10:
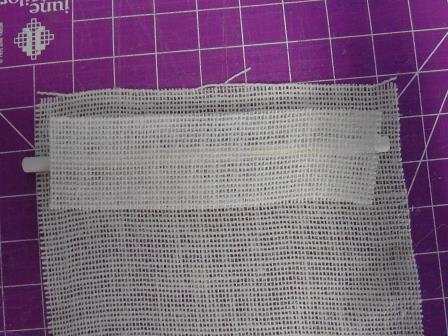
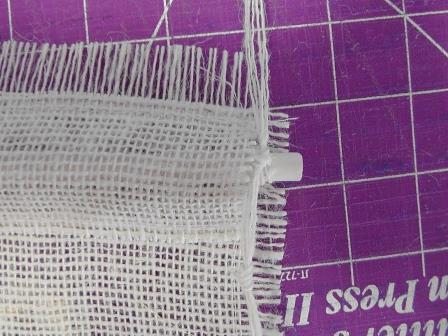
Cut a piece of burlap for a pocket to slide the dowel through. The pocket in the project was cut 7” long by 2” wide.
Step 11:
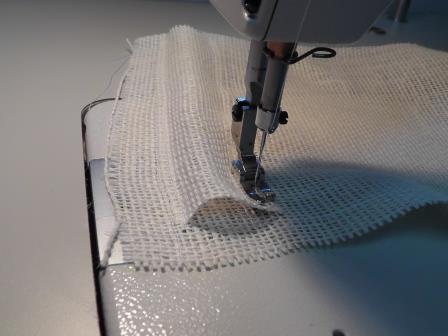
Stitch the pocket to the top of the burlap on the wrong side. Align the top of the pocket to the stay stitching. Stitch again 1/8” away. Place the dowel in the pocket and determine how much the fabric needs to be lifted to create the pocket for the dowel. Pin and stitch the bottom of the dowel pocket. Stitch again 1/8” away.
Step 12:
Center and pin the embroidered frames on the burlap base as planned.
(Click Image to Enlarge)
Step 13:
Place the embroidery thread used to stitch the frame outline on the sewing machine. Stitch each frame to the burlap, removing pins as you sew.
Step 14:
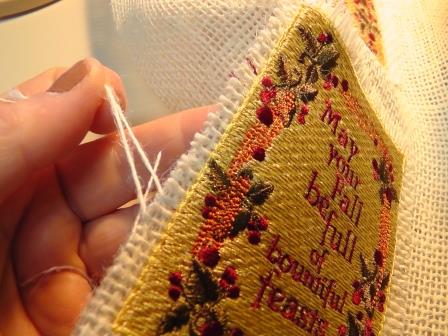
After all the frames are sewn on to the base fabric, remove the threads from around the frame to fringe the fabric around each frame.
Step 15:
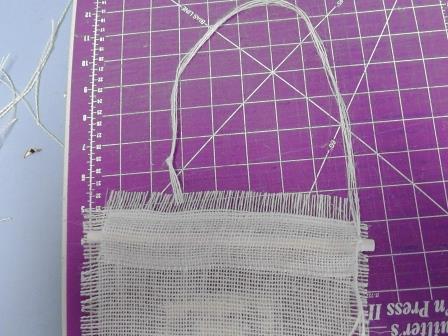
Remove the threads around the outside edges of the base fabric to fringe it. Save the fibers that are removed.
Step 16:
Gather up six to eight fibers that were removed along the long edge of the base fabric. Knot the ends together and trim the excess. This will be used to tie onto the dowel to hang the project on the wall.
Step 17:
Tie one end of the yarn hanger to one end of the dowel. Repeat for the other side.
Step 18:
Run your fingers along the frayed edges of the frames to make the fringe stand up and away from the base fabric.
Step 19:
(Click Image to Enlarge)
Hang the frame on your wall or give as a welcomed gift.
Ramona Baird has been in the embroidery industry for over 23 years. She and her husband owned a commercial and retail embroidery store in Arizona for many years. She is an experienced digitizer having been mentored by award-winners Pat Williams and Lindee Goodall. Ramona is a contributor to “Creative Machine Embroidery” magazine having 5 covers to her credit. Ramona has worked for Wilcom America and served many years as Education Director for the American Sewing Guild. With a degree in fashion design, she is able to design and execute patterns which Pat Williams says are “out of the box” in creativity and application. Ramona likes to challenge the boundaries of embroidery and bring new and exciting designs, ideas, and projects to EmbroideryDesigns.com. She wants embroiderers of all levels to increase their skills and enjoyment in using their embroidery machine for gift-making and personal pleasure.