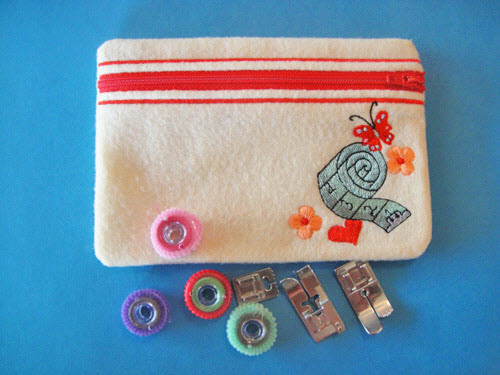
An acrylic felt zippered pouch to hold all of your extra sewing feet and bobbins when you go to your embroidery or sewing class. All made in the hoop, no other sewing required.
The finished pouch measures 6.25” x 4.25”, a great size for all the little sewing accessories you want to keep together. This is easy to do and makes great gifts for your sewing friends or for your craft fair. Note that the designs on this project coordinate with our ITH Scissors Cases, Grandmother’s Needle Book and Wrist Pin Cushion projects.
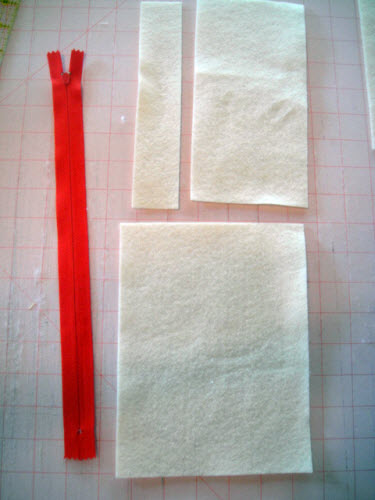
Step 1:
(Click Image to Enlarge)
Cut 1 8” x 6” rectangle of acrylic washable felt.
Cut 1 8” x 4” rectangle of acrylic washable felt.
Cut 1 1.5” x 8” rectangle of acrylic washable felt.
Open zipper and press to remove fold lines.
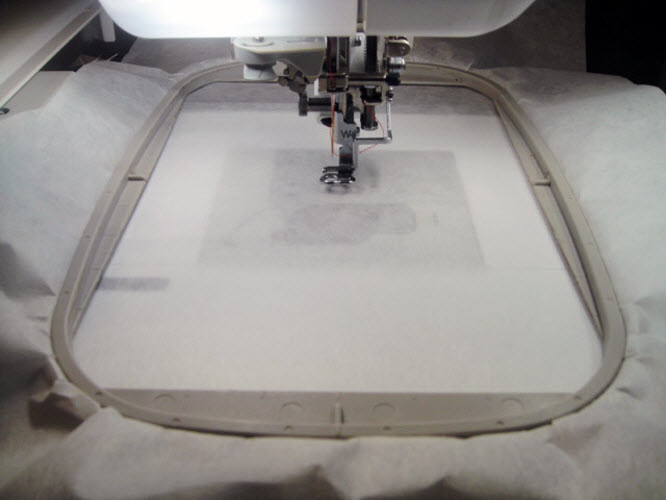
Step 2:
Hoop tear away stabilizer in your 5” x 7” embroidery hoop.
(Click Image to Enlarge)
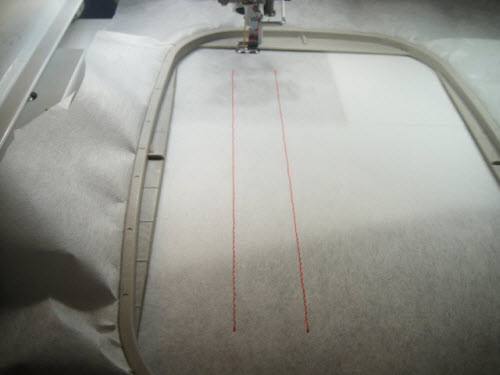
Step 3:
Load the design into your machine. Stitch the outline for the zipper. This can be any color, red was shown in the picture just to make it easier for you to see it.
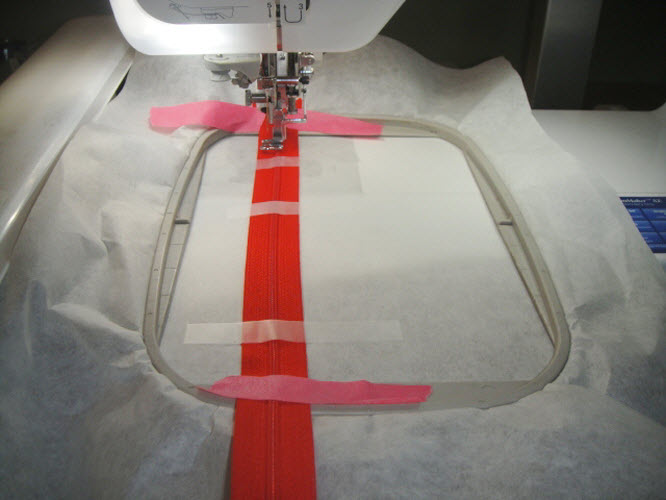
Step 4:
Lay the zipper directly over the outlines, zipper pull over the top of the hoop and facing up. Bottom of the zipper well over the bottom of the hoop. You have 12” of zipper and only 6” of bag, so the zipper should extend well over both the bottom and top edges of the hoop. Scotch tape in place.
(Click Image to Enlarge)
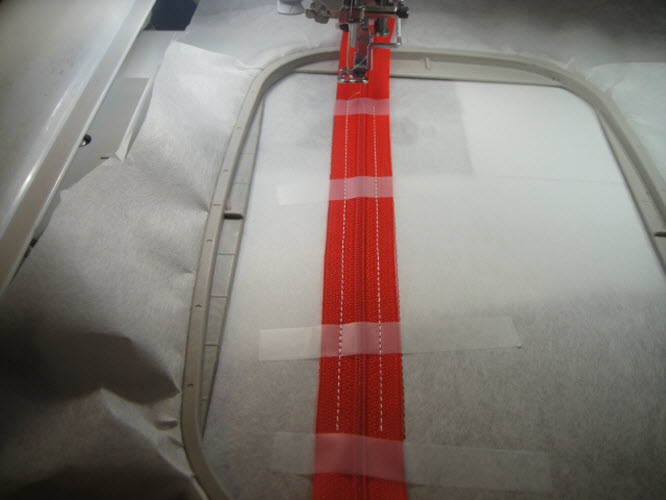
Step 5:
Color stop 2 stitches down both sides of the zipper. In the photo white thread was used for you to be able to see it, but you can stitch this in red. Remove all of the tape after this step runs.
(Click Image to Enlarge)
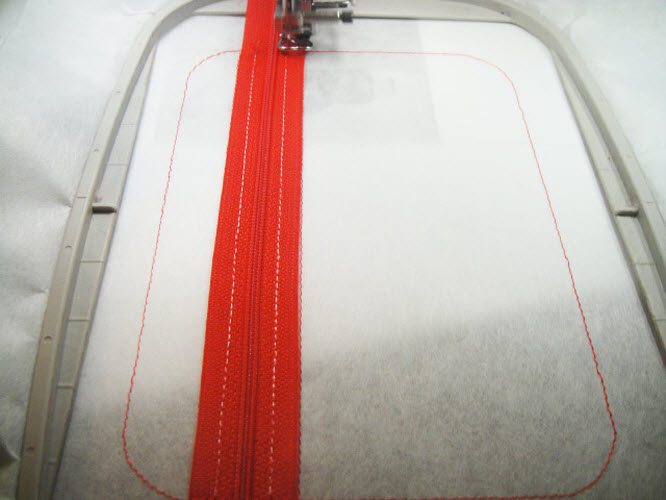
Step 6:
Color stop 3 is shown in red, but suggested that use a thread color that matches your felt. It is the general outline of the bag.
(Click Image to Enlarge)
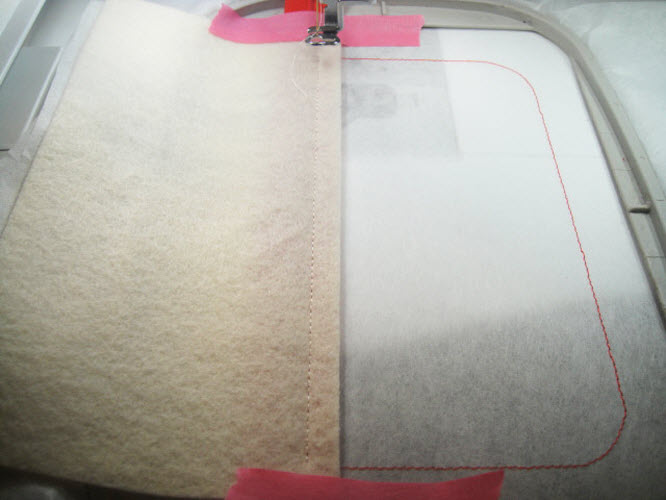
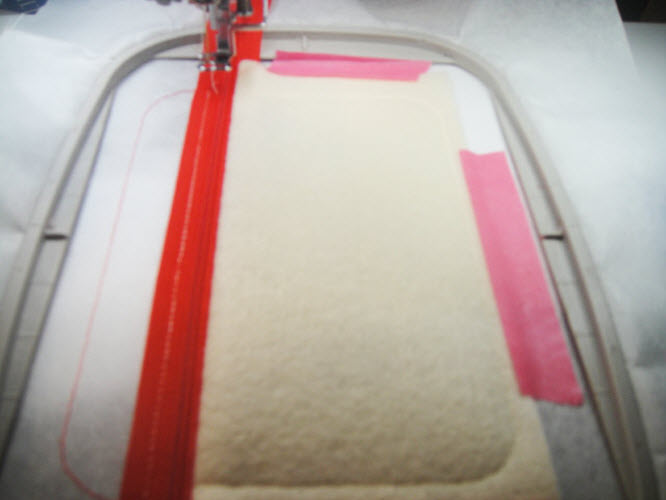
Step 7:
Lay the 4” x 8” rectangle of felt along the right had edge of the zipper. It should exceed the top and bottom outlines slightly. Tape at the top and bottom to secure. Run color stop 4 to stitch the seam in thread to match the felt.
(Click Image to Enlarge)
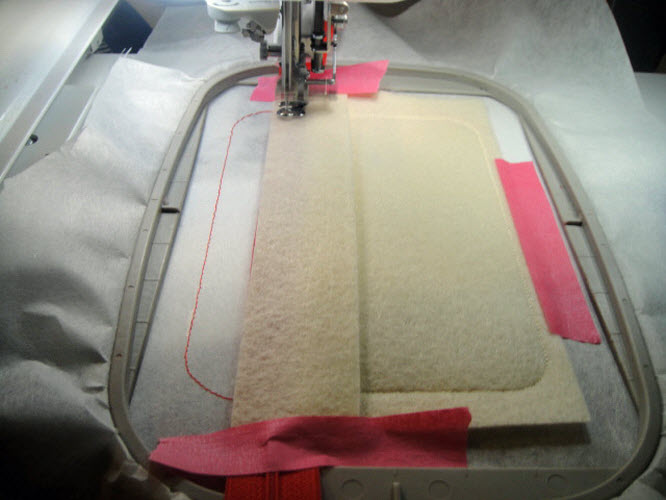
Step 8:
Remove the tape from the top and bottom. Flip the felt over the outlines on right hand side of the hoop. Finger press the fold over at the zipper edge to smooth the fold over as much as possible. Tape the top bottom and side edges of the felt to the stabilizer. Stitch the outline in thread to match your felt.
(Click Image to Enlarge)
Step 9:
Align the left edge of the 1.5” x 8” strip of felt along the left edge of the zipper tape. Tape in place with embroidery tape.
(Click Image to Enlarge)
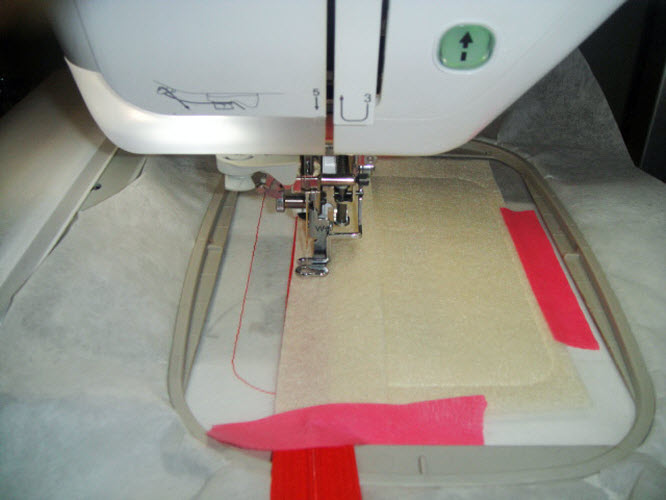
Step 10:
Stitch color stop #6 which is the seam line.
(Click Image to Enlarge)
Step 11:
Remove tape, flip the felt over to the left side of the outline and tape in place with embroidery tape. Stitch Color stop 7 which will tack down the felt.
(Click Image to Enlarge)
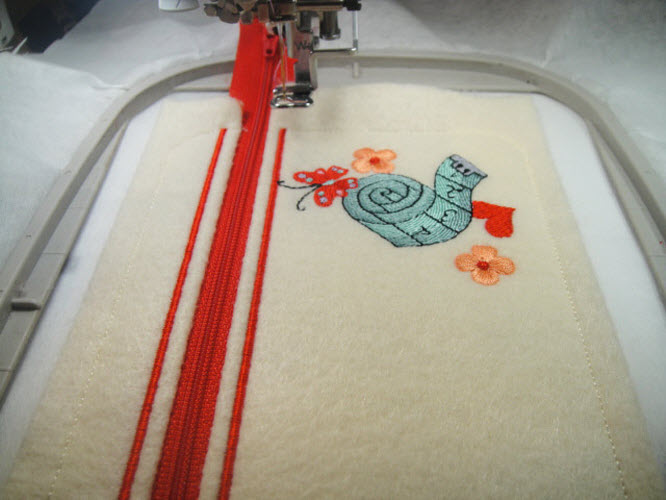
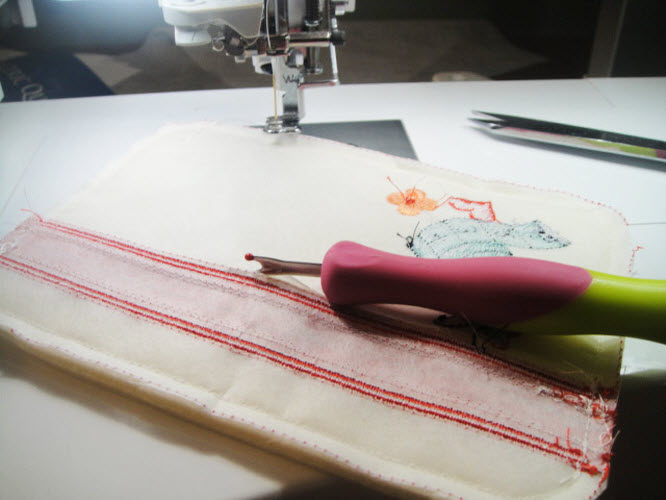
Step 12:
Stitch the color stops #8 through #18 following the color chart to embroider the design on the pouch.
(Click Image to Enlarge)
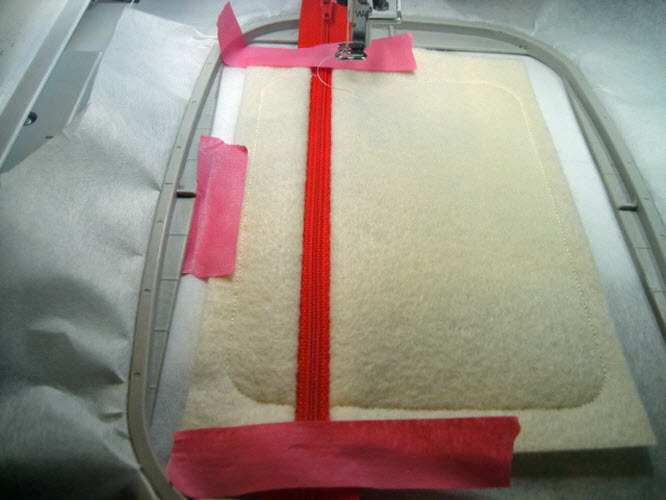
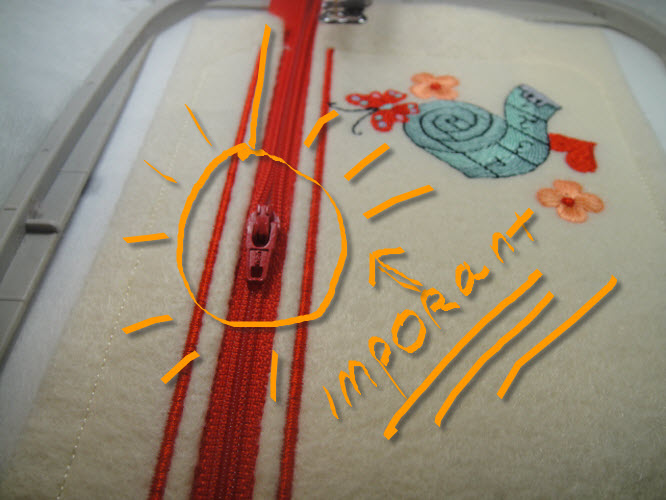
Step 13:
IMPORTANT – Slide the zipper pull down until it is the middle of the bag. If you forget to do this now you won’t be able to open the bag.
(Click Image to Enlarge)
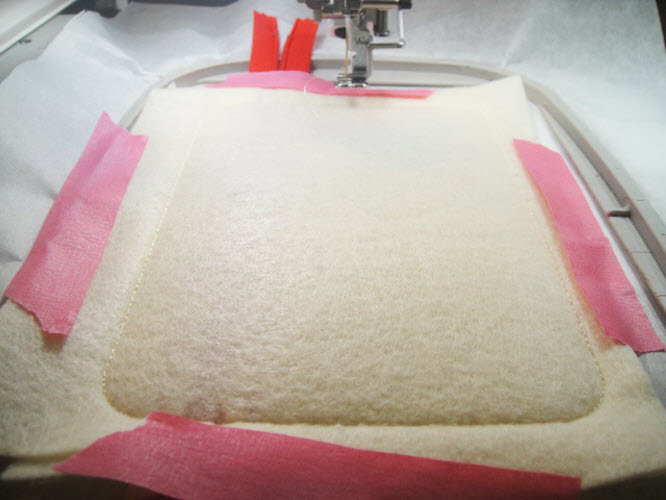
Step 14:
Lay the 8” x 6” rectangle of felt over the whole project and tape in place over the top, bottom and sides. The felt will exceed the previous outlines. Stitch the final color stop in thread to match your felt.
(Click Image to Enlarge)
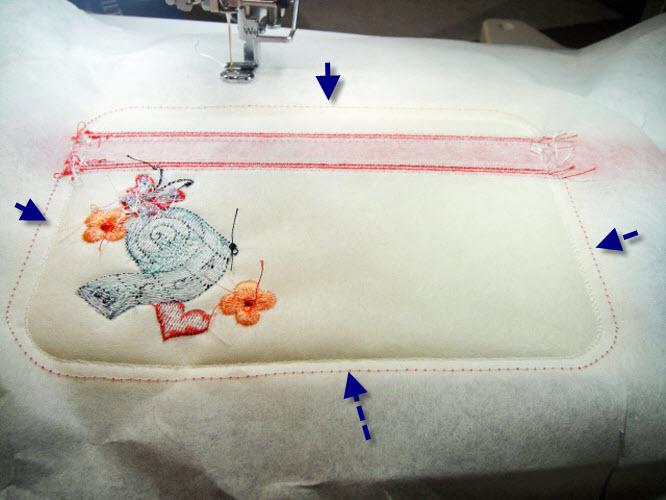
Step 15:
Unhoop and turn the project over. You will be able to see the original outlines. Trim the whole project along this outline.
(Click Image to Enlarge)
Step 16:
Remove the tear away backing as much as possible. I found that a seam ripper was useful in lifting the tear away from the felt and slicing along the straight edges.
(Click Image to Enlarge)
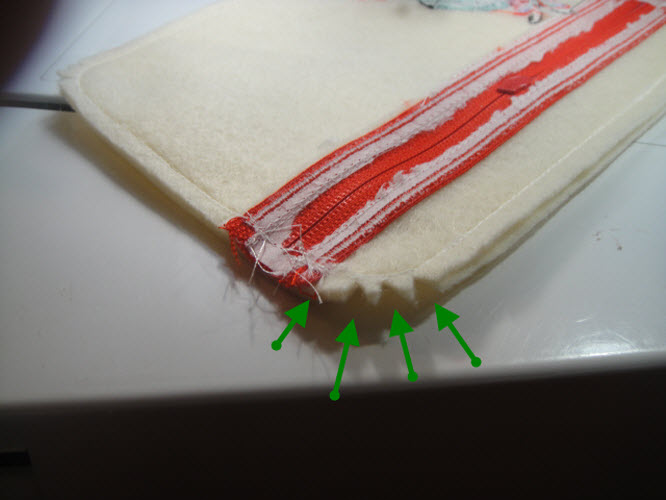
Step 17:
Notch all four curved corners of the bag to reduce bulk.
(Click Image to Enlarge)
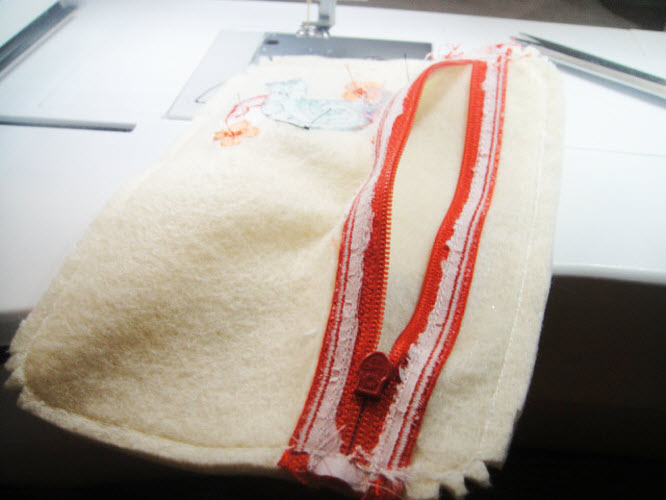
Step 18:
Open the zipper.
(Click Image to Enlarge)
Step 19:
Turn the bag to the right side.
(Click Image to Enlarge)
Step 20:
You want to steam the seams of the bag, but don’t want to put a really hot iron on the felt. Have your iron produce as much steam as possible and hover over the bag then put the iron down and finger press the seams.
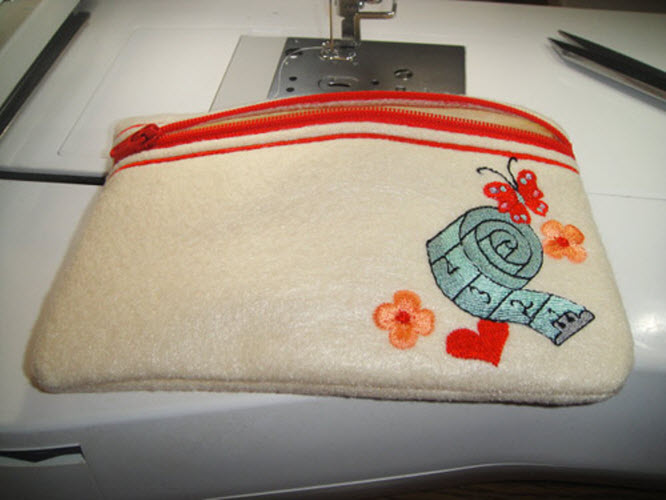
Step 21:
Congratulations! Your Sewing Accessory Zippered Pouch is complete. Just add those important accessories so you won’t forget to take them to your sewing or embroidery club meetings.
Award winning Digitizer, Embroidery Educator, Author and a Consultant to the Industry, Pat Williams has 30 years of experience in the embroidery industry. Pat has won multiple awards for her digitizing expertise including the 2007 Impressions Awards Grand Championship, Best of Show as well as the 1st and 2nd Place Awards. Pat’s love of digitizing has afforded her the opportunity to write numerous articles for Impressions magazine in the United States and Images Magazine in Europe. In 2001 Pat was named “Embroidery Educator of the Year.” For many years Pat taught digitizing seminars at the ISS Shows in Long Beach, CA and for Compucon software. She now resides in Tucson, AZ.