This is really a fun project. The colors widths and lengths of the ribbons you use will give each flower its own personality. Besides using them on shirts they would be cute all around the border of a skirt or on a wall hanging. Even though these designs will technically fit in a 5” x 7” embroidery hoop, a 6” x 6” hoop was used in the samples as it allowed a little more room to work with in the tiny t shirts. The 45 minutes listed for time required above is for one shirt.
Step 1:
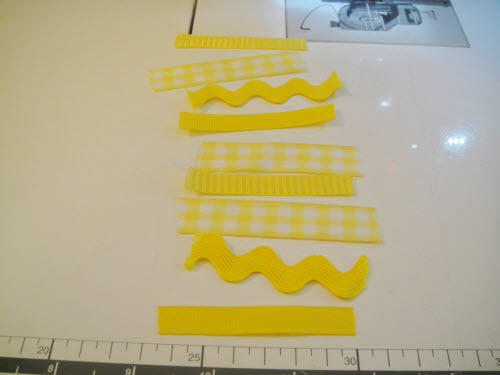
For the first flower cut approximately 9 strips of assorted ribbon and rickrack 2.5” long. Your project may take more or less strips depending on the widths of your ribbon. It is all right to add a few extra strips as you can cut them off if you don’t need them.
Step 2:
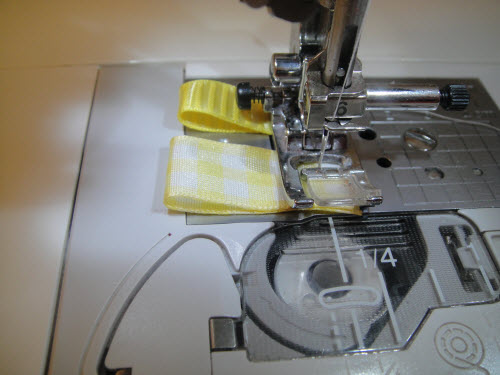
At your regular sewing machine fold the strips of ribbon in half and stitch together about ¼” from the bottom. You don’t need to clip between the ribbons just keep feeding them into your machine one after the other.
Step 3:
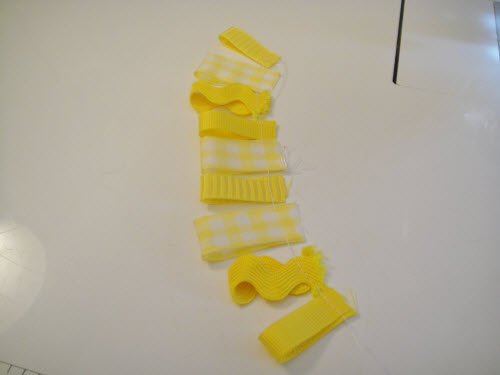
The result of the above two steps will give you a string of ribbons.
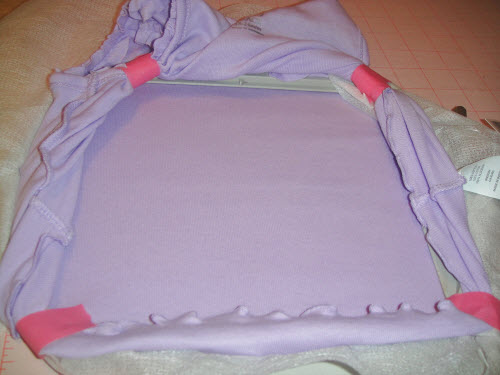
Step 4:
Going through the bottom of the shirt hoop the shirt and poly mesh stabilizer. Tape, clip or whatever other method you like the excess fabric so it will not fall into your embroidery field. In the sample embroidery tape was fed through the armholes and taped was extended right to the back of the hoop.
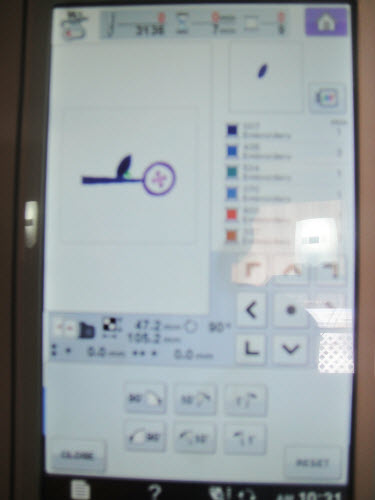
Step 5:
(Click Image to Enlarge)
Load the embroidery design RIBFL01 into your embroidery machine. Rotate the design if necessary so that the top of the design faces the top of the garment.
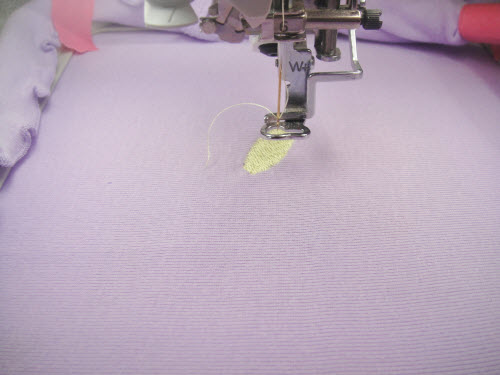
Step 6:
Run the 1st color sequence in Chartreuse which stitches the inside of the leaf.
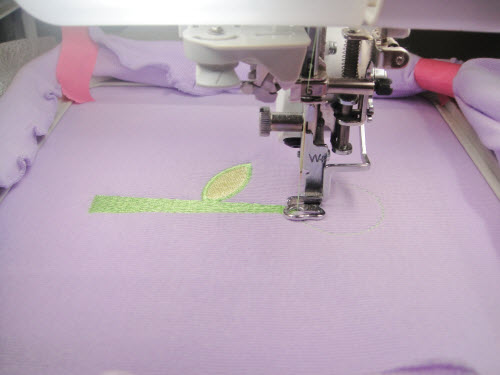
Step 7:
Run the 2nd color sequence in Margarita Lime, which is the stem of the flower.
Step 8:
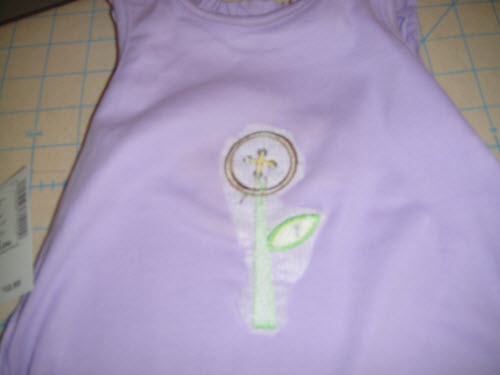
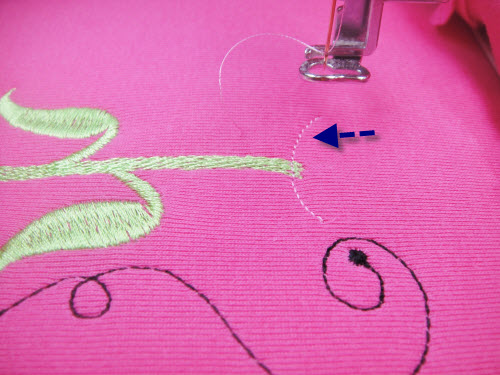
Run the 3rd color sequence, you can use the lime for this too, or change to a color that matches your ribbons. This is the outline for the ribbon placement. There is not a photo of this step, but it just a stitched outline of a circle for the placement of the ribbons.
Step 9:
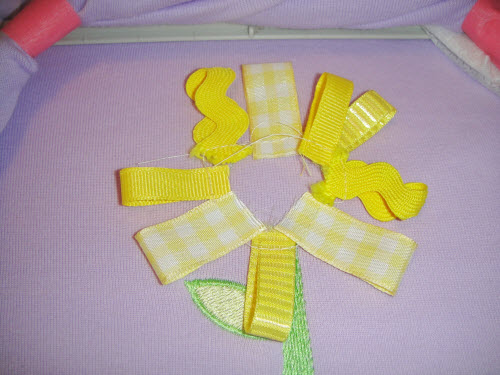
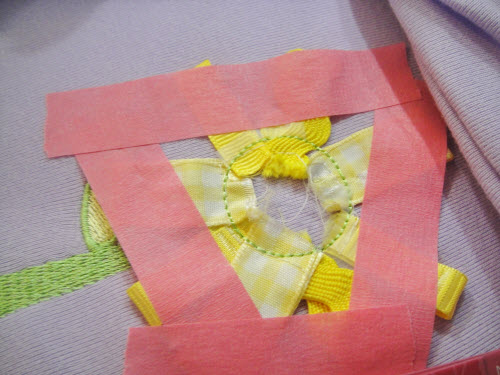
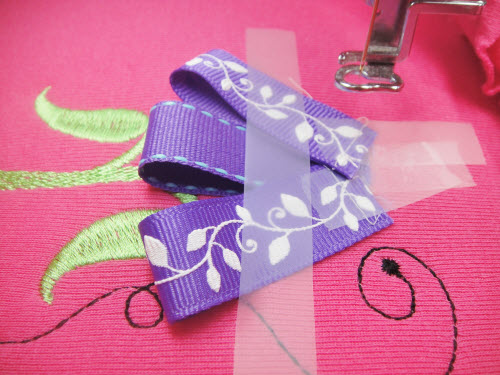
Lay the ribbon strip around the stitched circle. Have the ribbons bottoms be ¼” inside the circle.
Step 10:
Scotch tape each ribbon petal into place to hold it into position.
Step 11:
Hold down the outer edges of the ribbon loops with embroidery tape to prevent them from getting tangled or flipped by the presser foot.
Step 12:
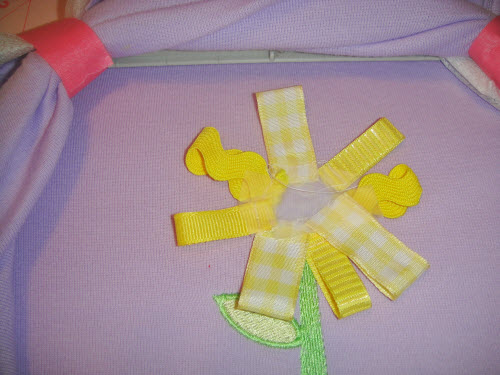
Stitch the next color sequence (#4) which will tack down the inside edges of the ribbon loops.
Step 13:
Remove the scotch tape from the ribbons and center of the design.
Step 14:
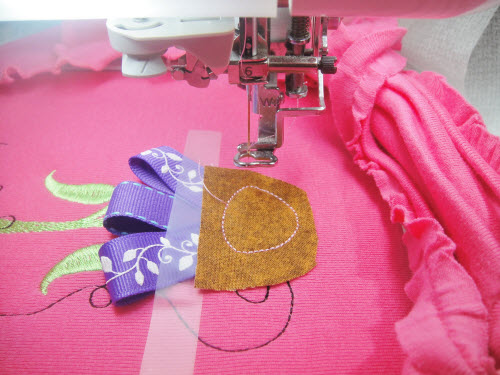
Run the next color (#5) sequence which is a placement line for your applique center.
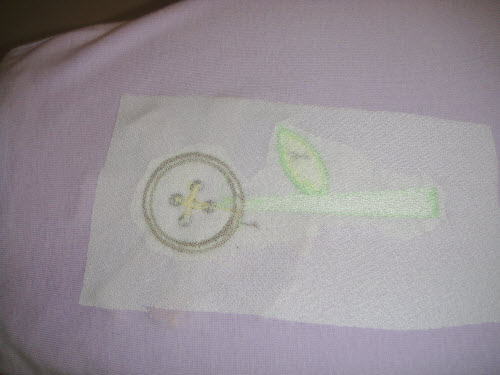
Step 15:
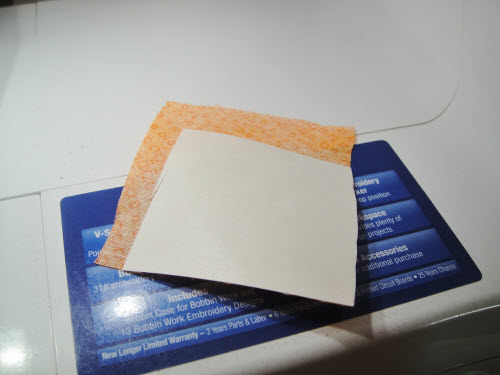
Iron a 2” square of applique backing to a small scrap for the flower center.
Step 16:
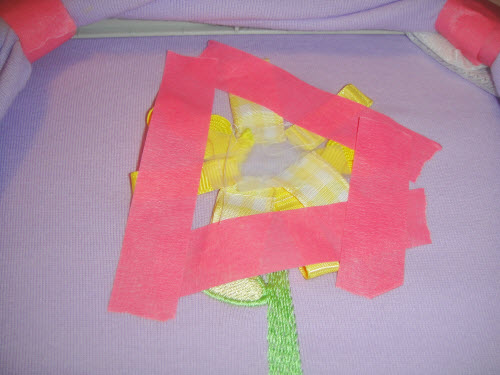
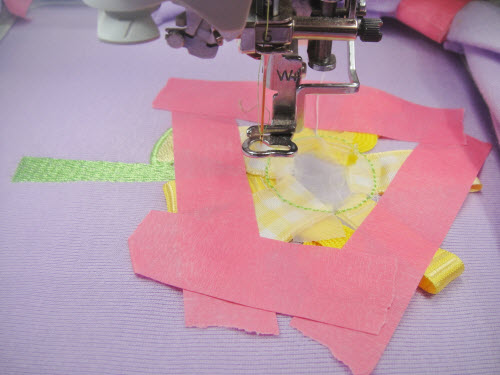
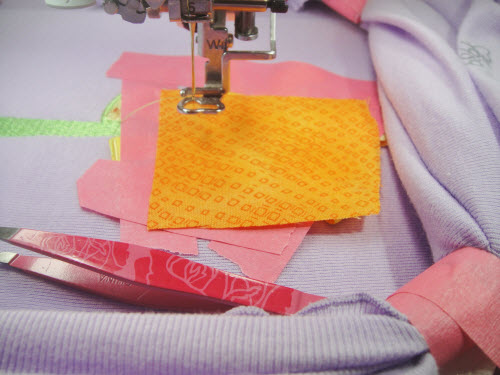
Remove the paper from the applique backing and finger press over the outline stitches. Run the 6th color sequence to tack down the fabric.
Step 17:
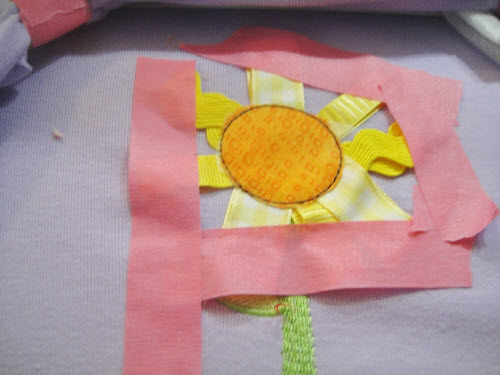
Trim the circle right up to the tack down line.
Step 18:
Complete the remaining color sequences to sew #7 Black for the eyes in the button; # 8 White for the thread; #9 Peanut Brittle for the border on the button applique.
Step 19:
Remove the garment from the hoop, remove the tape and trim the poly mesh backing to within ¼” of the embroidery.
Step 20:
For a child’s garment, cut a piece of lightweight knit interfacing and press over the back of the embroidery so that the bobbin threads and tie-ins and tie-offs won’t irritate the child’s skin.
Step 21:
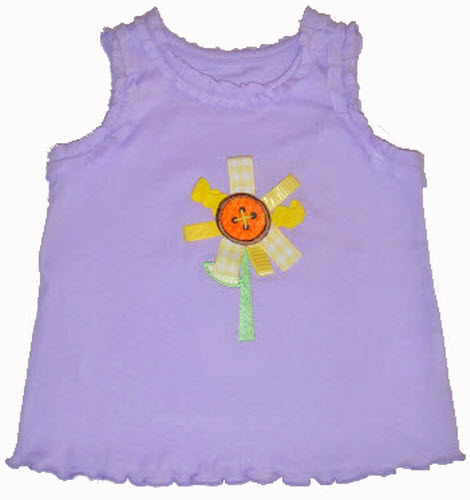
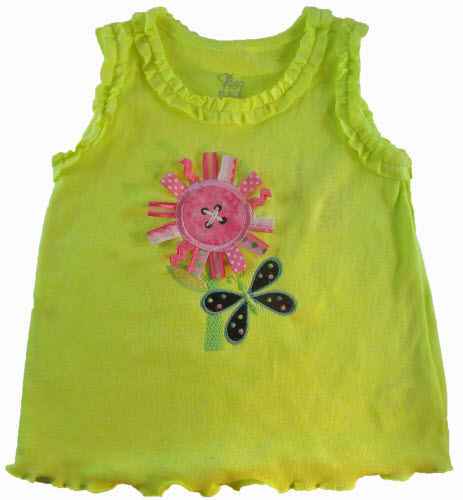
Your first completed ribbon appliqued tee will look similar to this.
Step 22:
For the cone flower, design RIBFL02, the process is much the same.
Step 23:
Hoop the shirt as for the first one with poly mesh backing. Run the first two color sequences.
Step 24:
When the first Outline stitches sew, color stop # 3, a half-moon line will sew.
Step 25:
Cut the ribbon into 3.5” lengths and stitch into loops on your sewing machine. Lay the string of ribbon loops ¼” over the edge of the outline. Tape in place, angling the loops outwards slightly, but make sure the edges of the ribbons stay within the outline.
Step 26:
Color stops # 5 and 6 will be an outline for the flower center. Place, stitch and trim your applique as for the 1st shirt.
Step 27:
Follow the color chart to complete the shirt.
Step 28:
The flower in design RIBFL03 has a larger center. Therefore it looks cute with smaller petals.
Step 29:
Cut flower petal lengths of 2” to 1.75”. How many you cut will depend on the widths of your ribbon.
Step 30:
Embroider the first two color sequences per the color chart, for the leaf center and stem.
Step 31:
Color stop #3 is the outline for the flower center. Tape and stitch down the loops as in the first shirt with color stop #4.
Step 32:
Place the applique fabric as in the first shirt. Tack down with Color stop #5.
Step 33:
Complete the design following the color chart.
Step 34:
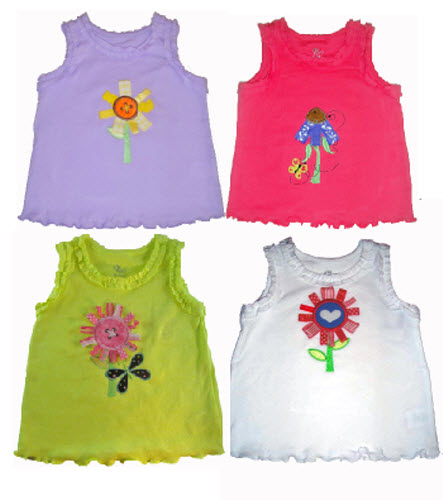
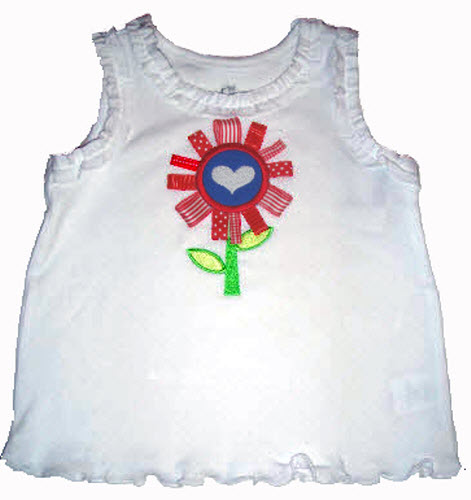
The red white and blue flower was made in the same manner as the 1st shirt using ribbons cut to 2” in length.
Step 35:
Mix up the types of ribbons and rick-racks that you use. You can also use multiple colors on one flower. Mix up the lengths that you cut your ribbons. Each flower will have a unique personality!
Award winning Digitizer, Embroidery Educator, Author and a Consultant to the Industry, Pat Williams has 30 years of experience in the embroidery industry. Pat has won multiple awards for her digitizing expertise including the 2007 Impressions Awards Grand Championship, Best of Show as well as the 1st and 2nd Place Awards. Pat’s love of digitizing has afforded her the opportunity to write numerous articles for Impressions magazine in the United States and Images Magazine in Europe. In 2001 Pat was named “Embroidery Educator of the Year.” For many years Pat taught digitizing seminars at the ISS Shows in Long Beach, CA and for Compucon software. She now resides in Tucson, AZ.