Border OptionsHugging border, circle, square, or rectangle — with a 3mm satin stitch.
Backing OptionsAvailable with iron-on, sew-on, or velcro backing.
Fast ShippingShipped quickly from the USA.
Free Online Tools
Powerful embroidery utilities that save time and prevent costly mistakes.
Stitch AssistantRECOMMENDED
Get the exact stabilizer, machine settings, needle, and thread color sequence for every embroidery design you purchase — based on that design's stitch density, dimensions, and color count.
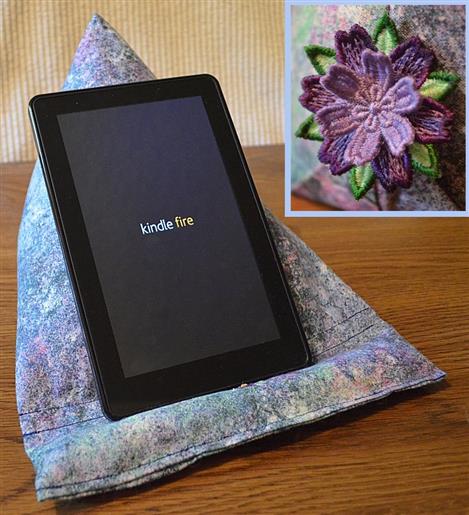
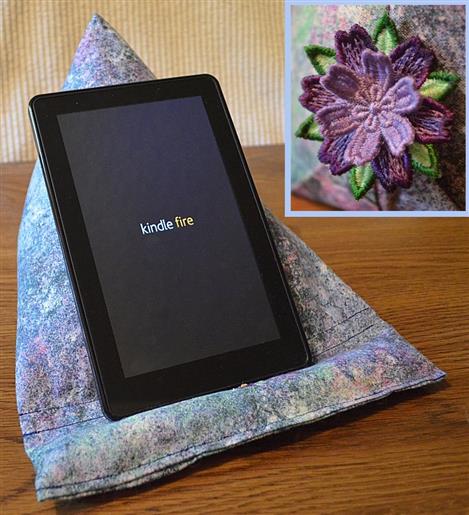
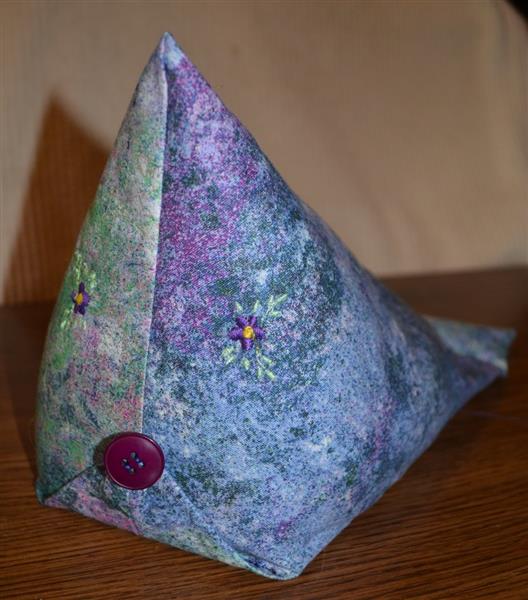
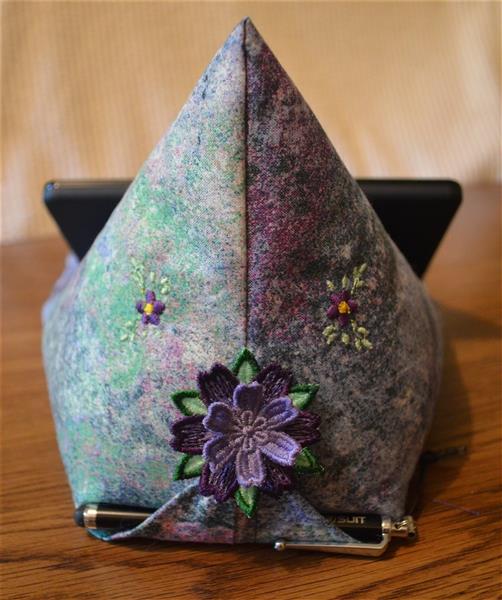
A stand suitable for phones, readers, pads and tablets that allows you to watch a movie or read hands free. Assembly is fast and a great gift for gadget lovers.
The pattern consists of one piece of fabric sturdy enough for stuffing and everyday wear. If you want the stand to have a flexibility like a bean bag chair that can somewhat mold to the form it's holding, or to the form where it's resting, the stand can be stuffed with sand, beans or crushed walnut shells. Or if you want a more firm stand it can be stuffed with fiberfill. But keep in mind, if you use a lighter stuffing, you must also add some type of weight like a rock to keep the stand anchored; and if a rock is used, it’s best to pad the bottom of the stand with a piece of cardboard cut to fit as a base.
Step 1:
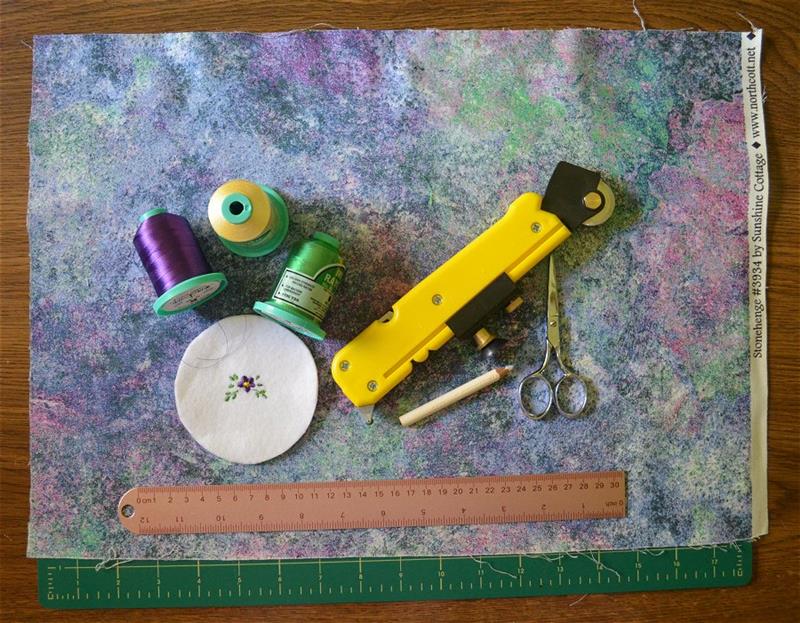
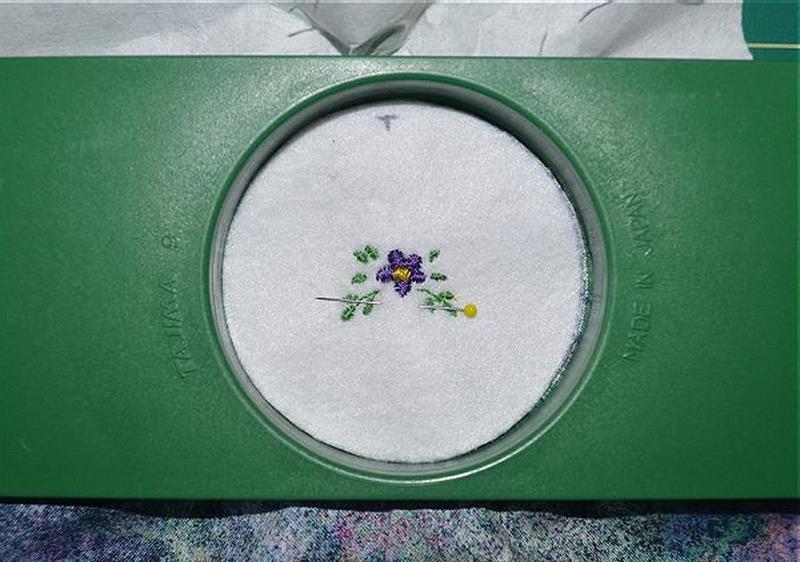
Gather materials and choose thread colors. Cut fabric to 18” long and 12” wide. Do not count the salvage in the measurement, but it can be left to secure the seam, as explained in Step 4. Stitch a sample of the small flower design to use as a placement template; mark around the inside of the hoop prior to removing the hoop and cut away excess to create the template.
(Click Image to Enlarge)
Step 2:
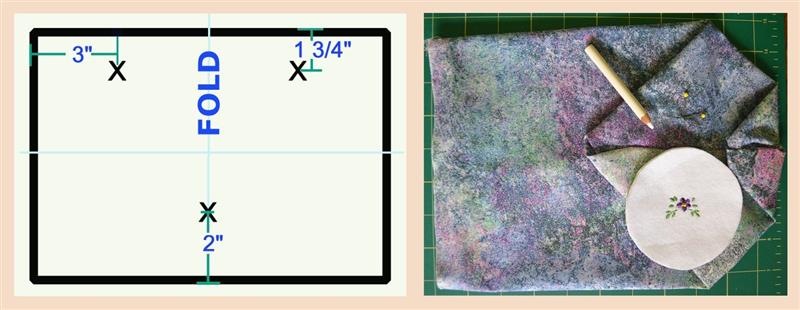
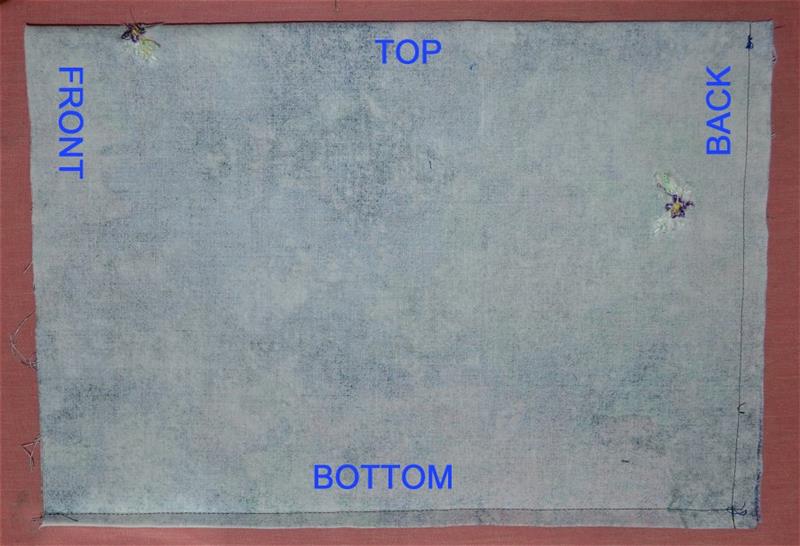
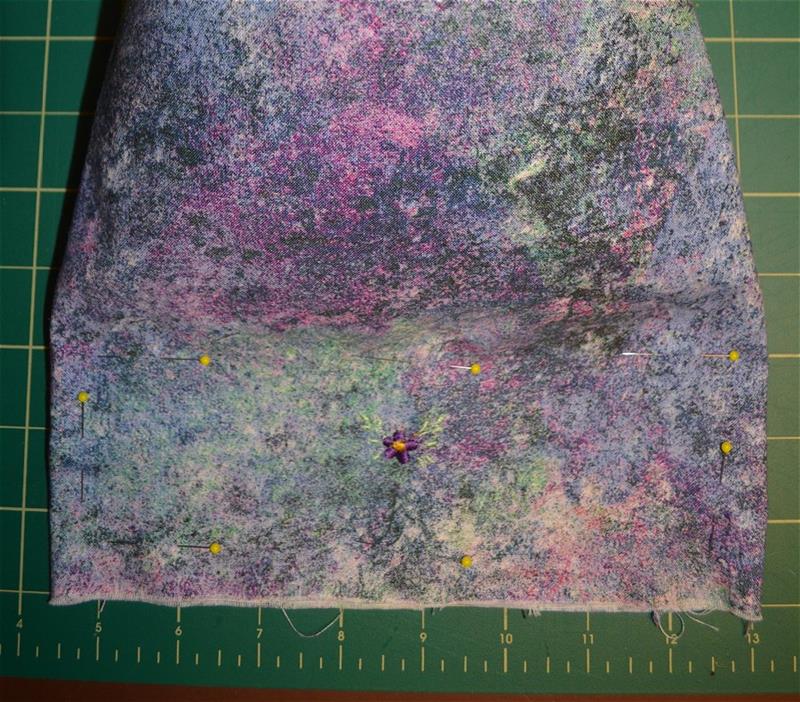
Mark design placement as seen in the illustration at right. If you’d like to embroider on the front pillow rest find the center of the fabric about 9” from each side, and up about 2” from the end. If you have chosen to make a larger or smaller size stand, you can determine a balanced placement on the back of the stand: with right sides together, fold lengthwise (matching up edges of print; do not include salvage). Pin a few places along the length and along the back side, and then turn right side out for a general idea of how it will be assembled. Lay the sample template on the fabric where you want the flower to stitch, fold back the template to find the approximate center, and then mark the spot, using chalk, pencil, crossed pins, or Target Stickers. Turn and remove pins. Measure from the fabric printed edge to the marked design center, and use this measurement to mark placement for the opposite side.
(Click Image to Enlarge)
Step 3:
Pin the template so that the center of the design is positioned over the marked X. The template should be pinned on the mark in the direction it will stitch. Hoop fabric with one sheet of stabilizer, and place the hoop so that the template is sitting inside. Remove the template and embroider design. Do the same with the remaining designs.
(Click Image to Enlarge)
Step 4:
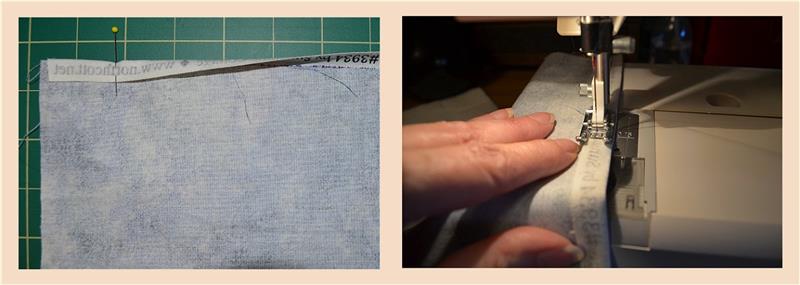
Stitch bottom seam. With right sides together, match up the printed edges and fold the salvage over to create a secured seam; this will add protection against wear and keep any loose fill or weights you may have used from pushing through the stitches. Press, pin and stitch a 3/8” seam to close.
(Click Image to Enlarge)
Step 5:
Stitch back seam.
(Click Image to Enlarge)
Step 6:
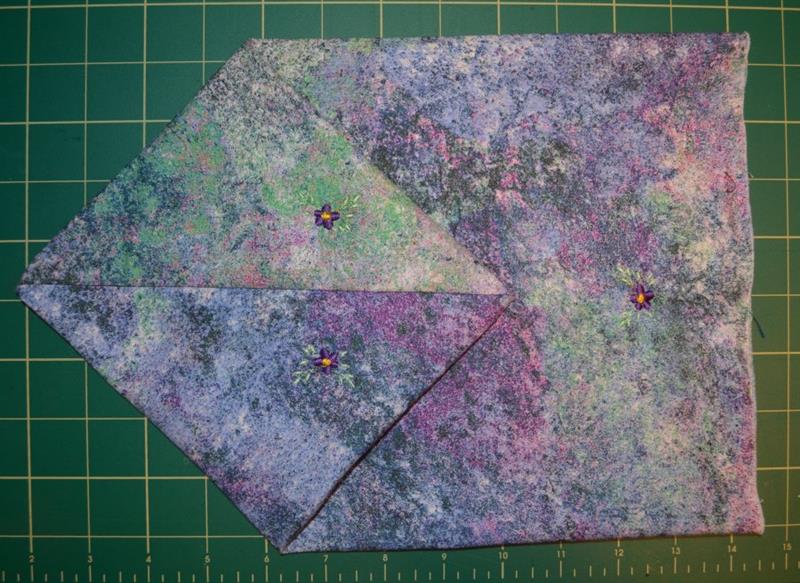
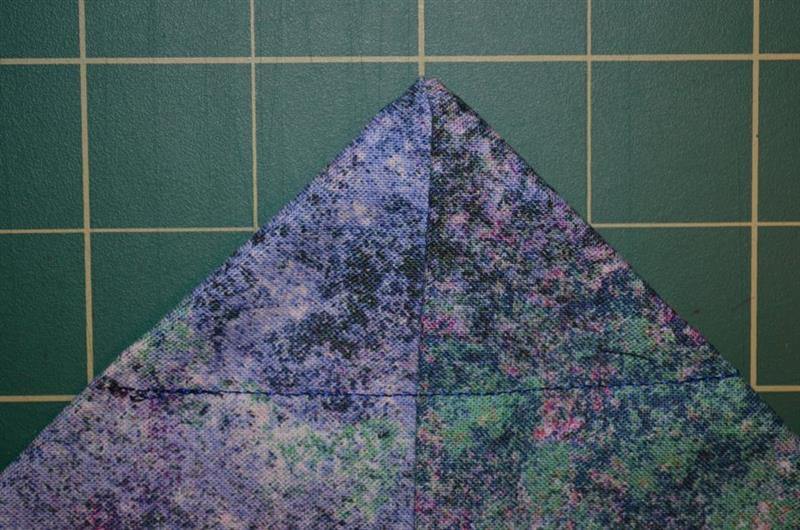
Turn and lay open with the bottom seam at center. With the no-seam side up, fold down the back to the shape of a diamond as seen in image.
(Click Image to Enlarge)
Step 7:
Stitch the bottom flap. Fold the outside tip of the diamond to the inside about half-way to meet at the diamond’s center and mark along the fold, and then stitch along mark. My seam resulted about 2” from the outside tip.
(Click Image to Enlarge)
Step 8:
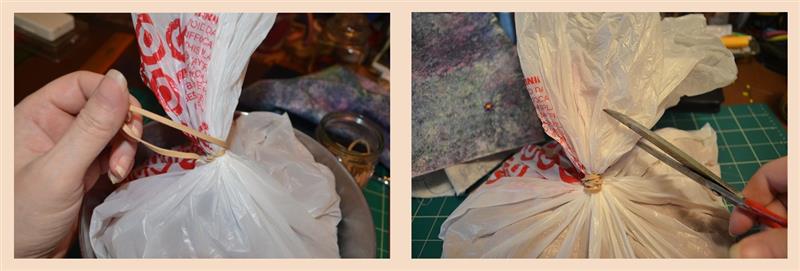
Fill one shopping bag with about 6 cups of crushed walnut shells or other heavy fill like craft sand and close top with a rubber band, leaving enough room in the bag to allow movement of fill and flexibility. Trim away the top of the plastic bag, leaving about a 2-3” excess; set the portion that is cut away to the side. If you would rather use fiberfill, no bag is necessary, however, at this point you will need to add a rock or other heavy item at the center bottom to add weight and keep the stand stable.
(Click Image to Enlarge)
Step 9:
Stuff the filled shopping bag into the opening of the stand with the top excess of the bag tucked up into the back top tip. Push it in as far as possible and pin about 3″ up from the open edge to hold back the stuffing while sewing the closing seam; pin along open edge to keep one side from shifting while you work and if preferred, mark a line as a guide where you will stitch.
(Click Image to Enlarge)
Step 10:
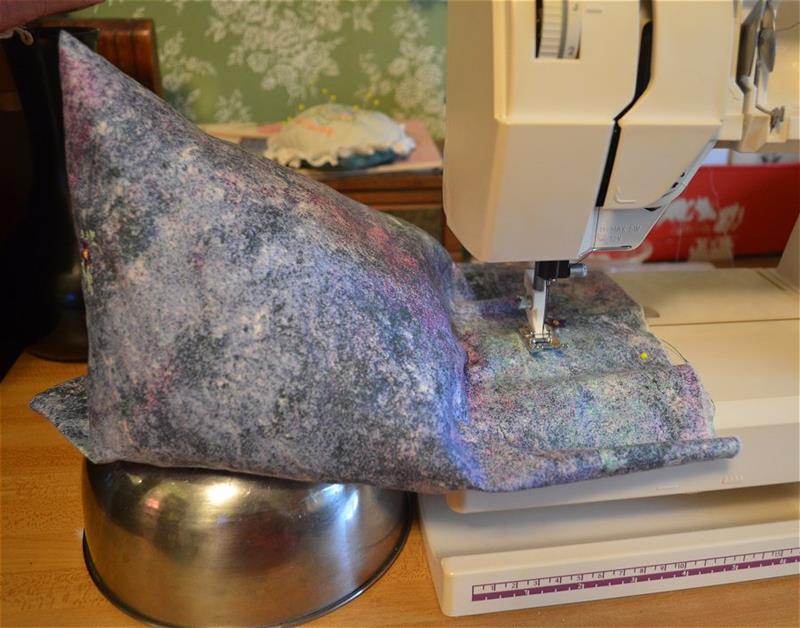
Stitch the closing seam. Setting an object under the filled part of the stand will help as you guide the bag slowly to stitch the seam. Stitch another seam across about ½” away from the closing seam. This will result in the ditch where the bottom of the tablet rests.
(Click Image to Enlarge)
Step 11:
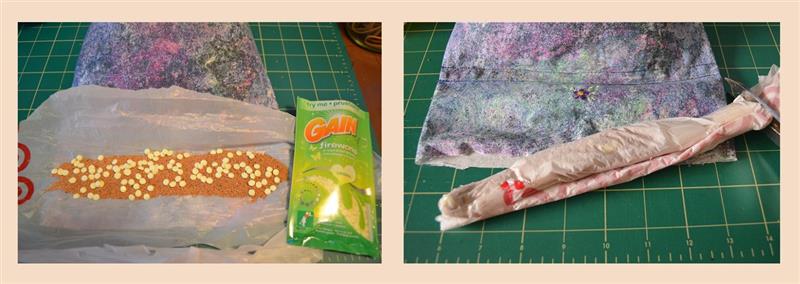
Make the plastic bag filler for the front pillow rest. Cut a rectangle portion about 14×6” from the plastic you had set aside. Lay across the area to be stuffed for the resting pillow. Spread about ½ cup of filler across the strip. If you want to add a scent, sprinkle about a tablespoon of scent booster across the top. Wrap and tape on each end to encase the fill. Roll the remaining plastic bag up and tape together with the first plastic roll; cut away the excess. Or you can alternately stuff with fiberfill.
(Click Image to Enlarge)
Step 12:
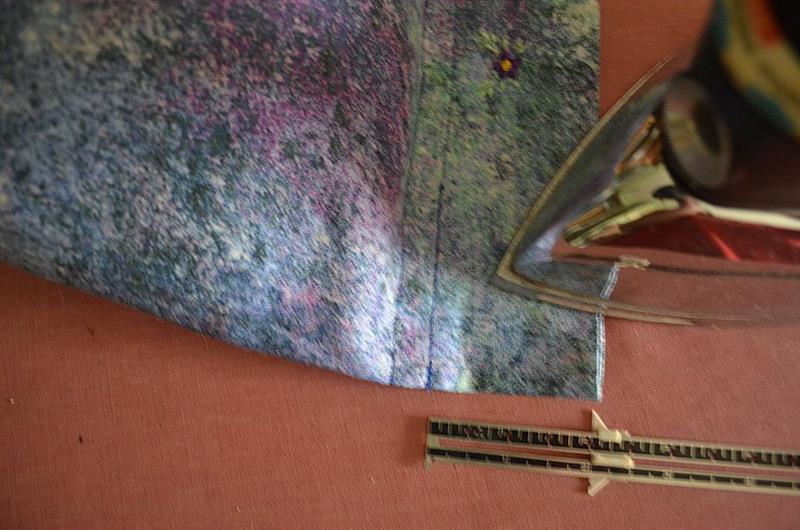
Fold in the ends of the stand, leaving 2” from the outside closing seam to the fold and press. Insert the wrapped shells or fiberfill and stitch to close along the edge.
(Click Image to Enlarge)
Step 13:
Fold up and tack the flap to the bottom back of the stand to create a holder for a tablet stylus; embellish with a button or a 3D FSL design as instructed in the next step.
(Click Image to Enlarge)
Step 14:
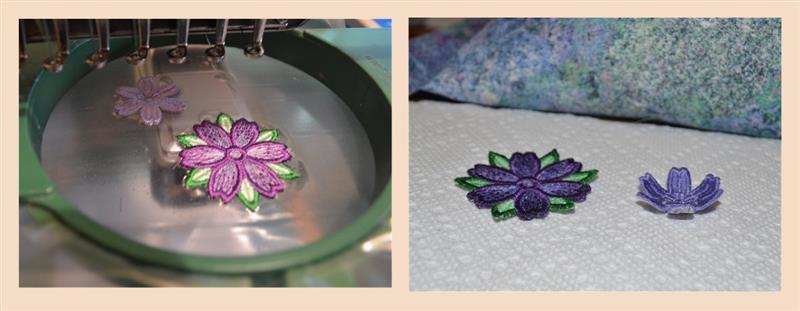
Stitch the 3D FSL design on a heavy water soluble stabilizer like Badgemaster. Rinse and lay on a paper towel to dry. Lift the smaller section of petals just a little with your finger tip to keep them from sticking to the paper towel and they will naturally curl upward as they dry. Assemble the two sections of petals with a dot of fabric glue.
(Click Image to Enlarge)
Step 15:
Tack the assembled 3D flower to the back of the stand with a few stitches; you can also add a few dots of glue to help hold it in place.
Bonnie Landsberger has been a crafter and hand embroiderer since childhood and a machine embroiderer and digitizer since 1986. She was the in-house head digitizer for a 50-head embroidery shop for 11 years and later offered custom digitizing services and stock design sales through her web site for Moonlight Design since 1993. She currently also holds a position as a customer service representative at EmbroideryDesigns.com.
Bonnie has won several awards for digitizing, including a gold medal in the 2002 Digitizing Olympics and grand prize in all categories & first place for Winter Holidays category in the Stitches Magazine Great Greeting Card Contest 2003.
Her embroidery and digitizing technical articles can be found in various trade magazines and she is currently a contributing writer and Editorial Advisory Board Member for Stitches Magazine. You can also find more of her articles online at EmbroideryDesigns.com and will continue to contribute articles to our Learning Center.