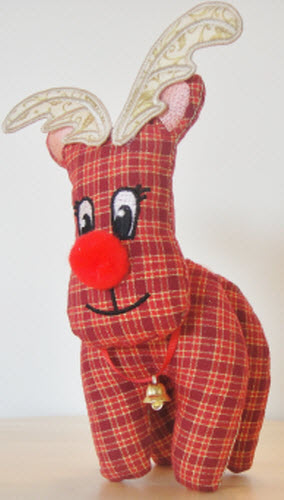
This darling little reindeer is sure to be the hottest item in your craft fair this year, so make them by the dozen! This is not a toy it is a Christmas decoration.
This little reindeer is about 3” wide at the shoulder and 8” in height.
Three quick hoopings make his body and face and are sewn on poly mesh stabilizer.
A 4th hooping of water soluble stabilizer makes his antlers. He is cute in any Christmas
fabric so be bold and make him up in reds, greens and Christmas blues.
Step 1:
Prepress your fabric with Magic Sizing or Best Press to give it an extra crispness.
Step 2:
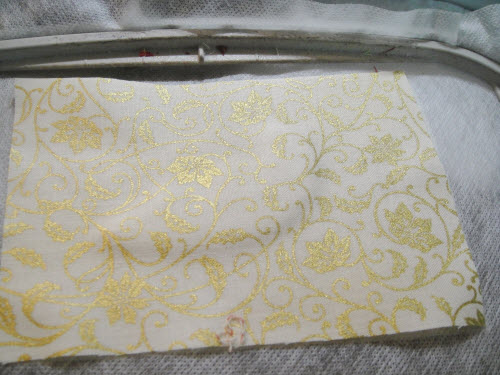
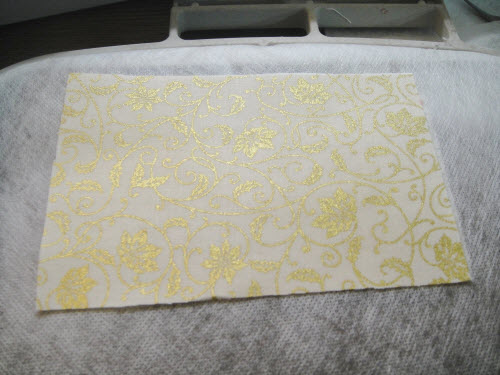
Cut 6 6” squares of body fabric and 4 6” x 3” rectangles of antler
fabric.
Step 3:
Load the embroidery design STFRD1 in your embroidery machine.
Step 4:
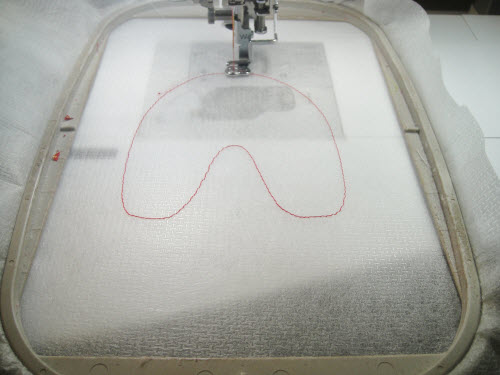
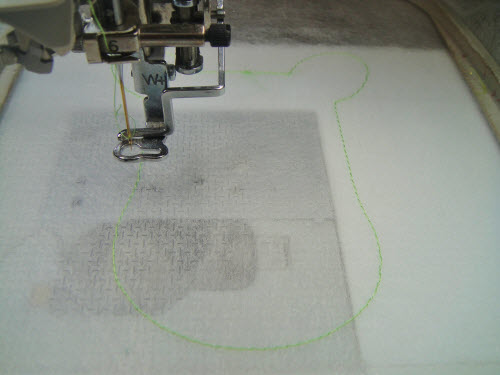
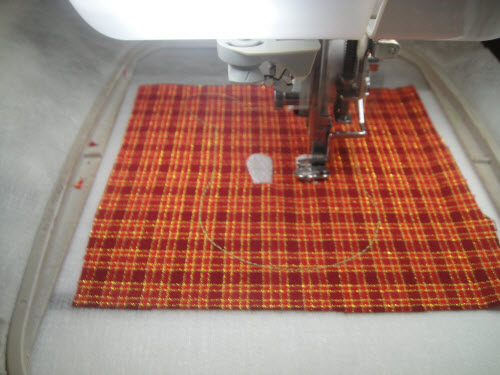
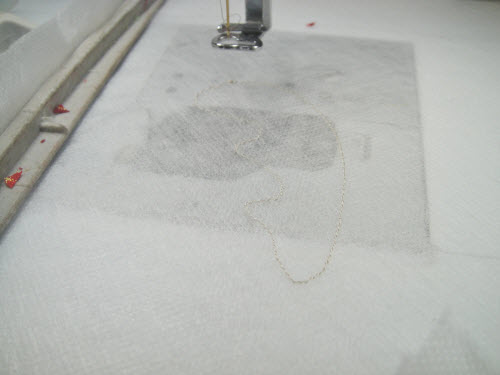
Hoop poly mesh stabilizer in your 5” x7” hoop.
Step 5:
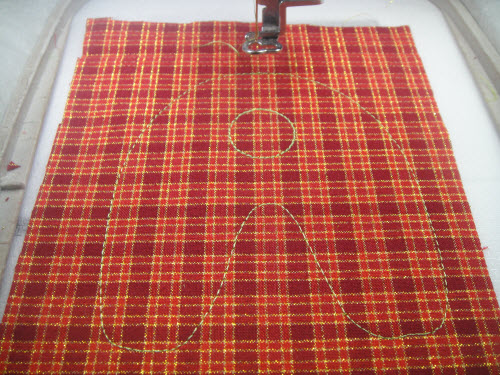
Stitch the 1st color sequence to stitch the outline for the legs.
Step 6:
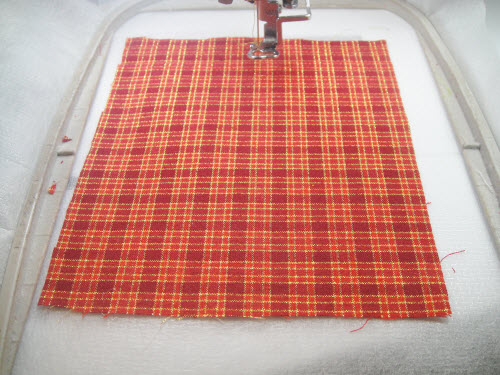
Spray the back of a square of body fabric with spray adhesive and place over the
outline right side up.
Step 7:
Stitch the 2nd color sequence to tack down and outline the legs. You will use a
thread matching your fabric. Contrasting thread has been used in the pictures just
so you can see the stitching better.
Step 8:
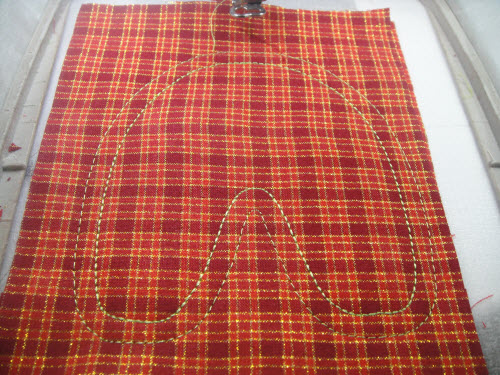
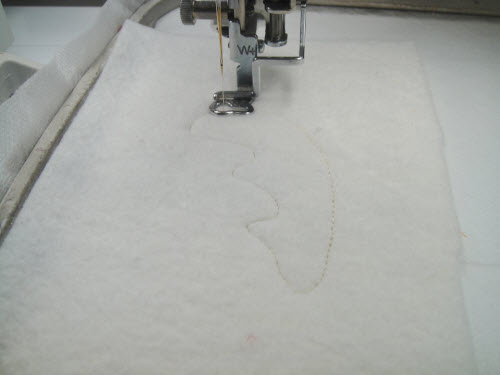
Lay a second 6” square of body fabric over the existing fabric right side
down.
Step 9:
Stitch the 3rd color sequence to complete the legs.
Step 10:
Lay this section aside and repeat steps 4 through 9 for the second set of legs.
Step 11:
Load design STFRD2 in your embroidery machine.
Step 12:
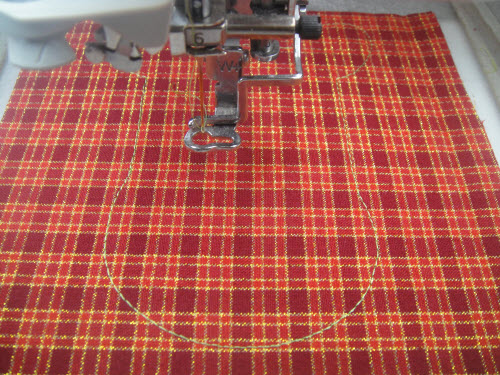
Hoop poly mesh stabilizer in your hoop and run the 1st color sequence which will
be the outline of the face.
Spray a 6” square of body fabric with spray adhesive and place over the outline
right side up. Run the 2nd color sequence which is the tack down line.
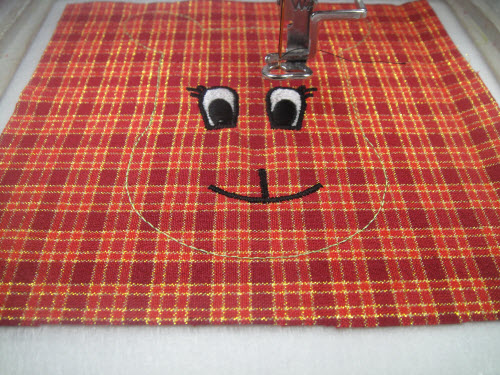
Step 14:
Load White thread in the machine and stitch the 3rd color sequence for the eyes.
Step 15:
Load Black thread in the machine and stitch the 4th color sequence for the mouth
and eyes.
Step 16:
Load White thread into the machine and run the 5th color sequence for the eye highlights.
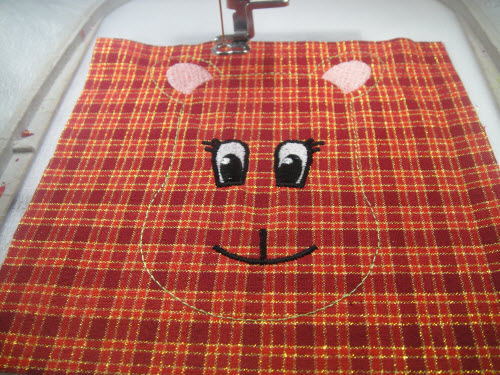
Step 17:
Load a Dusty Pink thread into the machine and run the 6th color sequence for the
ears.
Step 18:
Align a 2nd square of body fabric over the 1st, right side down. Load matching body
thread into the machine and stitch the 7th color sequence which is the seam and
cutting lines for the head. Lay this completed head aside for the moment.
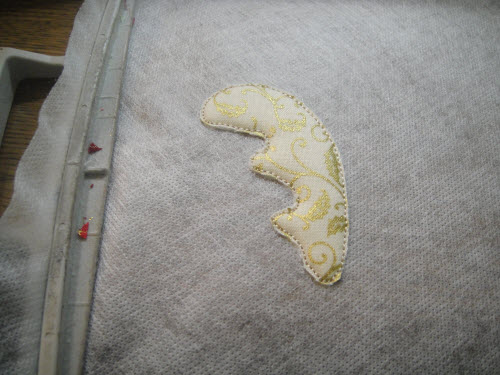
Step 19:
Load design STFRD3 into your machine. Load your antler thread into the top and bobbin
of your machine.
Step 20:
Hoop a single layer of water soluble fibrous stabilizer into your 5” x 7”
hoop. The antlers will sew in a 4” x 4” hoop, but trimming is easier
in a 5” x 7” hoop. Run the 1st color sequence which is the outline for
the 1st antler.
Step 21:
Spray a 3” x 6” rectangle of Battilizer with spray adhesive. Place over
the outline and run color sequence 2 which is the tack down.
Step 22:
Remove the hoop from the machine. Do not un-hoop. With small sharp scissors trim
the Battilizer as close as possible to the tack down line.
Step 23:
Spray the back of a 3” x 6”’ rectangle of antler fabric and place
over the Battilizer – right side up.
Step 24:
Turn the hoop over. Spray the back of another 3 “x 6” rectangle of antler
fabric and place over the back of the antler – right side up.
Step 25:
Return the hoop to the machine and run the 3rd color sequence which is the tack
down for the antler fabrics.
Step 26:
Remove the hoop from the machine. Trim the excess fabric as close to the tack down
stitches as possible from both the front and the back of the antler.
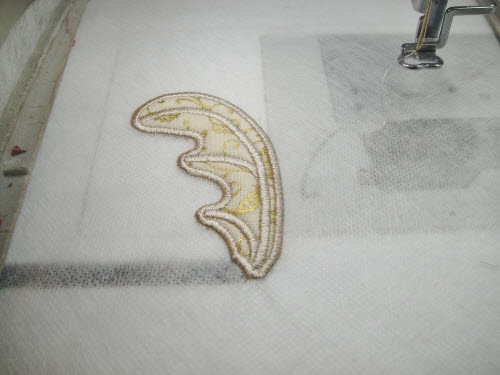
Step 27:
Stitch the 4th color sequence which is the detail and border of the 1st antler.
Step 28:
Stitching through color sequences 5 through 8 placing Battilizer and fabrics as
for the 1st antler, complete the second antler.
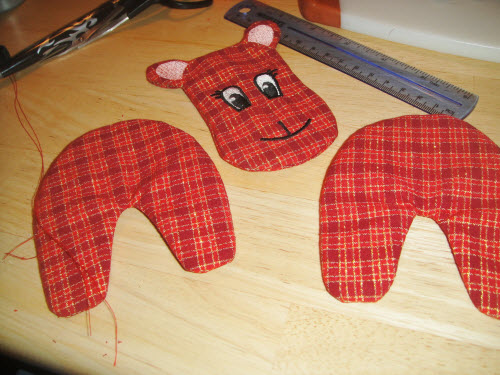
Step 29:
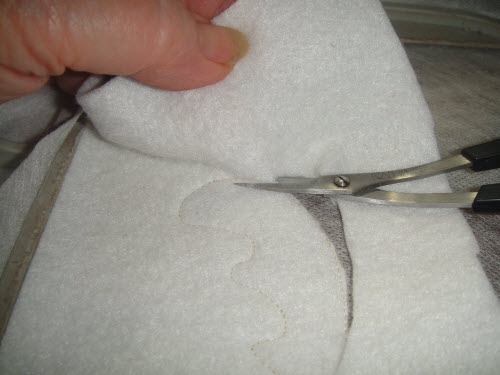
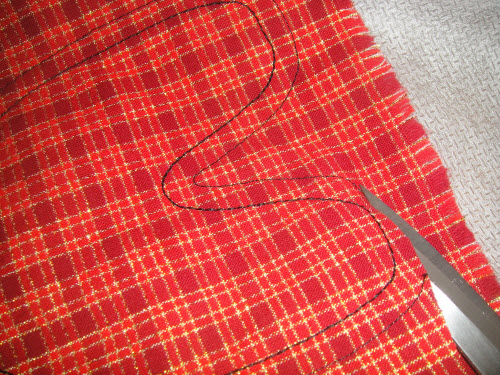
Cut the reindeer body and head sections out between the seam line and the outside
cutting lines.
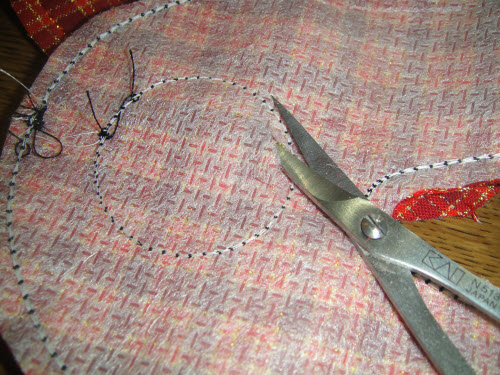
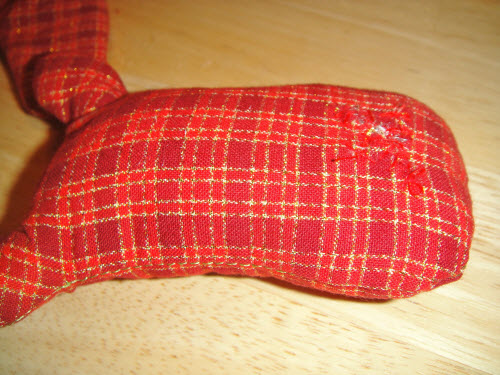
Step 30:
On the side of the legs, where the circle is stitched, lift the fabric away from
the back fabric and trim out the hole.
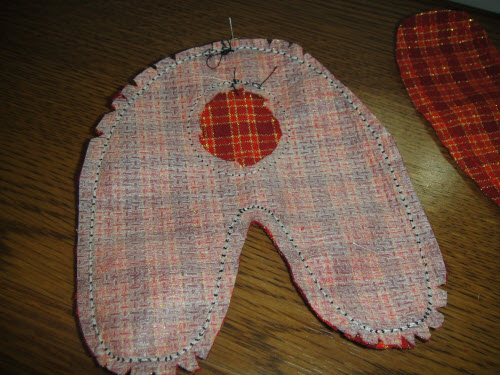
Step 31:
So that the curves will turn nicely, clip and notch the seam allowance on all curves
of the two body and head sections.
Step 32:
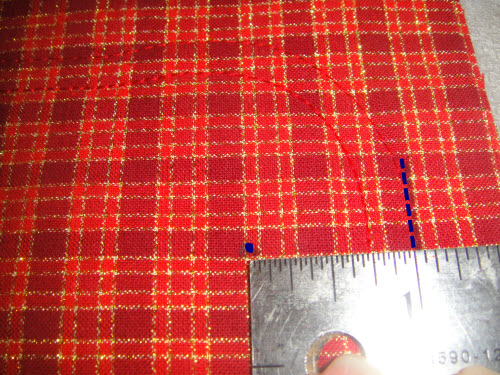
You need to make an opening in the back of the head to be able to turn the face
right side out. To do this, measure an inch up from the seam line at the bottom
of the head. Make a dot with a fabric marker.
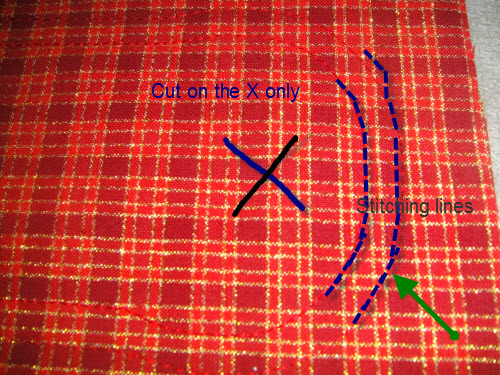
Step 33:
Draw an X on the dot so that your lines are along the bias of the fabric. Making
the cutting lines on the bias will minimize fraying. Make your X lines about ½”
long in each direction. Snip the lines open to be able to turn the head.
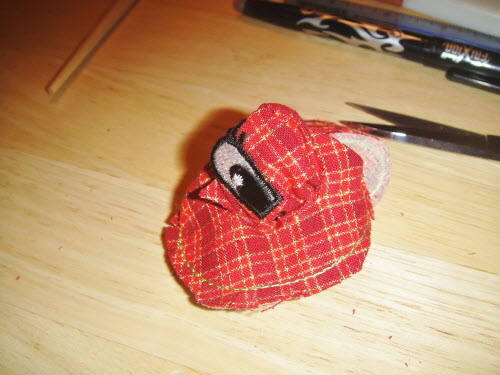
Step 34:
Turn the head through the opening.
Step 35:
Turn the legs through the hole in the one side.
Step 36:
Using a wooden instrument firmly stuff the head with small amounts of stuffing at
a time. Smooth the head as you go.
Step 37:
With a double thread and hand sewing needle whip stitch the edges of the head back
together. This doesn’t have to be too neat, just catch the edges of your slits
back together.
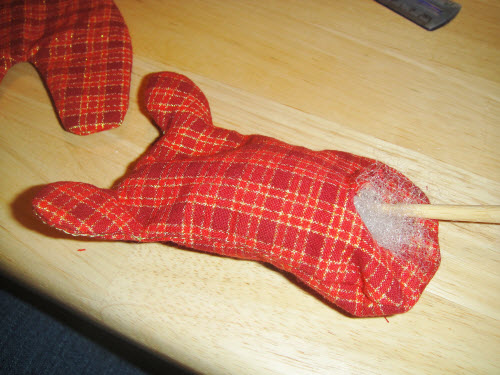
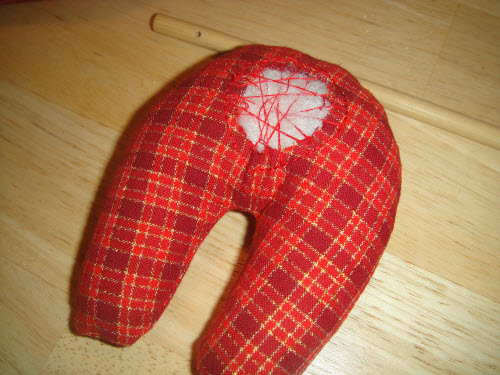
Step 38:
Firmly stuff the legs and then secure the stuffing by making long stitches across
the holes.
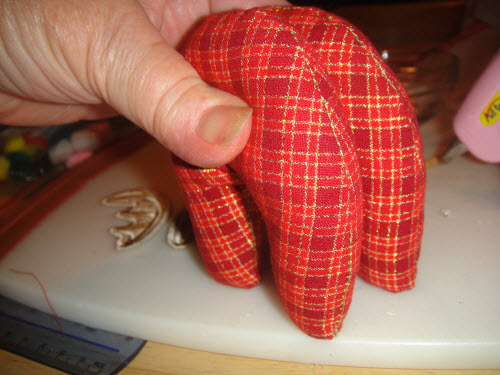
Step 39:
Outline the hole with hot glue on one set of legs. (Use a HOT glue gun – the
lower temp glue guns did not seem strong enough to hold this together.) Align to
the hole in the second set of legs and press together for a few seconds. Make sure
all legs touch the surface.
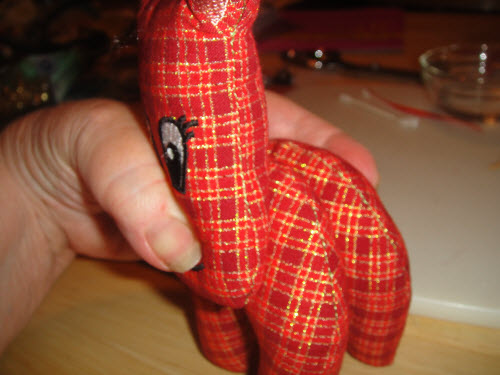
Step 40:
Apply hot glue around the splits you made on the back of the head. Press the head
to the body. Have the bottom of the face about 1/2” up from the inside curve
of the legs. You won’t hit the same spot every time, but having slight variations
in the head placement is a good thing as that is what gives the individual reindeer
personality. Don’t place the head too low on the legs as that will make him
top heavy and he will topple over.
Step 41:
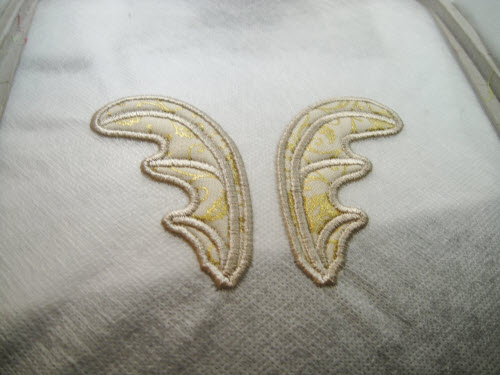
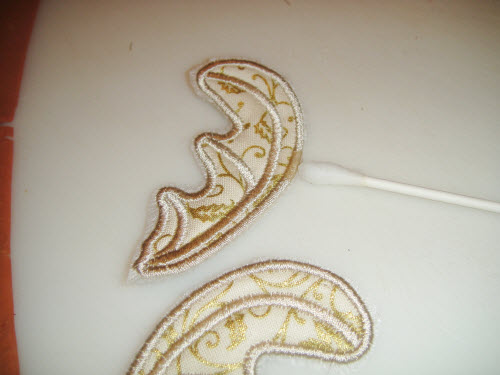
Cut the antlers from the water soluble stabilizer, but don’t cut close enough
to risk cutting the satin stitching. Wet a swab in water and go around the edges
of the antlers to remove the final bits of stabilizer.
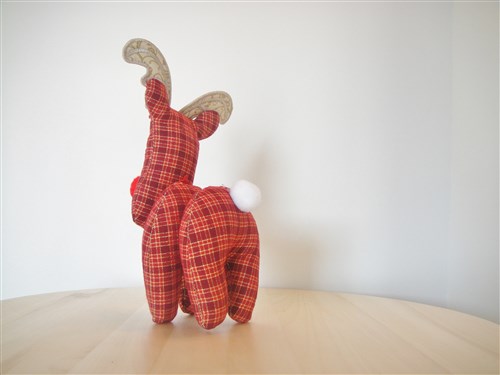
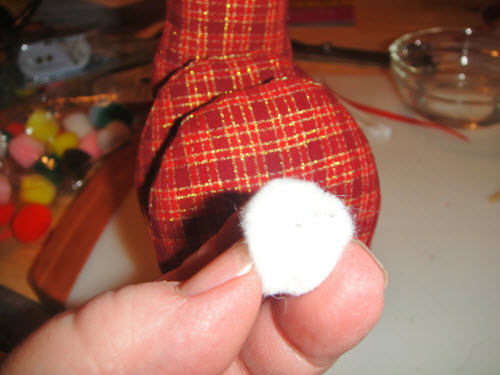
Step 42:
Put a small amount of hot glue on a pom-pom and place on the Reindeer’s hind
quarters. 1” or ½” pom-poms will both work and variance in size
between reindeers will also give them personality.
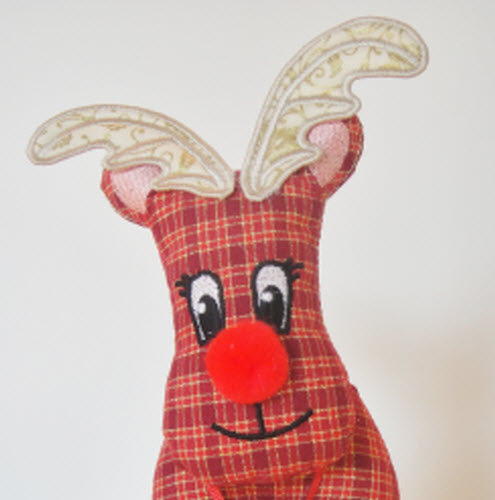
Step 43:
Put a small amount of hot glue on a pom-pom for the nose and place just above the
black embroidery on his face. Put a small dab of hot glue on each antler and place
on center front of his head in front of the ears. Variance in the angle of the antlers
and the height of the nose will also make each reindeer unique.
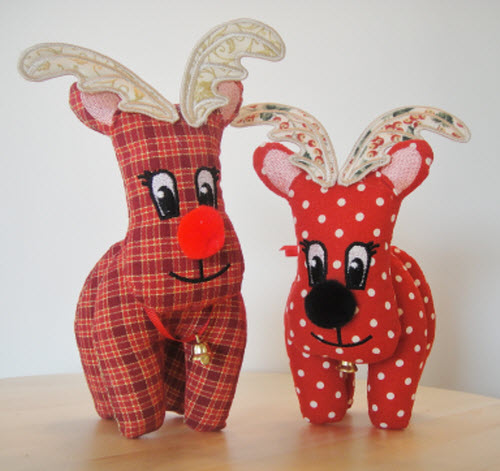
Step 44:
A final picture here to let you see how much leeway you have in giving each reindeer
personality. Be sure to make a lot of them as all of your family, friends and craft
fair customers will want one.
Award winning Digitizer, Embroidery Educator, Author and a Consultant to the Industry, Pat Williams has 30 years of experience in the embroidery industry. Pat has won multiple awards for her digitizing expertise including the 2007 Impressions Awards Grand Championship, Best of Show as well as the 1st and 2nd Place Awards. Pat’s love of digitizing has afforded her the opportunity to write numerous articles for Impressions magazine in the United States and Images Magazine in Europe. In 2001 Pat was named “Embroidery Educator of the Year.” For many years Pat taught digitizing seminars at the ISS Shows in Long Beach, CA and for Compucon software. She now resides in Tucson, AZ.