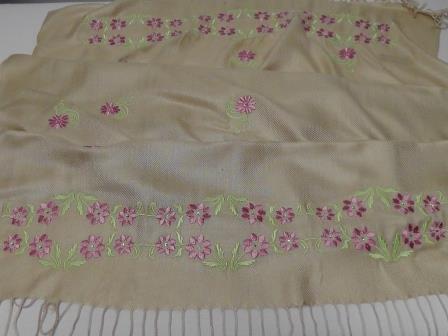
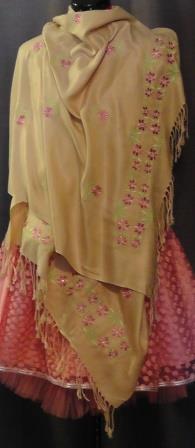
As spring turns to summer, sometimes just a light wrap is all that is needed in the evening to keep the chill away. Turn a plain purchased Pashmina into a stunning wrap sure to get lots of compliments!
Project Preview Video
Materials
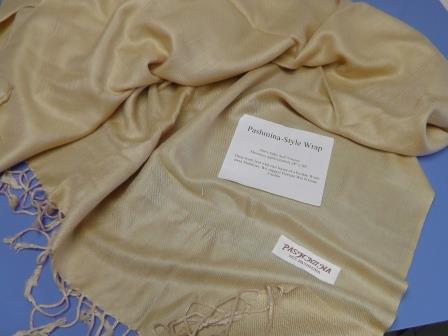
Pashmina
Embroidery designs
Embroidery thread (two colors: one for the flower and one for the leafy portion of the designs)
Stabilizer (type depends on care method for fabric)
Temporary spray adhesive
Target stickers (or other tape/marker compatible with the fabric)
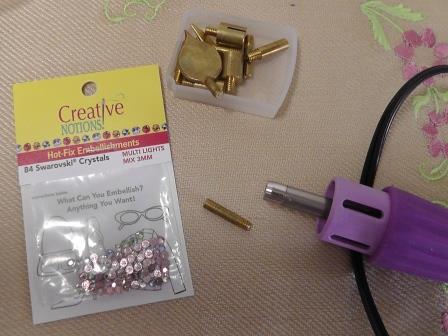
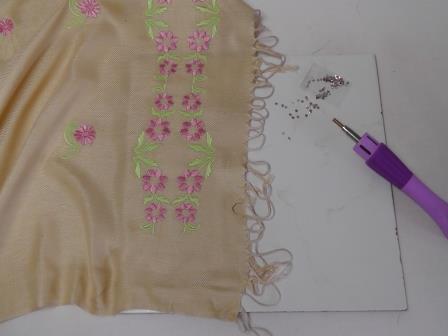
3 mm hot fix crystals
Hot fix crystal heat setting tool
Optional: embroidery software for combining designs (or this may be done at the machine)
Read the care instructions on the Pashmina. Tearaway stabilizer was used in the project because this Pashmina needs to be dry cleaned. If the Pashmina you purchase is washable, then perhaps you could use water soluble or a washaway tearaway stylizer for this project. In this project, the designs on each end were planned in embroidery software and then stitched according to the layout. If you do not have embroidery software, use paper templates to plan, align, and accurately stitch the designs. How the designs fit into an area for stitching will depend upon the largest hoop size for the machine you have.
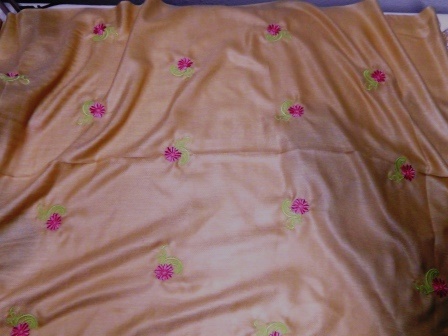
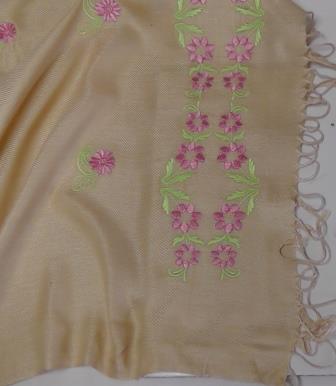
The designs scattered throughout the body of the Pashmina were placed 7” apart four to one row, and three to the next, off set. The designs were rotated to vary their appearance and give a more random look to the overall design in the body of the Pashmina.
Step 1:
After purchasing the Pashmina, determine the care method and decide on the stabilizer to be used.
Step 2:
Measure and determine how the Pashmina may be hooped for the end designs (FLG242 embroidery design) after they are prepared.
Step 3:
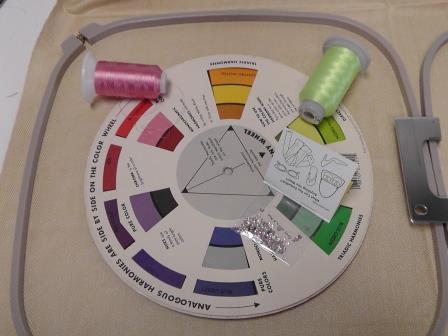
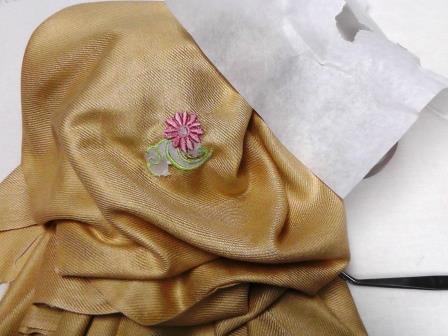
I had a hard time deciding which colors to use for the embroidery designs. The Pashmina is a light camel color so I decided to let the color wheel help me choose which colors to use in the embroidery design. The camel color falls in line with the yellows and gold at the top of the color wheel. I decided to use an analogous color scheme, meaning colors that are next to each other on the color wheel. I chose a rose pink for the flowers, and a bright yellow-green for the leaf part of the designs. Audition thread colors to see what you like with your Pashmina.
Step 4:
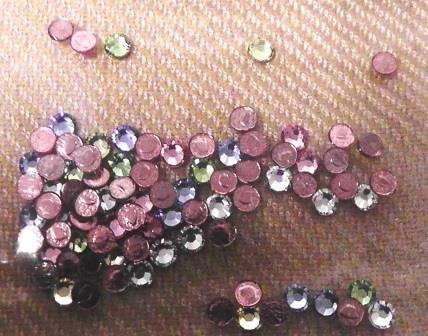
The crystals chosen for the project were multi-colored to add some bling and additional color to the finished project.
Step 5:
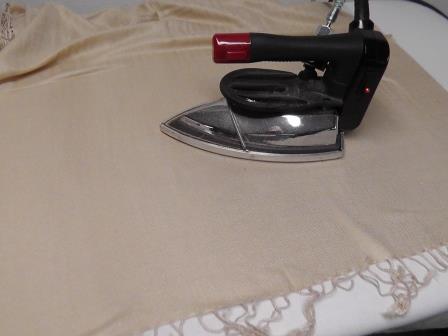
The first step is to decide on the placement for the Grand Slam Designs FLG254 embroidery design to be scattered throughout the body of the Pashmina. Press the Pashmina well.
Step 6:
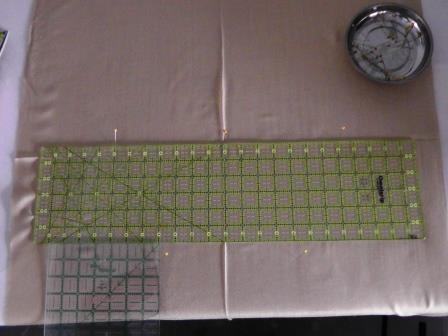
Find and mark the center of the Pashmina lengthwise and crosswise. Here I just pressed in a light crease in each direction, beginning from the center point determine the placement of the FLG254 design. I placed a pin at the center and 7” on each side of the center mark. Then, I placed pins 7” down and offset from the first pins. Be sure to keep the Pashmina on grain while marking.
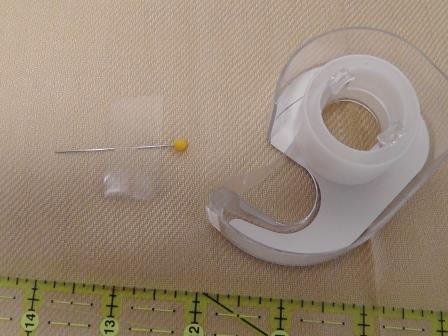
Step 7:
Use target stickers, place tape over the pins, or otherwise mark the placement for each of the flowers to be stitched. When working with pins, be careful they do not fall within the machine. If working with marking tools, be sure the marking method is compatible with the fabric.
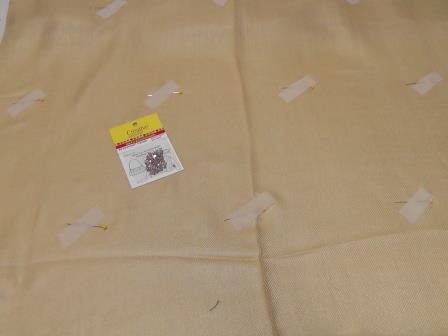
Step 8:
Continue marking the fabric toward each end keeping the same measurements throughout the process and keeping the marks on grain. Leave approximately 6” at each end blank; this will be stitched with Grand Slam Designs FLG242 after it is prepared.
Step 9:
The layout will look like this. Be sure you have enough of the heat fix crystals for the centers of each flower.
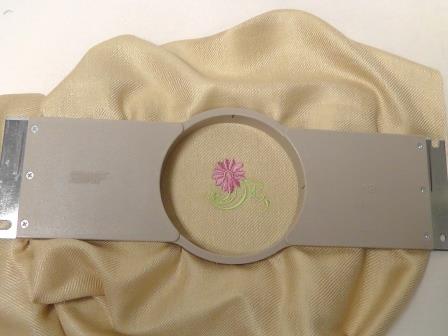
Step 10:
Use the smallest hoop possible for the embroidery. Hoop one marked area with the chosen stabilizer, and stitch the design following the color sequence.
Step 11:
Trim the threads and remove the stabilizer after each flower is stitched. If you are using a water soluble stabilizer, cut away as much as possible and rinse out the remaining stabilizer after the project is finished.
Step 12:
Continue hooping, rotating, and stitching the flowers for the body of the Pashmina as it was laid out and marked. The flowers, though laid out in a pattern, should be stitched in rotated directions to give a more random appearance to the design.
Step 13:
(Click Image to Enlarge)
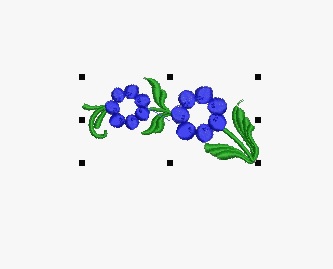
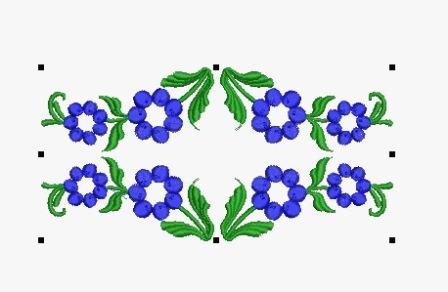
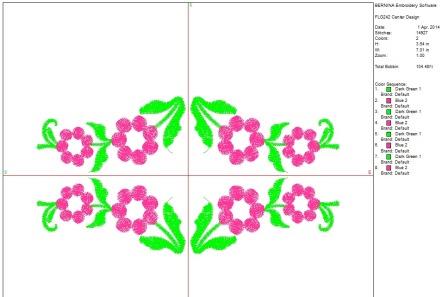
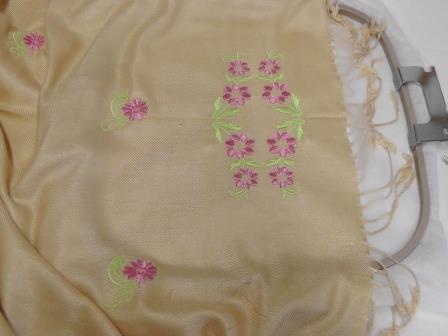
After all the flowers are stitched on the body of the Pashmina, it is time to design and stitch the flowers on each end. For the designs on the end, either print templates and lay them out, align and stitch the designs or use embroidery software which is what was done for this project. Open Grand Slam Designs FLG242 and save as a new design (this keeps the original design intact); name the new design “Pashmina End”.
Step 14:
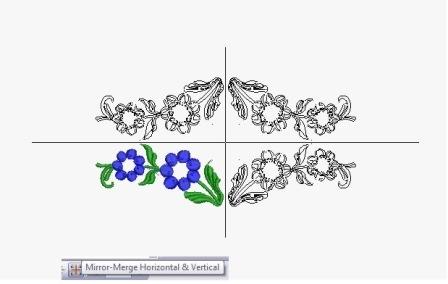
Use the “Mirror-Merge Horizontal & Vertical” tool to create four images of the design on screen. Align the design as shown. When everything is aligned how you want it, press enter to keep the design.
Step 15:
Select and group the entire design. This will be stitched in the center point of each end first, then repeated to create the entire design.
Step 16:
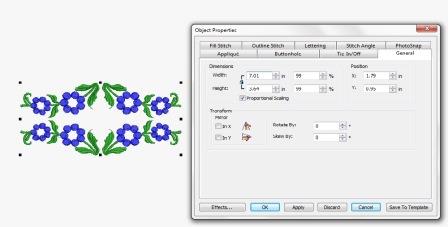
Open up the properties box to determine if the size needs to be adjusted for the Pashmina. I did not want the design to go all the way to each end, so I kept the size of the design as it was. Adjust as needed for your Pashmina and the hoop you will be using.
Step 17:
Copy the design and paste one to the left and one to the right of the original design. Align the design as you wish it to be on the Pashmina end. Check the dimensions and make sure it will fit on the end of the Pashmina. Save the design as a separate file and rename it “Pashmina End Final Design”. This is now is over a 21” design and cannot be stitched entirely in a hoop, but this allows us to create and view how the entire design will look. Recolor the design to see how it will look after it is stitched out. If you are pleased with the design, then it is time to stitch the design.
Step 18:
At this point, the design needs to be stitched with the hoop you have. If you have a very large hoop as you will see in the rest of the steps, then the entire center design may be stitched in three parts. The design will be stitched in the center first, then the design will be stitched once again on each side of the first stitching. If you have a small hoop, use your favorite technique for aligning and stitching the designs.
Step 19:
Print out templates if you like to determine the placement and alignment of the design.
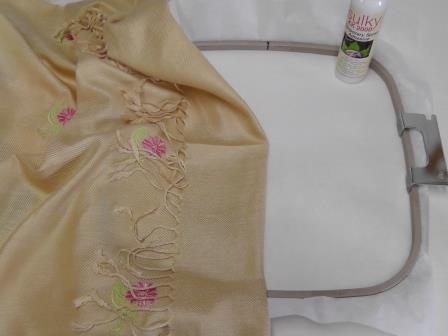
Step 20:
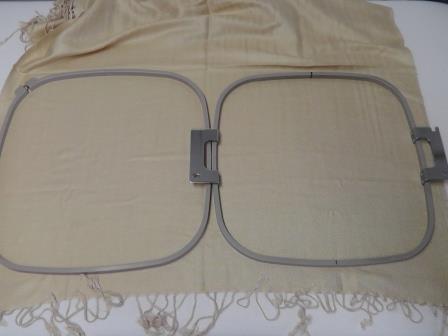
Find the center of the Pashmina end vertically and horizontally (I pressed in a light crease). Hoop the stabilizer. In this project one layer of tearaway stabilizer was used then sprayed with a temporary spray adhesive. Find the center point for alignment of the Pashmina end and align it in the hoop as shown. (Alternately, hoop the fabric with the stabilizer.)
Step 21:
Smooth the other part of the Pashmina in place. Be sure to keep the alignment square in the hoop. If there is fringe on the ends, tape it down so it won’t get caught in the stitching.
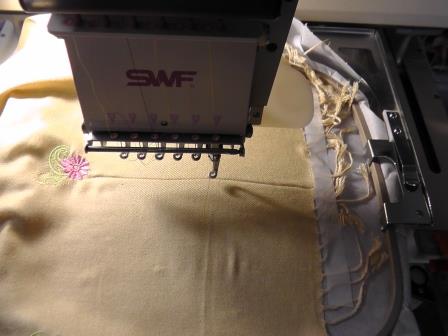
Step 22:
Place the hoop on the machine; align the center point of the design with the center mark on the fabric.
Step 23:
Stitch the design following the color sequence.
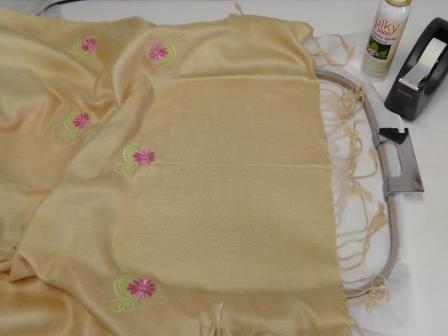
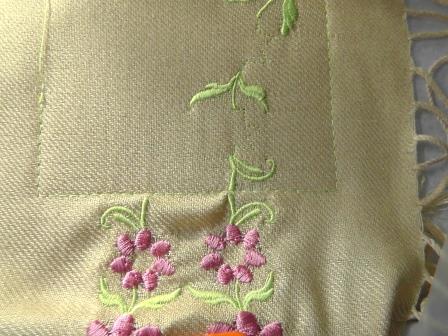
Step 24:
Align and stitch the same design to the top and bottom of the first stitched design, re-hooping and aligning the fabric as needed. After stitching the first design, I discovered a basting stitch was needed to further help hold the fabric in place for stitching. You may or may not have to do this depending on the fabric and whether or not you can hoop the fabric. Basting stitches may be created in software or at the machine if your machine has the capability. Repeat for the other end of the Pashmina.
Step 25:
(Click Image to Enlarge)
After the designs are stitched, remove the fabric from the hoop and remove the stabilizer.
Step 26:
After the designs are stitched it is time to decorate the Pashmina with hot fix crystals. Choose the tip needed for the size of crystals being used.
Step 27:
Attach the tip to the tool and heat up the tool. I find it helpful to use a 12” square tile to keep the tool safe and aid in picking up the crystals.
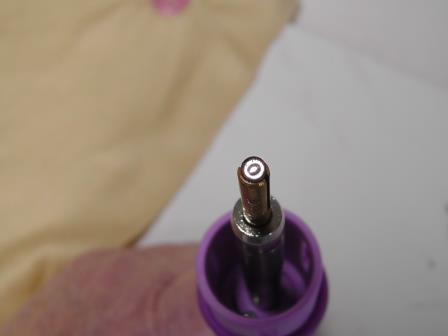
Step 28:
Pick up a crystal in the tool. The crystal is ready to be applied to the fabric after the glue on the back of the crystal heats up and bubbles.
Step 29:
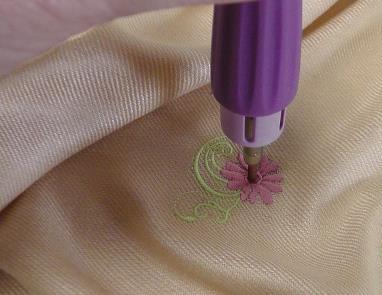
(Click Image to Enlarge)
Tap the crystal to the fabric at the center of the flower.
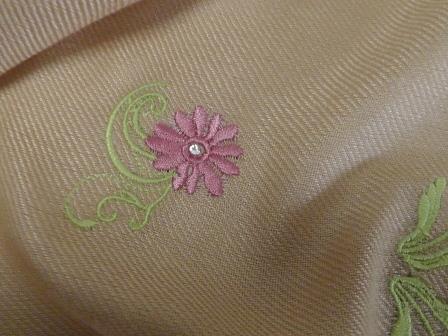
Step 30:
The crystal will remain in place.
Step 31:
Continue applying crystals in the center of all the flowers.
Step 32:
(Click Image to Enlarge)
Give the Pashmina a final press and wear the Pashmina and enjoy the compliments you will be given!
Ramona Baird has been in the embroidery industry for over 23 years. She and her husband owned a commercial and retail embroidery store in Arizona for many years. She is an experienced digitizer having been mentored by award-winners Pat Williams and Lindee Goodall. Ramona is a contributor to “Creative Machine Embroidery” magazine having 5 covers to her credit. Ramona has worked for Wilcom America and served many years as Education Director for the American Sewing Guild. With a degree in fashion design, she is able to design and execute patterns which Pat Williams says are “out of the box” in creativity and application. Ramona likes to challenge the boundaries of embroidery and bring new and exciting designs, ideas, and projects to EmbroideryDesigns.com. She wants embroiderers of all levels to increase their skills and enjoyment in using their embroidery machine for gift-making and personal pleasure.