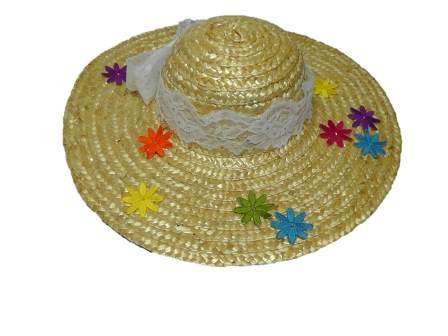
Did you know that it is possible to make embroidery designs free-standing when they are not digitized this way? Not every design is a good candidate for this technique, but small flowers like are on this hat are perfect. The technique to create stand-alone embroidery is done by hooping a mesh stabilizer, embroidering the design, then using a heated tool to melt away the stabilizer next to the stitching. Because the stabilizer is melted to the stitched edge, rayon thread will not work for this project; the tool would burn the thread. Every hat will be different, so instructions will be given on how to create the embroidery designs to make them free standing, and show how to apply the lace and bow at the crown of the hat and embellish with hot fix crystals.
Note: The wood burning tool to burn the edges of the stabilizer gets extremely hot as does the hot fix crystal tool. Use caution when using the tools and read and follow all the manufacturer’s directions that came with the tools. Slight fumes will be generated by using the wood burning tool with the stabilizer. Be sure to work in a well-ventilated area.
Step 1:
(Click Image to Enlarge)
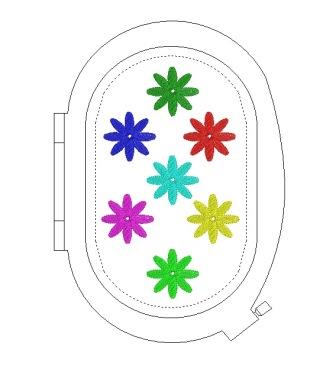
Determine the number of embroidered flowers there will be on the hat. Either at the machine or in software “gang up” several design for the largest hoop. Be sure the flowers are not too close to each other; each needs its own space in the hoop to embroider accurately. Sew each of the flowers in a single color, no second color for the outline unless you would like to.
Step 2:
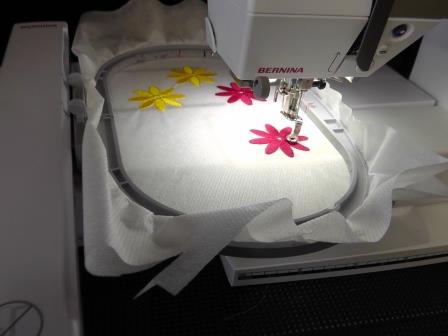
Hoop two layers of the mesh stabilizer in the hoop. Place the hoop on the machine and embroider the single flower in the thread color chosen. In this project, two flowers of each color were sewn.
Step 3:
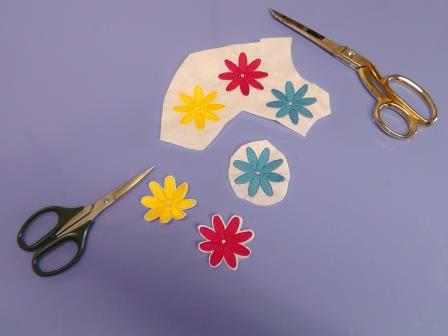
After the flowers are embroidered, remove the embroidered stabilizer from the hoop. Loosely cut apart around each of the flowers, and then cut more closely as shown.
Step 4:
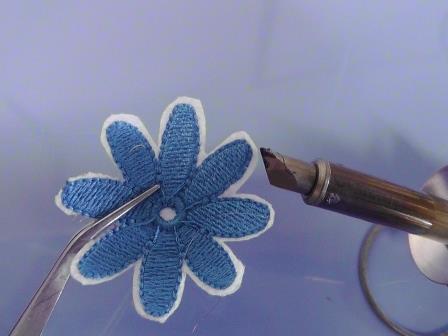
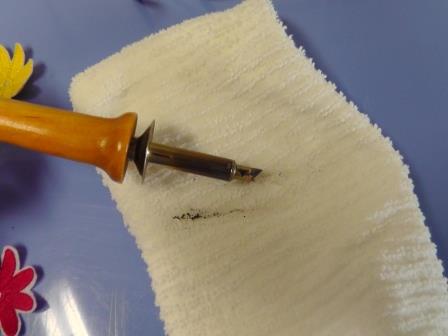
Using the pre-heated wood burning tool, barely touch the hot tip to the edge of the stabilizer remaining around the flower. You will see the stabilizer instantly melts back to the stitched edge. Melt away the stabilizer around the flower edges. Repeat for all the flowers.
Step 5:
If the tool gets gummy from the stabilizer, use a dampened cotton towel to wipe off the tip from time to time.
Step 6:
(Click Image to Enlarge)
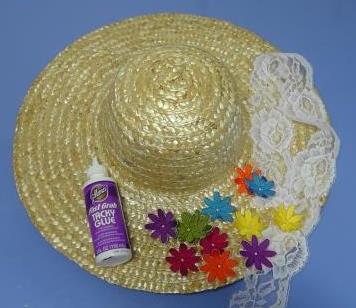
After all the flowers have been stitched and prepared, it is time to assemble the hat. Measure and cut a piece of lace to fit around the crown of the hat. Glue in place. Use the remaining lace to create a bow and band. Hand tack with needle and thread to the hat.
Step 7:
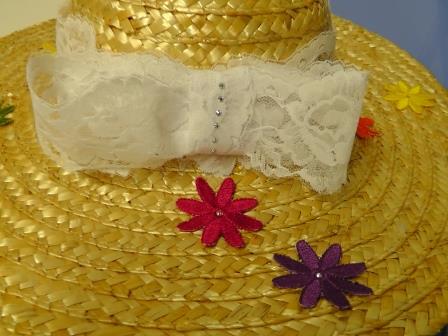
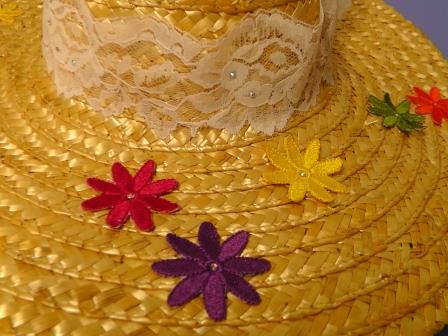
Determine the placement of the flowers. Place glue all the way to the edges on the back of each flower and position and adhere the flowers onto the hat as desired. Use the pre-heated crystal setter to apply the crystals, following the manufacturer’s directions.
Step 8:
Use the hot fix crystal tool to apply crystals to the bow as desired.
Step 9:
Add additional crystals to the lace band around the crown of the hat.
Step 10:
Set the hat aside until the glue dries and then enjoy wearing your Sparkly Spring Garden Hat!
Ramona Baird has been in the embroidery industry for over 23 years. She and her husband owned a commercial and retail embroidery store in Arizona for many years. She is an experienced digitizer having been mentored by award-winners Pat Williams and Lindee Goodall. Ramona is a contributor to “Creative Machine Embroidery” magazine having 5 covers to her credit. Ramona has worked for Wilcom America and served many years as Education Director for the American Sewing Guild. With a degree in fashion design, she is able to design and execute patterns which Pat Williams says are “out of the box” in creativity and application. Ramona likes to challenge the boundaries of embroidery and bring new and exciting designs, ideas, and projects to EmbroideryDesigns.com. She wants embroiderers of all levels to increase their skills and enjoyment in using their embroidery machine for gift-making and personal pleasure.