Prepare your fabric by ironing Appli-Kay Wonder, or a similar applique backing,
to the wrong sides of your fabric. You may use all one fabric for the roof and lower
portions of the bird house or, as in the sample shown, use one fabric for the lower
portions of the house and a 2nd fabric for the roof. All appliqued portions of the
bird house are done in the same manner. You may use separate colors to sew the siding
stitches on the house and for the detail on the roof if desired. Color stops are
in the designs for that purpose. Due to the pastel color of the sample house shown,
white bobbin thread was used for all steps except for the flowers on the front of
the house and for the flowers sewn separately that are on the roof. If you
choose to use a color other than white for the house, load your chosen color into
the bobbin as well.
Step 1:
(Click Image to Enlarge)
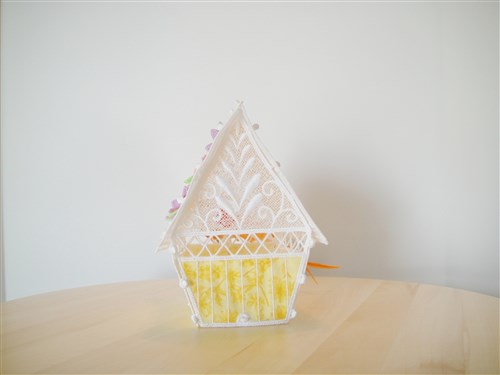
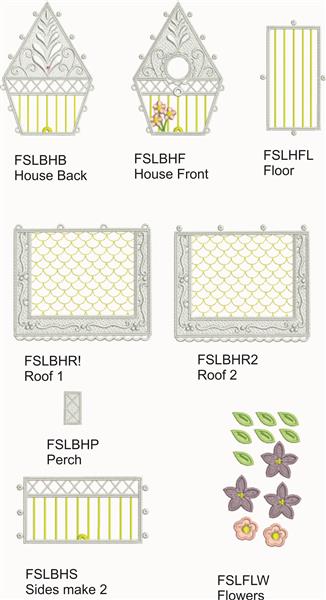
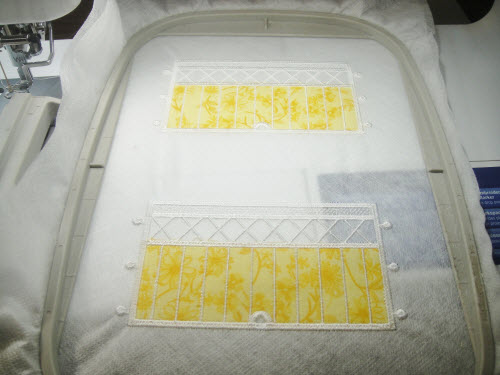
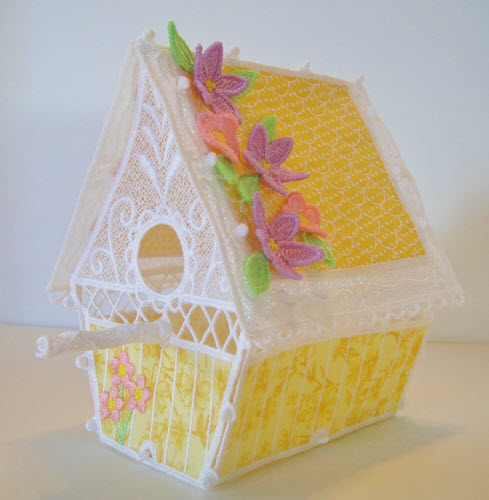
Bird House Front: the bird house project comes with these eight
separate design files.
Step 2:
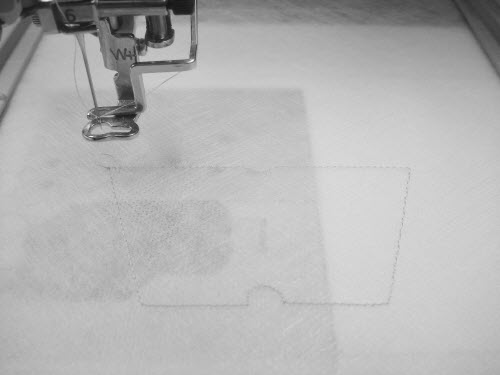
Hoop two layers of water soluble stabilizer. Stitch the first color sequence which
is the outline. This may be stitched in white but is illustrated darker to have
it show in the picture.
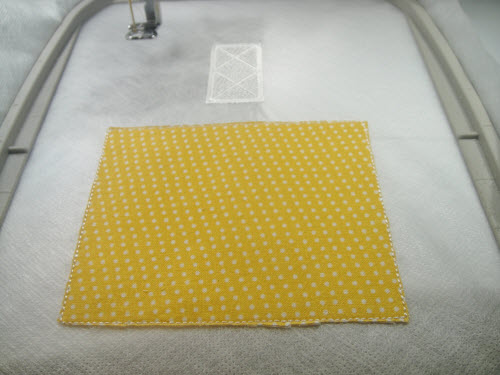
Step 3:
Cut a rectangle approximately 4” wide x 3” tall of your chosen fabric
that has the applique backing ironed on to it. Peel the paper backing from the applique
and finger press the fabric over the outlines just sewn.
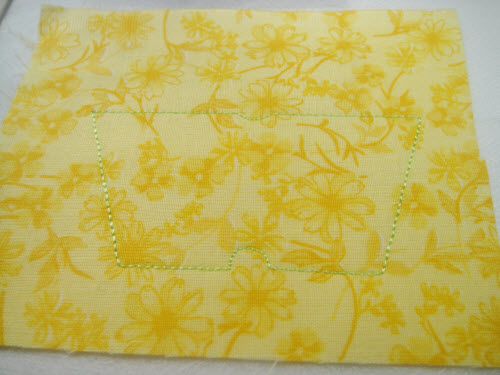
Step 4:
Stitch the tack down line. This is sewn in white, but a colored thread is used in
the picture so that you can see it better.
Step 5:
With very sharp small scissors (these work better than duckbill applique scissors)
lift the excess fabric around the stitching and trim very close to the outside edges
of the stitching.
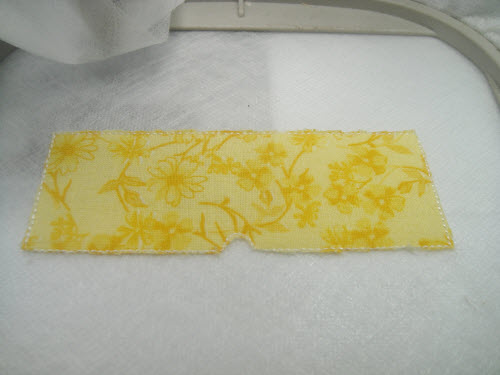
Step 6:
For the house front stitch the next color sequence in white for the siding, or you
may use a contrasting color here if desired.
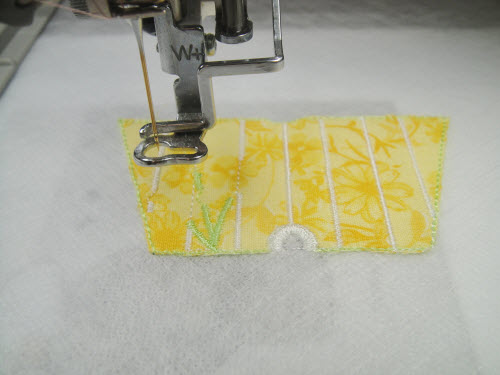
Step 7:
For the 4th color step change the top thread to lime green for the flower stems.
Step 8:
For the 5th color step change the top thread to Pink or color desired for the flowers.
Step 9:
For the 6th color steps change the top thread to yellow for the flower centers.
Step 10:
Change back to white thread to complete the design.
Step 11:
Bird House Back: repeat steps 2 through 6 and then skip through to
step 10 as outlined above.
Step 12:
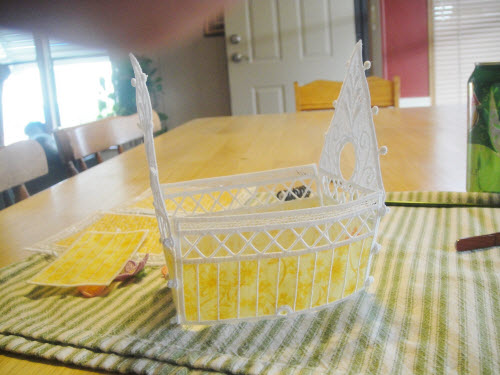
Bird House Sides: both sides of the bird house can be stitched
in one hooping by loading the design into machine and move the design up in the
hoop using the controls on your embroidery machine screen. Stitch the design all
in white thread unless you want the siding strips to be a separate color.
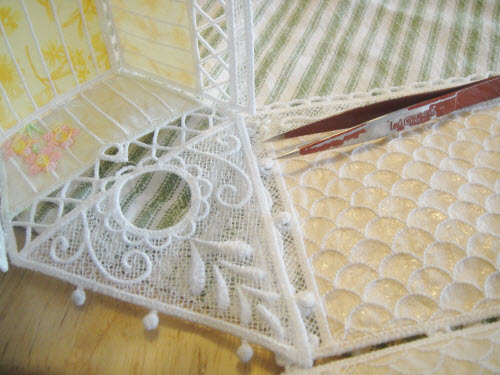
Step 13:
Stitch the outline.
Step 14:
Place the fabric.
Step 15:
Sew the tack down and trim the excess fabric.
Step 16:
Stitch the siding lines white or optional color.
Step 17:
Stitch the remaining borders and buttons.
Step 18:
When the first side is complete, move the design in the machine to the lower edge
of your embroidery hoop using the embroidery machines screen controls. Stitch the
second side the same as the first.
Step 19:
Roof 1 and Perch: roof1 and the perch can be embroidered in one
hooping as well. Load the perch design into the machine, move the embroidery hoop
to the top of the hoop and stitch the design. There is no fabric applique in the
perch.
Step 20:
Load the Roof1 design into the machine. Move the design to the bottom of the hoop.
Step 21:
Stitch the outline.
Step 22:
Place the fabric.
Step 23:
Sew the outline and trim the fabric.
Step 24:
Stitch the roof detail lines with white or contrasting fabric.
Step 25:
Stitch the remainder of the design in white.
Step 26:
Roof 2 and Floor: the second piece of the roof and the floor can
also be combined in one hooping.
Step 27:
Bring the Floor design into your machine and rotate 90 degrees.
Step 28:
Move the rotated design to the top of the hoop.
Step 29:
Stitch the outline.
Step 30:
Place the fabric.
Step 31:
Stitch the tack down and trim the fabric.
Step 32:
Stitch the remainder of the design.
Step 33:
Bring the Roof 2 design into the machine.
Step 34:
Move the design down to the bottom of the hoop.
Step 35:
Repeat steps 21 through 25.
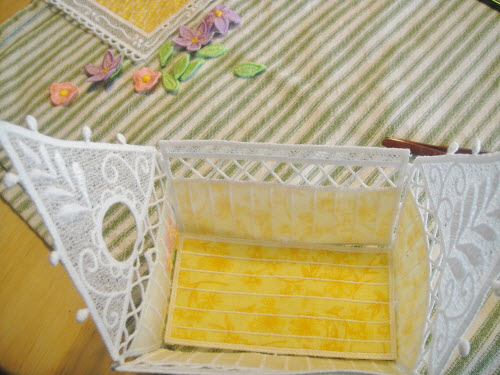
Step 36:
Flowers and Leaves: the flowers and leaves are all stitched in
one hooping to reduce the number of color changes in the project over all.
Step 37:
Hoop two layers of water soluble fibrous stabilizer.
Step 38:
Load lavender thread in both the top and bobbin. Stitch the 1st color sequence.
Step 39:
Load pink thread in both the top and bobbin. Stitch this 2nd color step.
Step 40:
Load yellow thread in both the top and bobbin. Stitch this 3rd color step.
Step 41:
Load lime thread in both the top and bobbin. Stitch the last color sequence.
Step 42:
Trim any connecting threads and the tie-in and tie off threads off of the flowers
and leaves.
Step 43:
(Click Image to Enlarge)
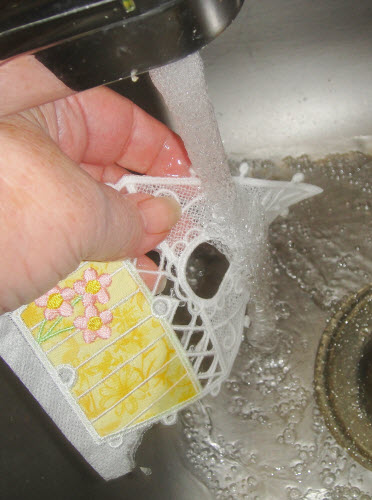
Removing Stabilizer: trim the excess stabilizer roughly around
the edges of each piece of the bird house. (Don’t do this to the flower pieces
yet.) Hold each piece under warm running water to remove the water soluble fibrous
stabilizer. Just hold them under the water long enough to remove the stabilizer
from the holes and outside edges of the pieces. We want some of the stabilizer to
remain to give stiffness to the pieces.
Step 44:
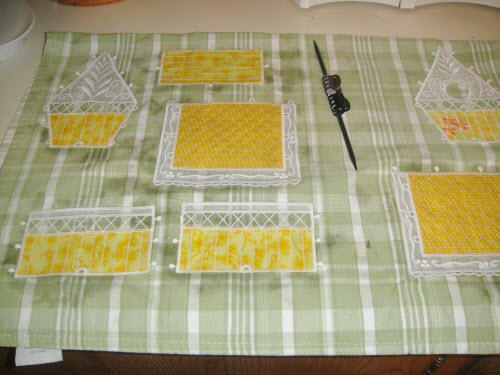
Lay the pieces on the woven cotton tea towel to dry.
Step 45:
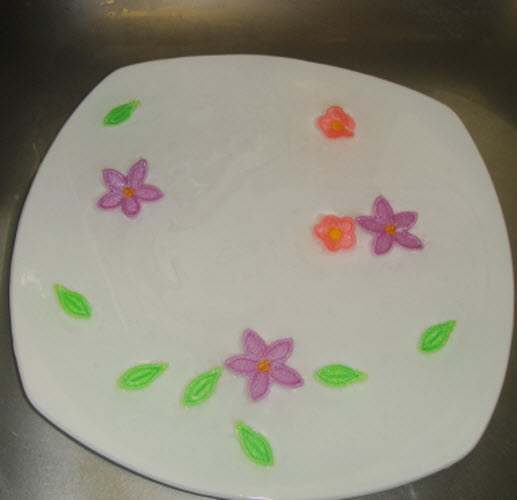
Lay the flower piece on a shallow plate or dish. Run warm water into the dish; the
flowers and leaves will float apart.
(Click Image to Enlarge)
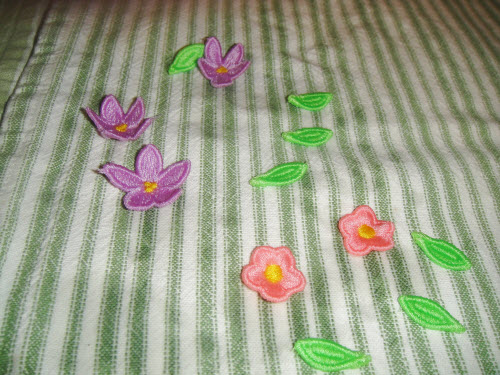
Step 46:
Lay the flowers and leaves onto the tea towel to dry, but instead of laying them
flat, curl the petals up slightly.
Step 47:
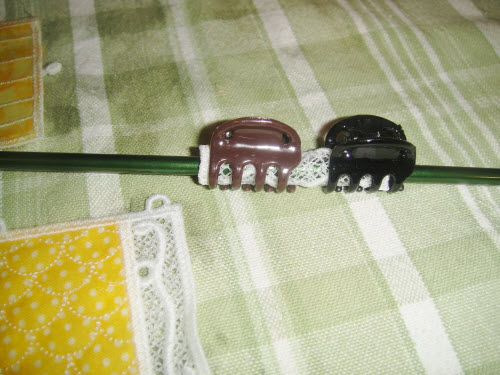
Take the perch piece and wrap it around a size 6 or smaller knitting needle. Clamp
on with miniature hair clips. Small rubbers bands would probably work too, we just
want it to get use to the idea that it is going to be coiled.
Step 48:
Wait about 3 hours for everything to thoroughly dry.
Step 49:
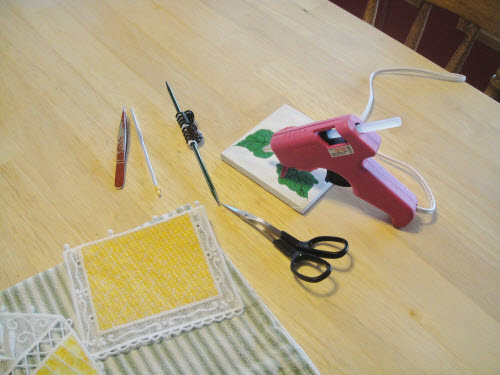
Assembly: assemble the tools that will assist you with putting
your bird house together. A pair of splinter tweezers, a small crochet hook, sharp
tiny scissors and a glue gun will all be helpful. Protect your work surface too,
by working on a folded tea towel or on a cutting board.
Step 50:
Lay the house back on your work surface, right side down and the buttons on a side
piece over the loops of the house back. With your tweezers or a crochet hook apply
pressure to the button and pull while pulling up on the house back to force the
button through the loop. They have to be tight to hold the project together. The
buttons will be positioned on the outside of the house.
Lay the flowers and leaves onto the tea towel to dry, but instead of laying them
flat, curl the petals up slightly.
Step 47:
Take the perch piece and wrap it around a size 6 or smaller knitting needle. Clamp
on with miniature hair clips. Small rubbers bands would probably work too, we just
want it to get use to the idea that it is going to be coiled.
Step 48:
Wait about 3 hours for everything to thoroughly dry.
Step 49:
Assembly: assemble the tools that will assist you with putting
your bird house together. A pair of splinter tweezers, a small crochet hook, sharp
tiny scissors and a glue gun will all be helpful. Protect your work surface too,
by working on a folded tea towel or on a cutting board.
Step 50:
Lay the house back on your work surface, right side down and the buttons on a side
piece over the loops of the house back. With your tweezers or a crochet hook apply
pressure to the button and pull while pulling up on the house back to force the
button through the loop. They have to be tight to hold the project together. The
buttons will be positioned on the outside of the house.
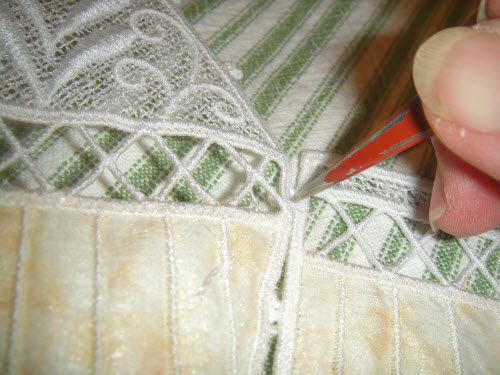
Step 51:
Push the buttons
through the loops, joining both sides of the bird house to the back of the bird
house.
Step 52:
Join one side of
the front of the house in the same manner.
(Click Image to Enlarge)
Step 53:
To join the last
set of buttons to the right side of the house you will have to work from the inside
of the house.
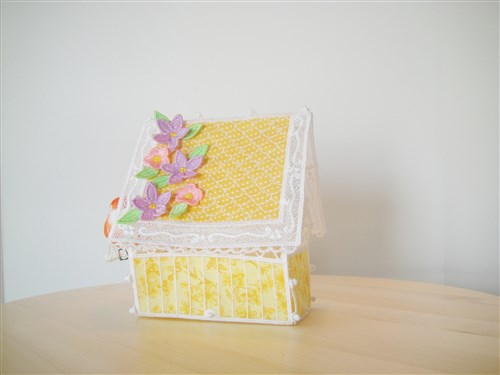
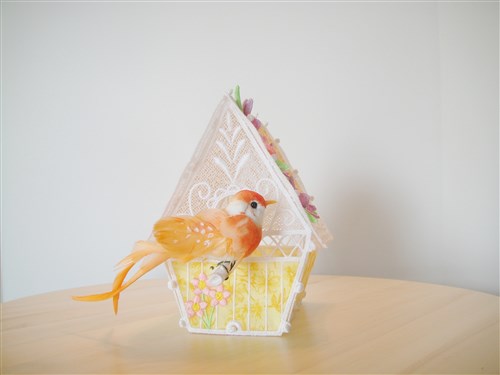
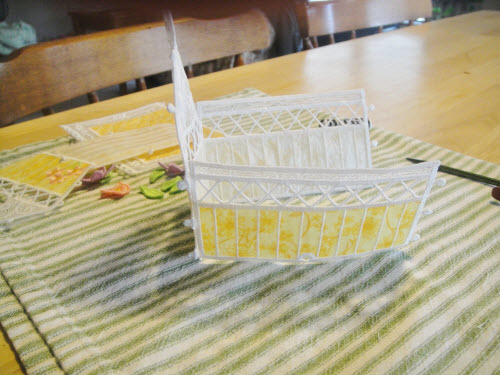
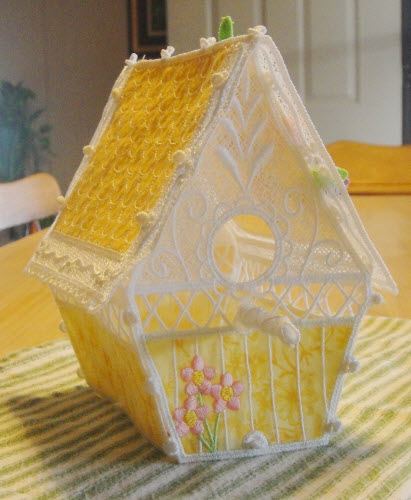
Step 54:
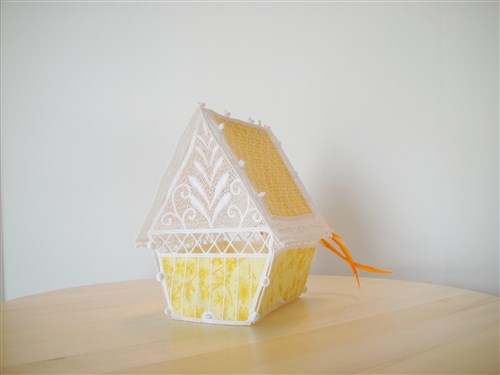
Fig 20 shows what
your house will now look like with all four walls joined together. All the buttons
appear on the right sides of the house walls.
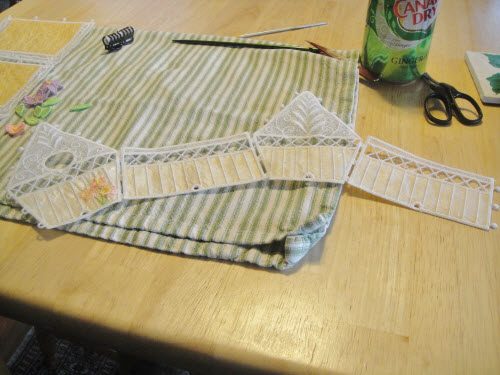
Step 55:
Place the floor,
right side up, in the bottom of the house and push its four buttons through the
eyelets at the lower centers of the walls.
Step 56:
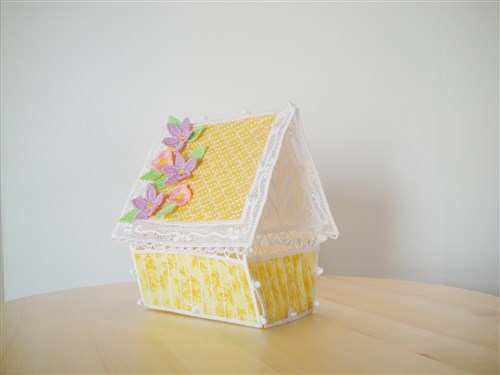
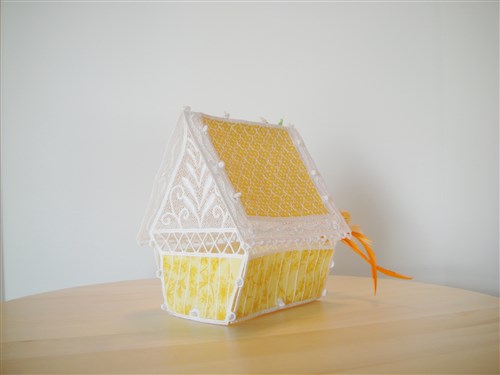
Attach the roof
pieces by pushing the buttons on the top of house top through the eyelets that are
embroidered along the sides of the appliqued portion of the roof. Either roof piece
may be attached to either side of the house.
(Click Image to Enlarge)
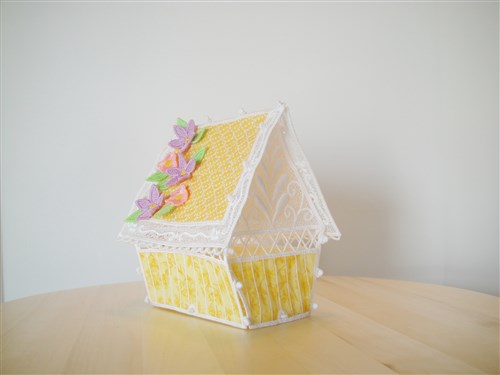
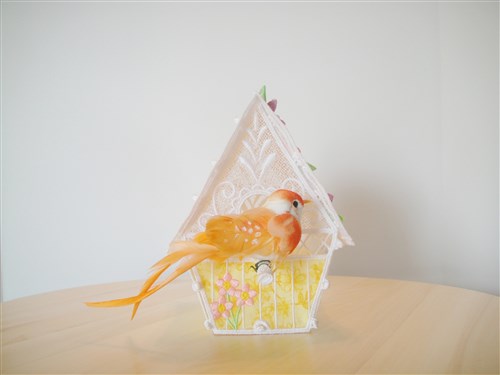
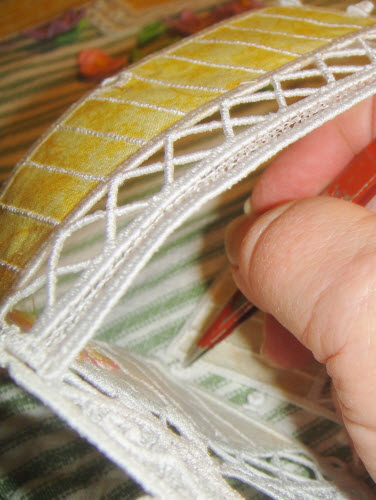
Step 57:
Join the buttons
and loops at the top of the roof.
Step 58:
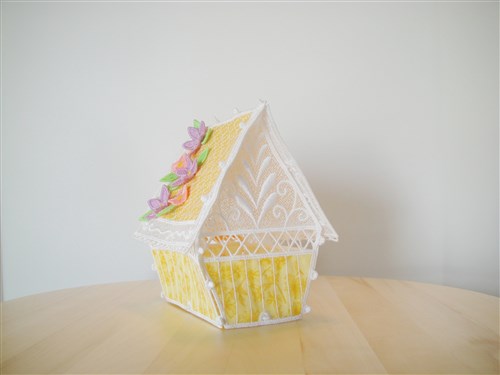
Roll the Roll the
perch lengthwise in as tight a roll as possible, run a little hot glue down the
lengthwise fold to hold into position. Place hot glue on one rolled end and position
over the circle below the main entrance to the bird house. Hold a few seconds for
the glue to set.
Step 59:
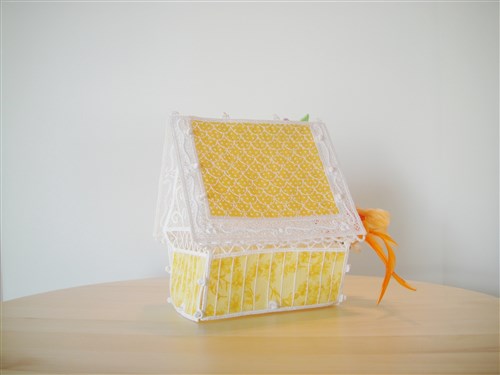
Starting at the
top of the roof on the right side; put a little hot glue on the back of a leaf and
position it so that it extends slightly over the roof; then glue on a lavender flower;
glue a leaf just slightly under the edge of the flower. Work your way down the side
hot gluing the flowers and leaves in any manner that suits you.
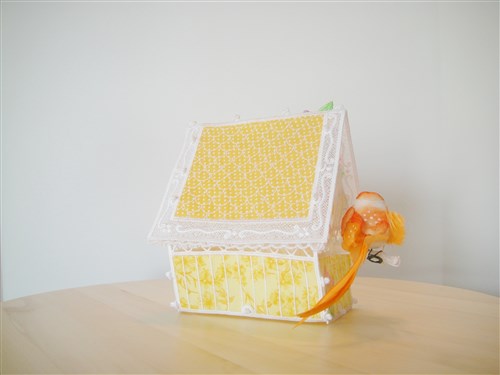
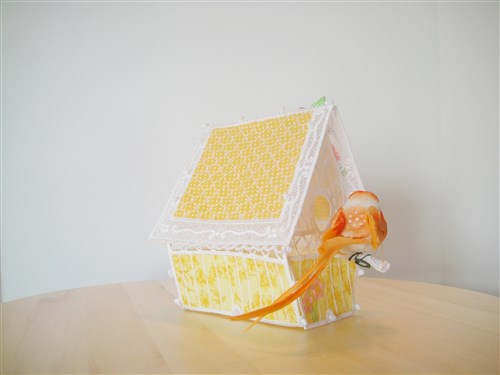
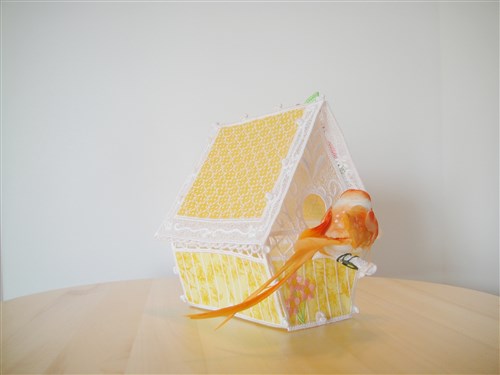
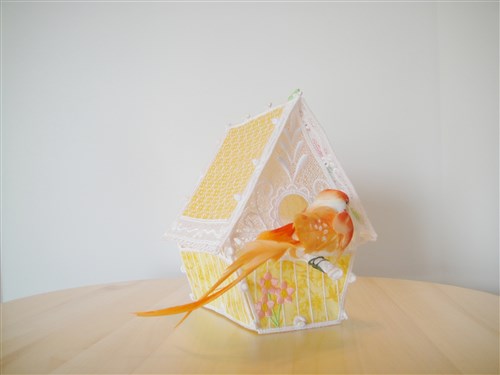
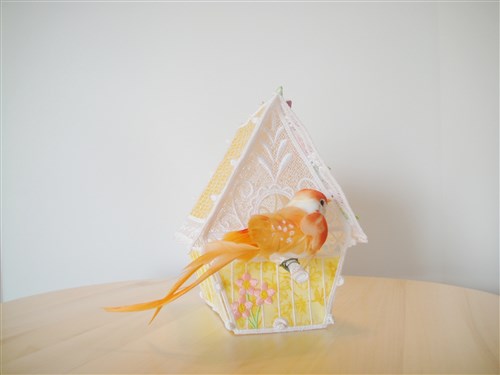
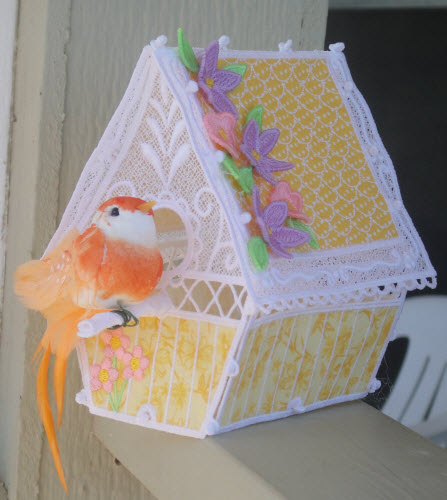
Step 60:
The little bird
in the sample was purchased at Hobby Lobby’s floral department and has a thin
wire at its base. The wire extending from the base is simply wrapped around the
perch. If your bird doesn’t have this wire, simply hot glue it to the perch.
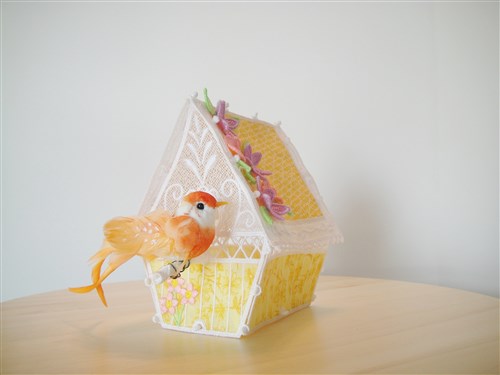
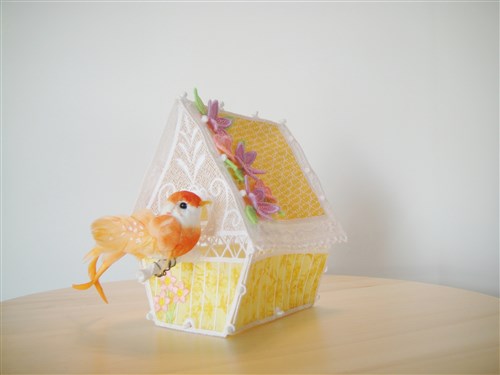
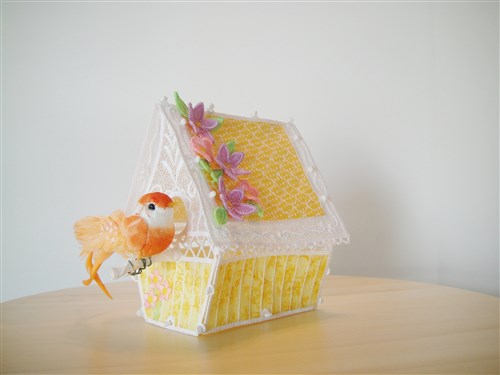
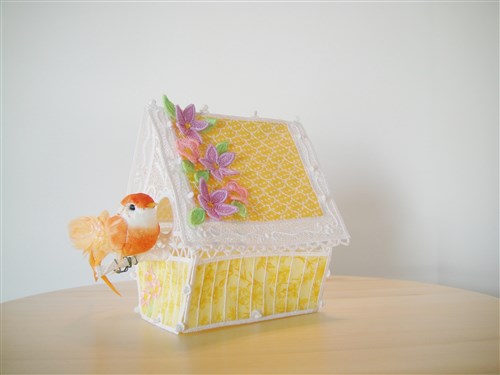
(Click Image to Enlarge)
Step 61:
Now make more in
a multitude of colors for Spring, Easter or Wedding table decorations! Your friends
and family will be amazed at what you can do with your embroidery machine.
Award winning Digitizer, Embroidery Educator, Author and a Consultant to the Industry, Pat Williams has 30 years of experience in the embroidery industry. Pat has won multiple awards for her digitizing expertise including the 2007 Impressions Awards Grand Championship, Best of Show as well as the 1st and 2nd Place Awards. Pat’s love of digitizing has afforded her the opportunity to write numerous articles for Impressions magazine in the United States and Images Magazine in Europe. In 2001 Pat was named “Embroidery Educator of the Year.” For many years Pat taught digitizing seminars at the ISS Shows in Long Beach, CA and for Compucon software. She now resides in Tucson, AZ.