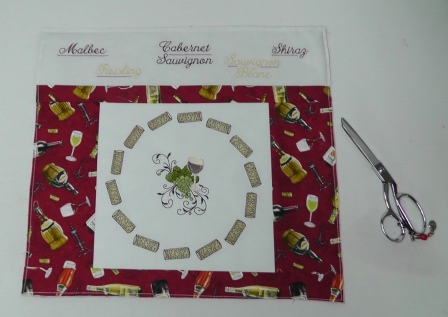
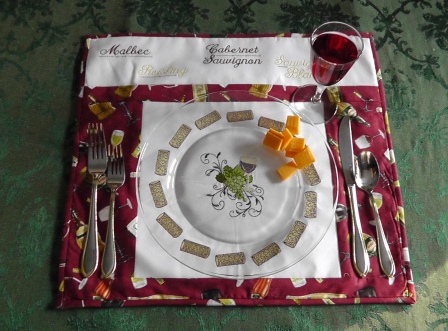
Placemats are fun to make and to use. When using clear dish wear, the beauty of the embroidery can shine through almost like a decorative charger plate.
This project was done using a large compact-commercial embroidery hoop so that the entire center design of the wine glass with grapes and the wreathed cork design could be done in one hooping, and the text split up and done in two hoopings. If you have smaller hoop sizes, plan the embroidery for the hoop size you will be using. Planning several hoopings will be required for the wreathing in the smaller hoop sizes.
The project was planned and sewn for using a 10 ½” clear glass plate. Adjust the measurements for the embroidery and fabric cutting for the size plate you will be using. Read through all the directions before beginning on the project. This project could also be done and used as a wall hanging, by adding a hanging sleeve at the top back of the piece before the binding is sewn on.
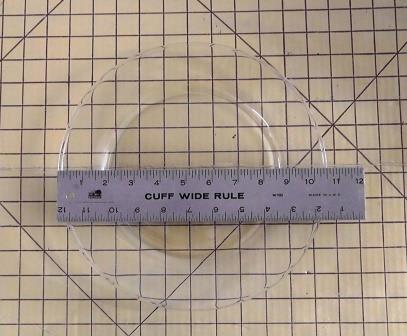
Step 1:
Measure the diameter of the plate.
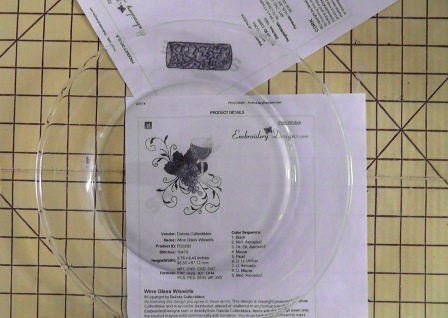
Step 2:
The “Wine Glass w/Swirls” embroidery design will be embroidered to center in the middle of the plate, and the “Cork” design wreathed in the embroidery software to fit around the center design to be viewed around the inside rim of the plate. Print the “Wine Glass w/Swirls” design at actual size. Check the size for the placement under the center of the plate. Print the “Cork” design at actual size. Determine how many “Cork” designs will pleasantly fill in the center of the rim of the plate.
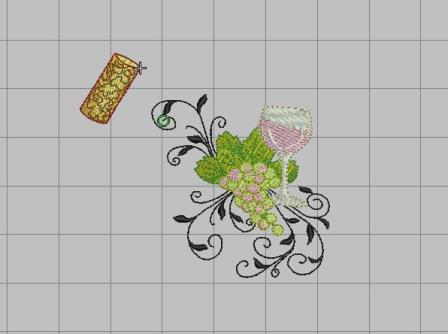
Step 3:
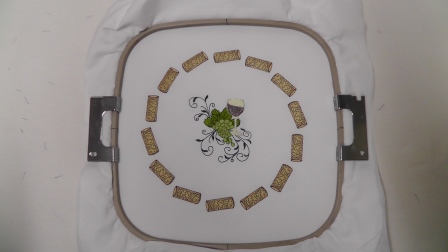
In this project, the wreathing tool was used in the digitizing software and 14 “Cork” designs were wreathed around the center design. Import the “Wine Glass w/Swirls” design into the embroidery software. Import the “Cork” design.
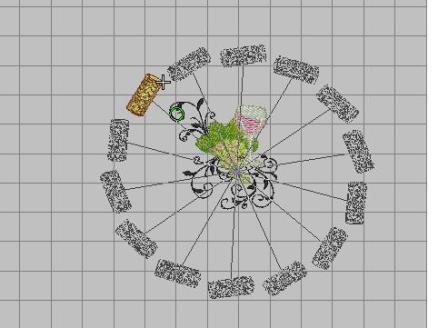
Step 4:
Using the “wreathing” tool, select the “Cork” design and select 14 as the number of corks to be centered in a wreath around the “Wine Glass w/Swirls” design.
Step 5:
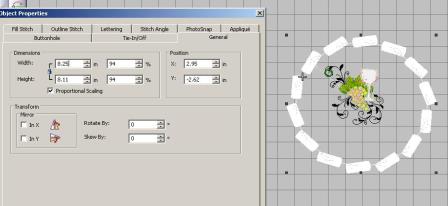
Select the cork wreath and use the properties tool to find the dimensions of the cork wreath design. Resize if needed to fit within the plate rim.
Step 6:
(Click Image to Enlarge)
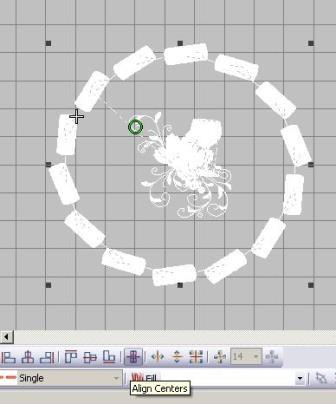
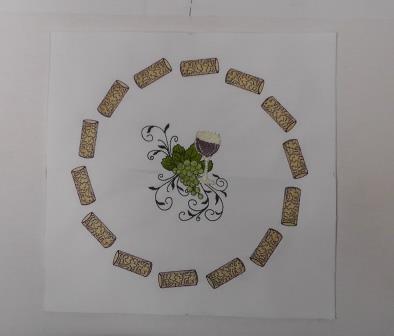
Select the wreathed cork design and the “Wine Glass w/Swirls” design; align the centers. This will place the glass design centered in the cork wreath design.
Step 7:
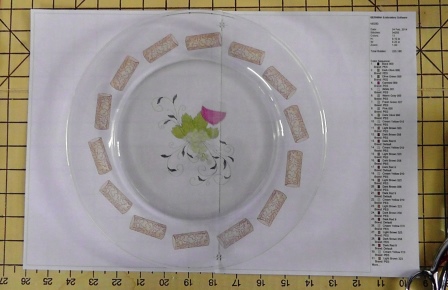
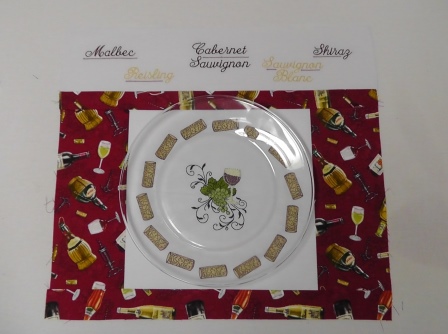
Using the properties tool, check the overall size of the design to make sure it will fit within the hoop. Print out the design at full scale. Tape the paper sections together to make a complete design. Place the paper printout behind the clear glass plate to assess the placement and size of the design. Make any edits if necessary.
Step 8:
Also be sure the design will fit within the hoop.
Step 9:
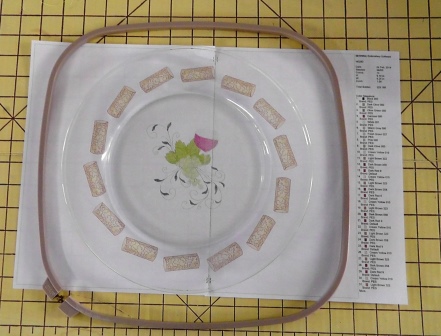
Hoop the white fabric with two layers of tearaway stabilizer. Stitch the design following the color sequence.
Step 10:
Remove the fabric from the hoop and press. Remove the stabilizer from behind the design. Check the design placement behind the plate.
Step 11:
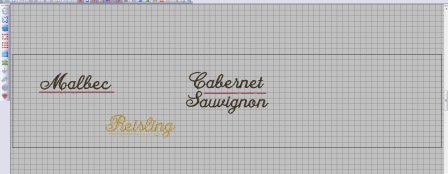
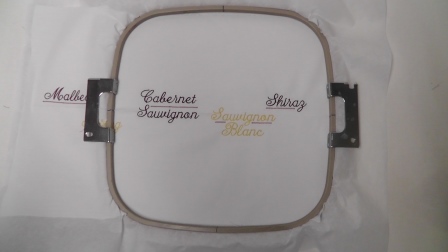
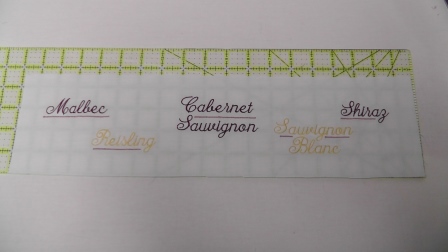
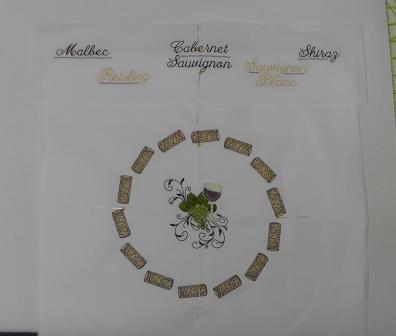
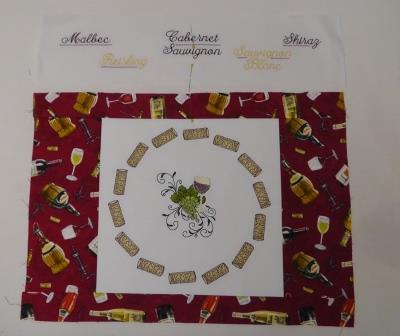
Next will be to plan the placement of the wine text designs. In the embroidery software, determine the number of wine text words that will fit within the width of the top panel of the placemat. In software, load and align designs “Malbec”, “Riesling”, “Cabernet Sauvignon”. Offset the designs as shown. Save the file for stitching.
Step 12:
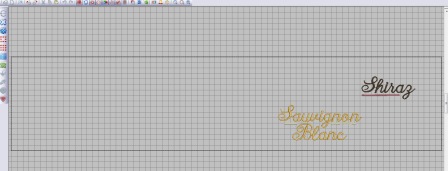
In the embroidery software, load the remaining two words “Sauvignon Blanc” and “Shiraz”. Offset the designs as shown. Save the file for stitching.
Step 13:
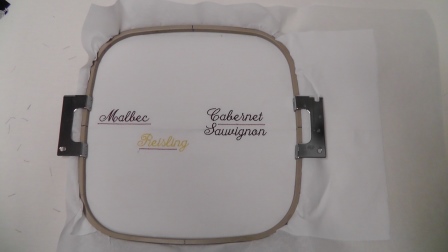
Cut the white fabric and stabilizer for the entire length of the top of the placemat, plus extra on the ends to be able to hoop it. Also cut the fabric high enough to be able to fit within the hoop fully. Fold and gently press the fabric lengthwise; this horizontal line will be centered in the hoop and aid in alignment of the designs for stitching. Hoop the fabric and tearaway stabilizer toward the left edge of the fabric. Align and stitch the first file, following the color sequence.
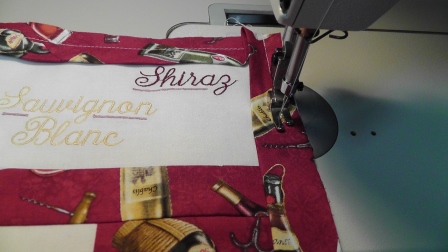
Step 14:
Re-hoop the fabric for the second set of text designs (“Shiraz” and “Savignon Blanc”) to be stitched. The “Cabernet Sauvignon” design which has already been stitched will be within the hoop. Center the horizontal press line within the hoop to keep the embroidery straight. Align and stitch the second file, following the color sequence.
Step 15:
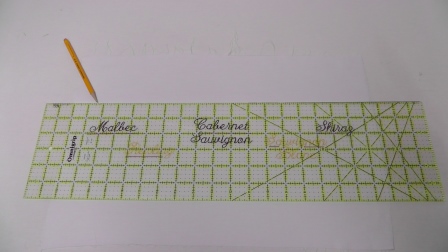
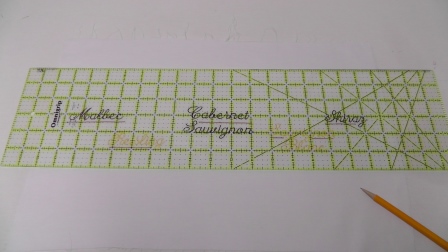
Remove the fabric from the hoop and press. Remove the stabilizer from the fabric. Mark the fabric 18 ½” wide by 4 ¼” high, centered on the designs. Mark along the top and bottom. Make sure the designs are centered.
Step 17:
Cut out the fabric along the lines.
Step 18:
(Click Image to Enlarge)
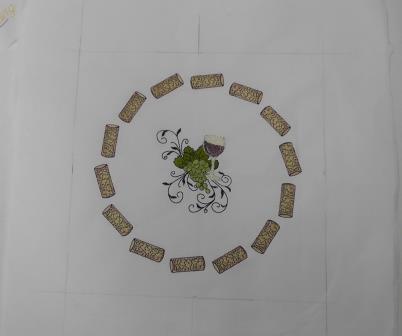
Next, mark and cut the center cork wreath embroidered fabric. Find the centers horizontally and vertically. Place pins in the fabric.
Step 19:
Keeping the design centered, measure and mark the center wreathed fabric piece 11” wide by 10 ½” high.
Step 20:
(Click Image to Enlarge)
Cut out along the marks.
Step 21:
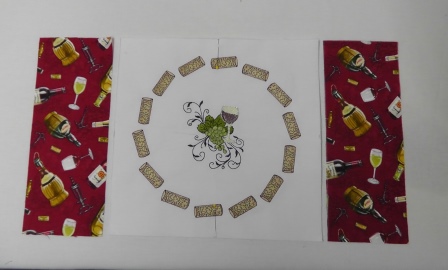
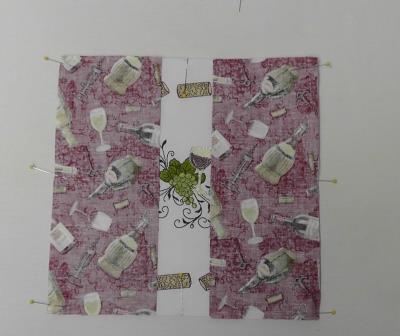
Place the side pieces (cut 4 ¼” wide by 10 ½” high) of wine themed fabric to the left and right of the center design.
Step 22:
Place right sides together and pin in place. Stitch using a ¼” seam allowance.
Step 23:
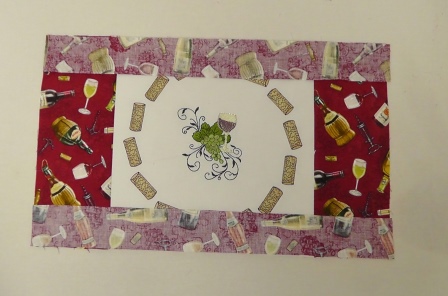
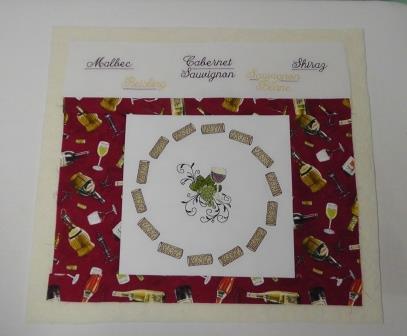
Press the fabric side pieces away from the center embroidered piece. Place the top and bottom strips (18 ½” wide x 2” high) above and below the center panel.
Step 24:
Place right sides together, pin and stitch using a ¼” seam allowance.
Step 25:
Press the strips away from the center panel. Center the text panel at the top of the placemat (cut size is 18 ½” wide x 4 ¼” high).
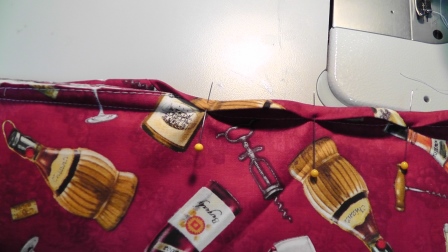
Step 26:
With right sides together, pin the text fabric to the placemat matching the lower cut edge of the text fabric to the top cut edge of the placemat; stitch using a ¼” seam allowance.
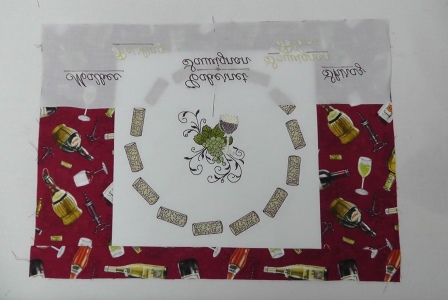
Step 27:
Press the text panel away from the placemat.
Step 28:
Press out any wrinkles in the cotton batting. Cut the batting at least 1” larger than the placemat all the way around.
Step 29:
(Click Image to Enlarge)
Cut a piece of backing fabric slightly larger than the batting. Starch and press the backing fabric. Lay the backing fabric wrong side up on a flat surface. Center the batting on top of the backing fabric, and then center the placemat, right side up, over the batting. Pin all the layers together.
Step 30:
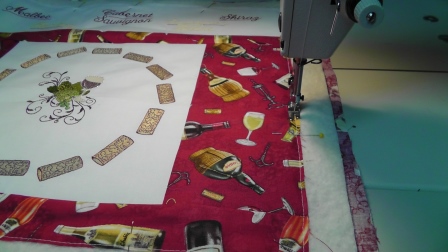
Baste all the layers together using a ¼” seam allowance.
Step 31:
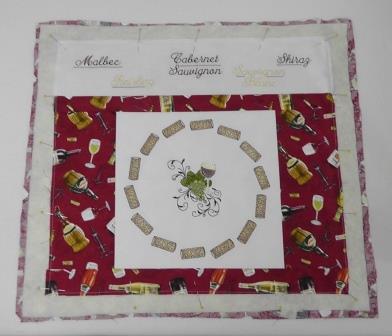
Trim the backing fabric and batting to the cut edge of the placemat; square up the placemat.
Step 32:
Cut bias strips of the wine themed fabric 2 ¼” wide. Stitch sections of bias strips together to make a strip long enough to go around the entire placemat, plus about 10” for turning corners and meeting the ends. Fold the fabric in half lengthwise and press.
Step 33:
With right sides together, stitch the binding to the placemat using ¼” seam allowances and mitering the corners. Use your favorite method for meeting stitching the ends together.
Step 34:
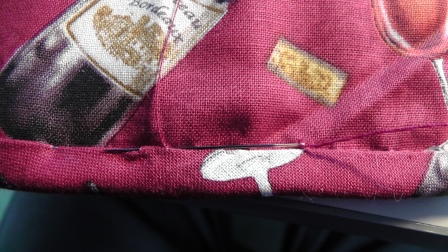
Roll the bias binding to the wrong side and pin in place.
Step 35:
Hand stitch the binding in place.
Step 36:
Pour your favorite wine, slice some cheese, and enjoy the “charger” look to the placemat you’ve just created.
Ramona Baird has been in the embroidery industry for over 23 years. She and her husband owned a commercial and retail embroidery store in Arizona for many years. She is an experienced digitizer having been mentored by award-winners Pat Williams and Lindee Goodall. Ramona is a contributor to “Creative Machine Embroidery” magazine having 5 covers to her credit. Ramona has worked for Wilcom America and served many years as Education Director for the American Sewing Guild. With a degree in fashion design, she is able to design and execute patterns which Pat Williams says are “out of the box” in creativity and application. Ramona likes to challenge the boundaries of embroidery and bring new and exciting designs, ideas, and projects to EmbroideryDesigns.com. She wants embroiderers of all levels to increase their skills and enjoyment in using their embroidery machine for gift-making and personal pleasure.