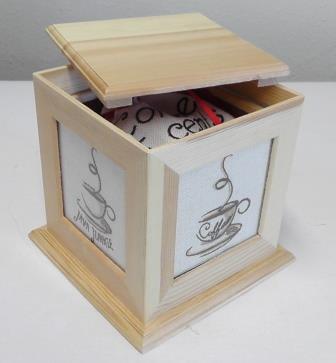
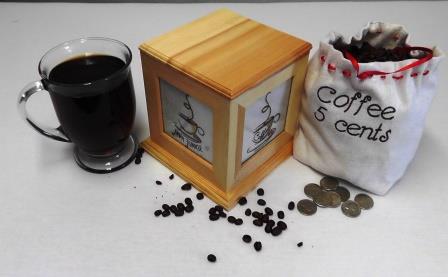
This simple, yet decorative wooden box, rotates on its base making all the embroidered coffee designs viewable with just a turn. Inside is a bag which holds whole beans waiting to be brewed into a fresh cup of coffee.
Embroidery thread (for each design as listed in the stitching sequence)
Tearaway stabilizer
Natural linen fabric (to fit the hoop and embroider the four box designs, for two pieces for the outside and lining of the bag to hold the coffee beans)
Spray starch
Card stock or lightweight cardboard (may be optional; see step 12)
Red 1/8” satin ribbon
Tapestry needle
Whole coffee beans
Embroidery editing software (to resize designs if needed or this may be done at the machine if the machine has this capability)
Since the box you purchase may be different in size than what is shown, techniques will be shown to measure and figure how much fabric is needed for the stitched designs in the box windows and how to measure and make the bean bag for the inside of the box. Hoop sizes vary as well, so cut the fabric and stabilizer to fit the hoop size you have for your machine. Read through all the instructions before beginning this project.
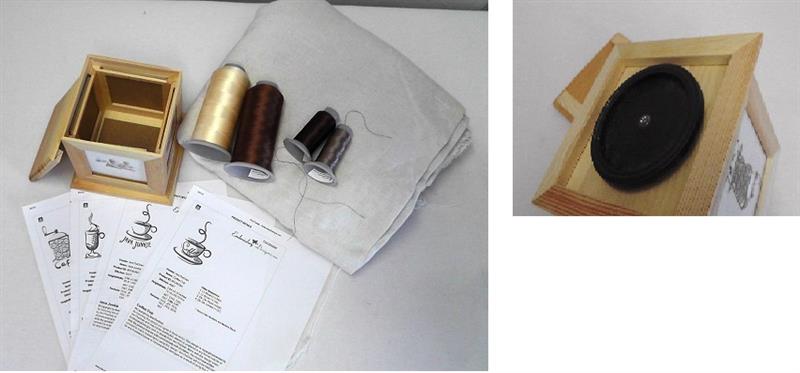
Step 1:
Purchase and gather the supplies needed for the project. The wooden box may be purchased at a craft store. Look for a box with a rotating base.
(Click Image to Enlarge)
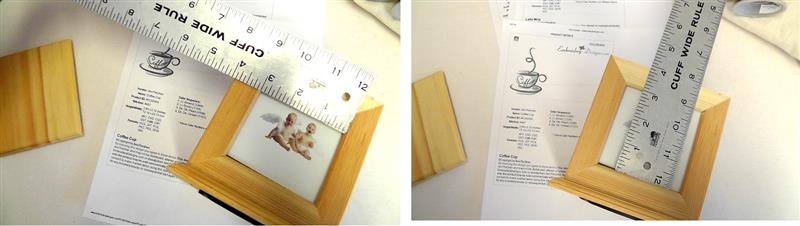
Step 2:
Measure the inside area of the windows of the box to determine if any of the designs need to be resized.
(Click Image to Enlarge)
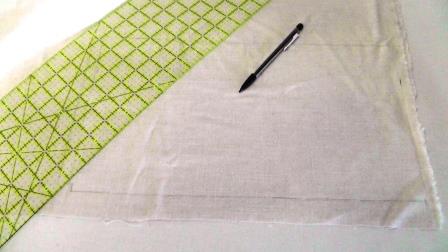
Step 3:
(Click Image to Enlarge)
Also measure the paper insert. This is the size the fabric will be cut after being embroidered. In embroidery software, create a “window” basting stitch file this size. This “window” basting stitch will be stitched first in the embroidery process and be used as the cutting line for the design so it will fit within the box window. If you do not have embroidery software or a machine capable of doing a basting stitch like this, you will have to measure and cut the fabric after the design is stitched, centering the design on the fabric to fit in the box window.
Step 4:
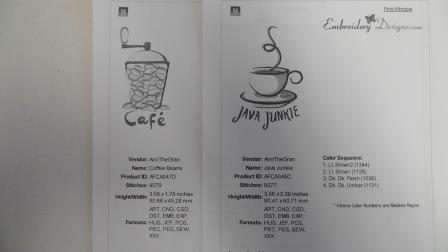
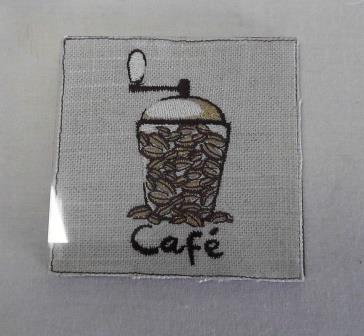
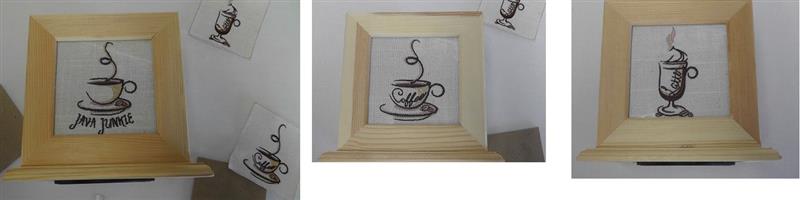
Check the sizes of the designs (AnnTheGran “Latte Mug”, AnnTheGran “Java Junkie” , AnnTheGran “Coffee Cup”, AnnTheGran “Coffee Beans”) and determine if any of them need to be resized in embroidery editing software (or at the machine if the machine has the capability) to fit within the box window dimension. For this box, only the “Coffee Beans” design had to be decreased in size slightly.
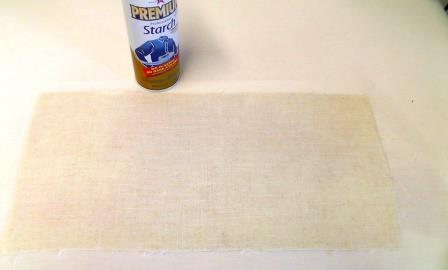
Step 5:
Cut, starch, and press four pieces from the linen fabric large enough to fit in the embroidery hoop.
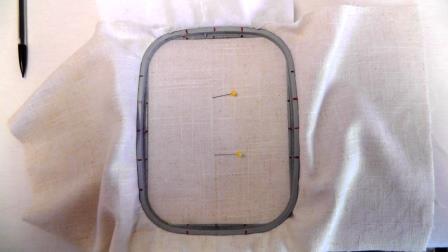
Step 6:
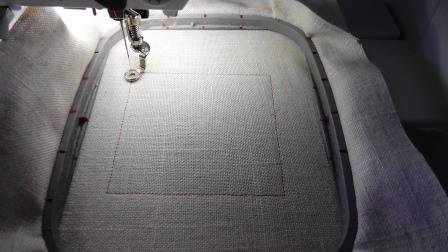
Hoop one piece of fabric with a piece of tearaway stabilizer and stitch the basting “window” file first. This will be the cutting line when trimming the stitched design.
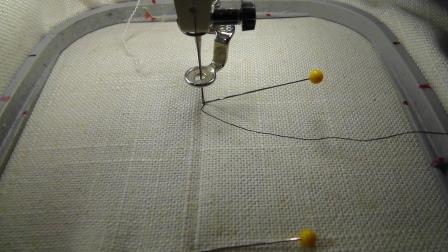
Step 7:
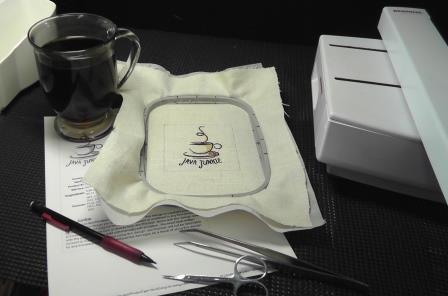
Stitch the design (Note: the coffee is in the photo for “staging” purposes only. Do not have any liquids near your machine when sewing or embroidering.)
Step 8:
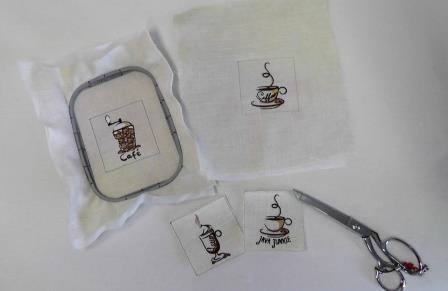
Stitch the remaining designs. Remove the designs from the hoop, press, and cut out along the “window” basting stitch line. Do not remove the stabilizer; it helps keep the fabric stiff making it easier to insert into the box windows.
Step 9:
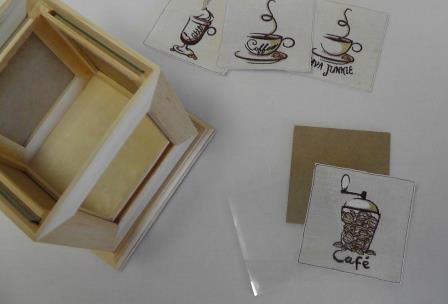
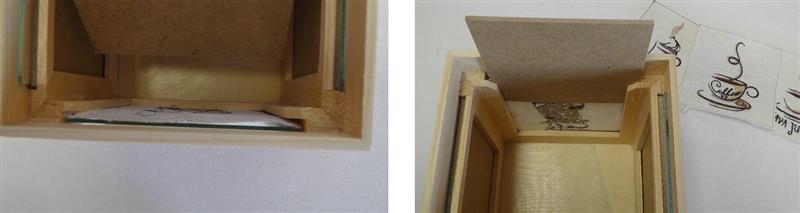
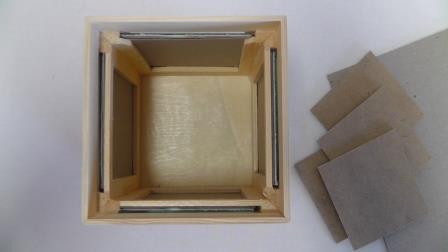
Remove the glass and chipboard from each box window.
Step 10:
(Click Image to Enlarge)
Place one embroidery design behind each glass.
Step 11:
Insert the design, with the glass, behind the box window. Insert the chipboard behind the design.
(Click Image to Enlarge)
Step 12:
Sometimes the fabric with embroidery takes up too much room and the chipboard may not fit behind the design. If this is the case, draw around the chipboard on cardboard or card stock. Cut out new pieces to fit behind the design in place of the chipboard.
Step 13:
Be sure the design is centered in the window
Step 14:
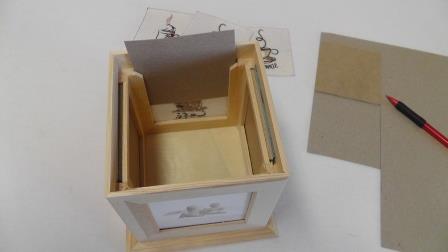
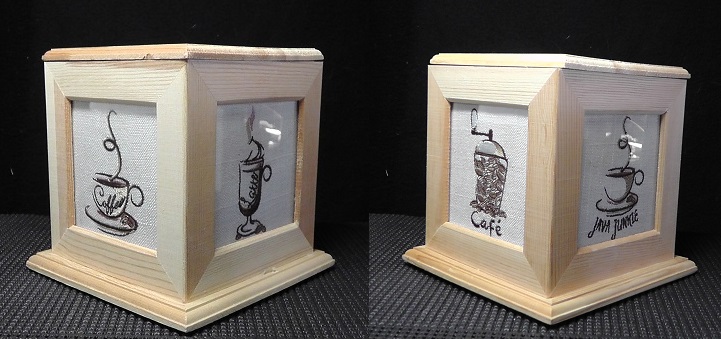
Insert all the designs in the box windows.
(Click Image to Enlarge)
Step 15:
All the designs have been inserted into the box windows.
Step 16:
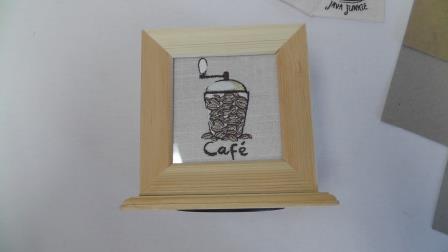
Place the cover on the box. Spin the box to view each embroidery design.
(Click Image to Enlarge)
Step 17:
(Click Image to Enlarge)
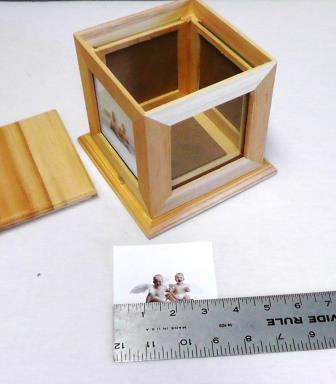
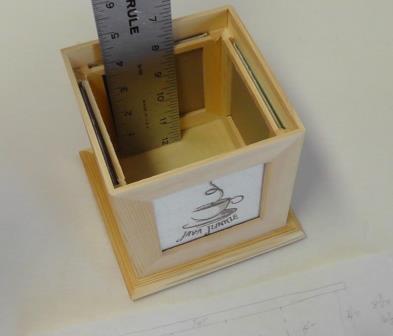
An optional bag to hold whole beans may be made to fit inside the box. Measure the box height and width. This box is a cube of 4”. I will measure and cut the fabric 16” long (to go around the inside of the box by 6” wide (height of the box 4” plus ½ the bottom 2”), plus ¼” seam allowances all around.
Step 18:
Measure and cut two pieces of the linen fabric; one for the outer bag and one for the lining of the bag. On the outer bag, determine and mark the center point of the embroidery design placement.
Step 19:
Starch and press the fabric.
Step 20:
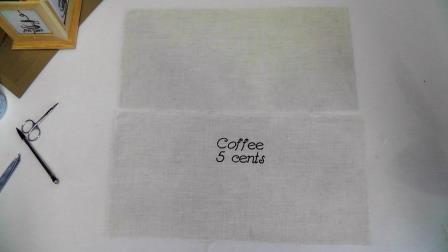
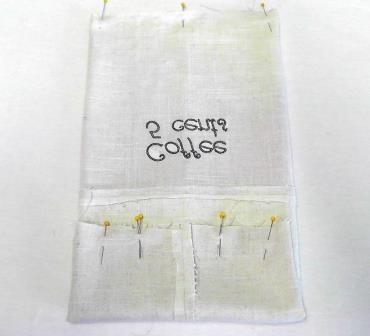
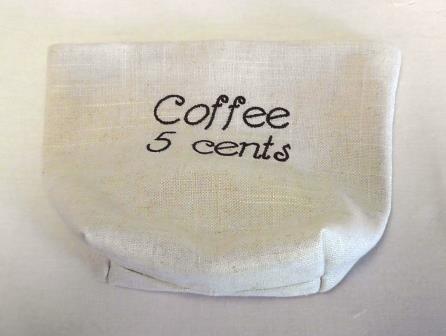
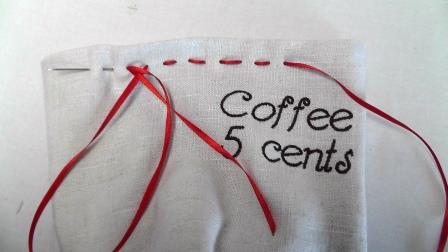
Determine where the embroidery design (AnnTheGran “Coffee 5 Cents” will be centered on the fabric (center front of the bag). Place a pin to locate the center of the design and bottom of the finished embroidery to double check that it won’t go into the bottom of the bag after the bag is sewn.
Step 21:
Place the hooped and stabilized fabric on the embroidery module. Align the center of the design to the center of the fabric marking. Remove the pins and stitch the design.
Step 22:
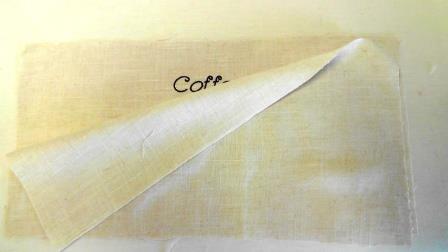
Remove the embroidered fabric from the hoop; remove the stabilizer and press the fabric.
Step 23:
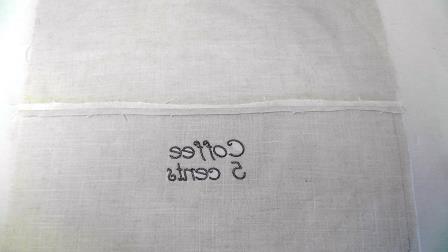
With right sides together, place the lining over the stitched fabric; pin together along the top edge.
Step 24:
Stitch the two pieces together along the top edge using a ¼” seam allowance. Press the seam allowance open.
Step 25:
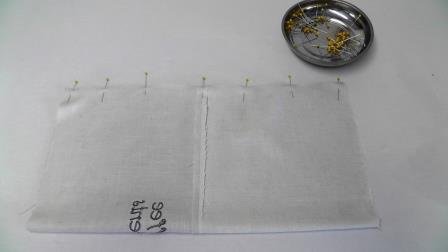
Bring the back cut edges together and pin.
Step 26:
Stitch the back seam and press the seam allowance open.
Step 27:
Meet the center back seam to the center front and pin. This will be the bottom of the bag.
Step 28:
(Click Image to Enlarge)
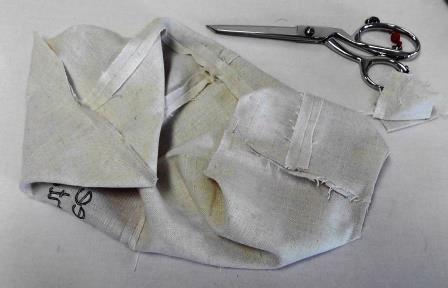
Meet the center back seam of the lining portion of the bag to its center front at the bottom and pin in place. There are now pinned bottom seams for the bag and lining. Sew each bottom seam using a ¼” seam allowance, removing the pins as you sew. Leave a portion of the lining bottom seam unsewn; the bag will be turned to the right side through this unsewn portion of the seam. Next will be to “box” the bottoms of the bag and lining to allow it to sit neatly in the wooden box.
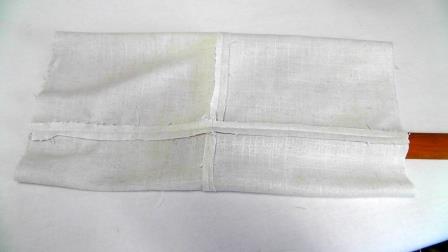
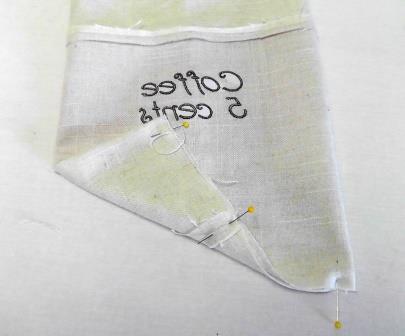
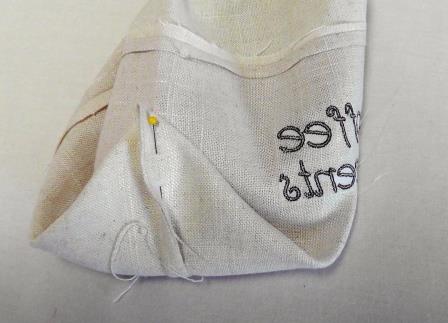
Step 29:
Fold the corners of the bag meeting the bottom seam to what would be a side edge of the bag and place a pin. About 1” from the corner, sew a seam straight across.
Step 30:
Trim off the points leaving about a ¼” seam allowance. Do this for all four corners.
Step 31:
(Click Image to Enlarge)
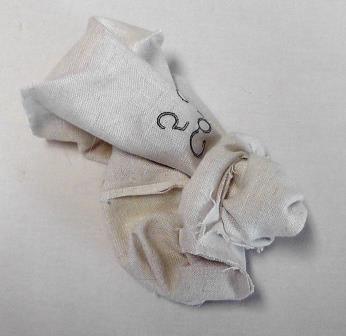
Turn the bag right side out through the unsewn portion of the lining bottom seam.
Step 32:
(Click Image to Enlarge)
Turn the edges of the unsewn seam to the inside and stitch the seam closed.
Step 33:
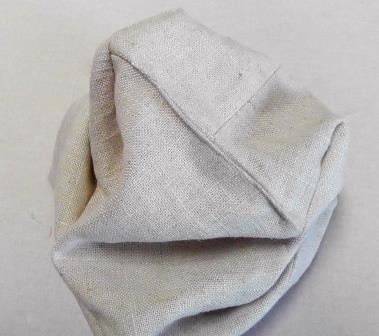
Place the lining inside the bag and press the top edge of the bag, forming out the boxed corners.
Step 34:
Thread a tapestry needle with the ribbon. Do running hand stitches around the top of the bag about ½” below the top edge. Begin and end at the center front of the bag above the embroidery.
Step 35:
Leave a thread tail of ribbon to close and tie the bag with a bow; cut the remaining ribbon. Fill the bag with whole coffee beans.
Step 36:
(Click Image to Enlarge)
Tie the bag closed with a bow, and insert the bag into the wooden box.
Step 37:
A wonderful box with a bag insert which holds favorite coffee beans.
Ramona Baird has been in the embroidery industry for over 23 years. She and her husband owned a commercial and retail embroidery store in Arizona for many years. She is an experienced digitizer having been mentored by award-winners Pat Williams and Lindee Goodall. Ramona is a contributor to “Creative Machine Embroidery” magazine having 5 covers to her credit. Ramona has worked for Wilcom America and served many years as Education Director for the American Sewing Guild. With a degree in fashion design, she is able to design and execute patterns which Pat Williams says are “out of the box” in creativity and application. Ramona likes to challenge the boundaries of embroidery and bring new and exciting designs, ideas, and projects to EmbroideryDesigns.com. She wants embroiderers of all levels to increase their skills and enjoyment in using their embroidery machine for gift-making and personal pleasure.