Border OptionsHugging border, circle, square, or rectangle — with a 3mm satin stitch.
Backing OptionsAvailable with iron-on, sew-on, or velcro backing.
Fast ShippingShipped quickly from the USA.
Free Online Tools
Powerful embroidery utilities that save time and prevent costly mistakes.
Stitch AssistantRECOMMENDED
Get the exact stabilizer, machine settings, needle, and thread color sequence for every embroidery design you purchase — based on that design's stitch density, dimensions, and color count.
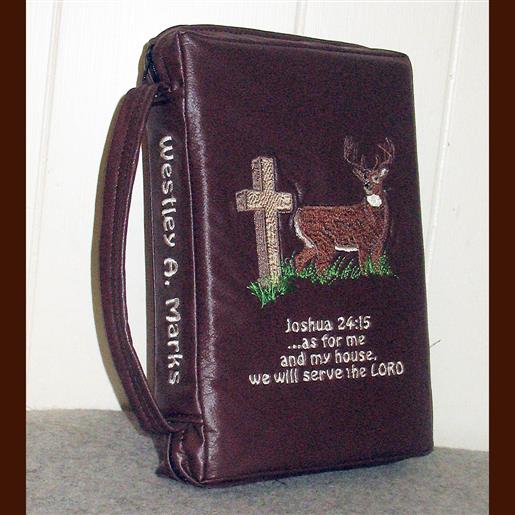
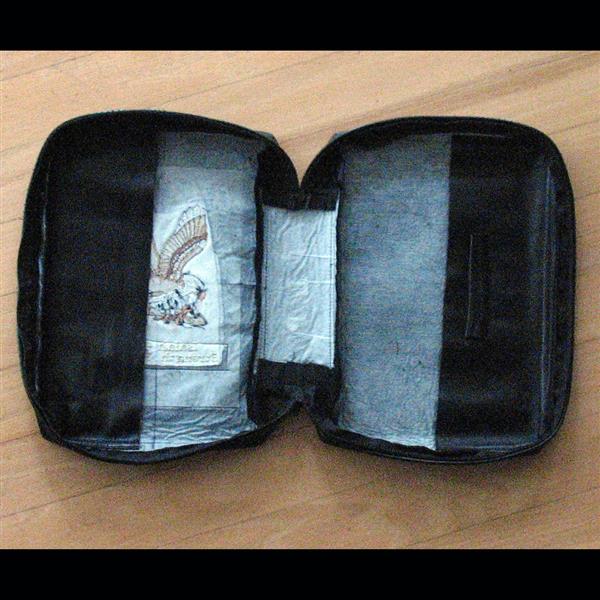
Bible covers are made to custom fit as indicated through ordering. Covers include an embroidery, wording with choice of font and color of font, zipper or no, handle or no, 2 inside pockets with a pen holder on each.
Step 1:
Measure and cut out leather look vinyl pieces to be 1" larger than the size needed for the Bible cover, with the exception of the piece for the zipper that must be cut 2" wider than the measure of the depth of the Bible.
Front and back covers measured first. Inside pockets are measured to be the same height as the cover and 3-4" wide. The spine is measured and cut to be 1" larger than the depth of the Bible and 4-6" long, depending on size of Bible. The piece of vinyl for the zipper is measured to be 2" wider than the depth of the Bible and however long is needed to go around the Bible minus the spine section. Pen holders are 1.5" x 2.5". If a handle is desired, it is cut to be about 3" wide and about 2" longer that the spine.
Step 2:
Construction begins with sewing the pen holders onto the inside pockets about 1.5" from one edge and centered from top to bottom.
Embroidery is also stitched out on the front cover at this time.
Step 3:
Pockets are sewn to one edge of the front and the back, making sure the one sewn on the embroidered front is sewn so it will be on the left hand side of the front inside cover.
Step 4:
Spine is sewn to the front and back cover. It is centered in the middle and placed on the opposite side of the pockets.
(Click Image to Enlarge)
Step 5:
The handle piece is folded so both edges overlap a bit on the back side. This piece is now sewn down the middle lengthwise, being sure that both raw edges are included in the stitching. It is then sewn to the ends for the spine before the zipper application
Step 6:
The strip for the zipper application is cut in half, lengthwise, and the zipper sewn down the middle.
***to have enough length in the zipper, a Sullivan zipper tape will need to be purchased***
Step 7:
The zipper is then stitched to the outside edges of the front and back beginning at one side of the spine, going around the Bible, and ending at the other side of the spine.
The zippered section will have to be clipped at the corners for the vinyl to go around the corners.
Step 8:
The last step before trimming is to do a stitching on the spine, where the zipper and spine overlap. This is a difficult step as the handle has to be moved out of the way and 4 layers of vinyl have to be stitched through.
Step 9:
Trim one of the inside seams on each seam (top, bottom, sides, etc.)
Began sewing and crafting as a child and began embroidering items in the 80's. Am now one of the instructor at a local sewing machine shop in our area that sells Baby Lock and Janome machines.
That, my local clientele, and having my 2 etsy shops (busybeeworker and busybee-holidays) keeps me having fun and busy.