2026 Flash Sale
Live Chat
Embroidery Designs
Welcome, Embroiderer
Login
68. Sudoku Game
{{mainImageAlt || (productInfo._source && productInfo._source.name) || ''}}

68. Sudoku Game Embroidery Project

By   Anonymous   on   April 13, 2014
  • SKILL LEVELBeginner
  • TIME REQUIRED02:30
Description

Please read the instructions.

Step of

Materials

Project Preview Video

Materials
  • Plain colored fabric
  • Different colors of felt or plain white felt with different colors

  • Designs used in this project


    Step 1:
    (Click Image to Enlarge)
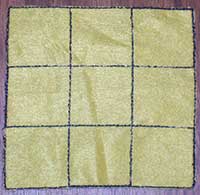
    All board pieces usually would be sewn on the same color, but they will be different in this tutorial for easy visual differentiation. Begin with center board piece. Stitch completely and remove from hoop. Trim close to outline stitching. (pic 1: center board)


    Step 2:
    (Click Image to Enlarge)
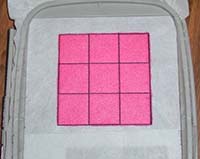
    Stitch first color of side board piece (it appears the same as the center board piece) and trim felt close to outline without cutting stabilizer. (pic 2: side board trimmed)


    Step 3:
    (Click Image to Enlarge)
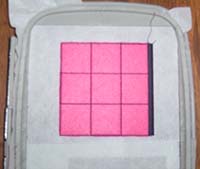
    Stitch first satin stitch to create the outside border. (pic 3: side board with outside satin stitch)


    Step 4:
    (Click Image to Enlarge)
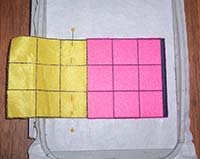
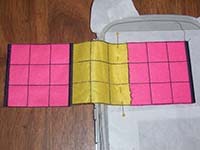
    Align center piece on opposite side. Match inner lines, and the corners will automatically match (or at least be close enough). Secure with pins outside of stitching area. (pic 4: center board aligned with side board) Stitch second satin stitch so that it joins the two pieces into a single unit. Remove from hoop and trim stabilizer.


    Step 5:
    (Click Image to Enlarge)
    Repeat step 2 on all three other sides of center piece. (pic 5: center board attached to two side pieces)


    Step 6:
    (Click Image to Enlarge)
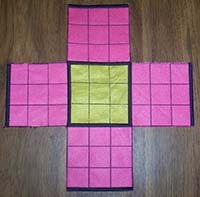
    Resulting unit will now resemble a cross, with satin stitching all around center piece and on the outer ends of the cross "arms". (pic 6: center board with all side pieces attached)


    Step 7:
    (Click Image to Enlarge)
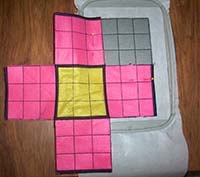
    Stitch first color of corner board piece, as with side pieces. Align top of one side piece with bottom of corner piece and side of ajoining side piece with left side of corner piece, again using the inner lines as your guide. (pic 7: aligning and attaching corner piece)


    Step 8:
    (Click Image to Enlarge)
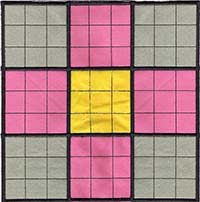
    Complete satin stitch and remove from stabilizer. Repeat as indicated with additional corner board pieces. The board is now complete. (pic 8: completed board)


    Step 9:
    (Click Image to Enlarge)
    To create number tokens: a placement stitch and the numerals stitch out first. Float a second piece of fabric underneath and stitch the tackdown stitch to keep the pieces together. Trim fabric close to placement stitches at this time (before stitching the satin stitch outlines) for a neater look. Stitch final satin stitch and remove from stabilizer.
     
    Notes: do not use knit fabrics for this pattern. All pieces should be stitched on plain colored fabric (patterns distract while working the puzzles) with medium weight tear-away, cut-away or wash-away fibrous stabilizer (not the clear film type). If felt or flannel is used, the natural properties of the fabric will hold the tokens in place while playing. If other fabric is used or for added adhesion, Velcro-type dots can be added to the backs of the tokens and the center of each square on the board. Just be sure that all "hook" sides are on the tokens and all "loop" sides are on the board, or vice versa. Use different colors of felt or plain white felt with different colors of thread (same color top and bobbin) for each numeral to give easy differentiation on the number dies. If more than one set will be made, using an identifying fabric on the back of each token per set makes it easy to keep the sets separate (ie. all red on the back of one set and all blue on the back of the second set).
     
    Smaller children enjoy using the set to play "Noughts and Crosses" (tic tac toe). The set comes with a bonus of four math symbols that can be used to practice simple math problems. They are sewn out just like the number tokens.
    Meet the Author: Anonymous
    Anonymous
    More From This Author
    Link is Broken, Please check the URL
    Exclusive Embroidery Offers!
    Copyright © {{ currentDate | date:'yyyy'}} - EmbroideryDesigns.com
    GET 50% OFF! ×