


PROJECT INSTRUCTIONS


PROJECT INSTRUCTIONS

ITH Quiet Book Embroidery Project
By
Rhonda Slack
on
April 14, 2014
PROJECT DETAILS
SKILL LEVEL
Beginner
TIME REQUIRED
04:30
Description
Please read the instructions.
Project Preview Video

QUICK VIEW
Chick, Mermaid & Cat Embroidery Bundle – Fun Designs (12 Designs)
$23.88
$14.33
Circle Price: $14.33

Fish Color Page
$3.89
Circle Price: $2.92

Finished Edge Book
$3.89
Circle Price: $2.92

Cat Coloring Page
$3.89
Circle Price: $2.92

QUICK VIEW
My Book Cover
$3.89
$1.95
Circle Price: $1.95

QUICK VIEW
Book Bottom Pocket
$3.89
$1.95
Circle Price: $1.95

QUICK VIEW
Color Page Dog
$3.89
$1.95
Circle Price: $1.95

QUICK VIEW
Color Page Bear
$3.89
$1.95
Circle Price: $1.95

QUICK VIEW
Flower Color Page
$3.89
$1.95
Circle Price: $1.95

QUICK VIEW
Chick Coloring Page
$3.89
$1.95
Circle Price: $1.95

QUICK VIEW
Frog Coloring Book
$3.89
$0.99
Circle Price: $0.99

Book Page Pocket
free
Circle Price: $0.00

Top Pocket Velcro
free
Circle Price: $0.00

QUICK VIEW
Cut Away Stabilizer - 2.5 Oz wt.
$8.94
Circle Price: $8.05


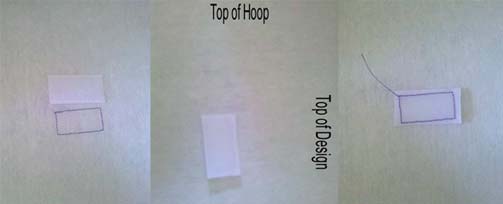
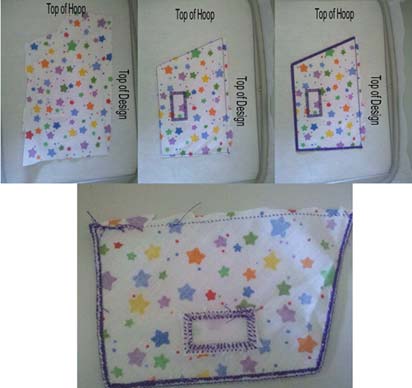
| Materials Cotton fabric of your choice, white cotton of a heavier tighter weave. Tear away stabilizer and plastic vinyl ( I recommend clear vinyl to keep the child’s markers and such from bleeding through. 1 ¼” Velcro I find that the washable crayons work better. The washable markers tend to bleed more when washed and not wash out as well. Please test crayons and markers before giving them to your child. |
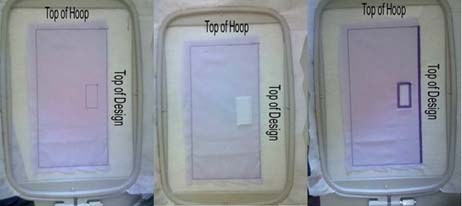
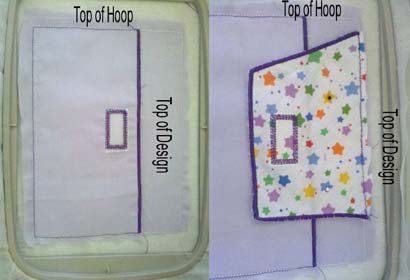
| Designs used in this project |
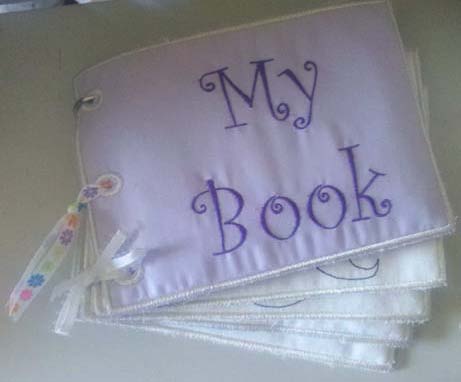
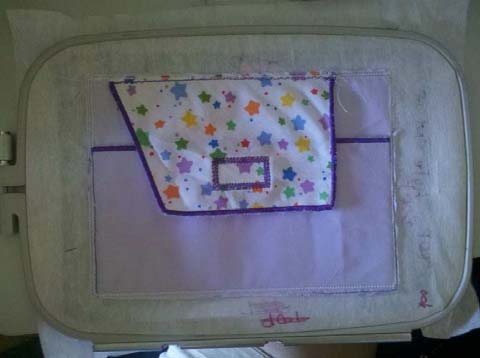
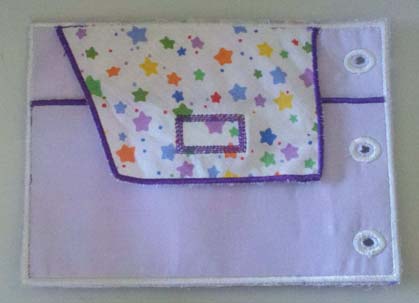
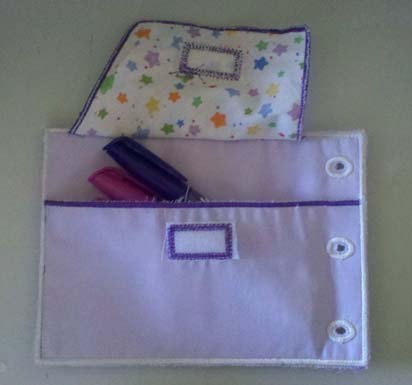
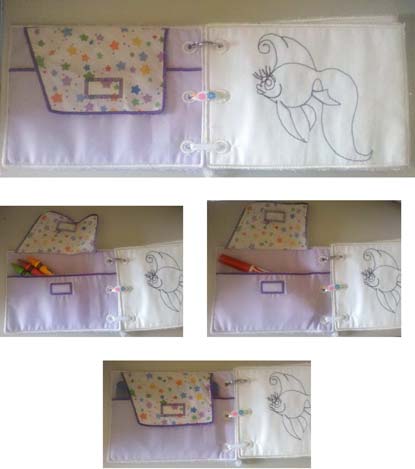
| Final Product: What You Will Create |
 |
|


Projects You May Like
Meet the Author:
Rhonda Slack

I am a work at home mom and a retired Air Force wife of 20 yrs. I have traveled the world with my husbands career and loved it. My favorite is still Guam. I sew and donate to New Borns In Need and to my local Church Humanitarian Projects. I learned to digitize out of the pure love of the embroidery machine. It's great to be an American! God Bless Our Troops and Bring Them Home Safely.
Feedback
Characters Remaining
Please Login to Submit a Feedback
Invalid Characters, Please enter a valid Comment
Please enter a valid Comment
Reviewed On
Link is Broken, Please check the URL