


PROJECT INSTRUCTIONS


PROJECT INSTRUCTIONS

Removing an Embroidery Design Embroidery Project
By
Pat Williams
on
September 23, 2013
PROJECT DETAILS
Description
Whether we missed a color change, didn’t back up enough after a thread break, or the machine just messed up, we are all faced at one time or another with this challenge.
Project Preview Video
Removing An Embroidery Design
One of the questions most often asked is "How do you take out an embroidery design?" Whether we missed a color change, didn’t back up enough after a thread break, or the machine just messed up, we are all faced at one time or another with this challenge.
|
 | Step 1:Always examine your embroidery work as you remove it from the machine. Look at the front and the back of the work before you remove it from the hoop. All the steps to remove a design are best accomplished when the whole piece of backing is still intact in the hoop. You can re-hoop a design if necessary, but if you have already trimmed the backing it is much more difficult to remove the design. Step 2: Turn your hoop to the backside. It is the bobbin thread that is holding your embroidery together. So the trick to removing the design is to eliminate all of the bobbin thread. Do not try any threads on the top side of the work. |
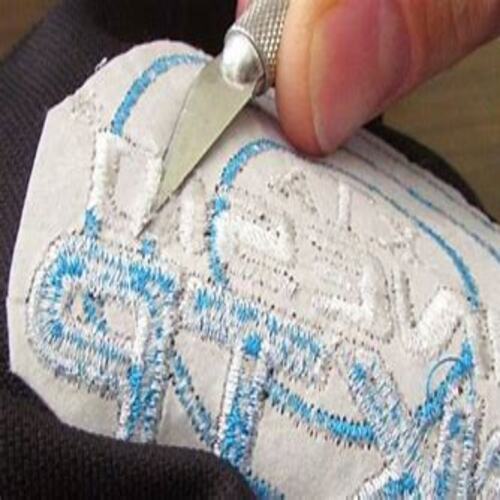
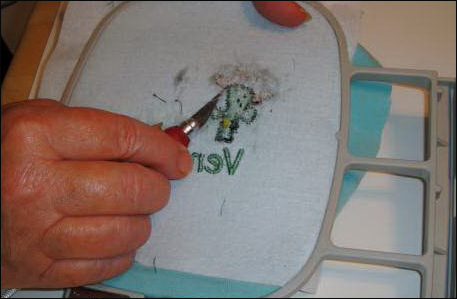
 | Step 3.Position the Exacto Blade. Hold the Exacto Blade at a comfortable position in your hand with sharp side of the blade up. The point of the blade is very sharp, always position the blade away from you. Gently lift and cut the bobbin thread on the back side of any letter or other satin stitches as the case may be. |
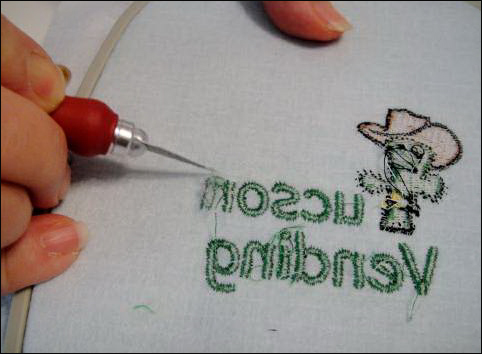 | Step 4:Turn the hoop. As the stitches turn in the embroidery, turn the hoop to keep the blade pointed away from you as you slice the bobbin stitches. |
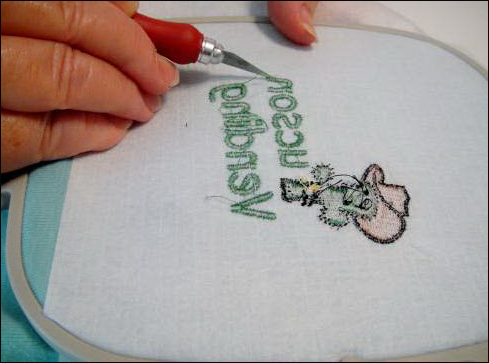
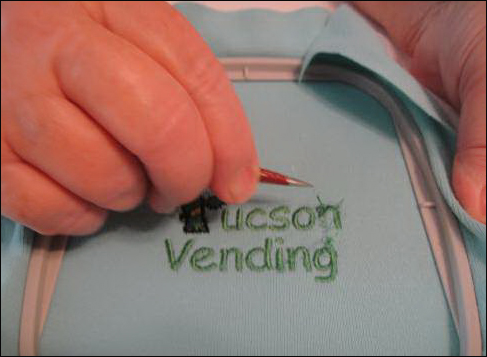 | Step 5:Remove the top thread. After you have cut all the bobbin thread on the back side, turn the hoop to the right side and with the tweezers gently pull out the top thread. Note: work on just one letter or section at a time. Step 6:Stubborn threads. If a thread resist being pulled out - do not tug on it. It is being held by a bobbin thread stitch in back. If you pull it, it will tighten that stitch and make it almost impossible to lift out. So, turn the work back over and cut bobbin threads again. Repeat as necessary. Tie-ins and Tie-offs are the most common areas in which this may happen. Step 7:Repeat. Repeat steps 3 through 6 until all the letters have been removed. |
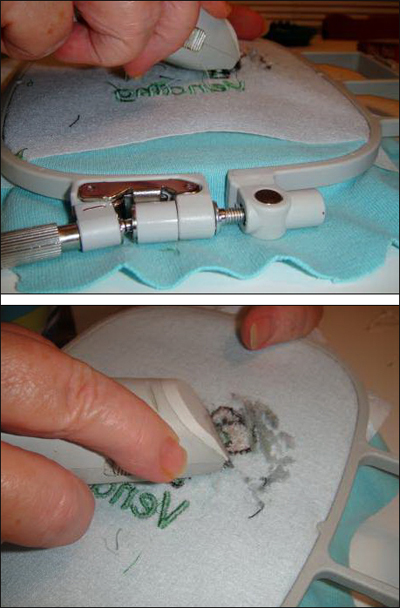 | Step 8:Removing fill stitches. Fill stitches can be removed by slicing through all the bobbin stitches with the Exacto knife, however it is accomplished more quickly with the Peggy Stitch Eraser. Hold the stitch eraser in what you think would be upside down position. You want the blades pointing down at the work rather than sliding at a flat angle to the stitches. You will probably want to place a finger or two underneath the work to give a little platform for the Stitch Eraser to glide over, but try not to loosen the work in the hoop too much. You need to hold the stitch eraser at an angles or about 15 degrees to the work. It takes a few minutes before you start seeing anything happen, but the stitch eraser is cutting the bobbin threads on the back side of the work. |
 | Step 9:Removing the top thread. When you feel as though you have cut a significant number of bobbin threads, turn the work over. With the tweezers gently pull the loose threads. This will make it evident to you where you have to go back and stitch erase again. |
 | Step 10: Exacto knife again. When satin stitches have been used around or on top of the fill stitches, you may need to go back to the Exacto knife to eliminate those satin stitches. |
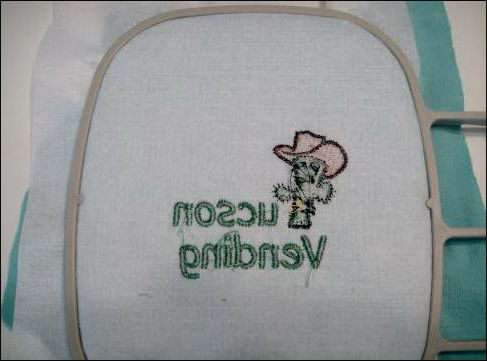
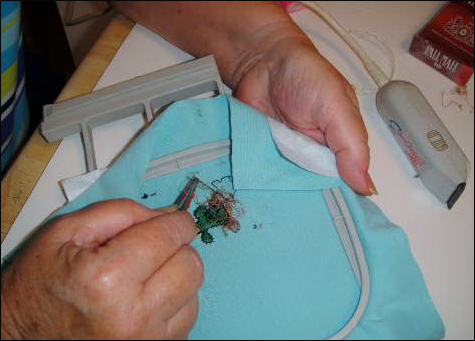
 | Step 11:Fragile fabric. You have removed the embroidery, but the underlying fabric is very fragile as it has already had thousands of needle penetrations. Depending on your fabric you may have one or two minor holes. A knit fabric was chosen for this example as it is the most likely fabric to develop holes. You will want to close those holes with a fine needle and thread before you re-embroider the fabric. If you do not sew up the holes they are likely to stretch when you re-embroider the fabric. |
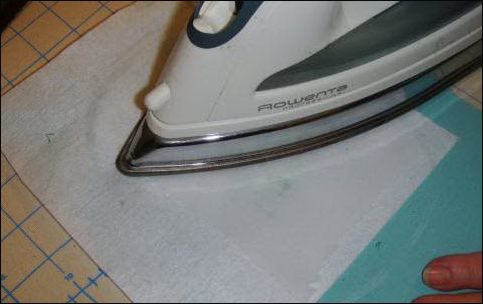 | Step 12: Back the fabric. If you are going to apply a different design over the previously embroidered area you can un-hoop the fabric and iron on a piece of fusible knit interfacing to give the fabric more strength. If you are going to sew the same design over the removed design attach a new piece of backing with spray adhesive. |
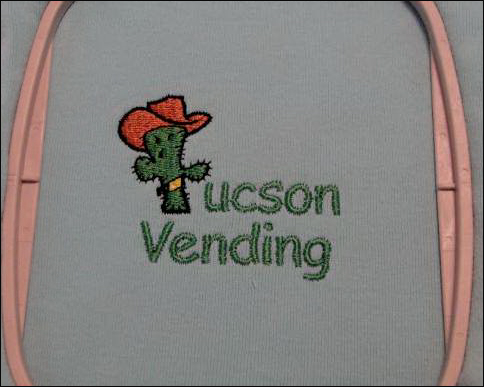
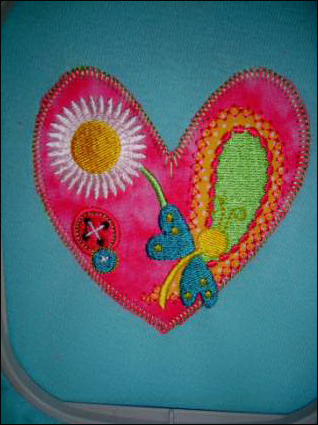 | Step 13: Applying a new design. Depending on what your original design is like, you may not be able to apply the same design to the shirt. In this instance an applique that would completely cover the damage left by the original design was applied over the design. |
 | Step 14: Applying the same design. If the original design is a solid circle or square with all the lettering contained inside the object, you can re-sew the original design over the damaged area. It is recommended that you increase the size of the design by 10 to 15% before re-embroidering to ensure that you will cover all the edges. Learning to take out an embroidery design is a worthwhile endeavor and worth practicing, so you will be armed with the correct tools and experience when saving a shirt, jacket or cap becomes critical. For the love of embroidery... Pat Williams |
Projects You May Like
Meet the Author:
Pat Williams

Award winning Digitizer, Embroidery Educator, Author and a Consultant to the Industry, Pat Williams has 30 years of experience in the embroidery industry. Pat has won multiple awards for her digitizing expertise including the 2007 Impressions Awards Grand Championship, Best of Show as well as the 1st and 2nd Place Awards. Pat’s love of digitizing has afforded her the opportunity to write numerous articles for Impressions magazine in the United States and Images Magazine in Europe. In 2001 Pat was named “Embroidery Educator of the Year.” For many years Pat taught digitizing seminars at the ISS Shows in Long Beach, CA and for Compucon software. She now resides in Tucson, AZ.
Feedback
Characters Remaining
Please Login to Submit a Feedback
Invalid Characters, Please enter a valid Comment
Please enter a valid Comment
Reviewed On
Link is Broken, Please check the URL