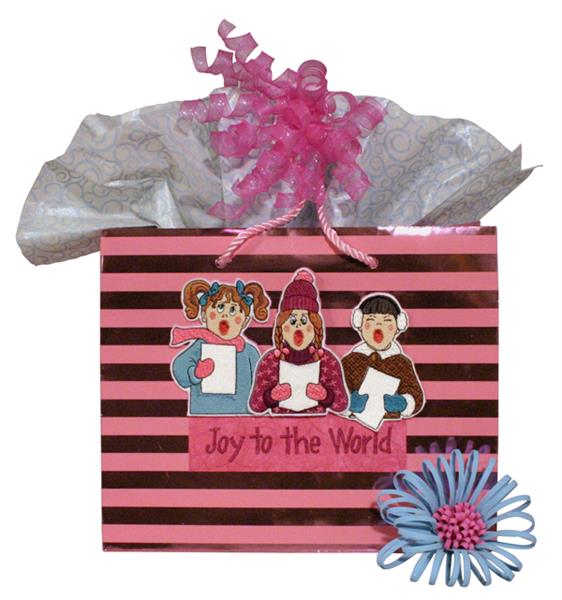
This project uses Fancyworks Studio, an easy to use lettering,
editing, and digitizing home embroidery software combined with
time-saving hooping techniques featured from If You can Hoop It, You Can Embroider It, Book 1 Gift Items.
Step 1:
Embroidery Software Instructions
Insert Fancyworks Studio CD into your computer’s CD-ROM drive and install software following the on-screen instructions.
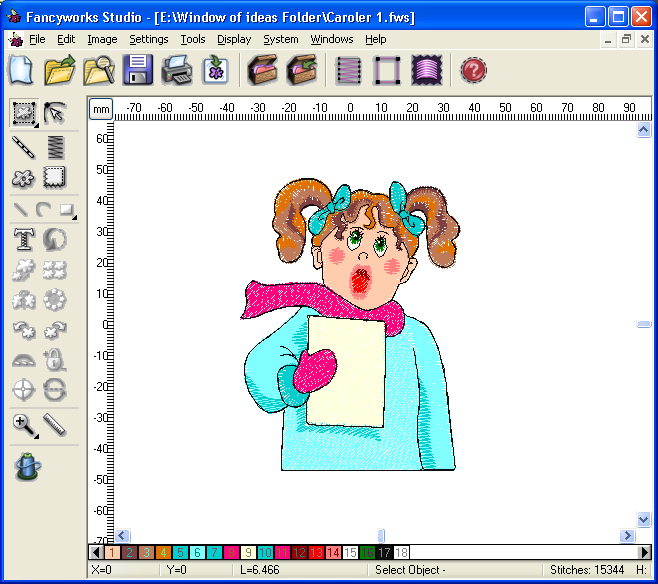
Open Fancyworks Studio software. In the Menu Bar under System & Unit of Measurements, select Millimeters and click OK. Click on the Open Design icon. Locate Caroler1.fws on the Creative Series CD. Click Open.
(Click Image to Enlarge)
Step 2:
Turn stitches on by clicking on the Display Stitches icon. If you want to change the colors in the design, press the SHIFT
and click on the color you want to change in the bottom color boxes.
Click on the Select New Color icon. The Select Color from Threadchart window will open. Choose a thread color, click OK.
Step 3:
Click on Add Design to Recipe Box. A Design Information
pop-up window will appear. Enter the thread colors and product numbers
for the type of thread you will be using (i.e., Isacord 1140). Follow
the sew out sequence chart on the right as a guide. Save changes. Print Information as a reference for embroidery sew out sequence.
Step 4:
Click on the Save Design
icon. Save the design in the file format for your embroidery machine
and place it in a folder you use to store your embroidery designs that
are then sent to your embroidery machine. Using your embroidery software
for your embroidery machine, load the design into your embroidery
machine.
Step 5:
Hoop the felt and cutaway stabilizer. Embroider the design. Remove the
embroidery from the hoop. Clip jump threads. Trim the felt and cutaway
close to the edge of the embroidery leaving approximately 1/16” of felt
and cutaway all around.
Repeat above steps for Caroler 2 and Caroler 3. Set them aside.
Step 6:
Lettering
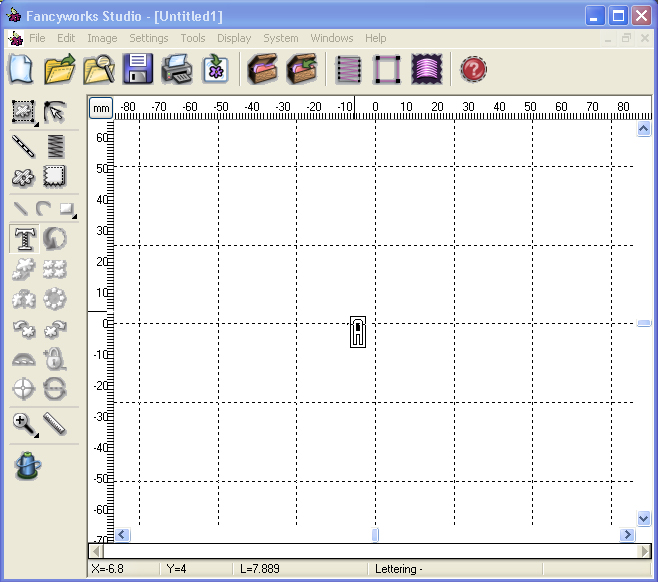
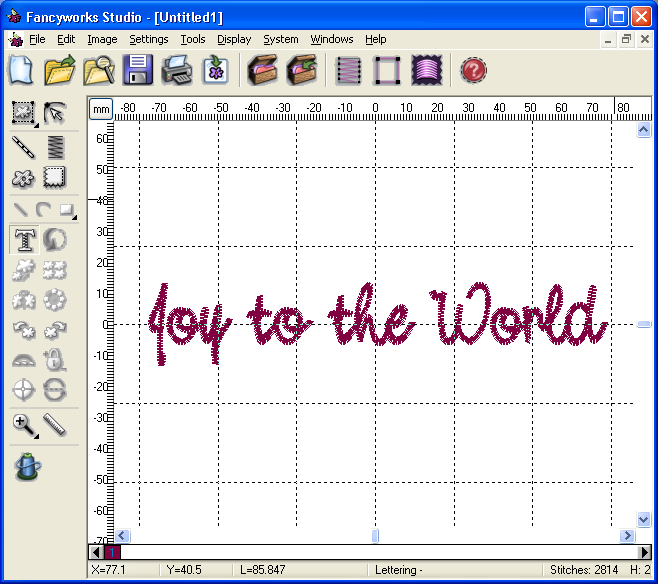
Click on New Design icon. Select Text icon. Move the cursor to the center of the work area and click. A text
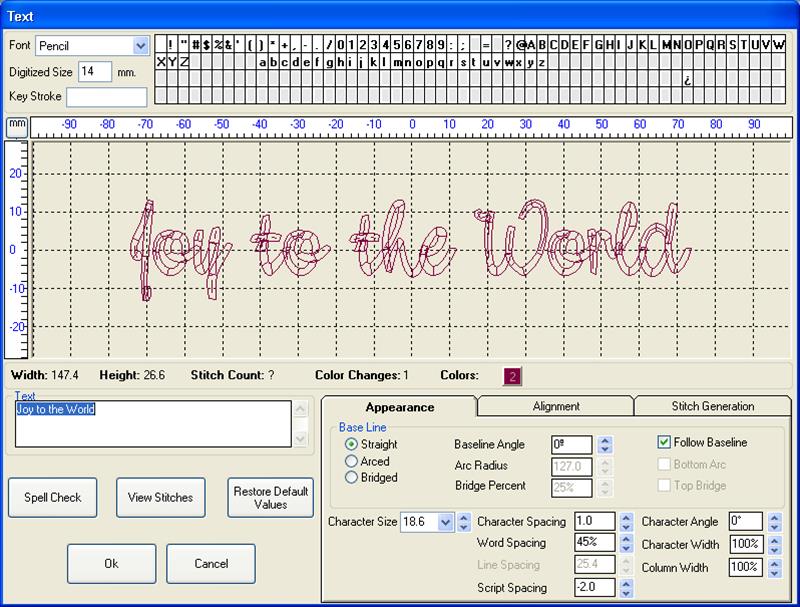
pop-up window will appear. In the Text box enter the words “Joy to the World.” Click on the Font down arrow and scroll through the fonts until you reach Pencil. Select it.
(Click Image to Enlarge)
Step 7:
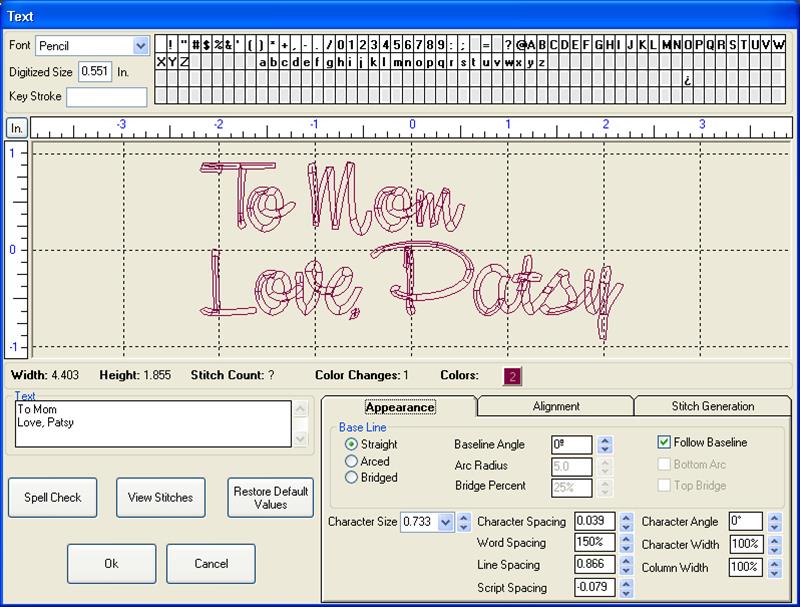
Under the Appearance Tab set the following:
Baseline: Straight
Character Spacing: 1.0
Character Angle: 0
Column Width: 100%
Character Size: 18.6
Word Spacing: 35%
Character Width: 100%
Script Spacing: -2
Under the Alignment Tab: check Kern
Under the Stitch Generation Tab:
Density: 1.5
Column Type: Satin
Trim: Check Letter (if applicable)
Stitch Length: 2.5
Lock Stitch: Check Letter
No Underlay
(Click Image to Enlarge)
Step 8:
Save Design
Save the design as a .fws by clicking on the Save Design icon. Name the file Joy.
(Always save as a .fws for future edits). Using your embroidery
software for your embroidery machine, load the design into your
embroidery machine.
(Click Image to Enlarge)
Step 9:
Name Tag for other side of bag
Repeat Lettering steps above. The previous settings will appear. In the Text box, enter the words you would like to have appear on the name tag. Under the Appearance Tab, change the Word Spacing to 50% and Line Spacing to 22. Under the Alignment Tab,
select Center for Multi Line Justification. All other settings stay the
same unless the names are long. In that case, you may need to adjust
the character size to fit within the 6 inch card stock. Click OK. Repeat
Save steps above, save file as Name Tag. Using your embroidery software for your embroidery machine, load the design into your embroidery machine.
(Click Image to Enlarge)
Step 10:
Hooping Technique
Set up your embroidery machine to embroider the Joy
design. It may be necessary to rotate the design 90 degrees depending on
your machine.
From the card stock, cut a rectangle 6” x 2.5” or large enough to cover any wording or logos on your gift bag.
Step 11:
Cut a piece of adhesive-back stabilizer larger than the hoop. Peel the
paper off the stabilizer to reveal the adhesive. Lay the stabilizer on a
flat surface with the adhesive side up. With the top and bottom hoops
together, place the hoops on top of the adhesive stabilizer and press
until the stabilizer sticks to the hoops. It should be smooth with no
waves in the stabilizer. Take the outer edges of the stabilizer and wrap
them around the hoop for added stability.
Step 12:
Lay the 6” x 2.5” piece of card stock in the middle of the hoop but
slightly off so the lettering will appear on the bottom half of the
card. Gently press down so it will stick to the adhesive stabilizer.
Attach the hoop to the embroidery machine. Embroider the
design. When finished, remove card stock from the hoop and trim
stabilizer even with edge of the card.
Follow the same procedure for the Name Tag but center the card stock in the hoop.
Step 13:
Bag Construction
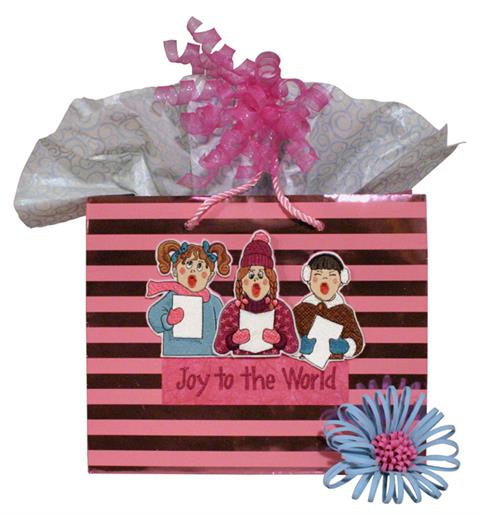
With household glue, glue the card stock with "Joy to the
World" in the center area of the gift bag, making sure it covers any
words or logos on the bag.
Glue Caroler 1 and Caroler 3 on either end of the card
stock above the stitched type. The bottom edges should be even and
parallel to the type.
Step 14:
Take 4 pieces of PopDots or 4 pieces of 1/8” thick foam core – ½”
square and stack two pieces together to form 2 sets. Adhere them to the
wrong side of Caroler 2, one on her hat an the other between her
mittens. (Tthe PopDots have an adhesive backing that you peel and stick,
if using foam core, adhere with household glue.) Place her between the
two Carolers with bottom edge even.
Glue the name tag on the other side of the bag.
You’re finished! Now you can use your custom holiday gift bag for a special present.
Deborah Sexton, the former editor of IMPRESSIONS magazine, has been in the decorated apparel industry for 25 years. She currently does marketing and public relations for decorated apparel suppliers as well as freelance writing for numerous industry publications. You can reach her at [email protected].