Border OptionsHugging border, circle, square, or rectangle — with a 3mm satin stitch.
Backing OptionsAvailable with iron-on, sew-on, or velcro backing.
Fast ShippingShipped quickly from the USA.
Free Online Tools
Powerful embroidery utilities that save time and prevent costly mistakes.
Stitch AssistantRECOMMENDED
Get the exact stabilizer, machine settings, needle, and thread color sequence for every embroidery design you purchase — based on that design's stitch density, dimensions, and color count.
True "Hand Look" Cross Stitch by Machine using Pattern Maker software.
This lesson will focus on how to create and stitch together cross
stitch designs larger than your hoop with perfect precision. You can
stitch these designs on any embroidery machine in any hoop size.
I have been using and teaching the Pattern Maker software for the
past seven and a half years all over the country and have created
multimedia tutorials on exactly how to use this program to its fullest
potential.
Download a four day trial version of the Pattern Maker software at no
risk. It is a full working version. (Be sure to download the
Professional version with machine add on). The website for Pattern Maker
is www.hobbyware.com.
Step 1:
(Click Image to Enlarge)
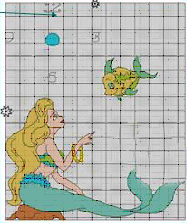
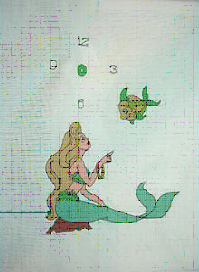
Use the centering marks on the graph you chose to mark where to scan.
Scan graph in sections that fit your scanner.
Scan large graphs into a graphics program. It makes them easier to manage.
Import each section into Pattern Maker and complete as you would a normal graph as a template.
Create an empty pattern page the size of the whole
design and copy and paste each section into the new pattern to create a
whole pattern.
Step 2:
(Click Image to Enlarge)
For this example we will be using the Mermaid design.
Stitch out part one of the design following the color order printed out of Pattern Maker.
The last color that will stitch will be the alignment lines.
Step 3:
(Click Image to Enlarge)
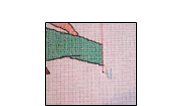
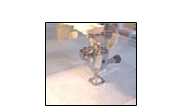
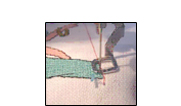
Using a quilting basting gun put a quilting tack in the first and last hole of the alignment line.
This is a basting stitch and easily pulls out so this will secure the alignment.
Step 4:
(Click Image to Enlarge)
Load Design part 2 to machine.
The first color that will stitch will be the alignment line.
Hoop sticky-paper stabilizer.
Stitch alignment line without thread in the sticky paper.
Step 5:
(Click Image to Enlarge)
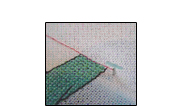
Take hoop off machine.
Place a thumb tack in the first and last hole of the alignment line.
Step 6:
(Click Image to Enlarge)
Line up fabric with Design Part 1 so that the thumb tack comes through the same hole as the quilting basting tack.
Secure to sticky paper.
Remove thumb tacks.
Step 7:
(Click Image to Enlarge)
Stitch the alignment line again without thread in the needle making
sure that the needle goes into the exact stitching of the original
alignment line.
When it lines up exactly the rest of the design will sew out perfectly.
Step 8:
(Click Image to Enlarge)
This is what the entire design looks like lined up after stitching.
The only place the design goes together is in the mermaid's tail.
Step 9:
(Click Image to Enlarge)
This is a picture of the finished mermaid clock frame project.
You can use this method for stitching all kinds of large designs, both embroidery and cross stitch!
Step 10:
With Pattern Maker 4 Cross Stitch, stitch large X-stitch graphs perfectly, no matter what hoop size you have!
Becky combines her 20+ year cross stitch experience with machine embroidery to create her own design collections, teach others in her techniques and distribute her designs to well-deserved acclaim through the internet currently to fifteen countries and counting! She has been an educator for Hobbyware's Pattern Maker software for the past nine years and consulted in the production of the machine embroidery version of the software. Becky is also a distributor of the software and bundles it with her self-guided tutorial CD-ROMs. You can contact Becky at [email protected].
















































 Bags & ZippersIn-the-hoop bags, pouches & zipper projects
 Mug Rugs & CoastersQuick gift-ready mug rugs & coasters
 Quilts & Quilt BlocksIn-the-hoop quilt blocks & layouts
 Kitchen & DiningPlacemats, trivets & kitchen ITH projects
 Home DecorDecor accents you stitch entirely in the hoop
 OrnamentsHoliday & keepsake in-the-hoop ornaments
 ED.com StabilizersOur in-house stabilizers for every project (7 Stabilizers Available)
 Sulky StabilizersSulky stabilizers for every project (100+ Stabilizers Available)
 Madeira StabilizersMadeira stabilizers for every project (75+ Stabilizers Available)
 View All StabilizersView all stabilizers (200+ Stabilizers Available)


