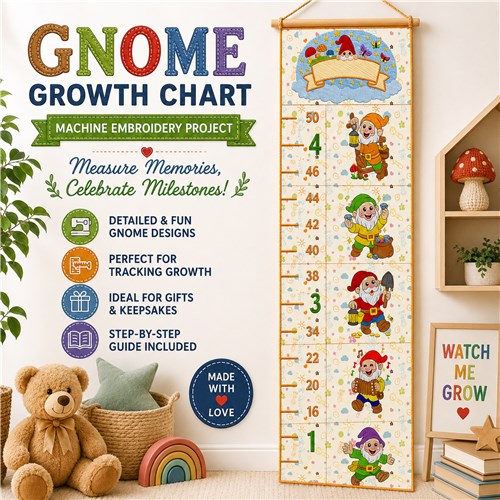
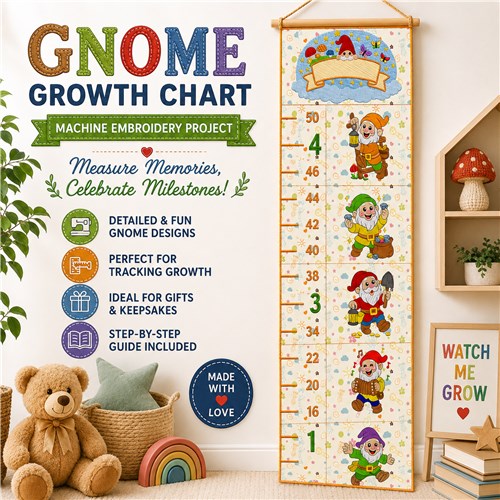
Create lasting memories with this adorable Gnome Growth Chart featuring playful gnome characters and milestone markers. Perfect for tracking a child’s growth while adding charm to nurseries, playrooms, and keepsake quilt projects.
Finding the center: Fold each piece lengthwise and finger-press near the center; unfold, then refold widthwise and finger-press again. Mark the intersection with a pencil dot (it will be stitched over and won't show).
Hoop each piece with 2 layers of medium-weight stabilizer and stitch out the designs.
Trim each block to 7½ inches wide × 6 inches high, centring the design as you trim. Set aside.
Step 3:
3. Stitching the Top Banner
Hoop size: 6×10 inch or larger — requiredCut 1 piece of fabric measuring 8½ × 12 inches.
Hoop with 1 layer of medium-weight cutaway stabilizer (or 2 layers of lightweight cutaway stabilizer) and stitch the design following the colour-change sequence.
When complete, trim the panel to 7 inches high × 11½ inches wide. Set aside.
Step 4:
4. Assembling the Growth Chart
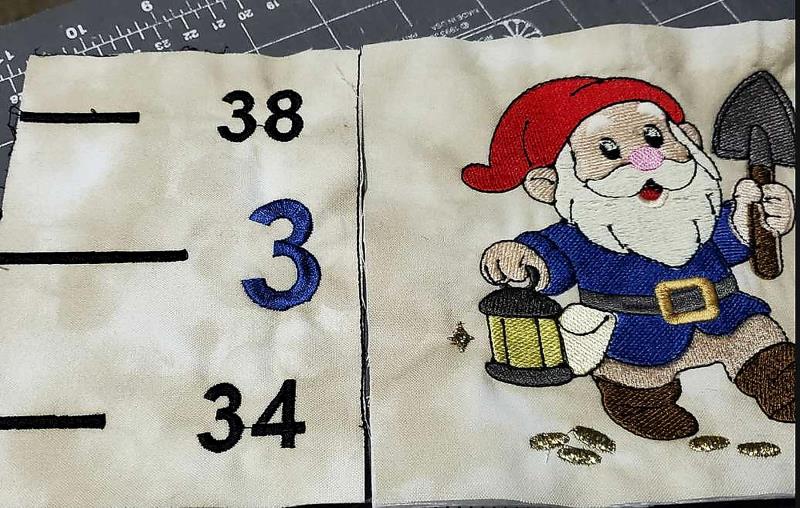
Step 1 — Pair number & gnome blocks
Place one number block on the left and one gnome block on the right. Seam together with a ¼-inch seam. Ensure the tops are perfectly aligned; trim if needed.
(Click Image to Enlarge)
Step 5:
Step 2 — Arrange all pairs
Arrange the 6 pairs as shown on the project photo: numbers up the left side, gnomes on the right.
Step 6:
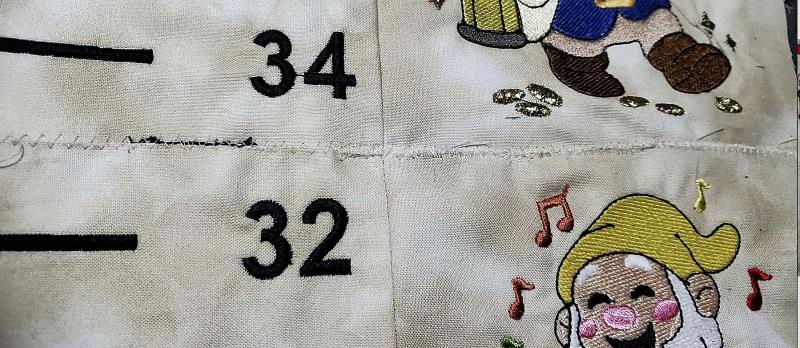
Step 3 — Join pairs with zig-zag
Lay two pairs right-side up, with the top edge of one pair touching the bottom edge of the next. Align seams carefully, then use a large zig-zag stitch to join them. Continue adding pairs one at a time until all six are connected. Trim any loose threads.
(Click Image to Enlarge)
Step 7:
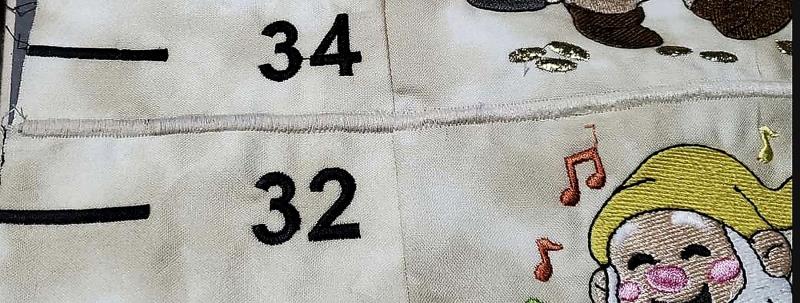
Step 4 — Cover with satin stitch
Select a large satin stitch and sew over every zig-zag seam to finish them neatly.
Note: The sample photos were taken before pressing — any waviness in the stitching disappears once ironed
(Click Image to Enlarge)
Step 8:
Step 5 — Attach the top banner
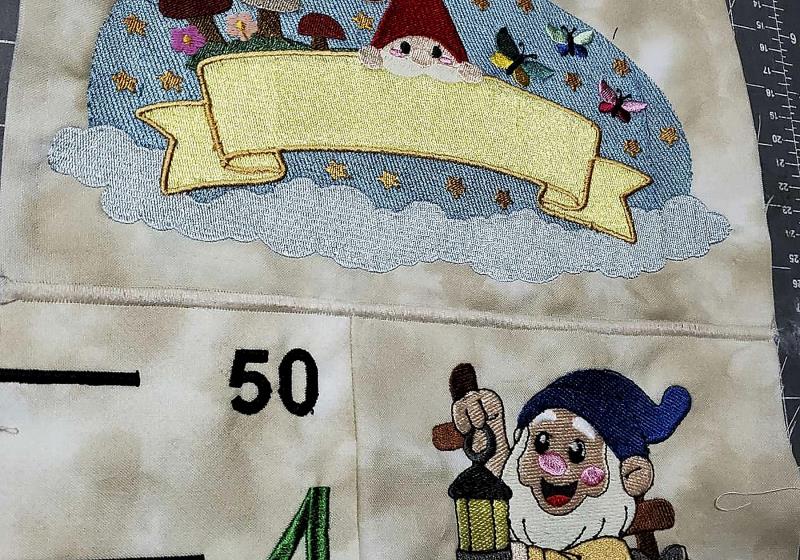
Lay the banner and the assembled panels right-side up, with the bottom edge of the banner touching the top of the number column. Stitch a large zig-zag to attach, then go back over with a satin stitch to cover.
(Click Image to Enlarge)
Step 9:
5. Finishing Options
Quilt & bind — Add batting and backing, quilt as desired, then bind using your preferred method.
Simple backing — Cut backing the same size as the front. Place right sides together, stitch all around leaving a ~6-inch opening. Turn right side out, press, and topstitch the opening closed.
Hanging — Add hanging loops at the top, or insert a hanging sleeve and thread through a dowel rod for display.
Step 10:
Congratulations!! You have completed your masterpiece. Sit back and enjoy!