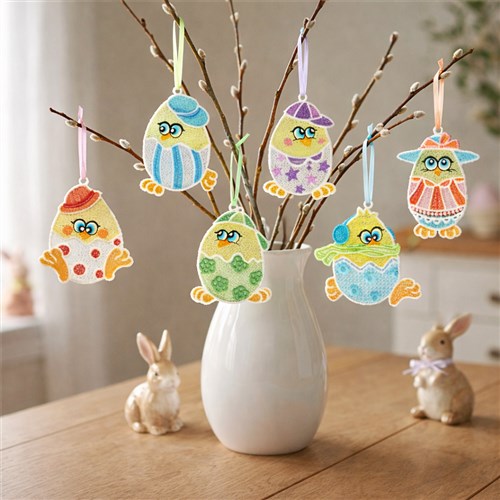
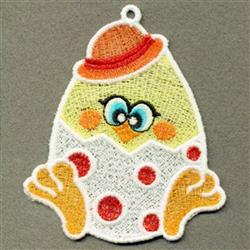
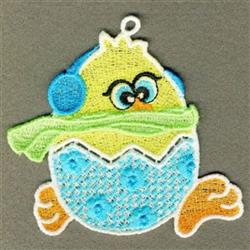
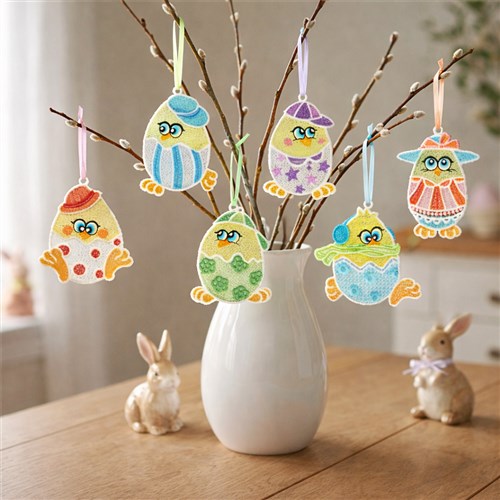
A stunning Easter tree centerpiece featuring 6 FSL lace eggs with funny faces,displayed on decorative branches in a ceramic vase or mason jar. The finished display stands approximately 12-18 inches tall and becomes an instant Easter focal point.
Step
of
FSL Funny Easter Eggs - Whimsical Easter Tree Display
By Sew Chic
• Vase: White ceramic vase, mason jar, or decorative container (6-8” tall)
• Filler: Decorative moss, Easter grass, or small rocks to secure branches
• Hangers: Thin ribbon, fishing line, or metallic thread to hang eggs
• Optional: Fairy lights (battery-operated) to weave through branches
Tools
• Scissors (small embroidery scissors)
• Spray bottle with warm water
• Bowl for soaking stabilizer
• Paper towels
• Tweezers (optional, for precise trimming)
Final Product: What You Will Create
Step 1:
Prepare Your Materials (15 minutes)
Gather all supplies before starting. Cut your water-soluble stabilizer into pieces slightly larger than your embroidery hoop. If using a 4” x 4” hoop, cut stabilizer
pieces approximately 5” x 5”.
Pro Tip: Label a small container or egg carton with numbers 1-6 to keep your finished eggs organized by design.
Step 2:
Hoop the Stabilizer (5 minutes per egg)
Place one piece of water-soluble stabilizer in your hoop, making sure it’s taut like a drum. The stabilizer should be smooth without wrinkles but not stretched so tight it distorts.
Important: FSL designs stitch directly onto the stabilizer—no fabric needed! The stabilizer becomes your “fabric” and will be removed later to create the 2free-standing lace effect.
Step 3:
Load and Stitch the First Design (20-30 minutes per egg)
1. Load the first Funny Easter Egg design into your embroidery machine
2. Thread your machine with white or ivory thread for the main egg
3. For the facial features, you have two options:
• Option A: Let the machine stop for color changes and switch to pastel threads for faces
• Option B: Stitch entirely in white/ivory for a classic look
4. Begin stitching
5. If doing multi-color: When the machine stops for color changes, switch to your chosen accent thread for the facial features
Pro Tip: Use the same color thread in your bobbin as your top thread for the cleanest look on both sides.
Step 4:
Remove and Rinse (10 minutes per egg)
1. Carefully remove the stitched egg from the hoop
2. Trim away excess stabilizer around the egg, leaving about 1/4” border
3. Fill a bowl with warm (not hot) water
4. Submerge the stitched egg and gently swish for 30-60 seconds
5. You’ll see the stabilizer begin to dissolve
6. Remove from water and lay flat on paper towels
7. Gently pat with paper towels to remove excess water
8. Shape the egg while damp—it should hold its 3D form
Pro Tip: Don’t overwash! Leaving a tiny bit of stabilizer residue actually helps the lace maintain its structure. The egg will stiffen more as it completely dries.
Step 5:
Dry and Shape (2-3 hours, mostly passive)
1. Place damp eggs on a flat surface lined with paper towels
2. While still pliable, gently shape the egg to ensure it has a nice rounded 3D form
3. Let air dry completely (2-3 hours)
4. Optional: For extra stiffness, you can apply fabric stiffener spray after the egg is completely dry
Pro Tip: Place a small ball of plastic wrap or tissue inside the egg while drying to help it maintain its 3D shape.
Step 6:
Repeat for All 6 Eggs (Repeat Steps 2-5)
Stitch all six Funny Easter Egg designs, varying your accent thread colors if desired for a colorful mixed display, or keep them all uniform in classic white.
Step 7:
Create Hangers (10 minutes)
1. Cut 6 pieces of thin ribbon, fishing line, or metallic thread, each 6-8” long
2. Thread one piece through the top of each egg (most FSL designs include a small loop or hole at the top)
3. Tie a small knot to create a hanging loop
4. Trim excess
Pro Tip: Using clear fishing line creates a magical “floating” effect for your eggs.
Step 8:
Assemble Your Easter Tree Display (15 minutes)
1. Arrange your branches in your chosen vase/container
2. Add filler (moss, Easter grass, or rocks) to secure branches
3. Adjust branches to create a pleasing arrangement with multiple hanging points
4. Hang your FSL eggs at various heights on the branches
5. Step back and adjust until you’re happy with the composition
6. Optional: Weave fairy lights through the branches for a magical glow
Pro Tip: Hang eggs at different heights—some close to branches, some dangling lower—for visual interest. Odd numbers (like the 6 eggs grouped as 3 and 3) look most appealing to the eye.
Step 9:
Variations to Try:
• Rainbow Collection: Stitch each egg in a different pastel color for a cheerful rainbow display
• Metallic Elegance: Use metallic gold or silver thread for a more formal, sophisticated look
• Glitter Finish: While damp, sprinkle fine glitter on the eggs for a sparkly effect
• Scented Eggs: Add a drop of essential oil to the water when rinsing stabilizer for lightly scented decorations
• Egg Garland: String all 6 eggs together in a horizontal garland instead of a tree display