Border OptionsHugging border, circle, square, or rectangle — with a 3mm satin stitch.
Backing OptionsAvailable with iron-on, sew-on, or velcro backing.
Fast ShippingShipped quickly from the USA.
Free Online Tools
Powerful embroidery utilities that save time and prevent costly mistakes.
Stitch AssistantRECOMMENDED
Get the exact stabilizer, machine settings, needle, and thread color sequence for every embroidery design you purchase — based on that design's stitch density, dimensions, and color count.
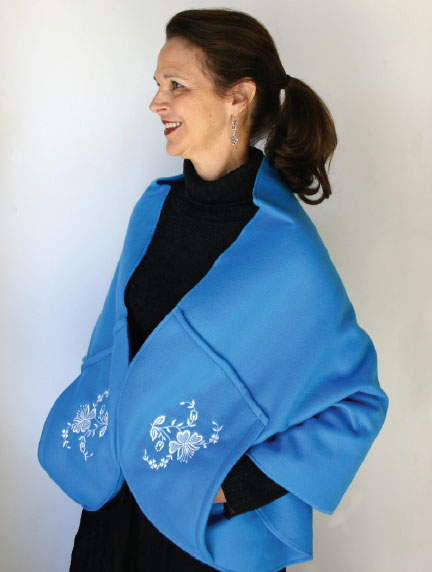
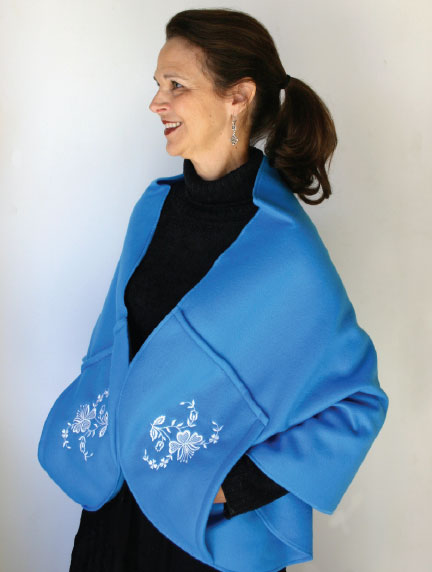
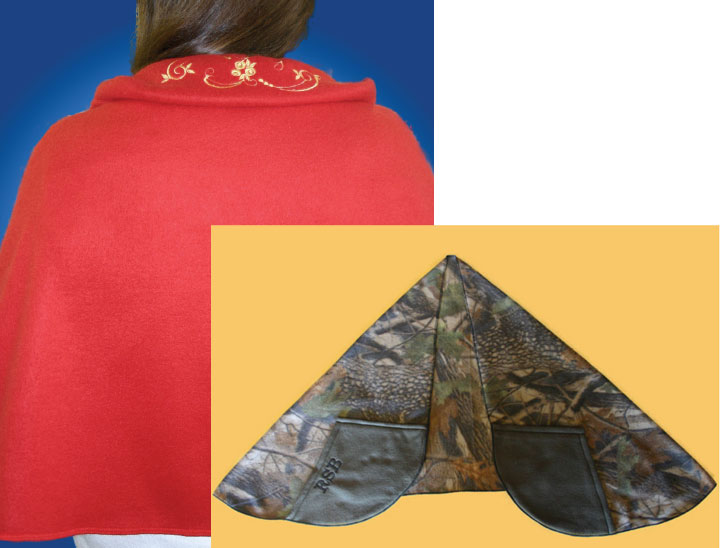
Wear this wrap for a little extra warmth while watching TV or while working at the office. Wear it outside when all you need is a light wrap. It's also great to take along in the car for your shoulders, lap, or legs. What a great gift it makes for the eld
1 1/4 yd. double sided heavy fleece or similar fabric
Embroidery design of choice
Appropriate embroidery thread
Stabilizer
Serger
Final Product: What You Will Create
Step 1:
Procedure
Cut out your Cozy Wrap according to the following instructions:
Use wide paper and construct a pattern that is 24" long by 30" wide.
Round both ends and corners on one end of the pattern by using an oversized plate or platter.
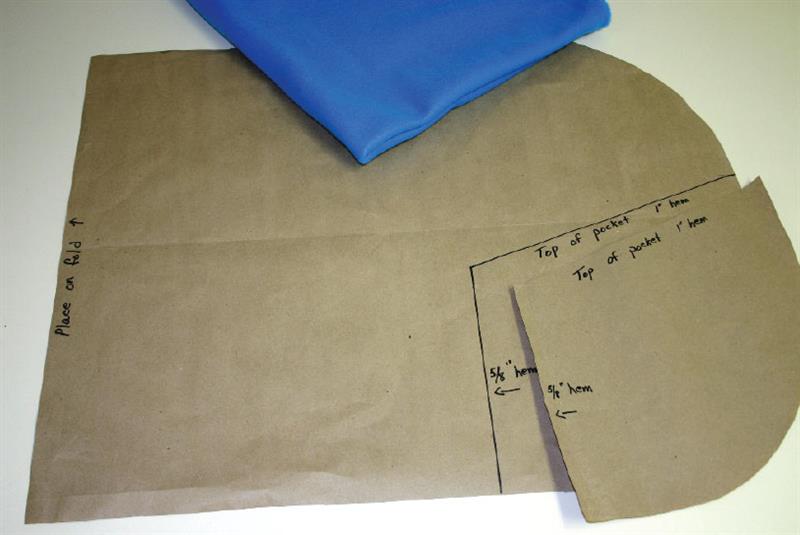
To cut a pattern for your pocket, fold your Cozy pattern top to bottom so you geta crease line. Measure 2" up from the crease on the curved end. Next, measure 12" in from this mark and come straight down to the bottom of the pattern. At this point, measure and draw a line that is 10" tall. Using your ruler, draw a slanted line from this last point to the mark that is 2" above the center fold. Trace this shape that you just made to use as the pattern for your pocket. (See the picture above for help.)
Place the straight end of the pattern on the fold of the fleece and cut out your Cozy Wrap.
Cut out your pockets.
Step 2:
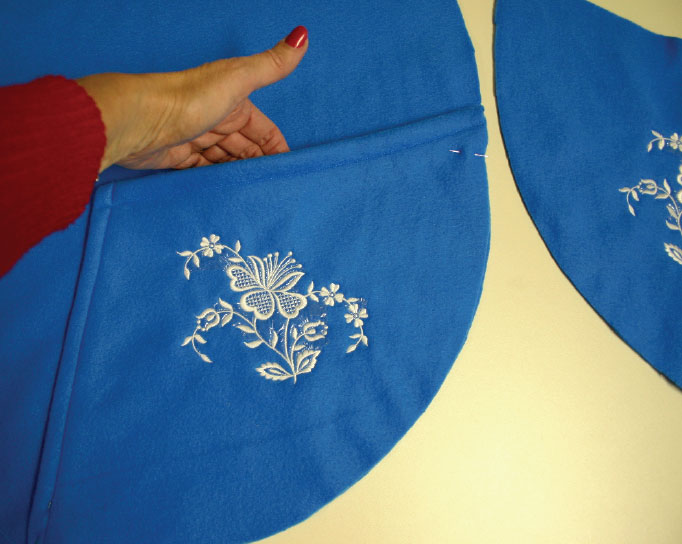
Your pocket will be turned back 1" on the long angled side for your top hem and 5/8" on the short end so place and do your embroidery accordingly.
Turn under your top hem and side edge and topstitch them down.
Step 3:
Place your pockets on each end of your wrap, matching the curve of the wrap to the curve of the pocket and pin them in place with the wrong side of the pockets on the right side of your wrap. Baste the pockets in place. Stitch down the side edge of the pocket by stitching over your topstitching.
Using a wide overlock stitch or wrap stitch on your serger, stitch all the way around your wrap.
Step 4:
Hint: You will put on your wrap by having the pockets on the topas you place it around your shoulders. You may want to mark this top edge by embroidering a monogram or design on the center back top edge. Try it on first so you are sure to turn the embroidery in the right direction!
Step 5:
This project is one of several included in Ms. Burt's recent book, "7 Steps to Successful Embroidery", available at your local dealer or by calling ABC Embroidery at 1 800 748 9433. The book includes 5 free designs from Great Notions. $19.95.
Designs used in her projects are from the following companies: Babylock, Brother, Cactus Punch, Designer's Gallery Interactives, Embroidery Library, Great Notions, and OESD.
Freida Burt is Director of Education for ABC Embroidery Systems in Columbus, MS. Freida has extensive knowledge and experience in both creative sewing and machine embroidery. She has taught widely in both the United States and Canada at consumer symposiums and retail stores as well as dealer training schools for many of the major sewing machine manufacturers. Freida is best known for instructing machine embroiders in the correct placement, alignment and stabilization of embroidery. She has written several articles for well known magazines, including Sew News and Embroidery Journal. Freida was recently a guest on the TV sewing program Jazzing It Up With Sally Cheney. In addition to teaching, Freida has helped design several products that are sold internationally. Those include the Embroiderer’s Friend, Embroiderer’s Hoop Mates and the Embroiderer’s Buddy.