6” x 6” (150mm*150mm) - 6” x 10” - or an extra-large embroidery hoop.
Fabric in your favorite colors like cotton or felt
2.5-ounce Cut-away Stabilizer, or your favorite stabilizer
Repositionable adhesive spray.
Fabric scissors.
Embroiderer Machine
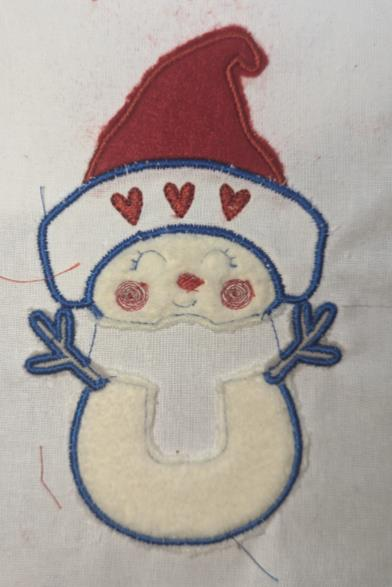
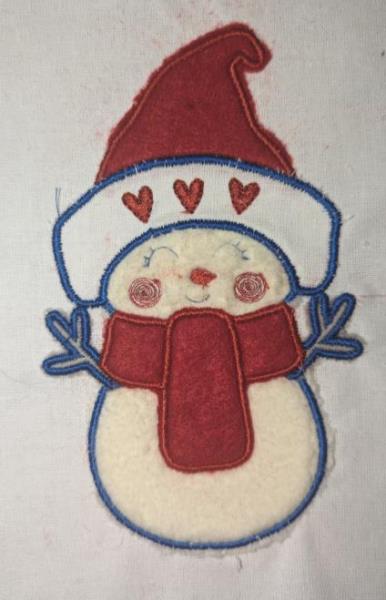
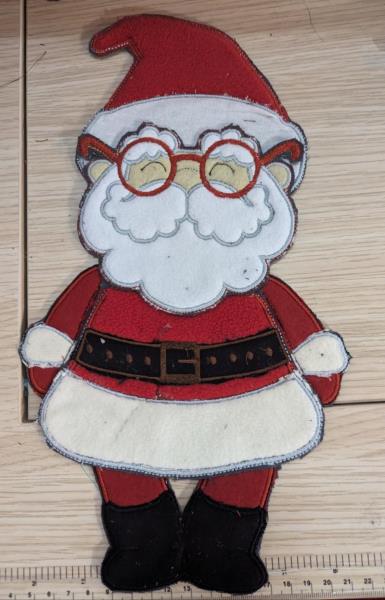
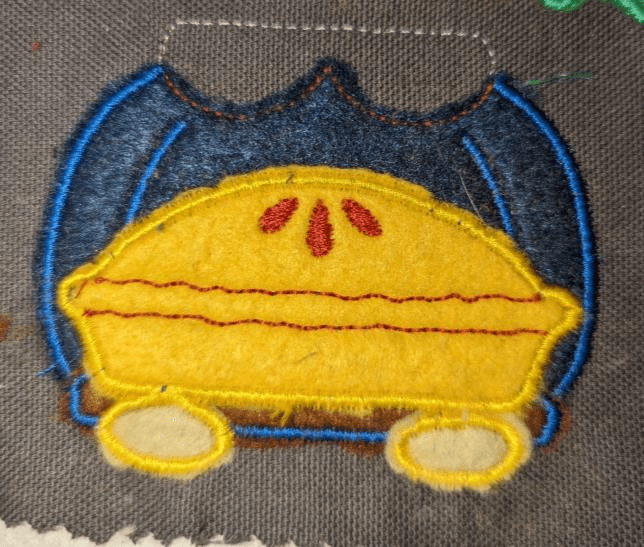
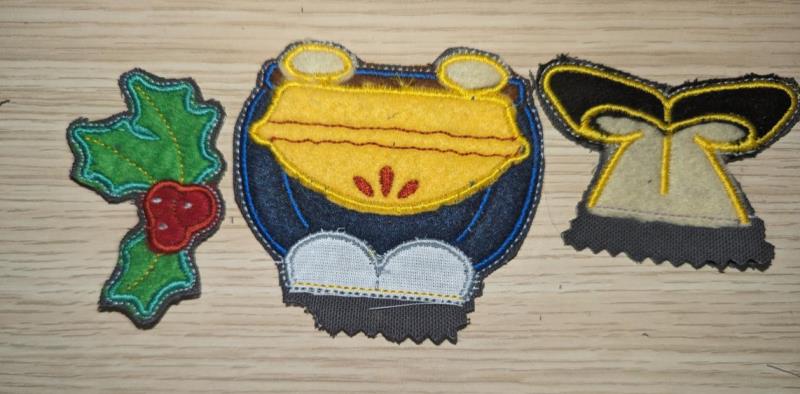
Final Product: What You Will Create
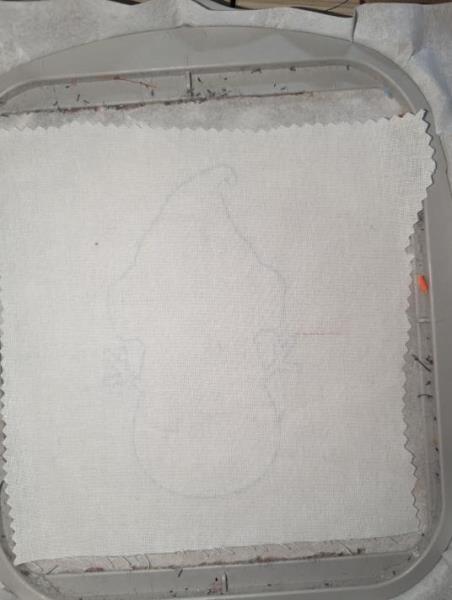
Step 1:
Snowman (the start)
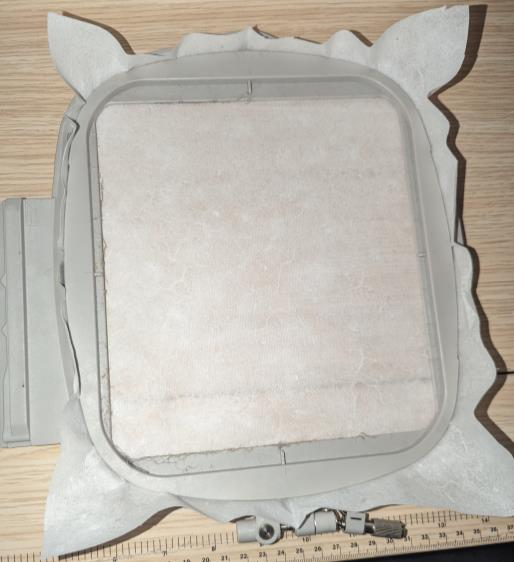
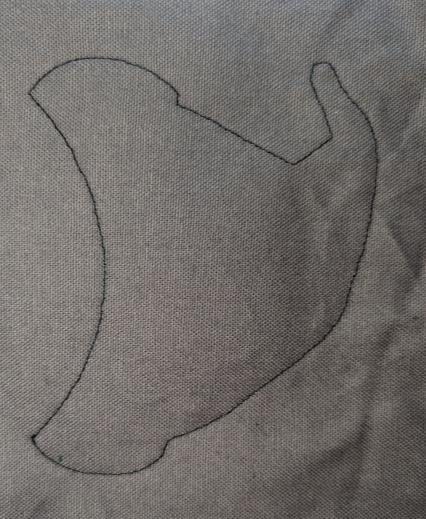
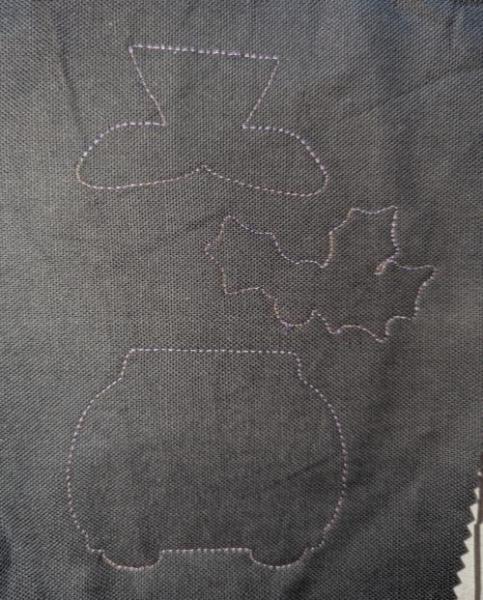
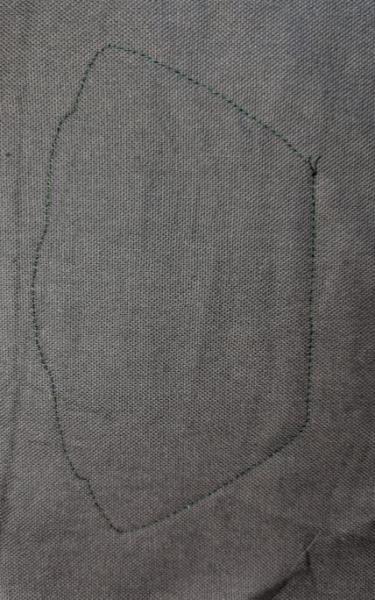
For start tautly hoop your cutaway stabilizer in your embroidery hoop and run color-stop 1 as a placement line. Remove the hoop from the machine, do not unhoop.
(Click Image to Enlarge)
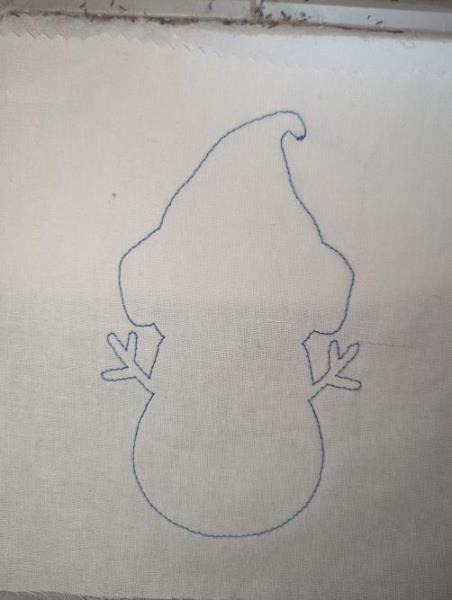
Step 2:
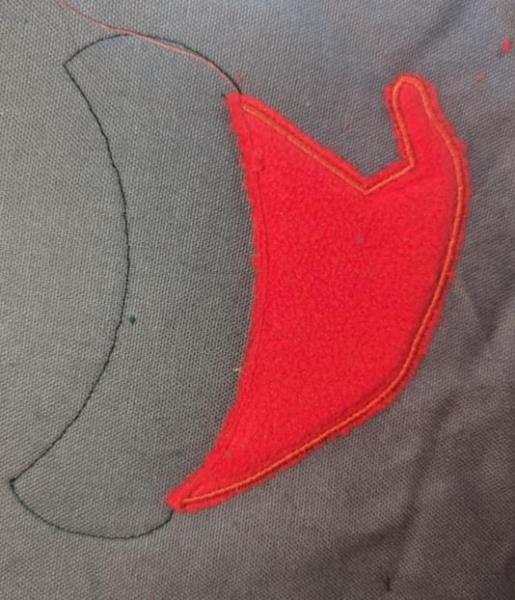
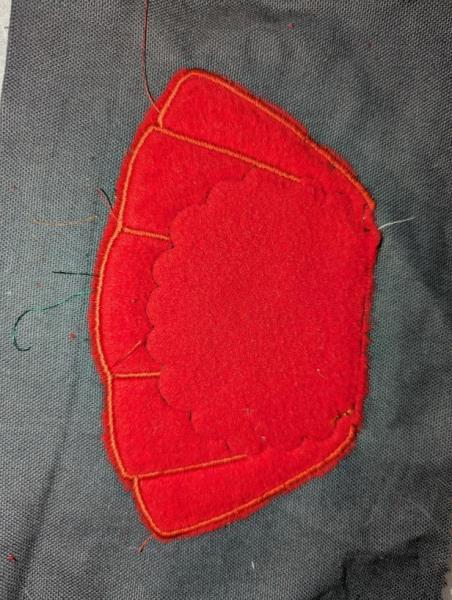
Cover the placement line with your main body fabric using the repositionable adhesive spray
(Click Image to Enlarge)
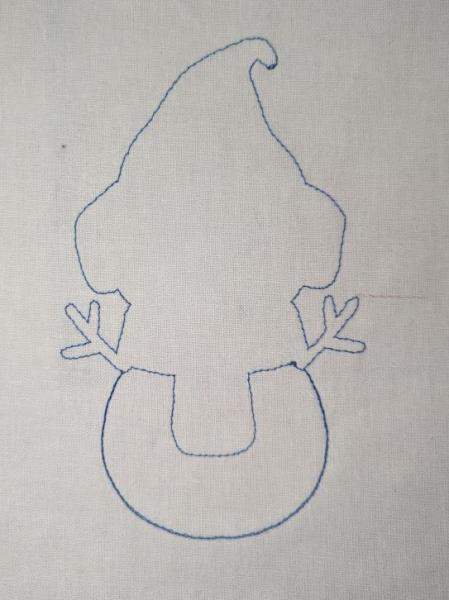
Step 3:
Run color-stop 2.
(Click Image to Enlarge)
Step 4:
you can throw the next colors-stop
(Click Image to Enlarge)
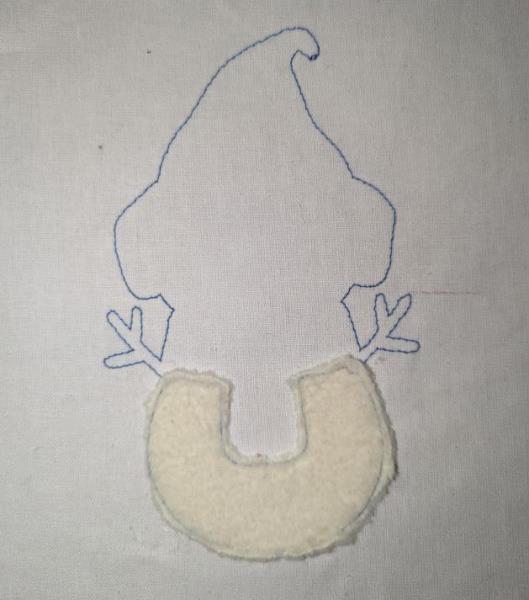
Step 5:
4 (placement fabric) belly
Cover the placement line with f fabric with the help of the repositionable adhesive spray, and run next color-stop Cut the excess fabric.
(Click Image to Enlarge)
Step 6:
outlines and embroidery
Run the next color-stop for outlines
(Click Image to Enlarge)
Step 7:
Cover the placement line with fabric with the help of the repositionable adhesive spray, and run next color-stop Cut the excess fabric
(Click Image to Enlarge)
Step 8:
(Click Image to Enlarge)
Run the next color-stop for outlines
Step 9:
Cover the placement line with fabric with the help of the repositionable adhesive spray, and run next color-stop Cut the excess fabric.
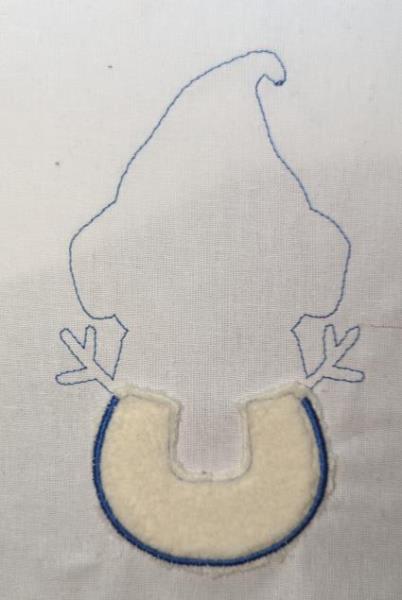
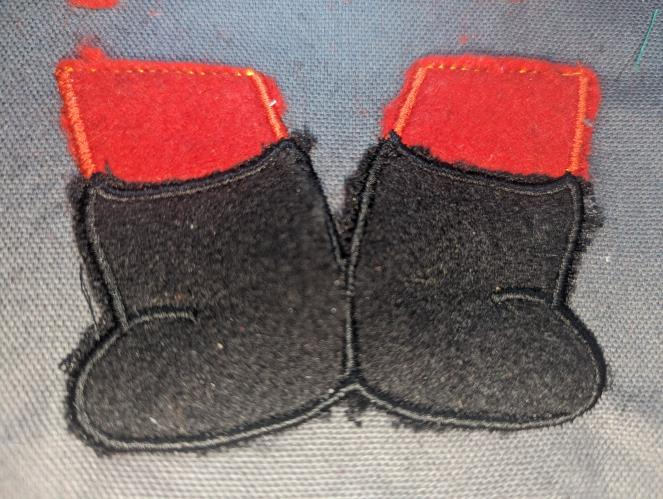
Step 10:
Run the next color-stop for outlines - face - Cheak - Nose
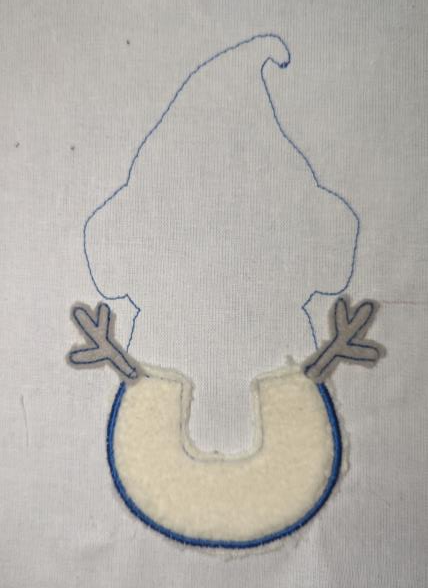
Step 11:
(Click Image to Enlarge)
Cover the placement line with fabric with the help of the repositionable adhesive spray, and run next color-stop Cut the excess fabric.
Run the next color-stop for outlines
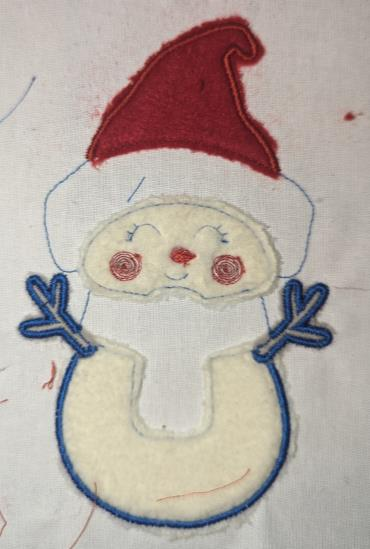
Step 12:
(Click Image to Enlarge)
Cover the placement line with fabric with the help of the repositionable adhesive spray, and run next color-stop Cut the excess fabric.
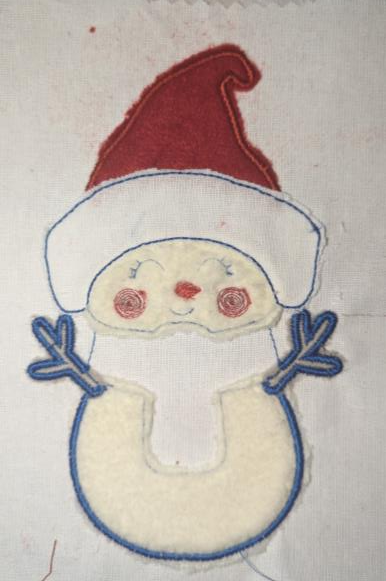
Step 13:
(Click Image to Enlarge)
Run the next color-stop for outlines - Outlines head - Hat - Hearts
Step 14:
(Click Image to Enlarge)
Cover the placement line with fabric with the help of the repositionable adhesive spray, and run next color-stop Cut the excess fabric.
Run the next color-stop for outlines
Step 15:
Cover the project with your main fabric facing down, and run color-stop . (if you use a thick fabric, you won't be able to see the seams through)
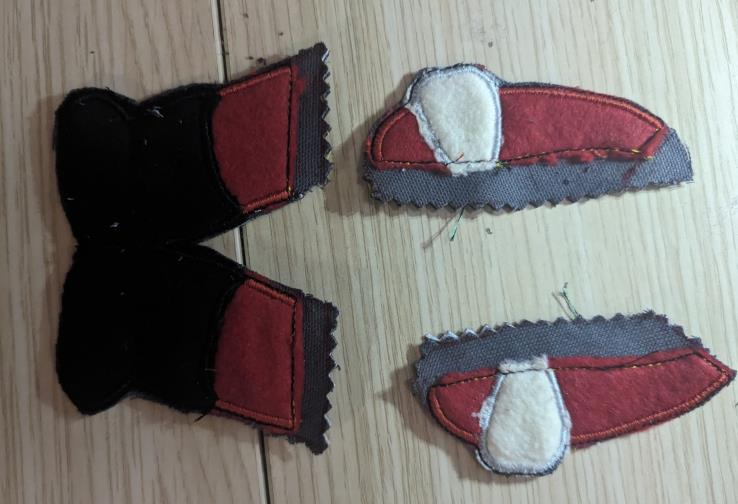
Step 16:
(Click Image to Enlarge)
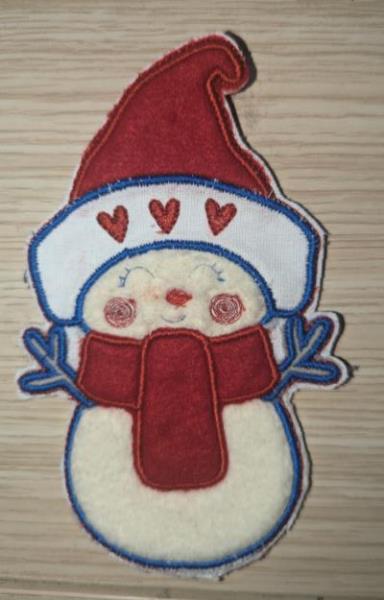
Remove the project from the hoop and Cut the outline close to the seam. Cut off any excess thread and fabric
Step 17:
- For start tautly hoop your cutaway stabilizer in your embroidery hoop and run color-stop 1 as a placement line. Remove the hoop from the machine, do not unhoop
- Cover the placement line with your main body fabric using the repositionable adhesive spray and run color-stop 2.
- you can throw the next 2 colors-stop
(Click Image to Enlarge)
Step 18:
Cover the placement line with your fabric with the help of the repositionable adhesive spray, and run color-stop. Cut the excess fabric for:
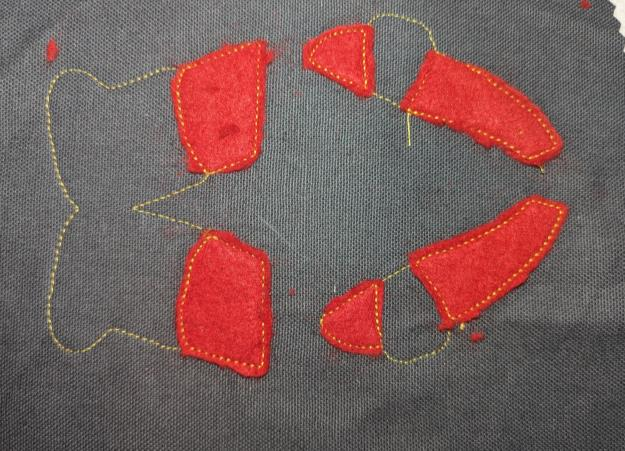
- arms *4
- legs *2
(Click Image to Enlarge)
Step 19:
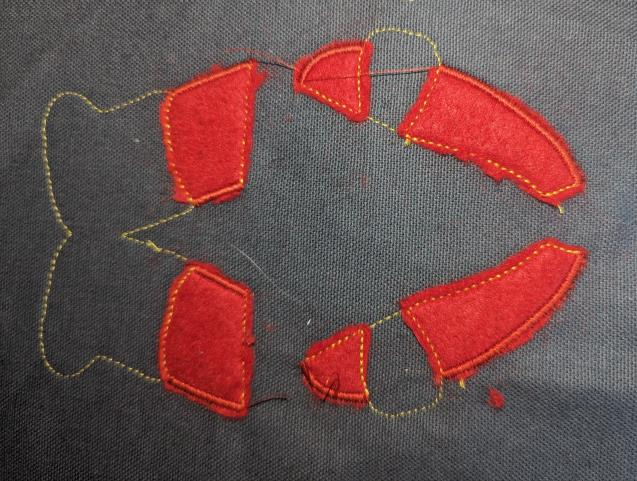
Run the next color-stop one by one for outlines and embroidery
- legs and arms
(Click Image to Enlarge)
Step 20:
Cover the placement line with your fabric with the help of the repositionable adhesive spray, and run color-stop. Cut the excess fabric for
Run the next color-stop one by one for outlines and embroidery
(Click Image to Enlarge)
Step 21:
Cover the placement line with your fabric with the help of the repositionable adhesive spray, and run color-stop. Cut the excess fabric for:
Run the next color-stop one by one for outlines and embroidery
(Click Image to Enlarge)
Step 22:
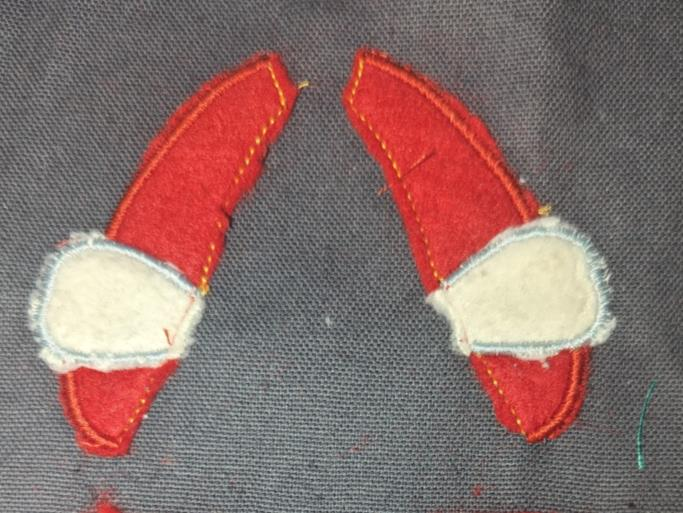
- Cover the project with your main fabric facing down, and run color-stop . (if you use a thick fabric, you won't be able to see the seams through)
- Remove the project from the hoop and Cut the outline close to the seam.
- Cut off any excess thread and fabric
- Let a margin on the top of legs and the side of arms
(Click Image to Enlarge)
Step 23:
- For start tautly hoop your cutaway stabilizer in your embroidery hoop and run color-stop 1 as a placement line. Remove the hoop from the machine, do not unhoop
- Cover the placement line with your main body fabric using the repositionable adhesive spray and run color-stop 2.
- you can throw the next colors-stop
(Click Image to Enlarge)
Step 24:
Cover the placement line with your fabric with the help of the repositionable adhesive spray, and run color-stop. Cut the excess fabric for:
Run the next color-stop one by one for outlines and embroidery
(Click Image to Enlarge)
Step 25:
Cover the placement line with your fabric with the help of the repositionable adhesive spray, and run color-stop. Cut the excess fabric for
Run the next color-stop one by one for outlines and embroidery
(Click Image to Enlarge)
Step 26:
- Cover the project with your main fabric facing down, and run color-stop . (if you use a thick fabric, you won't be able to see the seams through)
- Remove the project from the hoop and Cut the outline close to the seam.
- Cut off any excess thread and fabric
- Let a margin on the bottom
(Click Image to Enlarge)
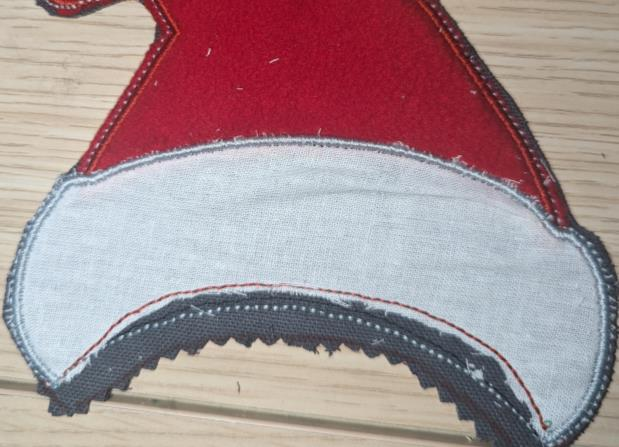
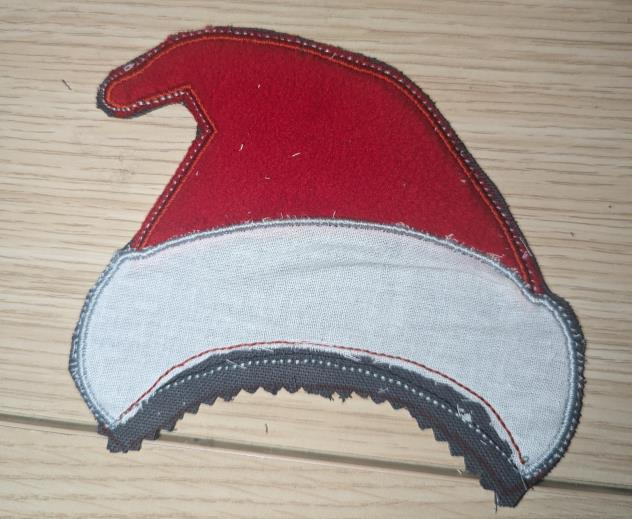
Step 27:
santa’s head (the start)
- For start tautly hoop your cutaway stabilizer in your embroidery hoop and run color-stop 1 as a placement line. Remove the hoop from the machine, do not unhoop
- Cover the placement line with your main body fabric using the repositionable adhesive spray and run color-stop 2.
- you can throw the next colors-stop
Step 28:
Cover the placement line with your fabric with the help of the repositionable adhesive spray, and run color-stop. Cut the excess fabric for: - face - ears
Run the next color-stop one by one for outlines and embroidery
Step 29:
Cover the placement line with your fabric with the help of the repositionable adhesive spray, and run color-stop. Cut the excess fabric for
Run the next color-stop one by one for outlines and embroidery - bearb - glasses
Step 30:
- Cover the project with your main fabric facing down, and run color-stop . (if you use a thick fabric, you won't be able to see the seams through) - Remove the project from the hoop and Cut the outline close to the seam. - Cut off any excess thread and fabric
Step 31:
- For start tautly hoop your cutaway stabilizer in your embroidery hoop and run color-stop 1 as a placement line. Remove the hoop from the machine, do not unhoop
- Cover the placement line with your main body fabric using the repositionable adhesive spray and run color-stop 2.
- you can throw the next colors-stop
(Click Image to Enlarge)
Step 32:
Cover the placement line with your fabric with the help of the repositionable adhesive spray, and run color-stop. Cut the excess fabric
Run the next color-stop one by one for outlines and embroidery
(Click Image to Enlarge)
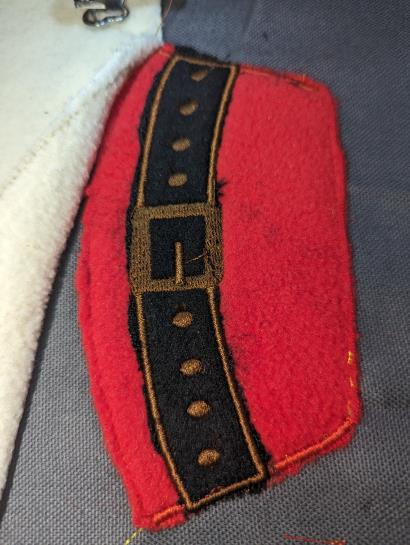
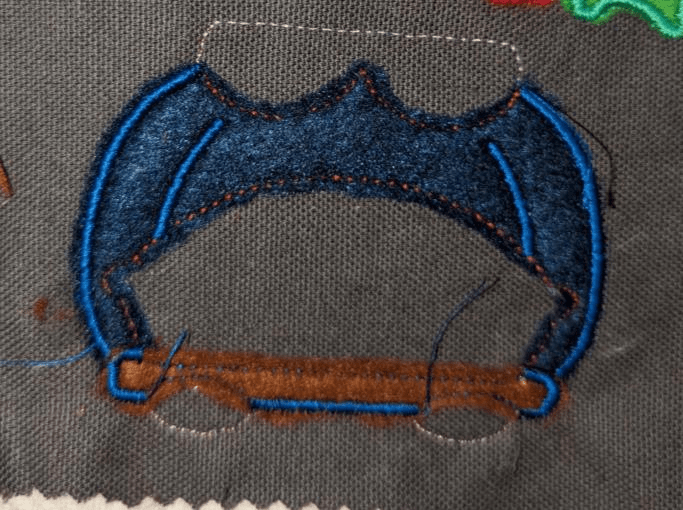
Step 33:
Cover the placement line with your fabric with the help of the repositionable adhesive spray, and run color-stop. Cut the excess fabric
Step 34:
Run the next color-stop one by one for outlines and embroidery - belt - clasp
(Click Image to Enlarge)
Step 35:
Cover the placement line with your fabric with the help of the repositionable adhesive spray, and run color-stop. Cut the excess fabric for:
Run the next color-stop one by one for outlines and embroidery
(Click Image to Enlarge)
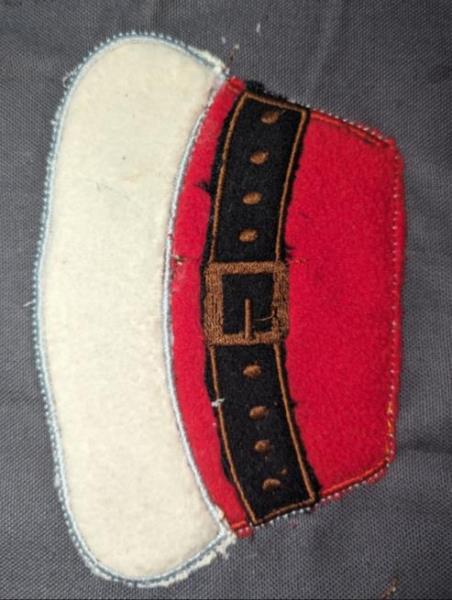
Step 36:
- Cover the project with your main fabric facing down, and run color-stop . (if you use a thick fabric, you won't be able to see the seams through)
- Remove the project from the hoop and Cut the outline close to the seam.
- Cut off any excess thread and fabric
(Click Image to Enlarge)
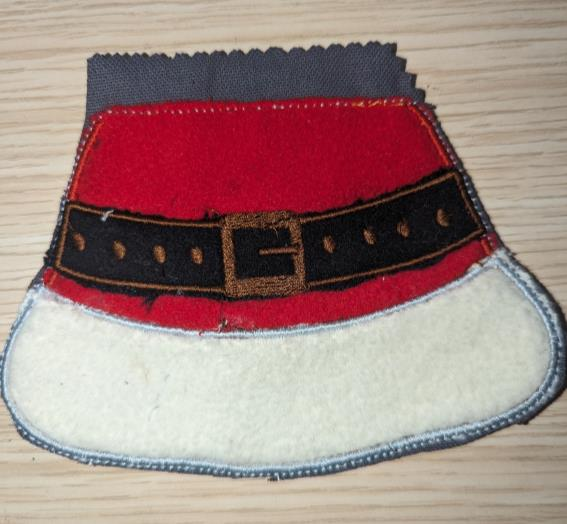
Step 37:
(Click Image to Enlarge)
Glue the pieces together
Step 38:
(Click Image to Enlarge)
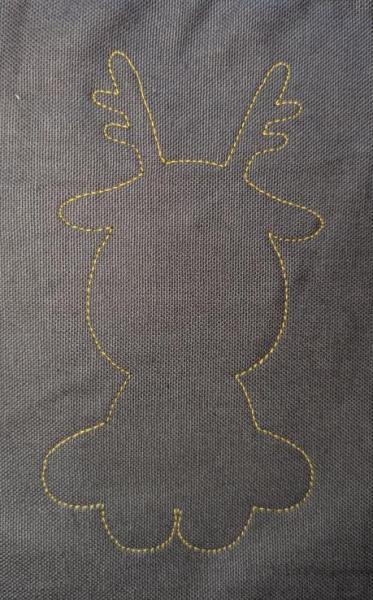
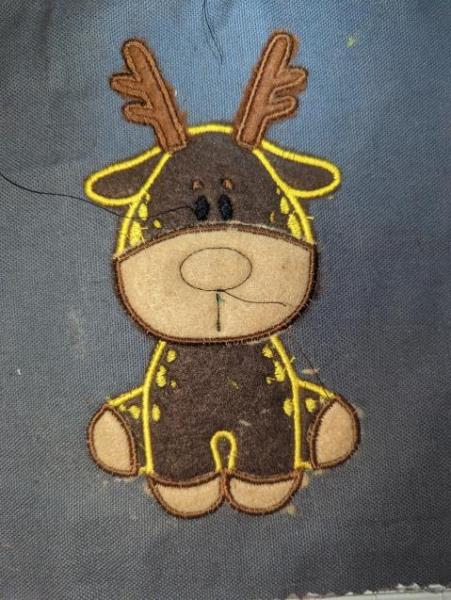
4 reindeer (the start)
- For start tautly hoop your cutaway stabilizer in your embroidery hoop and run color-stop 1 as a placement line. Remove the hoop from the machine, do not unhoop
- Cover the placement line with your main body fabric using the repositionable adhesive spray and run color-stop 2.
- you can throw the next colors-stop
Step 39:
(Click Image to Enlarge)
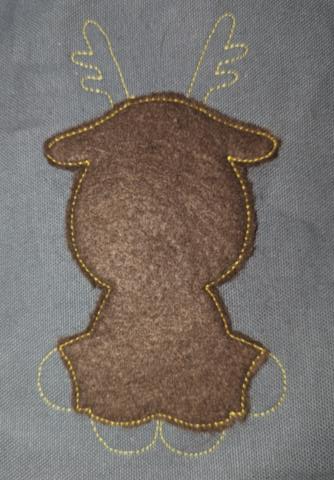
Cover the placement line with your fabric with the help of the repositionable adhesive spray, and run color-stop. Cut the excess fabric for body
Step 40:
Run the next color-stop one by one for outlines and embroidery
(Click Image to Enlarge)
Step 41:
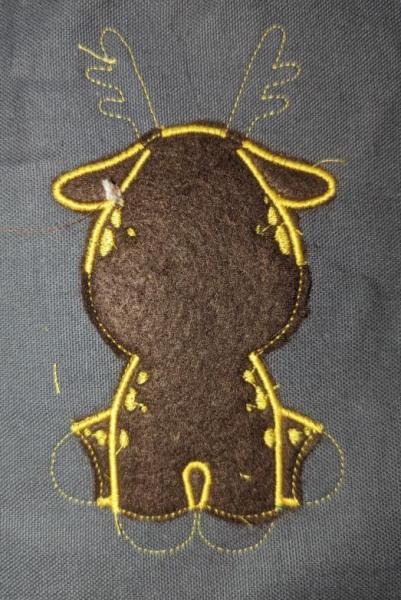
Cover the placement line with your fabric with the help of the repositionable adhesive spray, and run color-stop. Cut the excess fabric
Run the next color-stop one by one for outlines and embroidery
Step 42:
(Click Image to Enlarge)
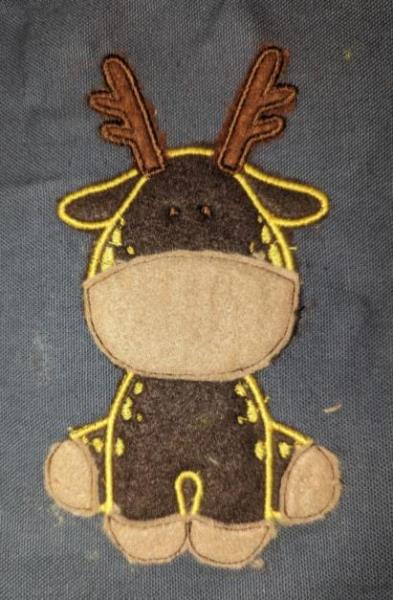
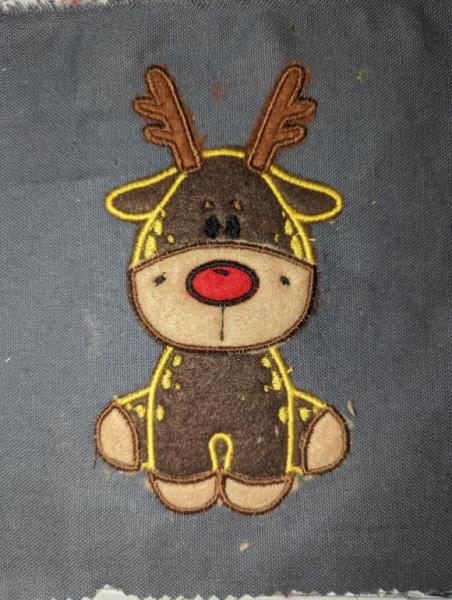
Cover the placement line with your fabric with the help of the repositionable adhesive spray, and run color-stop. Cut the excess fabric for: - nose - foot
Step 43:
Run the next color-stop one by one for outlines and embroidery - outlines - eyes
(Click Image to Enlarge)
Step 44:
Cover the placement line with your fabric with the help of the repositionable adhesive spray, and run colorstop. Cut the excess fabric for nose
Run the next color-stop one by one for outlines and embroidery - outlines - embroidery
(Click Image to Enlarge)
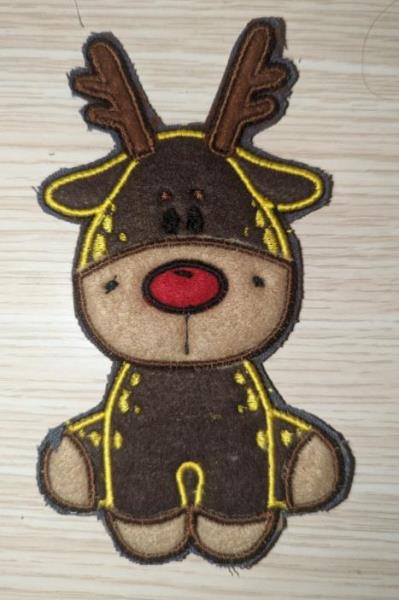
Step 45:
(Click Image to Enlarge)
- Cover the project with your main fabric facing down, and run color-stop . (if you use a thick fabric, you won't be able to see the seams through)
- Remove the project from the hoop and Cut the outline close to the seam.
- Cut off any excess thread and fabric
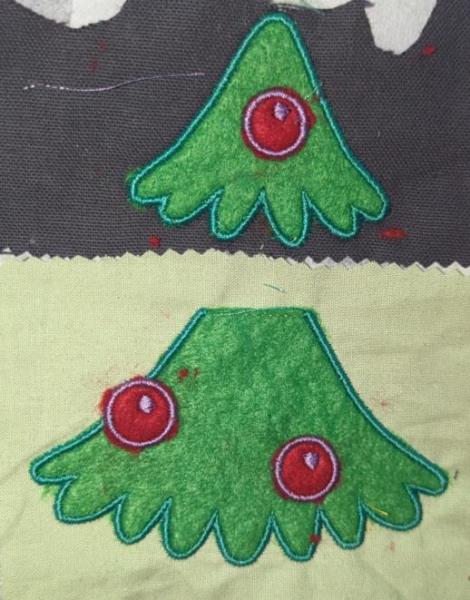
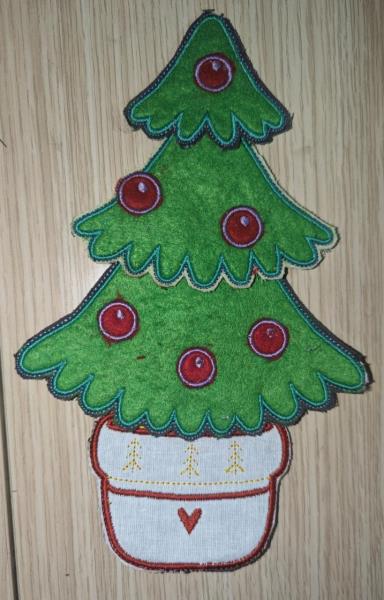
Step 46:
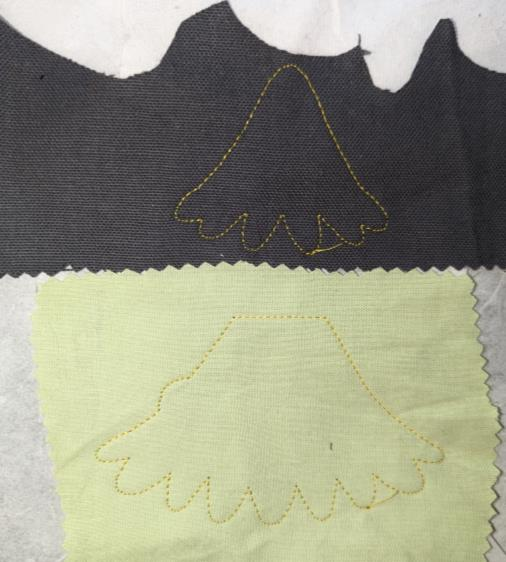
Christmas tree (the start)
- For start tautly hoop your cutaway stabilizer in your embroidery hoop and run color-stop 1 as a placement line. Remove the hoop from the machine, do not unhoop
- Cover the placement line with your main body fabric using the repositionable adhesive spray and run color-stop 2.
- you can throw the next colors-stop
(Click Image to Enlarge)
Step 47:
Cover the placement line with your fabric with the help of the repositionable adhesive spray, and run color-stop. Cut the excess fabric
Run the next color-stop one by one for outlines and embroidery
(Click Image to Enlarge)
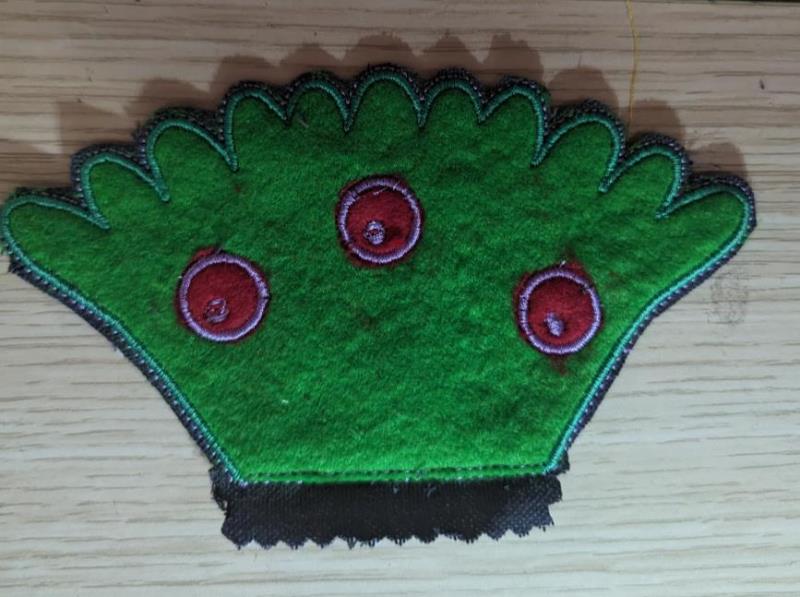
Step 48:
Cover the placement line with your fabric with the help of the repositionable adhesive spray, and run color-stop. Cut the excess fabric
Run the next color-stop one by one for outlines and embroidery - Christmas ornament - Embroidery
Step 49:
- Cover the project with your main fabric facing down, and run color-stop . (if you use a thick fabric, you won't be able to see the seams through)
- Remove the project from the hoop and Cut the outline close to the seam, let a margin on the top of the middle tree
- Cut off any excess thread and fabric
(Click Image to Enlarge)
Step 50:
- For start tautly hoop your cutaway stabilizer in your embroidery hoop and run color-stop 1 as a placement line. Remove the hoop from the machine, do not unhoop
- Cover the placement line with your main body fabric using the repositionable adhesive spray and run color-stop 2.
- you can throw the next colors-stop
(Click Image to Enlarge)
Step 51:
Cover the placement line with your fabric with the help of the repositionable adhesive spray, and run color-stop. Cut the excess fabric
Run the next color-stop one by one for outlines and embroidery
(Click Image to Enlarge)
Step 52:
Cover the placement line with your fabric with the help of the repositionable adhesive spray, and run color-stop. Cut the excess fabric for:
Run the next color-stop one by one for outlines and embroidery - Christmas ornament - Embroidery
(Click Image to Enlarge)
Step 53:
- Cover the project with your main fabric facing down, and run color-stop . (if you use a thick fabric, you won't be able to see the seams through)
- Remove the project from the hoop and Cut the outline close to the seam, let a margin on the top
- Cut off any excess thread and fabric
(Click Image to Enlarge)
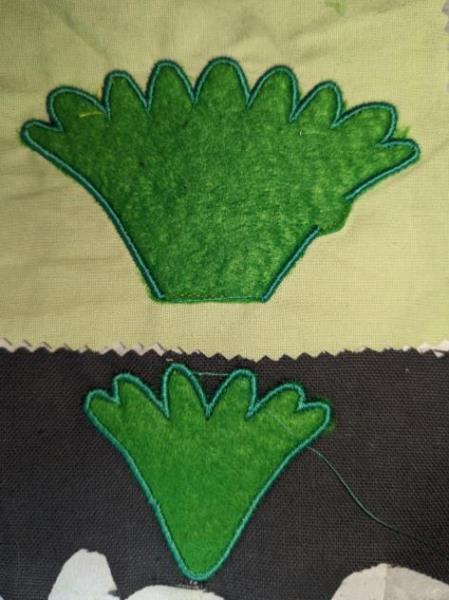
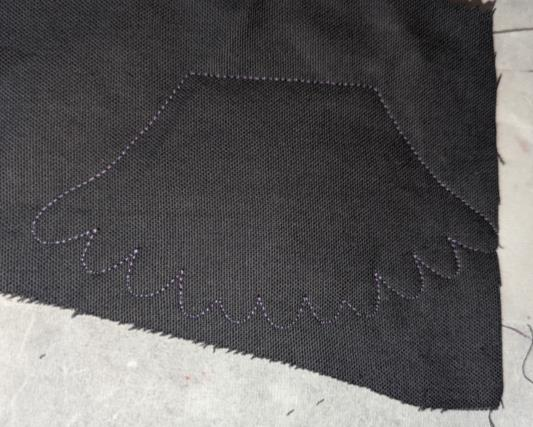
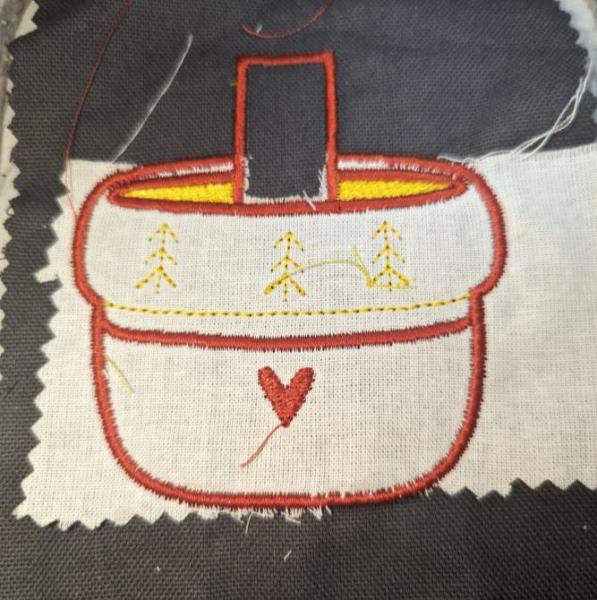
Step 54:
Christmas tree part3 (the start)
- For start tautly hoop your cutaway stabilizer in your embroidery hoop and run color-stop 1 as a placement line. Remove the hoop from the machine, do not unhoop
- Cover the placement line with your main body fabric using the repositionable adhesive spray and run color-stop 2.
- you can throw the next colors-stop
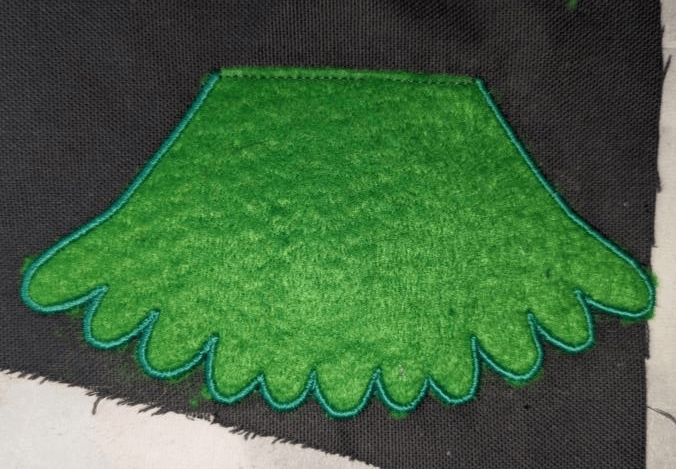
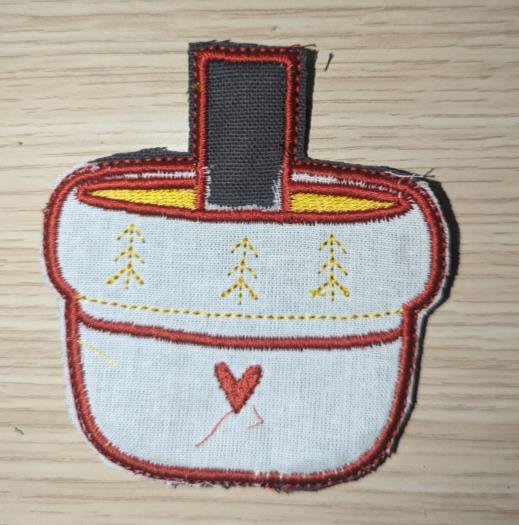
Step 55:
Cover the placement line with your fabric with the help of the repositionable adhesive spray, and run color-stop. Cut the excess fabric
Run the next color-stop one by one for outlines and embroidery; you can change color for each color-stop
(Click Image to Enlarge)
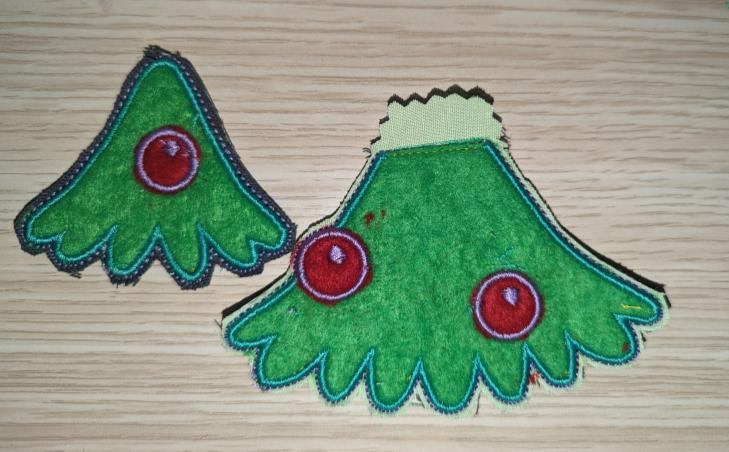
Step 56:
- Cover the project with your main fabric facing down, and run color-stop . (if you use a thick fabric, you won't be able to see the seams through)
- Remove the project from the hoop and Cut the outline close to the seam, let a margin on the top
- Cut off any excess thread and fabric
(Click Image to Enlarge)
Step 57:
(Click Image to Enlarge)
Glue the pieces together
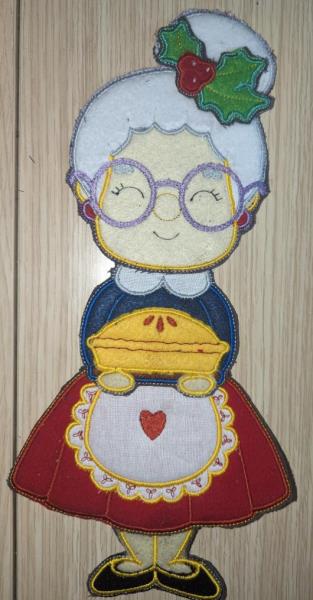
Step 58:
Mother Christmas (the start)
- For start tautly hoop your cutaway stabilizer in your embroidery hoop and run color-stop 1 as a placement line. Remove the hoop from the machine, do not unhoop
- Cover the placement line with your main body fabric using the repositionable adhesive spray and run color-stop 2.
- you can throw the next colors-stop
(Click Image to Enlarge)
Step 59:
Cover the placement line with your fabric with the help of the repositionable adhesive spray, and run colorstop. Cut the excess fabric
Run the next color-stop one by one for outlines and embroidery
Step 60:
Cover the placement line with your fabric with the help of the repositionable adhesive spray, and run colorstop. Cut the excess fabric for:
Run the next color-stop one by one for outlines and embroidery
(Click Image to Enlarge)
Step 61:
Cover the placement line with your fabric with the help of the repositionable adhesive spray, and run color-stop. Cut the excess fabric
Run the next color-stop one by one for outlines and embroidery -outlines - embroidery
(Click Image to Enlarge)
Step 62:
Cover the placement line with your fabric with the help of the repositionable adhesive spray, and run color-stop. Cut the excess fabric
Run the next color-stop one by one for outlines and embroidery
(Click Image to Enlarge)
Step 63:
Cover the placement line with your fabric with the help of the repositionable adhesive spray, and run colorstop. Cut the excess fabric
Run the next color-stop one by one for outlines and embroidery
(Click Image to Enlarge)
Step 64:
Cover the placement line with your fabric with the help of the repositionable adhesive spray, and run color-stop. Cut the excess fabric
Run the next color-stop one by one for outlines and embroidery
(Click Image to Enlarge)
Step 65:
Cover the placement line with your fabric with the help of the repositionable adhesive spray, and run color-stop. Cut the excess fabric
Run the next color-stop one by one for outlines and embroidery
Step 66:
Cover the placement line with your fabric with the help of the repositionable adhesive spray, and run colorstop. Cut the excess fabric
Run the next color-stop one by one for outlines and embroidery
(Click Image to Enlarge)
Step 67:
Cover the placement line with your fabric with the help of the repositionable adhesive spray, and run colorstop. Cut the excess fabric
Run the next color-stop one by one for outlines and embroidery - collar - holly
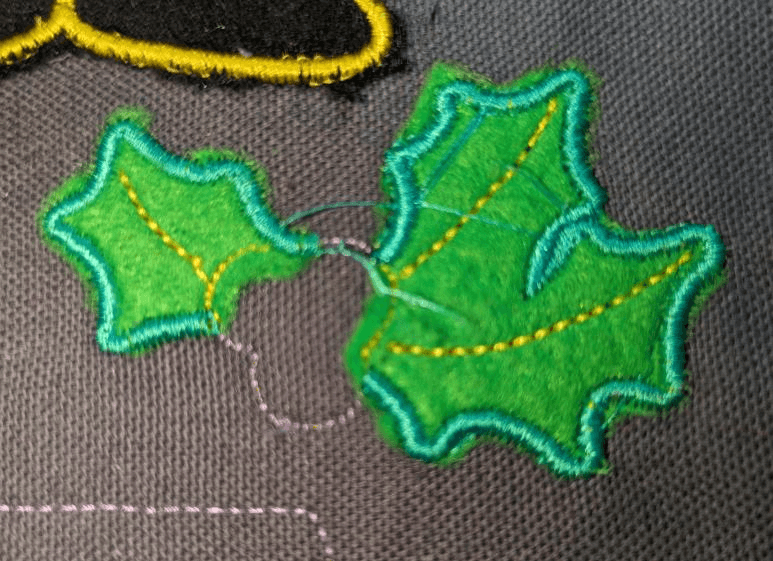
Step 68:
- Cover the project with your main fabric facing down, and run color-stop . (if you use a thick fabric, you won't be able to see the seams through)
- Remove the project from the hoop and Cut the outline close to the seam, let a margin on the top
- Cut off any excess thread and fabric
(Click Image to Enlarge)
Step 69:
(Click Image to Enlarge)
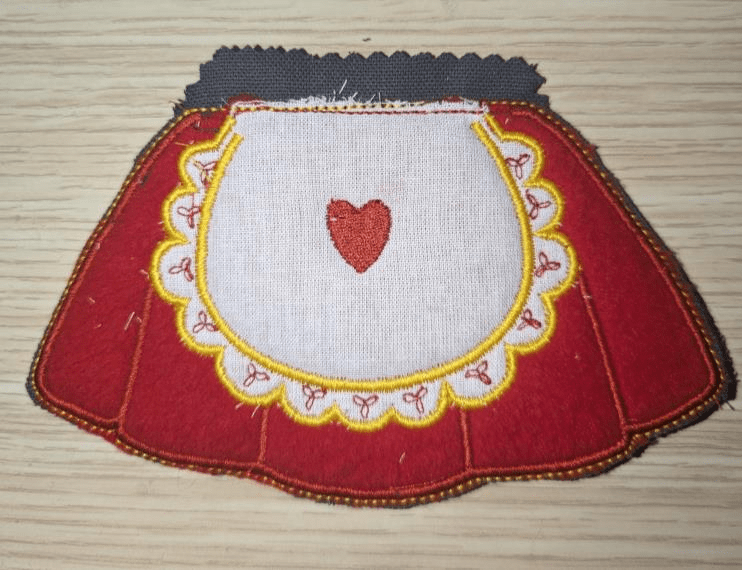
Mother Christmas : skirt (the start)
- For start tautly hoop your cutaway stabilizer in your embroidery hoop and run color-stop 1 as a placement line. Remove the hoop from the machine, do not unhoop
- Cover the placement line with your main body fabric using the repositionable adhesive spray and run color-stop 2.
- you can throw the next colors-stop
Step 70:
Cover the placement line with your fabric with the help of the repositionable adhesive spray, and run colorstop. Cut the excess fabric
Run the next color-stop one by one for outlines and embroidery
(Click Image to Enlarge)
Step 71:
Cover the placement line with your fabric with the help of the repositionable adhesive spray, and run color-stop. Cut the excess fabric for:
Run the next color-stop one by one for outlines and embroidery - outlines - embroidery
Step 72:
- Cover the project with your main fabric facing down, and run color-stop . (if you use a thick fabric, you won't be able to see the seams through)
- Remove the project from the hoop and Cut the outline close to the seam, let a margin on the top
- Cut off any excess thread and fabric
(Click Image to Enlarge)
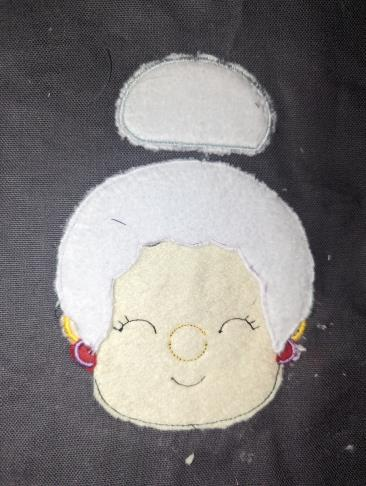
Step 73:
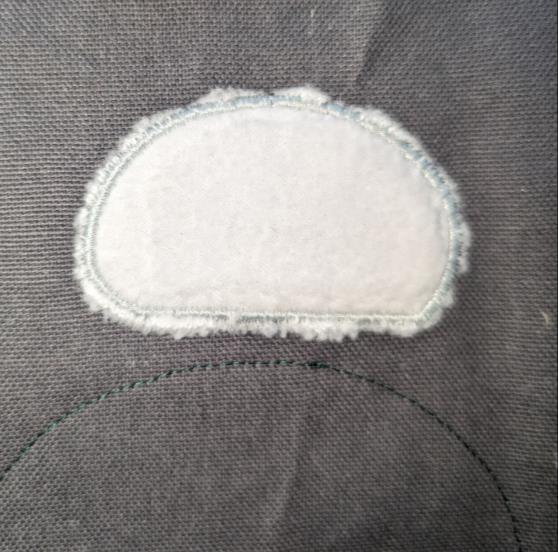
Mother Christmas : head (the start)
For start tautly hoop your cutaway stabilizer in your embroidery hoop and run color-stop 1 as a placement line. Remove the hoop from the machine, do not unhoop
- Cover the placement line with your main body fabric using the repositionable adhesive spray and run color-stop 2.
- you can throw the next colors-stop
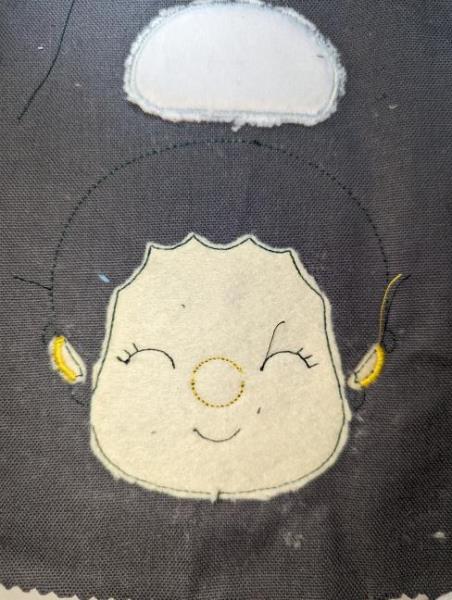
Step 74:
Cover the placement line with your fabric with the help of the repositionable adhesive spray, and run colorstop. Cut the excess fabric
Run the next color-stop one by one for outlines and embroidery
(Click Image to Enlarge)
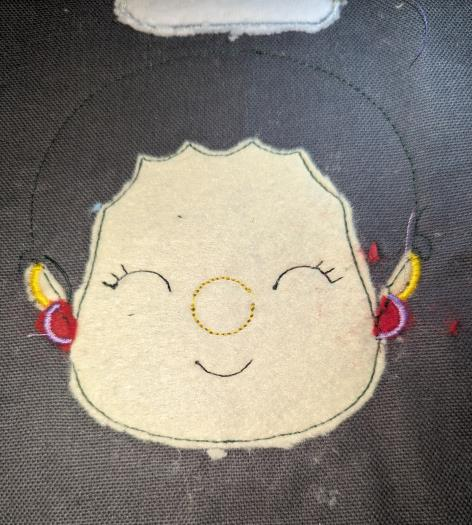
Step 75:
Cover the placement line with your fabric with the help of the repositionable adhesive spray, and run color-stop. Cut the excess fabric for:
Run the next color-stop one by one for outlines and embroidery - outlines - embroidery
(Click Image to Enlarge)
Step 76:
Cover the placement line with your fabric with the help of the repositionable adhesive spray, and run color-stop. Cut the excess fabric
Run the next color-stop one by one for outlines and embroidery
(Click Image to Enlarge)
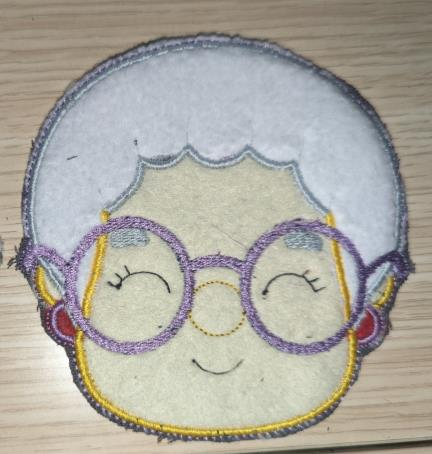
Step 77:
(Click Image to Enlarge)
Cover the placement line with your fabric with the help of the repositionable adhesive spray, and run color-stop. Cut the excess fabric
Step 78:
Run the next color-stop one by one for outlines and embroidery - hair - face - glasses
Step 79:
- Cover the project with your main fabric facing down, and run color-stop . (if you use a thick fabric, you won't be able to see the seams through)
- Remove the project from the hoop and Cut the outline close to the seam, let a margin on the top
- Cut off any excess thread and fabric