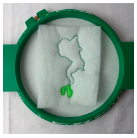
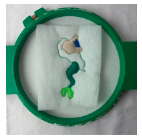
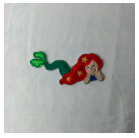
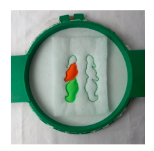
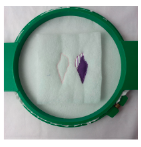
Step 1: | Step 1: - For the Mermaid part tautly hoop 2.5-ounce cutaway stabilizer in your embroidery hoop and run color-stop 1 as a placement line.Remove the hoop from the machine, do not unhoop. Cover the placement line with batting with the help of the repositionable adhesive spray, and run color-stops 2 and 3.
|
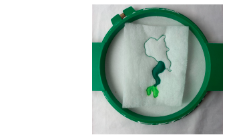
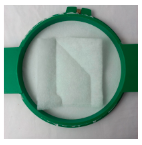
Step 2: | Step 2: - Run color-stop 4 as a placement line. Cover the placement line with green light fabric with the help of the repositionable adhesive spray, and run color-stop 5. Cut the excess fabric.
|
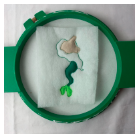
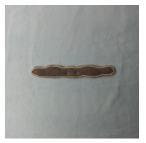
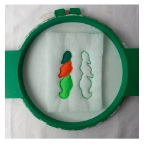
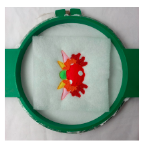
Step 3: |  (Click Image to Enlarge) Step 3: - Run color-stop 6 as a placement line. Cover the placement line with green fabric with the help of the repositionable adesive spray, and run color-stop 7. Cut the excess fabric.
|
Step 4: | Step 4: - Run color-stop 8 as a placement line. Cover the placement line with khaki fabric with the help of the repositionable adhesive spray, and run color-stop 9. Cut the excess fabric.
|
Step 5: | Step 5: - Run color-stop 10 as a placement line. Cover the placement line with blue fabric with the help of the repositionable adhesive spray, and run color-stop 11. Cut the excess fabric.
|
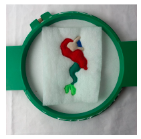
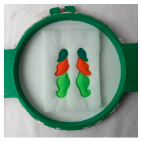
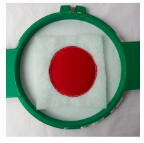
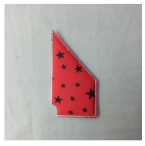
Step 6: | Step 6: - Run color-stop 12 as a placement line. Cover the placement line with red fabric with the help of the repositionable adhesive spray, and run color-stop 13. Cut the excess fabric.
|
Step 7: | Step 7: - Run color-stop 14 through color-stop 22.
|
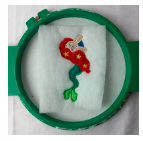
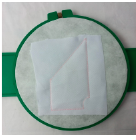
Step 8: | Step 8: - Remove the hoop from the machine, do not unhoop. Cover the back of the hoop with white fabric with the help of the repositionable adhesive spray and run color-stop 23.
|
Step 9: | Step 9: - Remove the project from the hoop. Cut out the outline of the design, with sharp scissors, and save it for later.
|
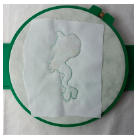
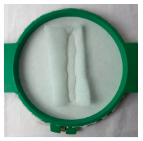
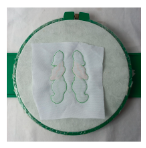
Step 10: | Step 10: - For the Sand part tautly hoop 2.5-ounce cutaway stabilizer in your embroidery hoop and run color-stop 1 as a placement line.
- Remove the hoop from the machine, do not unhoop. Cover the placement line with batting with the help of the repositionable adhesive spray, and run color-stops 2.
|
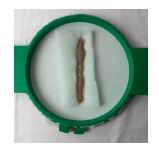
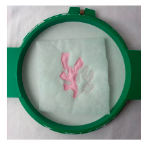
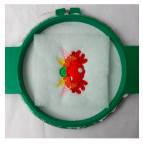
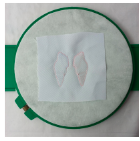
Step 11: |  (Click Image to Enlarge) Step 11: - Cover the placement line with khaki fabric with the help of the repositionable adhesive spray, and run color-stops 3 and 4. Cut the excess fabric. And run color-stop 5.
|
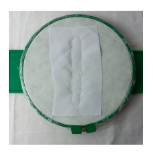
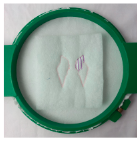
Step 12: | 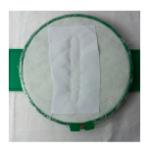 (Click Image to Enlarge) Step 12: - Remove the hoop from the machine, do not unhoop. Cover the back of the hoop with white fabric with the help of the repositionable adhesive spray and run color-stop 6.
|
Step 13: | Step 13: - Remove the project from the hoop. Cut out the outline of the design, with sharp scissors, and save it for later.
|
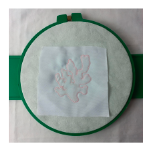
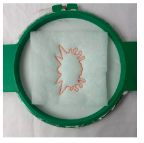
Step 14: | Step 14: - For the coral part tautly hoop 2.5-ounce cutaway stabilizer in your embroidery hoop and run color-stop 1 as a placement line.
- Remove the hoop from the machine, do not unhoop. Cover the placement line with batting with the help of the repositionable adhesive spray, and run color-stops 2 and 3.
|
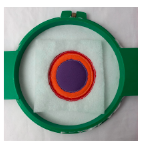
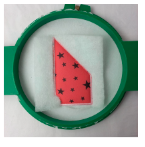
Step 15: | Step 15: - Run color-stop 4 as a placement line. Cover the placement line with pink fabric with the help of the repositionable adhesive spray, and run color-stop 5. Cut the excess fabric.
|
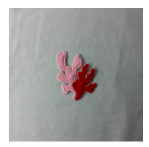
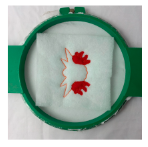
Step 16: | Step 16: - Run color-stop 6 as a placement line. Cover the placement line with red fabric with the help of the repositionable adhesive spray, and run color-stop 7. Cut the excess fabric.
|
Step 18: | Step 18: - Remove the hoop from the machine, do not unhoop. Cover the back of the hoop with white fabric with the help of the repositionable adhesive spray and run color-stop 10.
|
Step 19: | Step 19: - Remove the project from the hoop. Cut out the outline of the design, with sharp scissors, and save it for later.
|
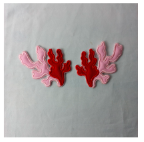
Step 20: | Step 20: - Follow the previous step for the other Coral.
|
Step 21: | Step 21: - For the seaweed part tautly hoop 2.5-ounce cutaway stabilizer in your embroidery hoop and run color-stop 1 as a placement line.
- Remove the hoop from the machine, do not unhoop. Cover the placement line with batting with the help of the repositionable adhesive spray, and run color-stops 2 and 3.
|
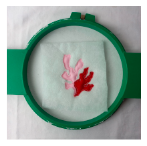
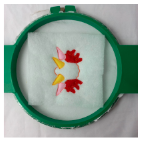
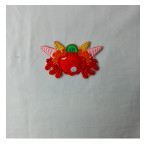
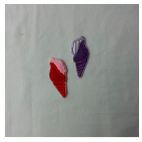
Step 22: | 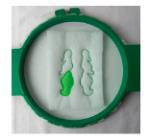 (Click Image to Enlarge) Step 22: - Run color-stop 4 as a placement line. Cover the placement line with green light fabric with the help of the repositionable adhesive spray, and run color-stop 5. Cut the excess fabric.
|
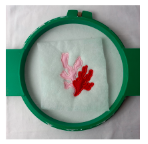
Step 23: |  (Click Image to Enlarge) Step 23: - Run color-stop 6 as a placement line. Cover the placement line with orange fabric with the help of the repositionable adhesive spray, and run color-stop 7. Cut the excess fabric.
|
Step 24: | Step 24: - Run color-stop 8 as a placement line. Cover the placement line with green fabric with the help of the repositionable adhesive spray, and run color-stop 9. Cut the excess fabric.
|
Step 25: | Step 25: - Do the same for the other seaweed.
|
Step 26: | Step 26: - Run color-stop 16 through color-stop 18.
|
Step 27: | Step 27: - Remove the hoop from the machine, do not unhoop. Cover the back of the hoop with white fabric with the help of the repositionable adhesive spray and run color-stop 19.
|
Step 28: | Step 28: - Remove the project from the hoop. Cut out the outline of the design, with sharp scissors, and save it for later.
|
Step 29: | Step 29: - For the coral reef part tautly hoop 2.5-ounce cutaway stabilizer in your embroidery hoop, and run color-stop 1 as a placement line.
- Remove the hoop from the machine, do not unhoop. Cover the placement line with batting with the help of the repositionable adhesive spray, and run color-stops 2 and 3.
|
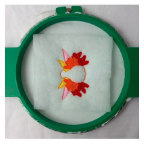
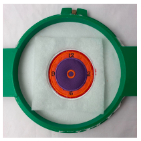
Step 30: | Step 30: - Run color-stop 4 as a placement line. Cover the placement line with red fabric with the help of the repositionable adhesive spray, and run color-stop 5. Cut the excess fabric. Do the same for the other.
|
Step 31: | Step 31: - Run color-stop 8 as a placement line. Cover the placement line with pink fabric with the help of the repositionable adhesive spray, and run color-stop 9. Cut the excess fabric. Do the same for all the horns, just change the fabric.
|
Step 32: | Step 32: - Run color-stop 16 as a placement line. Cover the placement line with orange fabric with the help of the repositionable adhesive spray, and run color-stop 17. Cut the excess fabric. Do the same for all the horns, just change the fabric.
|
Step 33: | Step 33: - Run color-stop 20 as a placement line. Cover the placement line with green light fabric with the help of the repositionable adhesive spray, and run color-stop 21. Cut the excess fabric. Do the same for all the horns, just change the fabric.
|
Step 34: | Step 34: - Run color-stop 22 as a placement line. Cover the placement line with printed fabric with the help of the repositionable adhesive spray, and run color-stop 23. Cut the excess fabric.
|
Step 35: | Step 35: - Run color-stop 24 through color-stop 29.
|
Step 36: | Step 36: - Remove the hoop from the machine, do not unhoop. Cover the back of the hoop with white fabric with the help of the repositionable adhesive spray and run color-stop 30.
|
Step 37: | Step 37: - Remove the project from the hoop. Cut out the outline of the design, with sharp scissors, and save it for later.
|
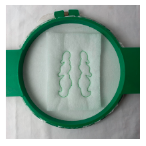
Step 38: | Step 38: - For the snails part tautly hoop 2.5-ounce cutaway stabilizer in your embroidery hoop, and run color-stop 1 as a placement line.
- Remove the hoop from the machine, do not unhoop. Cover the placement line with batting with the help of the repositionable adhesive spray, and run color-stops 2 and 3.
|
Step 39: | Step 39: - Run color-stop 4 as a placement line. Cover the placement line with lilac fabric with the help of the repositionable adhesive spray, and run color-stop 5. Cut the excess fabric.
|
Step 40: | Step 40: - Run color-stop 6 as a placement line. Cover the placement line with purple fabric with the help of the repositionable adhesive spray, and run color-stop 7. Cut the excess fabric.
|
Step 41: | Step 41: - Do the same for the other, run color-stop 12 through color-stop 15.
|
Step 42: | Step 42: - Remove the hoop from the machine, do not unhoop. Cover the back of the hoop with white fabric with the help of the repositionable adhesive spray and run color-stop 16.
|
Step 43: | Step 43: - Remove the project from the hoop. Cut out the outline of the design, with sharp scissors, and save it for later.
|
Step 44: | Step 44: - For the clock part tautly hoop 2.5-ounce cutaway stabilizer in your embroidery hoop, and run color-stop 1 as a placement line.
- Remove the hoop from the machine, do not unhoop. Cover the placement line with batting with the help of the repositionable adhesive spray, and run color-stop 2.
|
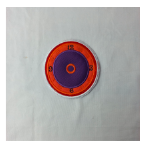
Step 45: | Step 45: - Cover the placement line with red fabric with the help of the repositionable adhesive spray, and run color stops 3 and 4. Cut the excess fabric.
|
Step 46: | Step 46: - Run color-stop 5 as a placement line. Cover the placement line with orange fabric with the help of the repositionable adhesive spray, and run color-stop 6. Cut the excess fabric.
|
Step 47: | Step 47: - Run color-stop 7 as a placement line. Cover the placement line with purple fabric with the help of the repositionable adhesive spray, and run color-stop 8. Cut the excess fabric.
|
Step 48: | Step 48: - Run color-stop 9 through color-stop 13.
|
Step 49: | Step 49: - Remove the hoop from the machine, do not unhoop. Cover the back of the hoop with white fabric with the help of the repositionable adhesive spray and run color-stop 14.
|
Step 50: | Step 50: - Remove the project from the hoop. Cut out the outline of the design, with sharp scissors, and save it for later.
|
Step 51: | Step 51: - For the background part tautly hoop 2.5-ounce cutaway stabilizer in your embroidery hoop, and run color-stop 1 as a placement line.
- Remove the hoop from the machine, do not unhoop. Cover the placement line with batting with the help of the repositionable adhesive spray, and run color-stop 2.
|
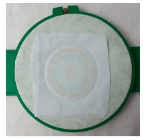
Step 52: | Step 52: - Cover the placement line with printed fabric with the help of the repositionable adhesive spray, and run color stops 3 and 4. Cut the excess fabric. And run color-stop 5.
|
Step 53: | Step 53: - Remove the hoop from the machine, do not unhoop. Cover the back of the hoop with white fabric with the help of the repositionable adhesive spray and run color-stop 6.
|
Step 54: | Step 54: - Remove the project from the hoop. Cut out the outline of the design, with sharp scissors, and save it for later.
|
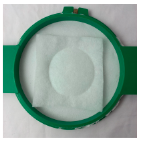
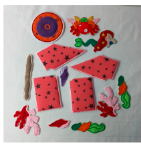
Step 55: | 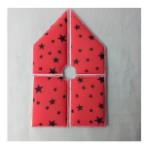 (Click Image to Enlarge) Step 55: - Follow the same steps for the rest of the parts.
|
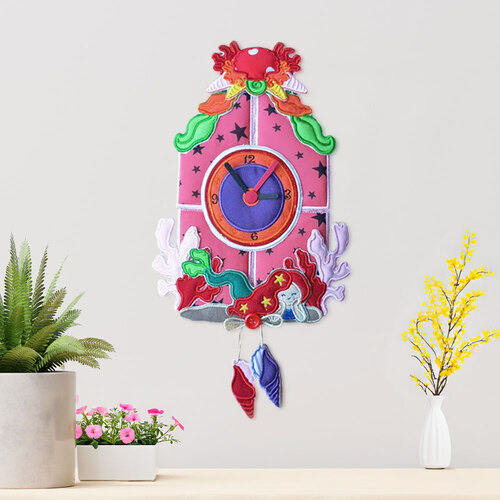
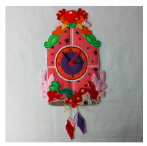
Step 56: | Step 56: - We put all the pieces together.
|
Step 57: | Step 57: - Join the 4 pieces of the background as illustrated in the image. Stick the seaweed to the top of the background. Place the coral reef on top of the seaweed.
- Stick the corals to the bottom of the background. Put the sand on top of the corals and place the mermaid on top of it.
- Place the clock in the center of the background.
- And finally hang the snails with the help of jute twine through the holes that are in the sand.
- Use complementary decoration.
|
|