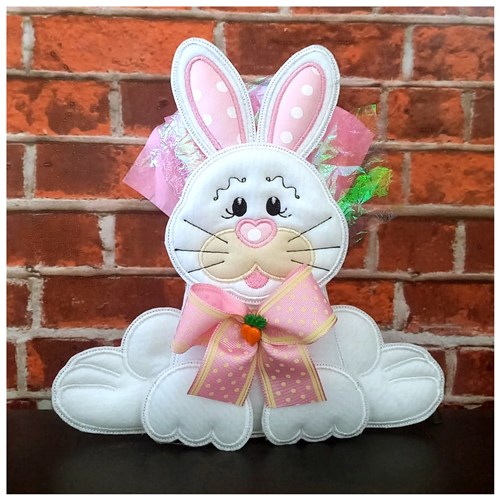
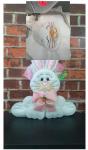
Create a charming Easter Bunny treat holder with this in-the-hoop embroidery design! Perfect for gifting sweets or decorating your Easter table. Easy to stitch, adorable in design—this project is a festive favorite for spring celebrations!
Cotton Fabric (or felt) in the colors. Colors can be whatever you prefer.
Ribbons and Buttons (for adornaments).
Hot Glue Gun.
A ring to hang the project on the wall (if desired).
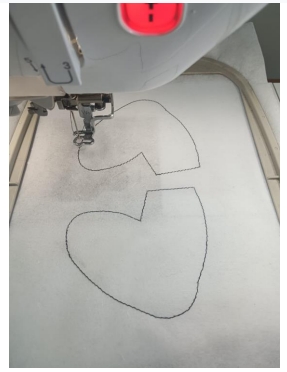
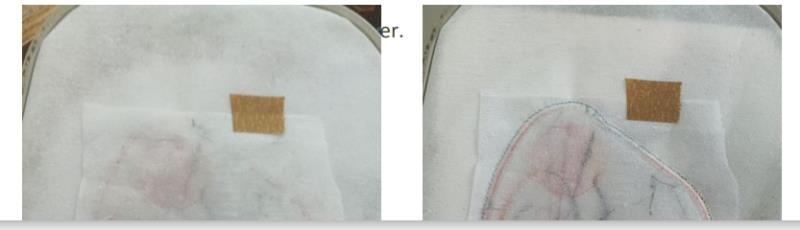
Step 1: Hoop stabilizer and stitch out the placement line.
Step 2:
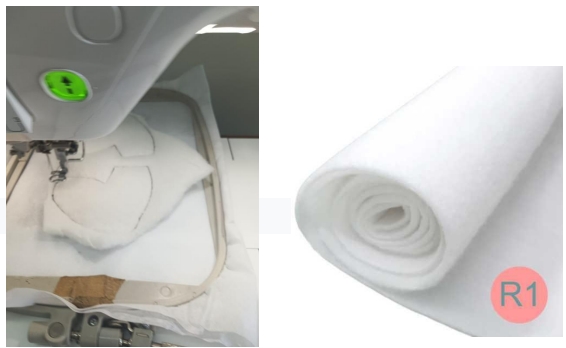
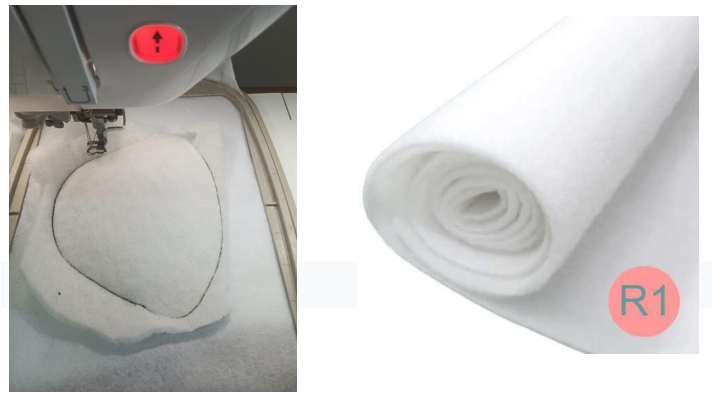
Place Batting (or Padding) R1 or R2 over the placement line you stitched before and stitch.
(Click Image to Enlarge)
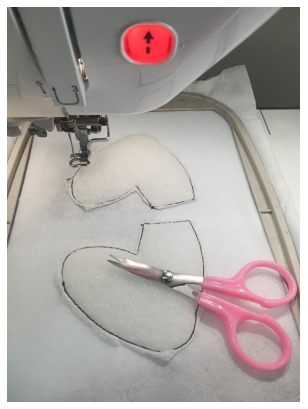
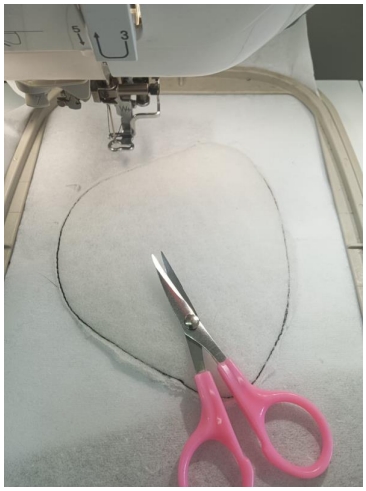
Step 3: Trim the batting as close as you can to the stitching without cutting the stitching.
(Click Image to Enlarge)
Step 4:
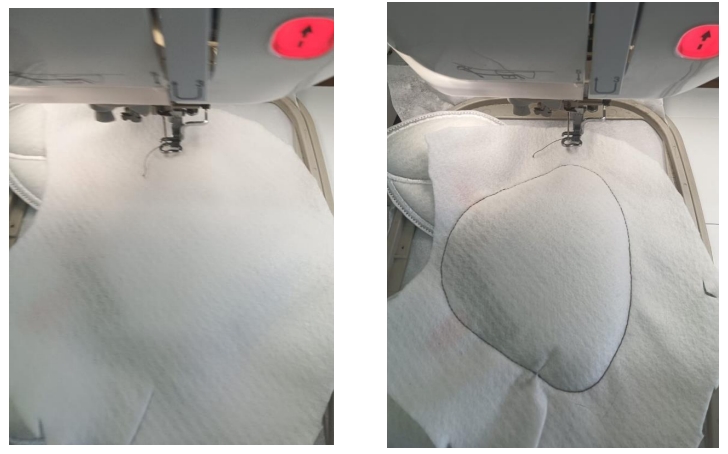
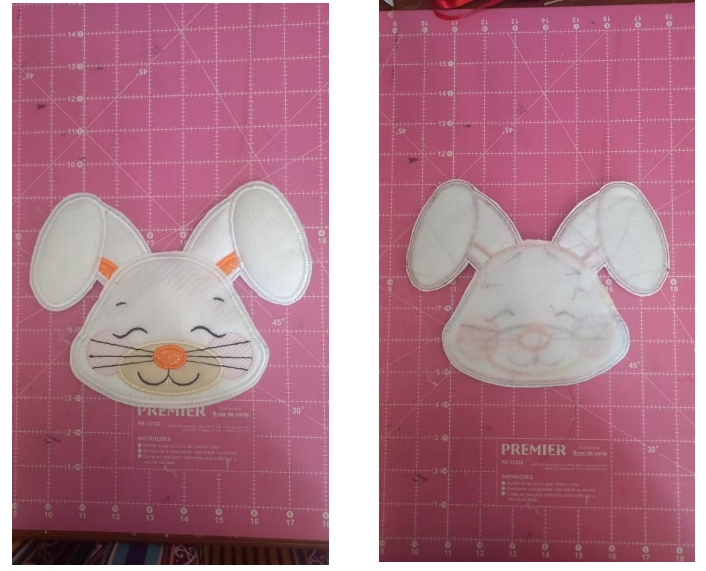
Place the felt right side up covering the batting. Stitch down.
(Click Image to Enlarge)
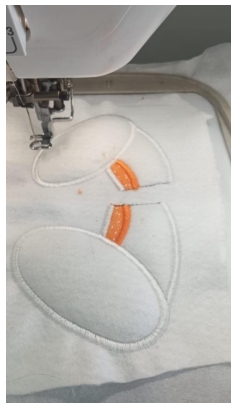
Step 5: Continue the appliqués process following the machine order until the penultimate step.
(Click Image to Enlarge)
Step 6:
(THE LAST STEP OF THE MACHINE):
Leave your work in the hoop.
Remove the hoop from your machine and turn the hoop over so the wrong side of the hoop is up.
Place the fabric on the wrong side of the hoop covering all the stitch lines.
Tape in place with sticky tape or masking tape.
Put the hoop in the machine and stitch.
(Click Image to Enlarge)
Step 7:
Remove the hoop from the machine and remove your work from the hoop. Trim as close as you can. Be careful to not cut the stitches. Save to use the ears in the next step.
Step 8: SECOND PART:
(Click Image to Enlarge)
Step 1:Hoop stabilizer and stitch out the placement line.
Step 2:
Place Batting (or Padding) R1 or R2 over the placement line you stitched before and stitch.
(Click Image to Enlarge)
Step 3:
(Click Image to Enlarge)
Trim the batting as close as you can to the stitching without cutting the stitching.
Place the ears on top of the mark made by the machine with tape and sew on the machine.
Step 4:
Place the felt right side up covering the batting. Stitch down.
(Click Image to Enlarge)
Step 5:
Continue the appliqués process following the machine order until the penultimate step.
Step 6:
(THE LAST STEP OF THE MACHINE)
Leave your work in the hoop.
Remove the hoop from your machine and turn the hoop over so the wrong side of the hoop is up.
Place the fabric on the wrong side of the hoop covering all the stitch lines.
Tape in place with sticky tape or masking tape.
Put the hoop in the machine and stitch.
(Click Image to Enlarge)
Step 7:
Remove the hoop from the machine and remove your work from the hoop. Trim as close as you can. Be careful to not cut the stitches.
(Click Image to Enlarge)
Step 8:
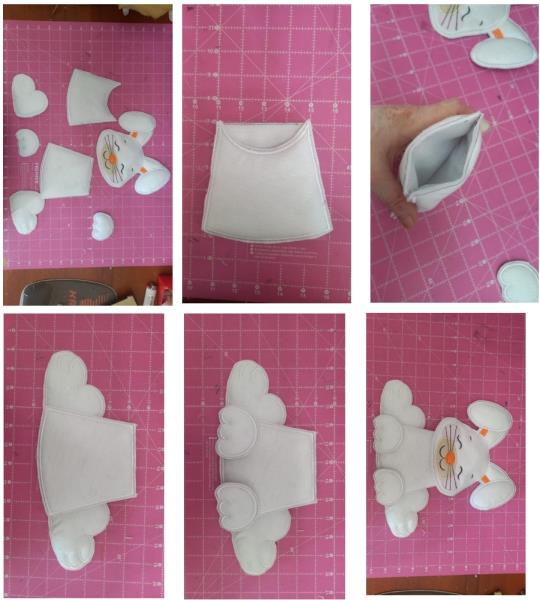
Repeat the above process for all available parts of this project. Once all the pieces are finished, you can put together with a glue gun (the most recommended and that's what I use) or you can also put together using a sewing machine or hand sewing.
(Click Image to Enlarge)
Your project is finished!
We remind you that for all parts of this project you will follow the same step by step!
Then just put them together using a hot glue gun or a sewing machine (or even hand sewing).
This project was made by our team and we hope you had fun making it.
We are working hard and continuously to bring our customers new projects that are easy to make and at the same time charming.