Border OptionsHugging border, circle, square, or rectangle — with a 3mm satin stitch.
Backing OptionsAvailable with iron-on, sew-on, or velcro backing.
Fast ShippingShipped quickly from the USA.
Free Online Tools
Powerful embroidery utilities that save time and prevent costly mistakes.
Stitch AssistantRECOMMENDED
Get the exact stabilizer, machine settings, needle, and thread color sequence for every embroidery design you purchase — based on that design's stitch density, dimensions, and color count.
Stitch a cuddly and safe toy with this ITH Baby Bear Rattle design! Perfect for little hands, this soft plush project makes a thoughtful handmade gift for newborns, baby showers, or nurseries. Easy to stitch and adorable to gift.
Put your tearable support in a 10×10 cm frame.
(For my part, I work out of the frame using temporary glue).
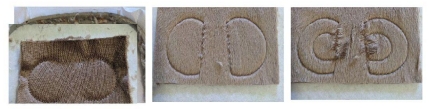
Start by making the ears.
Step 2: The Ears
Step 1
Sew on your support. From this seam, measure the fabric size you’ll need.
Always let the fabric extend beyond the seam so it can hide the stitches.
Cut your fabric, place it on the support, and secure with temporary glue.
Step 2
Sew the fabric onto your support.
Step 3
Sew the centre of the ears. Measure and cut fabric for the centre, then place it on your base fabric.
Step 4
Sew the centre fabric to the base fabric. Trim the excess fabric.
Step 5
Do bumblebee stitches on the centre of the ear.
Place the back fabric of the ears right sides together and secure in place.
Step 6
Sew the back and front of the ears together.
Once finished, remove from the frame, cut excess fabric, and set aside.
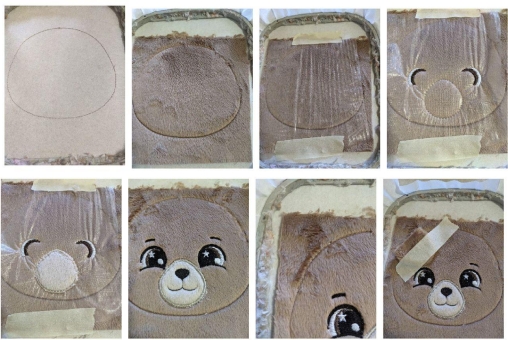
Step 3: The Head
Step 1
Sew on the support to mark the fabric placement for the head.
Place your head fabric to cover the seam.
Step 2
Sew the fabric onto your support.
Add water soluble support before continuing.
Step 3 & 4
Embroidery stitches.
Step 5
Sew on the support to mark the muzzle placement.
Cut beige fabric to size, place it over the seam (hiding it), and secure.
Step 6
Sew the beige fabric onto the main fabric.
Trim the excess and add a small piece of water soluble support on the muzzle.
Step 7
Bumblebee stitches all around the muzzle.
Step 8 & 9
Embroidery stitches.
Step 10
Sew on your support to mark ear placement.
Place the ear (right sides together) and secure before stitching.
Step 11
Sew the left ear.
Step 12
Sew the right ear.
Step 13
Sew to close the front with the back.
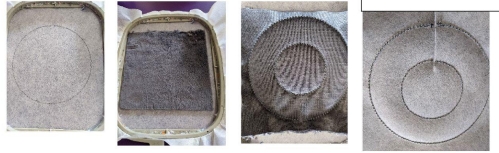
Step 4: The Ring
Step 1
Sew on the support to show fabric placement.
Place fabric over the seam.
Step 2
Sew the fabric onto your support.
Place the second fabric right sides together.
Step 3
Sew both fabrics together.
Remove from the frame, cut carefully where there’s no seam, trim excess, and turn inside out.
Fill with stuffing.
Finish with an invisible seam to close the ring.
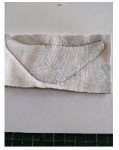
Step 5: The Bandana
You have two options:
Make it in a 13×18 cm frame using the embroidery machine, or
Print the pattern and use a sewing machine (preferred method).
Step 1
Sew on the support to mark fabric placement.
Place fabric and proceed.
Step 2
Sew fabric onto support.
Place the second fabric right sides together on top.
Step 3
Sew both pieces together.
Remove from support, trim excess fabric, flip, and sew along the top edge to close.
Add snap buttons.
Step 4
Assemble:
The ring should already be closed.
Position the head at the seam of the ring and secure (fabric glue helps).
Sew with invisible stitches (repeat at least three times for strength).