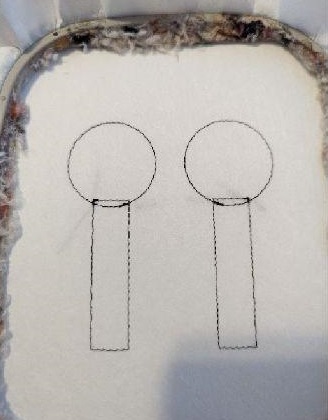
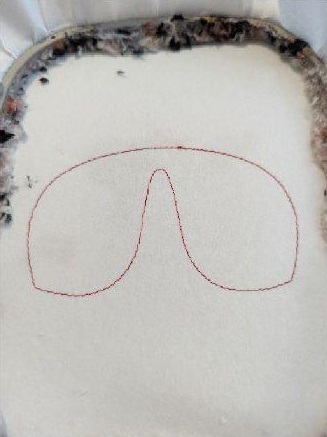
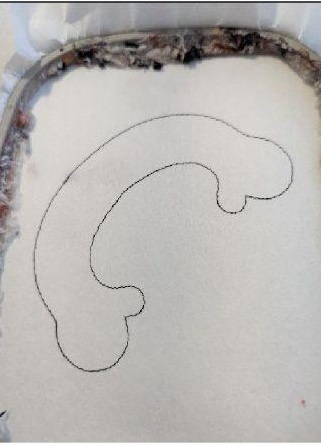
Stop 1 and 2 are done on your support to tell you the location of your fabric.
Step 2:
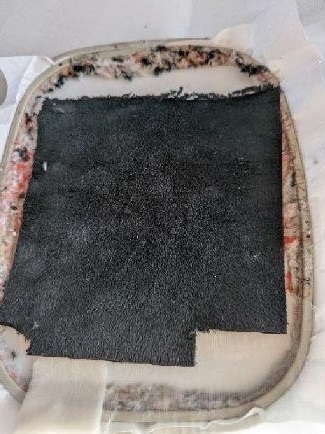
(Click Image to Enlarge)
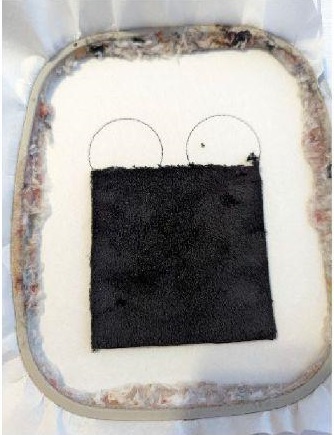
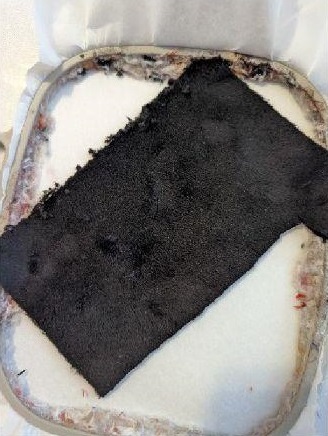
Put your black fabric on the seams, take care to hide the seams well
Step 3:
(Click Image to Enlarge)
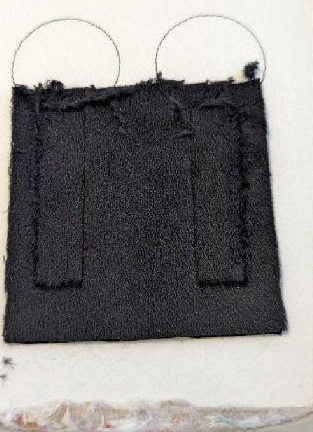
Make stop #3, this seam will hold your fabric on your support
Step 4:
(Click Image to Enlarge)
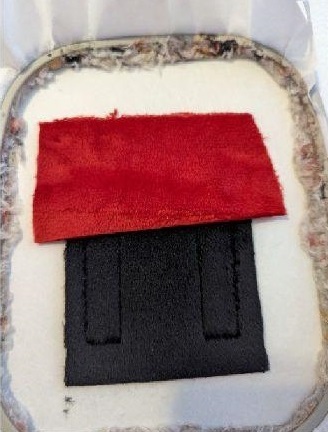
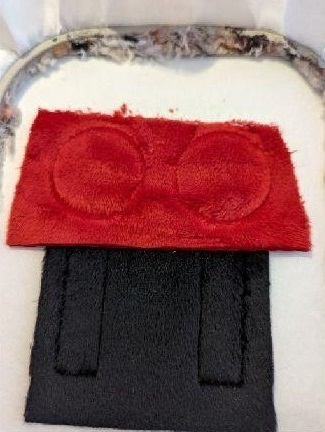
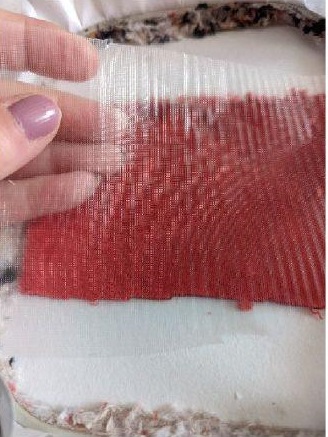
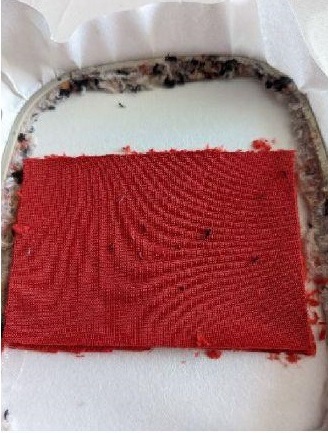
Put your red fabric in the top (seam in circles)
Step 5:
(Click Image to Enlarge)
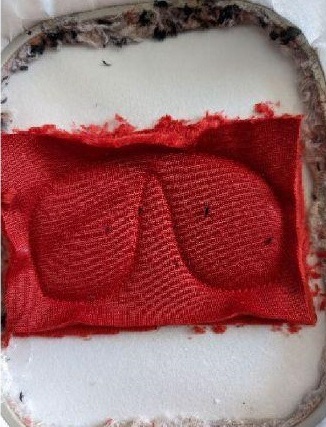
Make stop #4 that will hold your fabric on the support
Step 6:
(Click Image to Enlarge)
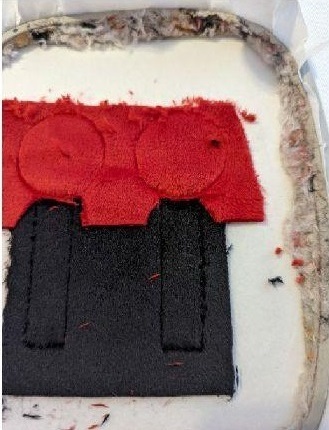
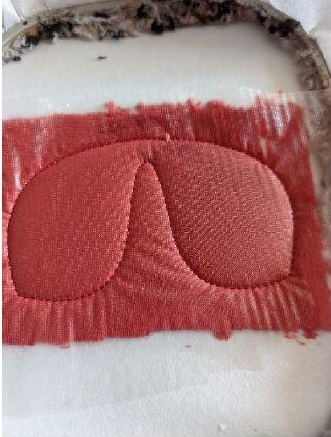
Remove excess tissue in the red and black joint
Step 7:
(Click Image to Enlarge)
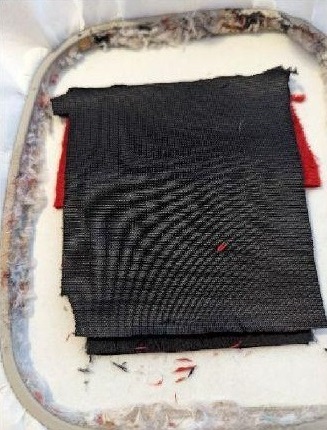
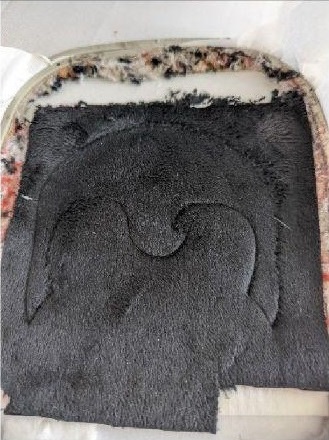
Put your piece of black fabric, place against place
Step 8:
(Click Image to Enlarge)
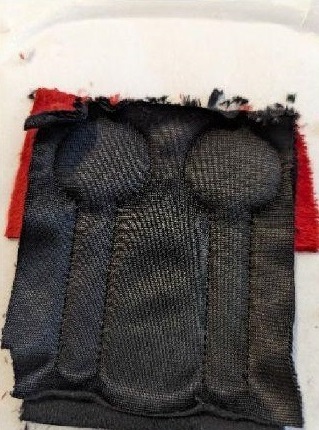
Make stop #5, this seam will sew your 2 pieces together. Get out of your frame, remove the support and cut the excess fabric
Step 9:
(Click Image to Enlarge)
THE WINGS
Stop 1 does this on your support to tell you the location of your fabric
Step 10:
(Click Image to Enlarge)
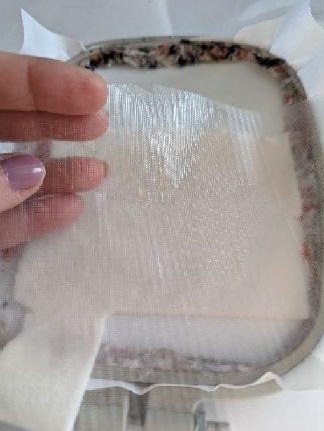
Once your sewing is finished, put on your fabric and water-soluble support
Step 11:
(Click Image to Enlarge)
Make stop 2, this seam will sew your fabric and water-soluble support on your base support
Step 12:
(Click Image to Enlarge)
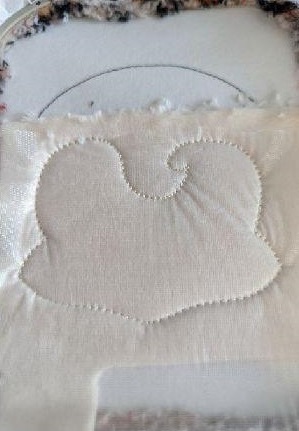
Stop No. 3: embroidery stitch
Step 13:
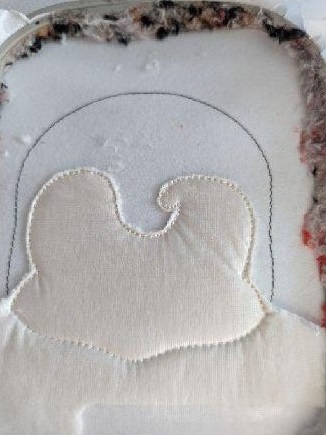
(Click Image to Enlarge)
Once your embroidery stitches are finished, take your 2nd piece of fabric and put it place against place on your work
Step 14:
(Click Image to Enlarge)
Make the last seam (stop 4) this coutre will sew your 2 pieces together.
Get out of the frame, remove your support and cut the excess fabric.
Step 15:
(Click Image to Enlarge)
THE ARMS
Stop #1: This fact on your stand to tell you the location of your fabric
Step 16:
(Click Image to Enlarge)
Put your fabric on this seam taking care to hide this seam well
Step 17:
(Click Image to Enlarge)
Stop #2: this seam will hold your fabric on your support
Step 18:
(Click Image to Enlarge)
Put your 2nd piece of fabric, place against place on your work
Step 19:
(Click Image to Enlarge)
Stop #3: This seam will sew your 2 pieces together.
Get out of the frame, remove the support and cut the excess fabric
Step 20:
(Click Image to Enlarge)
THE HEAD
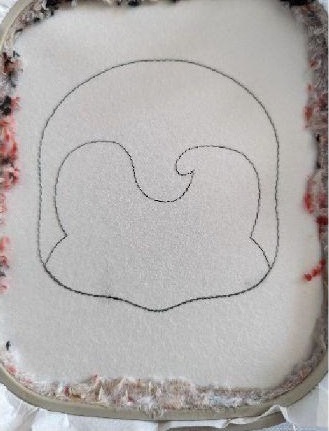
Stop 1 and 2 are done on the support to tell you the location of your fabric
Step 21:
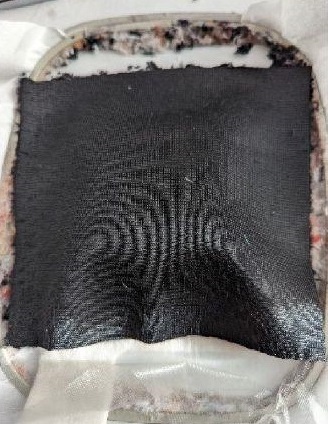
(Click Image to Enlarge)
Put your piece of fabric for the lower face and your water-soluble support
Step 22:
(Click Image to Enlarge)
Stop #3: This seam will sew your fabric and water-soluble support on your support
Step 23:
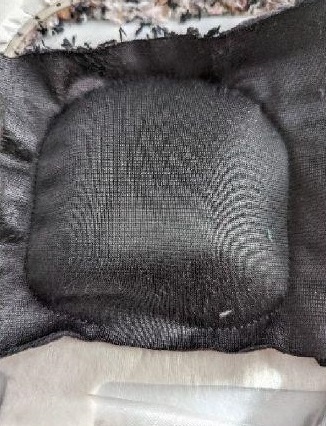
(Click Image to Enlarge)
Remove excess tissue in the top part
Step 24:
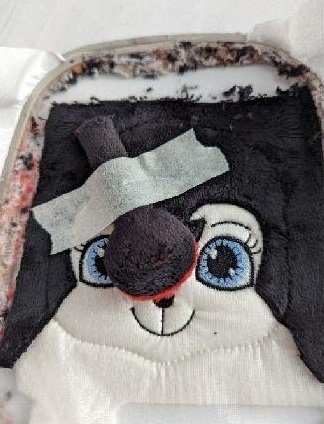
(Click Image to Enlarge)
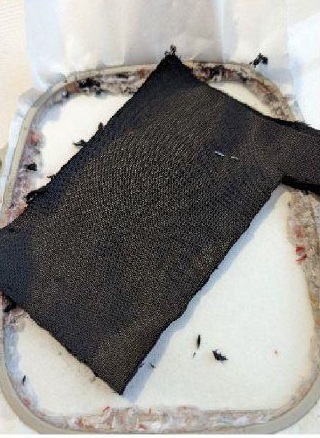
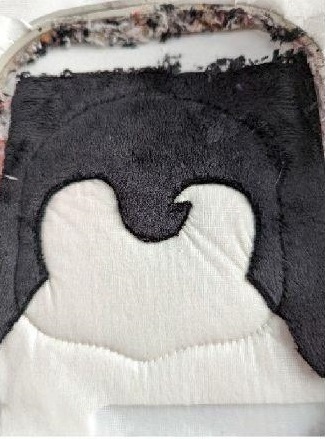
Put your fabric for the top of the head
Step 25:
(Click Image to Enlarge)
Stop #4: this seam will sew your fabric on your support
Step 26:
(Click Image to Enlarge)
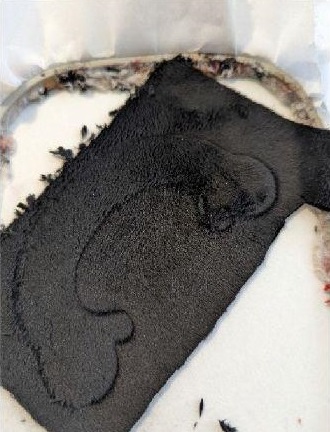
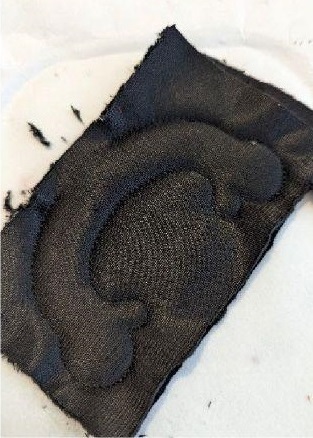
Remove excess tissue in the lower part of the head (black)
Step 27:
(Click Image to Enlarge)
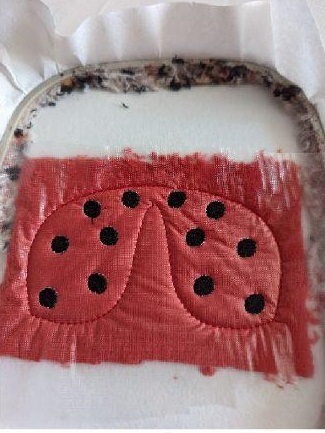
Stop from 5 to 8: embroidery stitch
Step 28:
(Click Image to Enlarge)
Stop #9: This seam tells you the location of your antenna
Step 29:
(Click Image to Enlarge)
Place your antenna place against place on the seam of stop #9, hold in place
Step 30:
(Click Image to Enlarge)
Stop 10: Sewing your antenna onto your fabric.
Make stop 11 and 12 in the same way as 9 and 10
Step 31:
(Click Image to Enlarge)
Once your 2 antennas are in place, put your 2nd piece of fabric place against place.
I suggest you put the speed of your embroiderer to a minimum to follow your fabric when sewing
Step 32:
(Click Image to Enlarge)
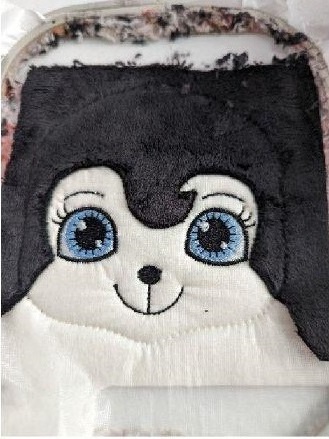
Stop 13: sewing your 2 pieces together.
Once done, remove from your frame, remove the support and cut the excess fabric
Step 33:
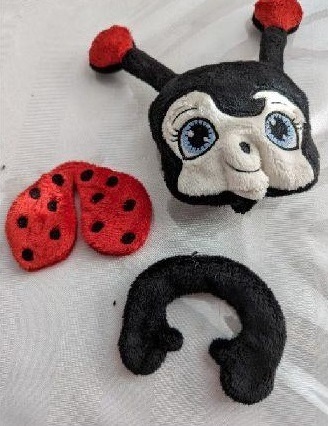
(Click Image to Enlarge)
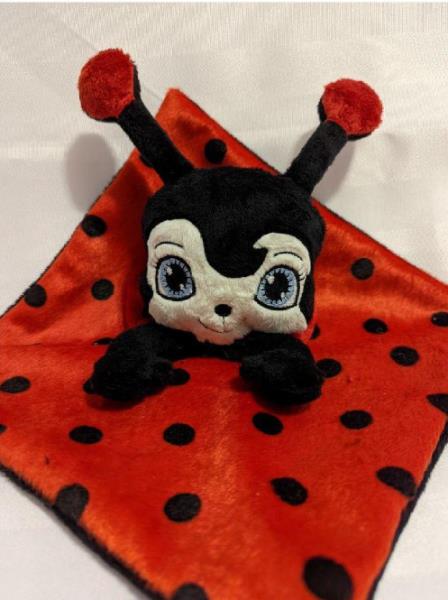
You should have this: head with antenna, arms and wings
Step 34:
THE ASSEMBLY
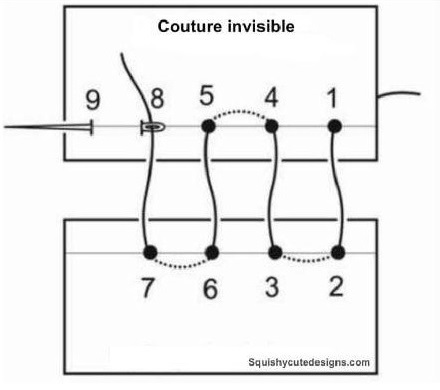
For the head, put your stuff, once well filled make an invisible seam to close
Step 35:
(Click Image to Enlarge)
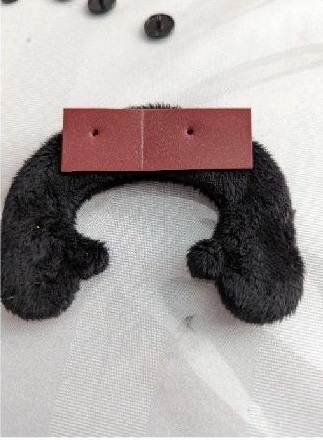
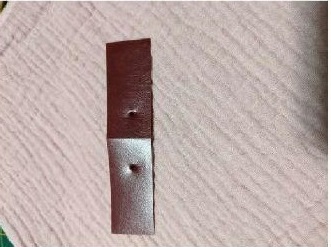
If you put on press buttons, it must be done before putting the stuff. Here I made a template with 3 cm between the 2 holes
Step 36:
(Click Image to Enlarge)
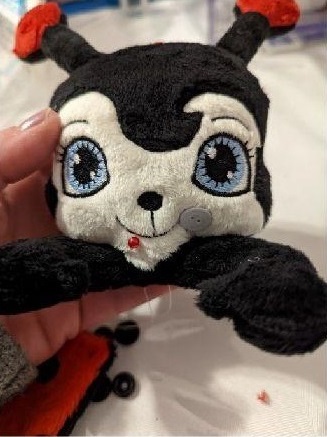
Once you have put the plug and close your seam of the arms, it is necessary to position the head. Set up and make an invisible seam all around. I do with tapestry thread and at least 3 turns so that it is solid
Step 37:
(Click Image to Enlarge)
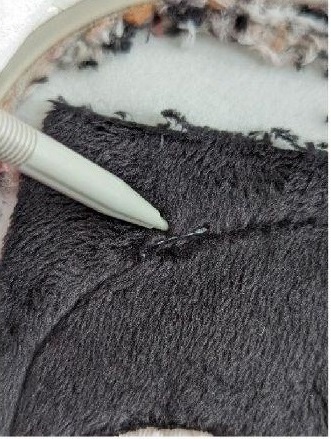
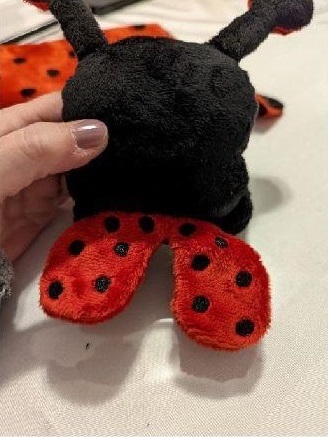
Position your wings on the back. I put at the junction of the head and arms
Step 38:
(Click Image to Enlarge)
This template will be used to put your buttons press on the back of the arms and on the cover