This is a collaboration between ITH Boutique and Emerson.
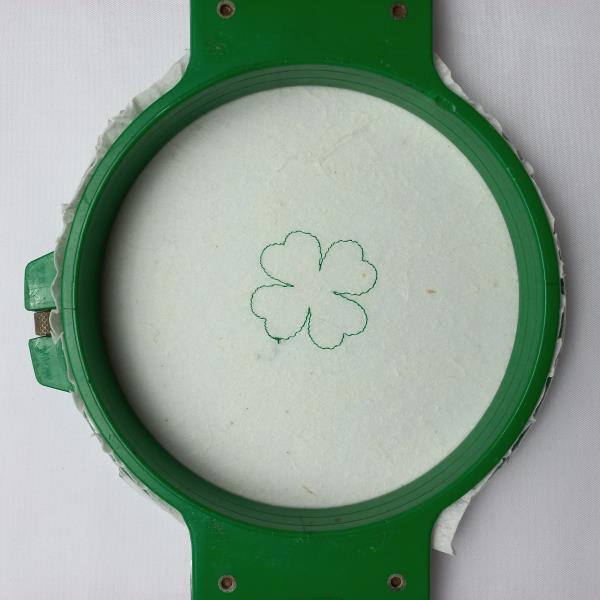
Step 1:
For the shamrock part tautly hoop 2.5-ounce cutaway stabilizer in your embroidery hoop and run color-stop 1 as a placement line.
(Click Image to Enlarge)
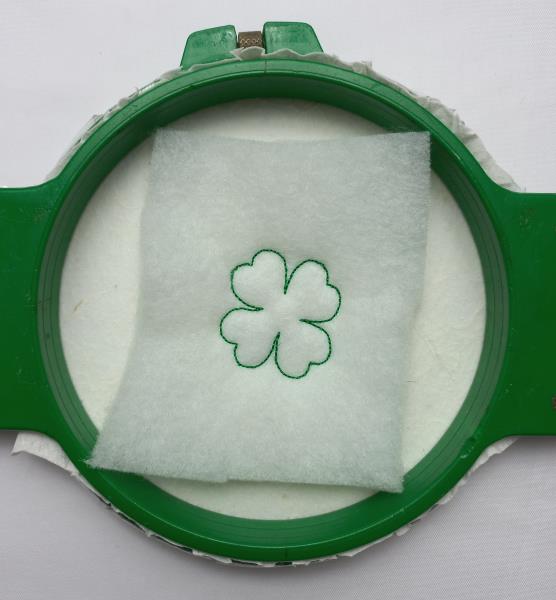
Step 2:
Remove the hoop from the machine, do not unhoop. Cover the placement line with batting with the help of the repositionable adhesive spray, and run color-stop 2.
(Click Image to Enlarge)
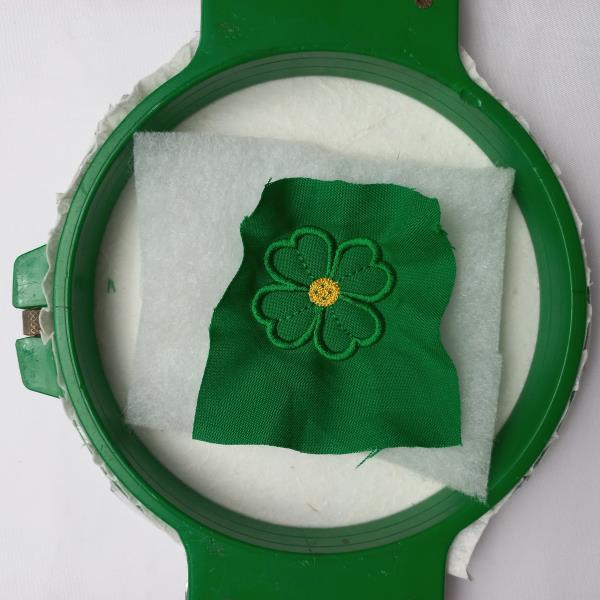
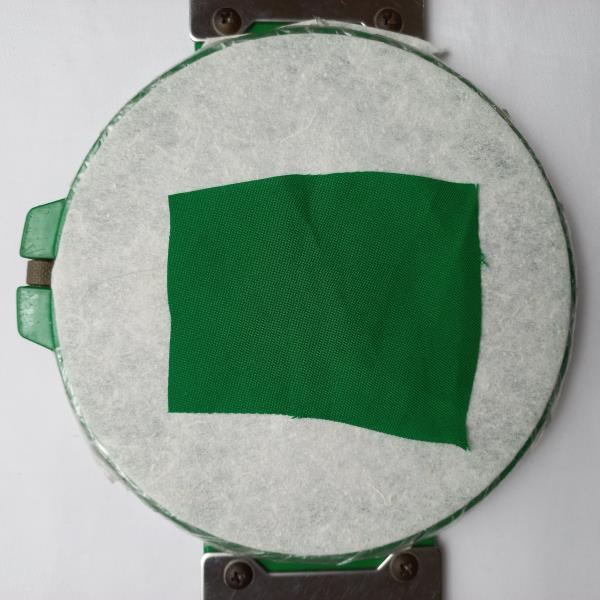
Step 3:
Cover the placement line with green fabric with the help of the repositionable adhesive spray, and run color-stop 3 through color-stop 6.
(Click Image to Enlarge)
Step 4:
Remove the hoop from the machine, do not unhoop. Cover the back of the hoop with green fabric with the help of the repositionable adhesive spray and run color-stop 7.
(Click Image to Enlarge)
Step 5:
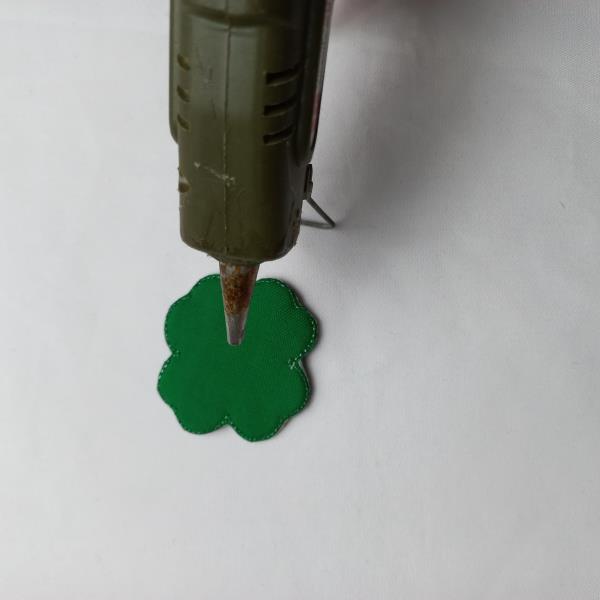
Remove the project from the hoop. Cut out the outline of the design, with sharp scissors, and save it for later.
(Click Image to Enlarge)
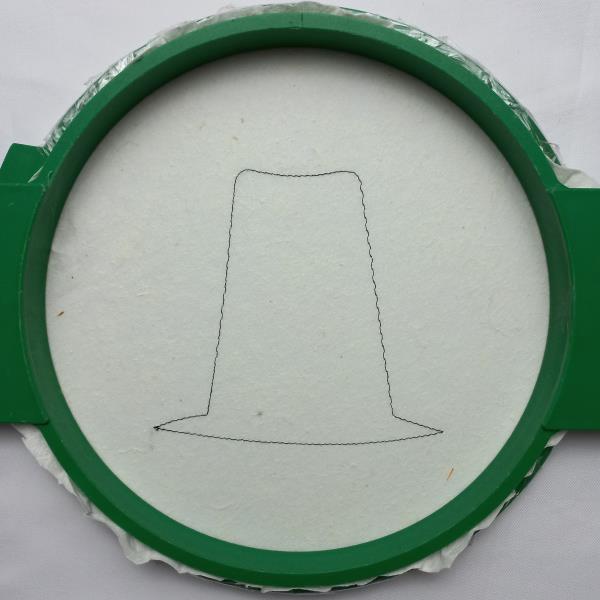
Step 6:
For the hat part tautly hoop 2.5-ounce cutaway stabilizer in your embroidery hoop and run color-stop 1 as a placement line.
(Click Image to Enlarge)
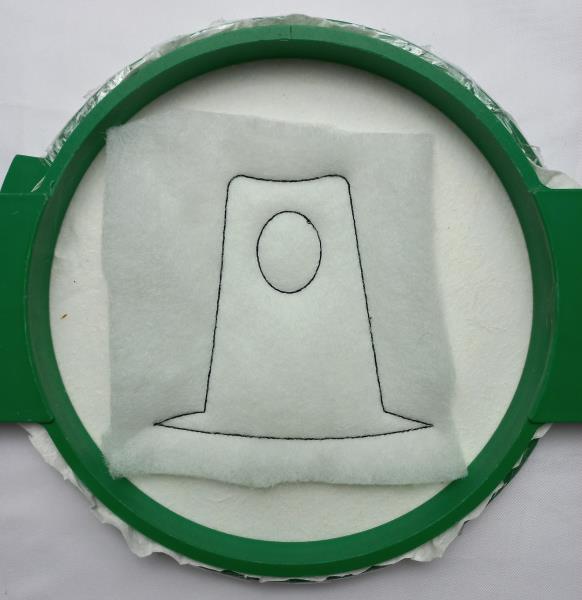
Step 7:
Remove the hoop from the machine, do not unhoop. Cover the placement line with batting with the help of the repositionable adhesive spray, and run color-stop 2.
(Click Image to Enlarge)
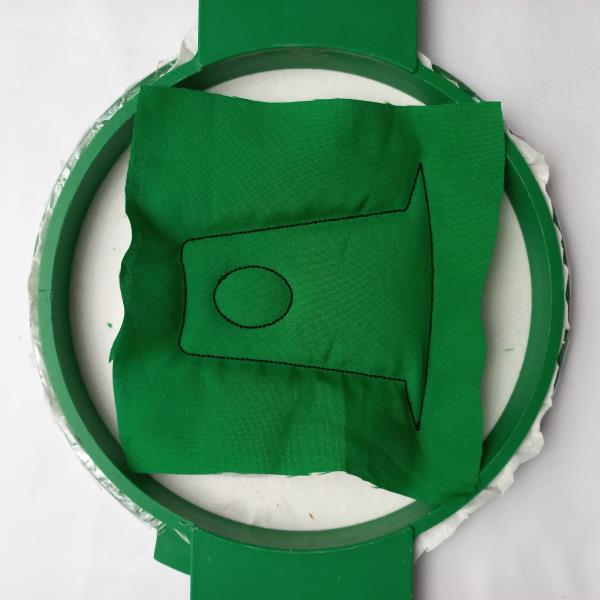
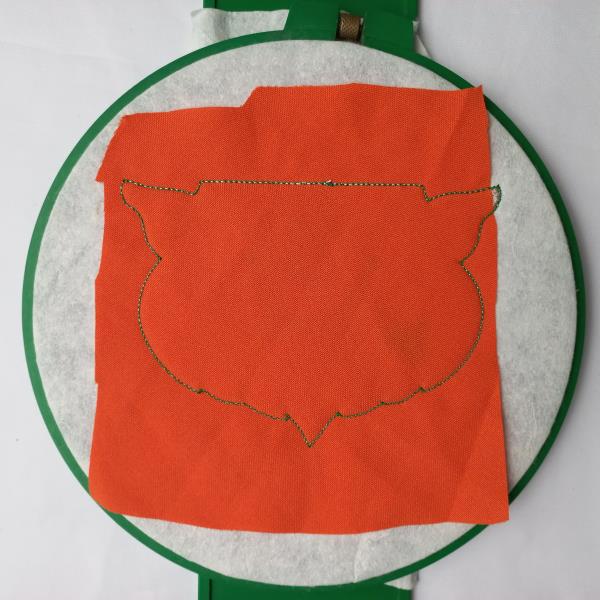
Step 8:
Cover the placement line with green fabric with the help of the repositionable adhesive spray, and run color-stops 3 and 4.
(Click Image to Enlarge)
Step 9:
Run color-stop 5 as a placement line. Cover the placement line with black fabric with the help of the repositionable adhesive spray, and run color-stop 6. Cut the excess fabric.
(Click Image to Enlarge)
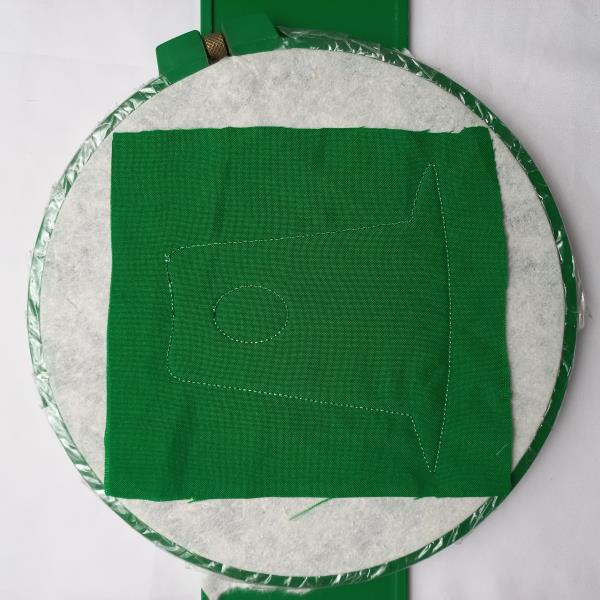
Step 10:
Run color-stop 7 through color-stop 9.
(Click Image to Enlarge)
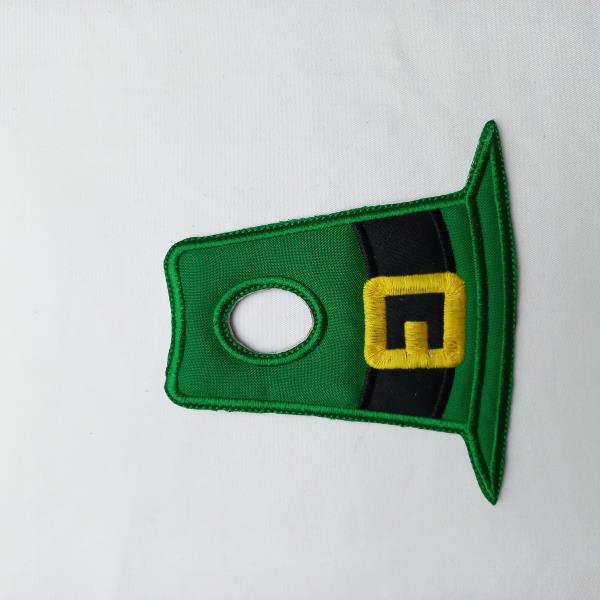
Step 11:
Remove the hoop from the machine, do not unhoop. Cover the back of the hoop with green fabric with the help of the repositionable adhesive spray and run color-stop 10.
(Click Image to Enlarge)
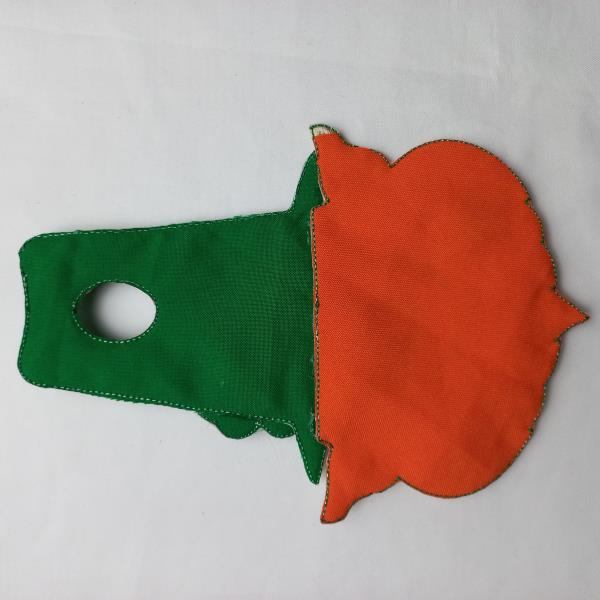
Step 12:
Remove the project from the hoop. Cut out the outline of the design, and the center part with sharp scissors, and save it for later.
(Click Image to Enlarge)
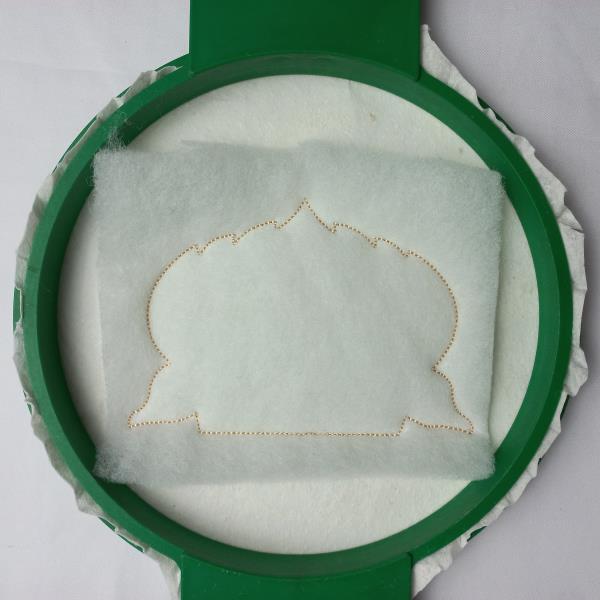
Step 13:
For the face part tautly hoop 2.5-ounce cutaway stabilizer in your embroidery hoop and run color-stop 1 as a placement line.
(Click Image to Enlarge)
Step 14:
Remove the hoop from the machine, do not unhoop. Cover the placement line with batting with the help of the repositionable adhesive spray, and run color-stop 2 and 3.
(Click Image to Enlarge)
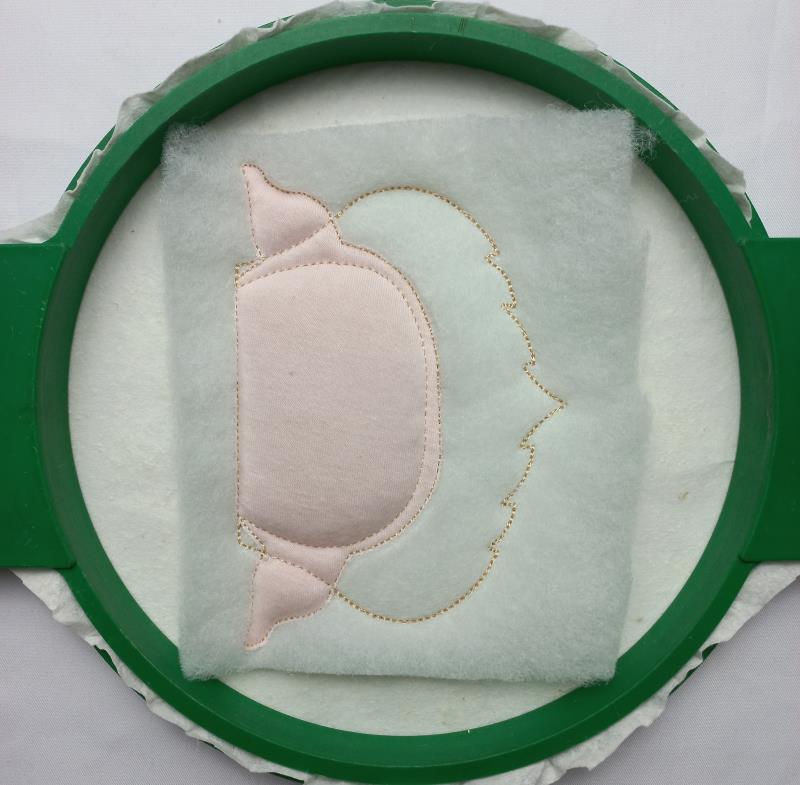
Step 15:
Run color-stop 4 as a placement line. Cover the placement line with khaki fabric with the help of the repositionable adhesive spray, and run color-stop 5. Cut the excess fabric.
(Click Image to Enlarge)
Step 16:
Run color-stop 6 as a placement line. Cover the placement line with orange fabric with the help of the repositionable adhesive spray, and run color-stop 7. Cut the excess fabric.
(Click Image to Enlarge)
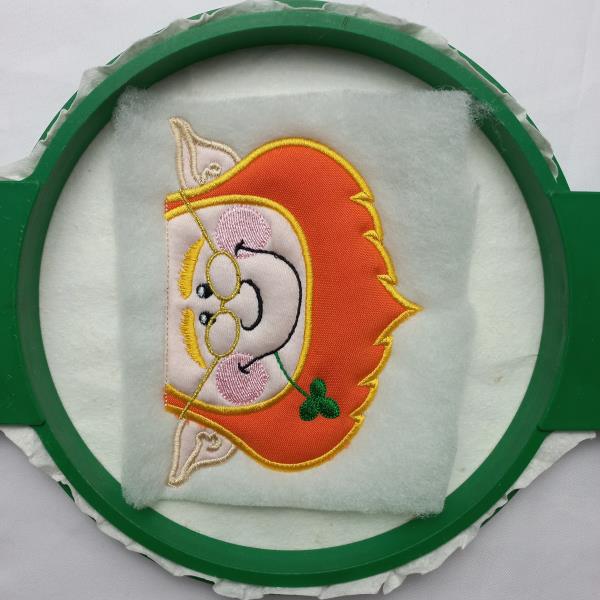
Step 17:
Run color-stop 8 through color-stop 14.
(Click Image to Enlarge)
Step 18:
Remove the hoop from the machine, do not unhoop. Cover the back of the hoop with orange fabric with the help of the repositionable adhesive spray and run color-stop 15.
(Click Image to Enlarge)
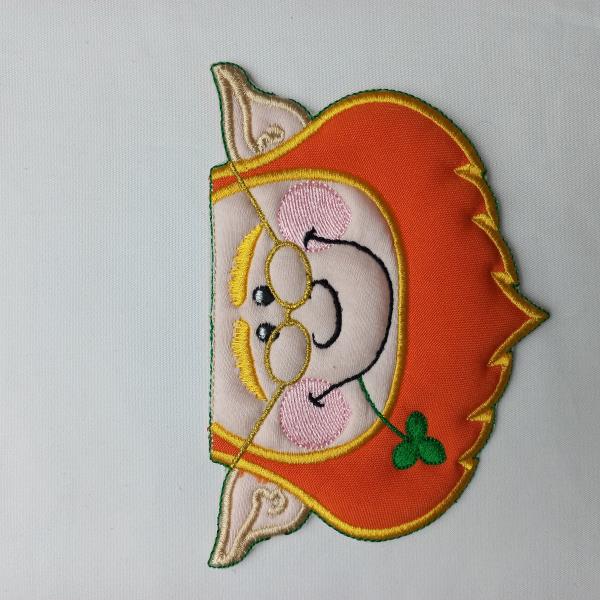
Step 19:
Remove the project from the hoop. Cut out the outline of the design, with sharp scissors, and save it for later.
(Click Image to Enlarge)
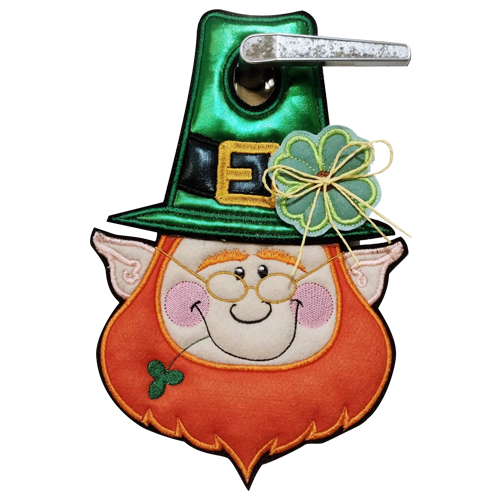
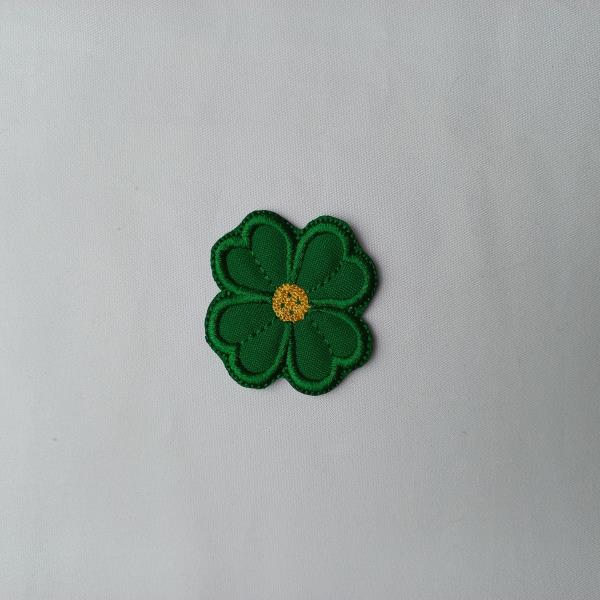
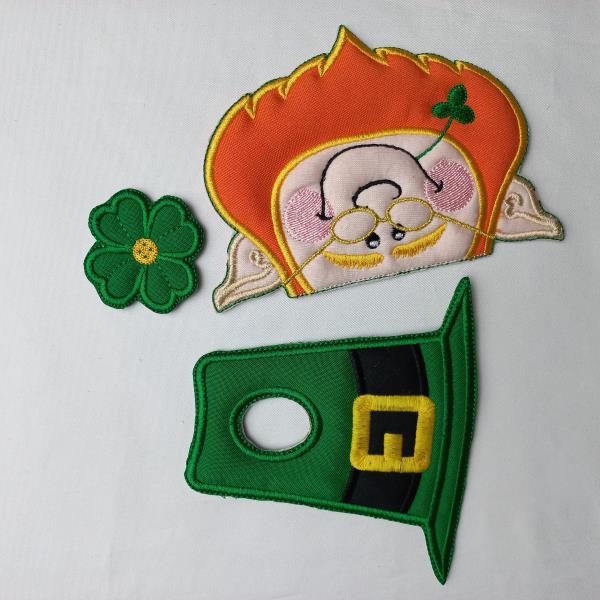
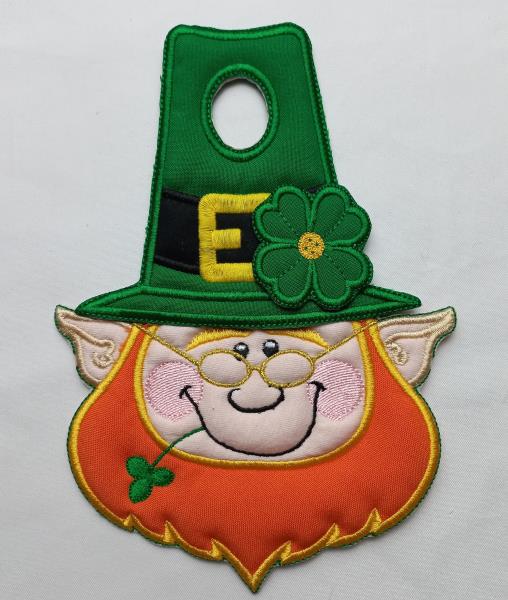
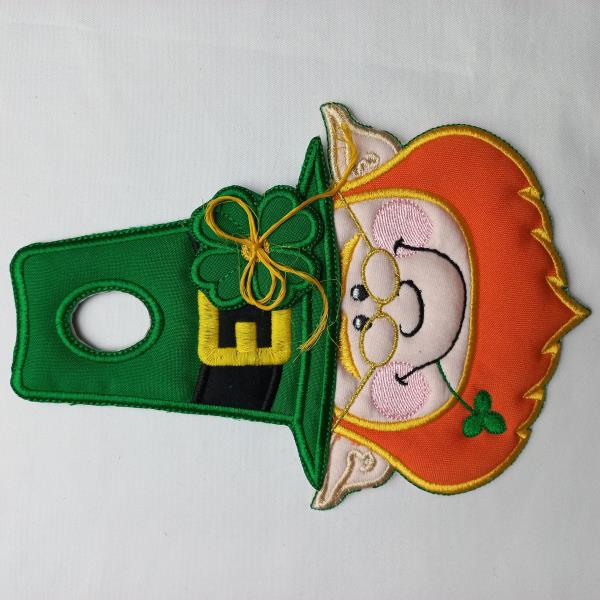
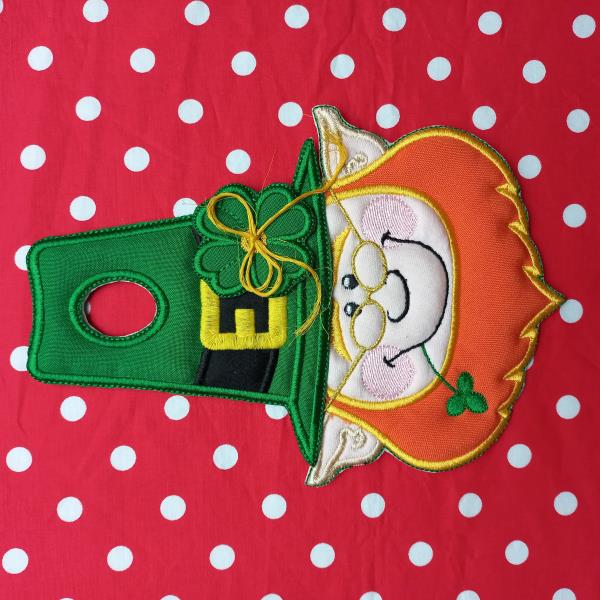
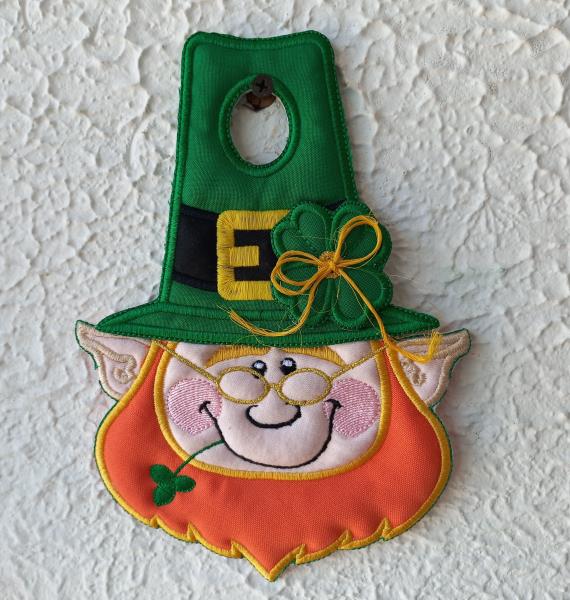
Step 20:
We put all the pieces together.
(Click Image to Enlarge)
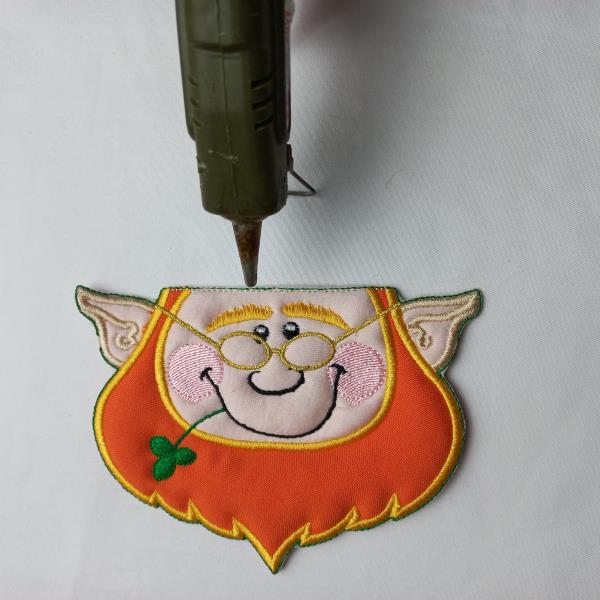
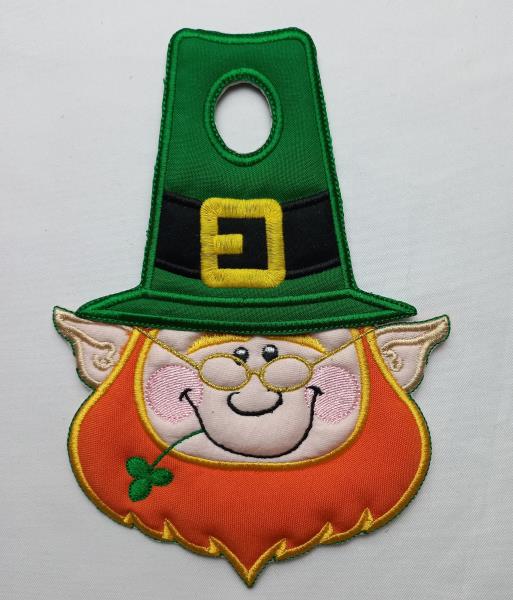
Step 21:
With the help of a needle and thread or some type of textile glue. The Hat part will be the top center part, joined with the face part at the, put the shamrock part to the hat at the height you prefer. Or as the reference image suggests.
Use complementary decoration. Have fun doing this beautiful project.