With just a small pattern change on the front pocket, embroidery can be added. These instructions will show the change.
Step 1:
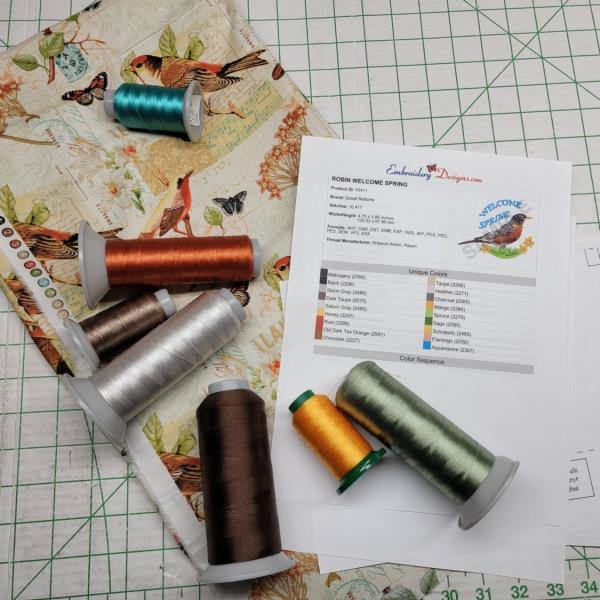
Read through these instructions thoroughly before beginning and assemble all the materials needed to complete the project. Also, read through the instructions on the PDF pattern and watch the video (provided in the PDF pattern). Coordinate the thread colors to the fabric—especially the text. Print out a template of the embroidery design.
(Click Image to Enlarge)
Step 2:
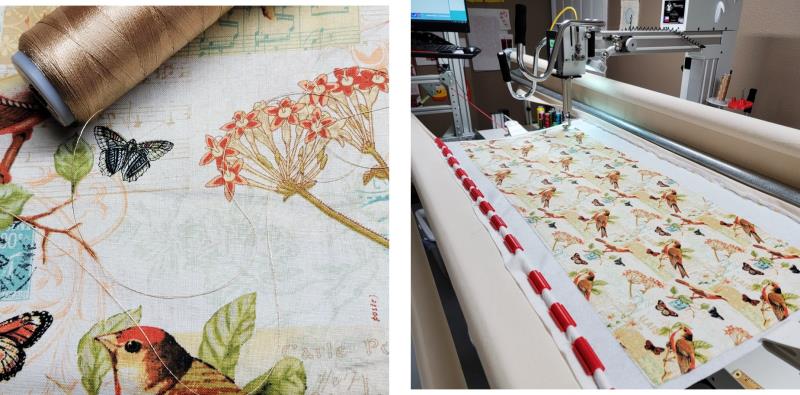
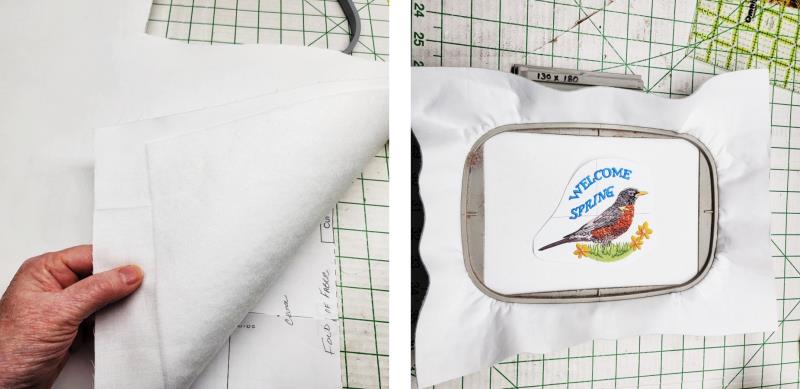
The pattern calls for the fabric to be fused with batting. Do this, and if desired, quilt the fabric to add some extra texture and interest to the finished project.
(Click Image to Enlarge)
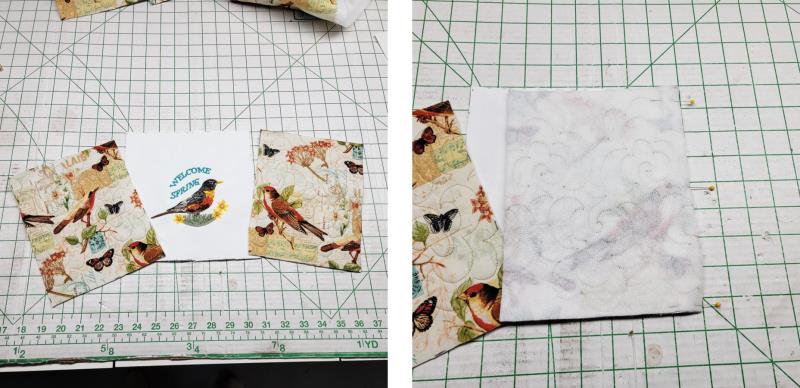
Step 3:
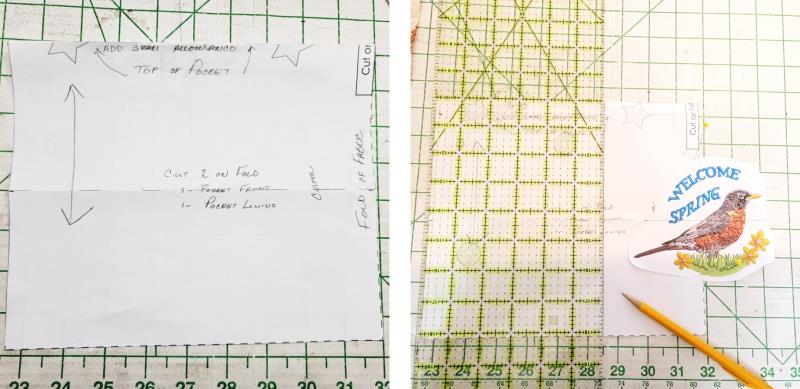
Follow the pattern instructions for cutting and making the pattern, with the exception of the front pocket. For the front pattern, it is cut apart, to allow the embroidered panel to be inserted. To do this, trim around the embroidery template. Fold the pattern pocket horizontally to find the center. Align the crosshairs of the embroidery template to the center fold and horizontal line as shown. Mark about 1” outside of the outer most edge of where the embroidery will be. Draw a line perpendicular to the pattern bottom.
(Click Image to Enlarge)
Step 4:
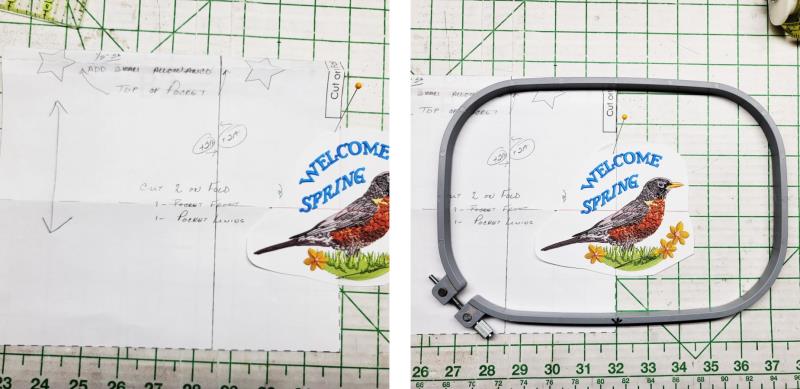
This will be a cut line to which a seam allowance must be added on each side so that the pieces can be sewn back together. Also add a ½” seam allowance to the pocket top; instead of folding the pocket as instructed in the PDF pattern, a seam will be made. Center the hoop over the paper pattern and determine how much fabric to cut for the embroidery.
(Click Image to Enlarge)
Step 5:
Fuse the fleece onto the back of the fabric for embroidery. Hoop the fabric with a layer of cutaway stabilizer.
(Click Image to Enlarge)
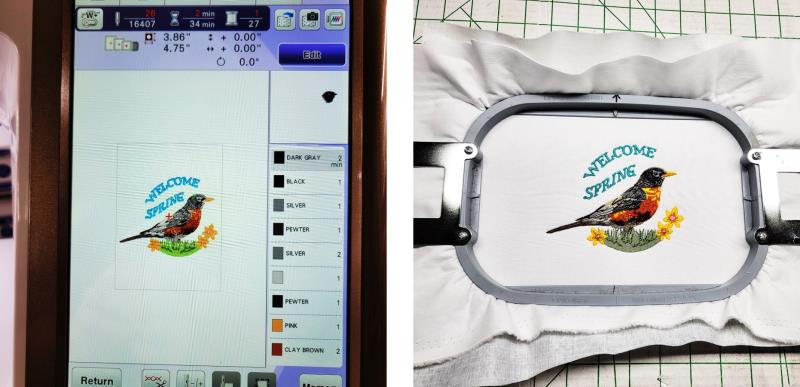
Step 6:
Load the Robin design on the machine and stitch the design. Cut away the excess stabilizer.
(Click Image to Enlarge)
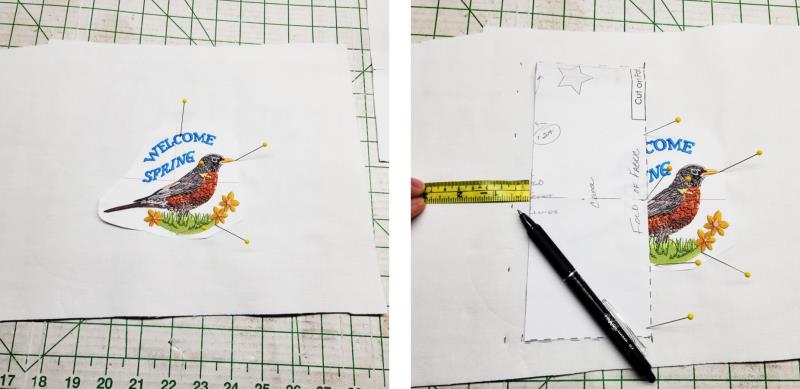
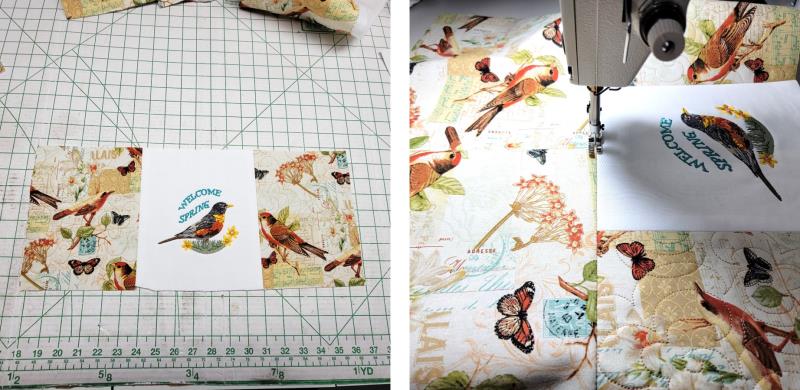
Step 7:
Place the paper embroidery design over the embroidery. Cut the pocket front pattern along the line drawn. Align the fold line and horizontal center line to the embroidery template. Use a marking tool to mark along the top and bottom pattern edges, and mark the ½” seam allowance on the left side.
(Click Image to Enlarge)
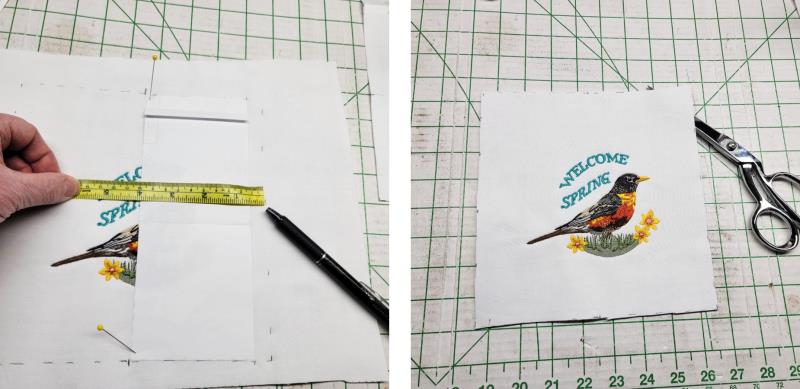
Step 8:
Flip the pattern over, aligning the crosshairs and mark the top and bottom lines, adding the ½” seam allowance on the right. Cut out the embroidered panel along the drawn lines.
(Click Image to Enlarge)
Step 9:
Use the remaining piece of the pocket front, add the ½” seam allowance, and cut out two side panels (these should also be backed with the fusible batting). Place the panel sides, right sides together with the embroidered panel, pin, and sew the ½” seam allowances.
(Click Image to Enlarge)
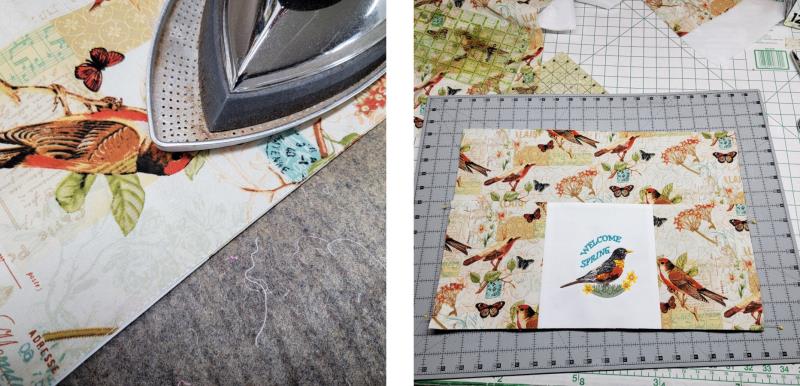
Step 10:
Press the seams open. Cut a piece of pocket lining the same size as the new pocket, sew the top seam and understitch.
(Click Image to Enlarge)
Step 11:
Press the lining to the back and press. Cut the back fabric piece and lining. Place the new pocket front at the lower edge of the back fabric piece. Complete the project according to the PDF pattern instructions, stitching along each side of the embroidered panel if desired.
(Click Image to Enlarge)
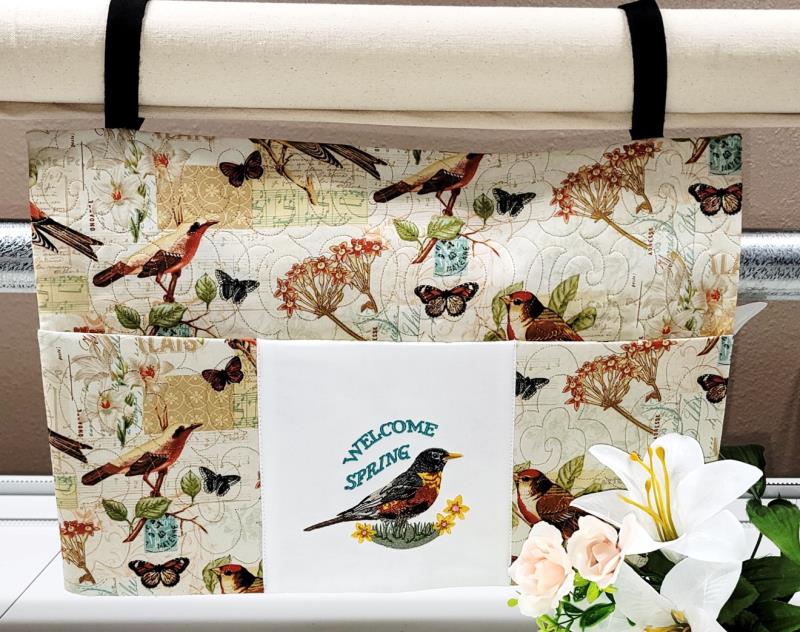
Step 12:
Thank you for purchasing the Walker Bag PDF pattern and the embroidery design. The nice thing about PDF patterns is they are digital and can be printed over and over as needed. Think ahead and make bags to gift for holidays and birthdays, too, changing out the embroidery design to match the occasion!
Ramona Baird has been in the embroidery industry for over 23 years. She and her husband owned a commercial and retail embroidery store in Arizona for many years. She is an experienced digitizer having been mentored by award-winners Pat Williams and Lindee Goodall. Ramona is a contributor to “Creative Machine Embroidery” magazine having 5 covers to her credit. Ramona has worked for Wilcom America and served many years as Education Director for the American Sewing Guild. With a degree in fashion design, she is able to design and execute patterns which Pat Williams says are “out of the box” in creativity and application. Ramona likes to challenge the boundaries of embroidery and bring new and exciting designs, ideas, and projects to EmbroideryDesigns.com. She wants embroiderers of all levels to increase their skills and enjoyment in using their embroidery machine for gift-making and personal pleasure.