The bag pattern comes in three different sizes. The medium size was used for this project. A slight change was made to the pattern front to easily accommodate the embroidery.
Step 1:
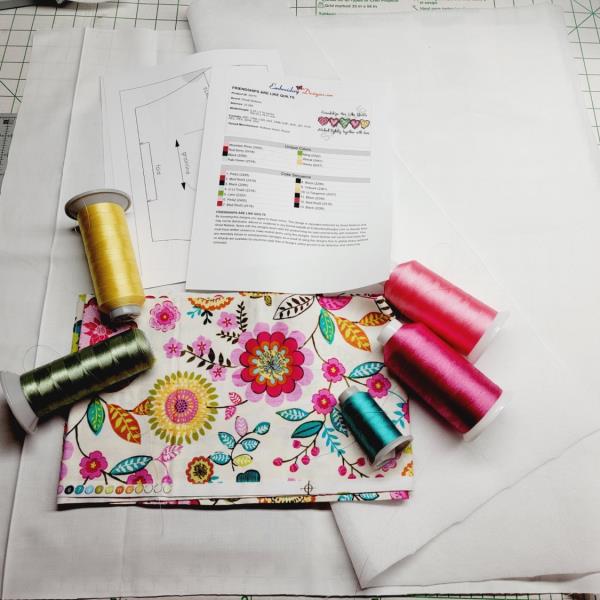
Read through the instructions thoroughly before beginning and assemble all the materials needed to complete the project and then read through all the instructions for the pattern. Coordinate the thread colors to the fabric for the embroidery.
(Click Image to Enlarge)
Step 2:
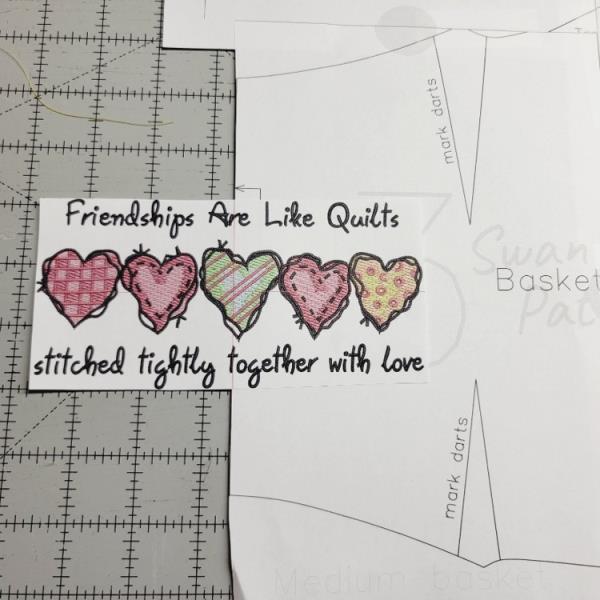
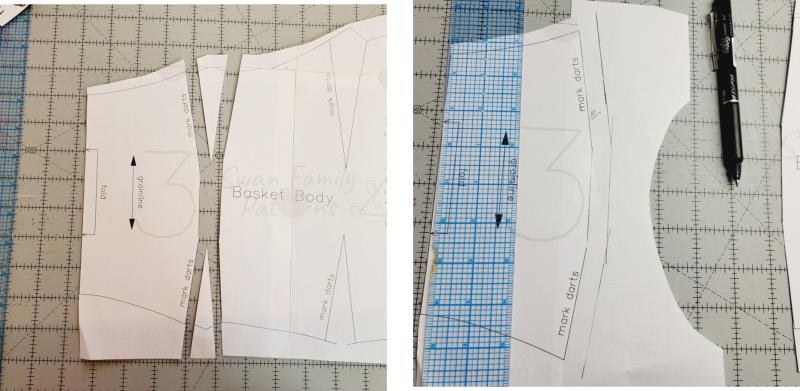
Print out a paper template of the embroidery design at actual size and cut it out. Print out the pattern pieces. Locate the center front fold of the pattern. The photo shows how the embroidery will be centered on the pattern piece.
(Click Image to Enlarge)
Step 3:
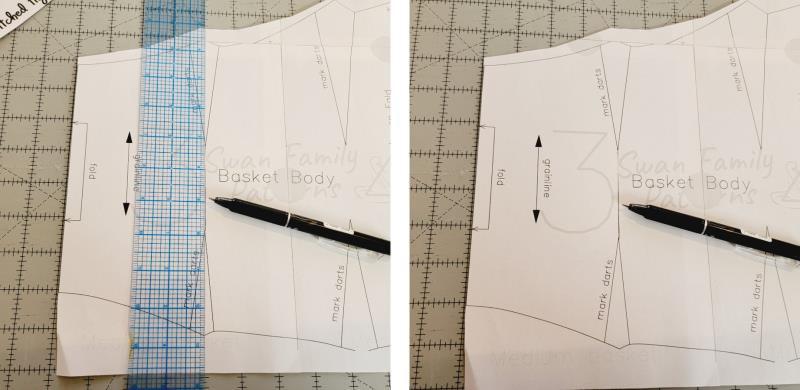
The embroidery could be done on the pattern as it is, but for this project a plain white Kona cotton fabric was used, and a print fabric used for the rest of the bag front. To do this, darts were changed to a seam. To do this, on the darts closest to the center front, draw a line from dart point to dart point.
(Click Image to Enlarge)
Step 4:
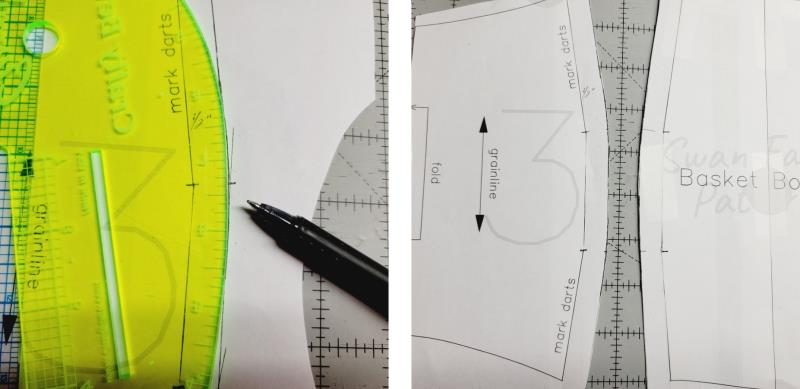
Now cut a line from the lower left dart leg, along the line just drawn, up the upper left dart leg. Cut along the upper and lower right dart legs. Place a piece of paper under the cut lines, tape the pattern piece over it, and then add the ½” seam allowance.
(Click Image to Enlarge)
Step 5:
Add a matching mark at the dart point and across from it; these will be matching marks. Use a French curve to smooth out the dart point. Repeat for the other side of the pattern.
(Click Image to Enlarge)
Step 6:
Choose the smallest hoop possible for stitching the design. Cut the piece of Kona cotton to fit the pattern and hoop with a layer of poly mesh.
(Click Image to Enlarge)
Step 7:
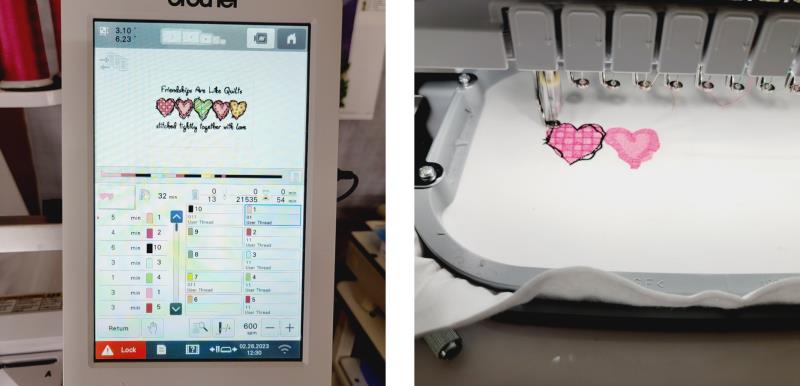
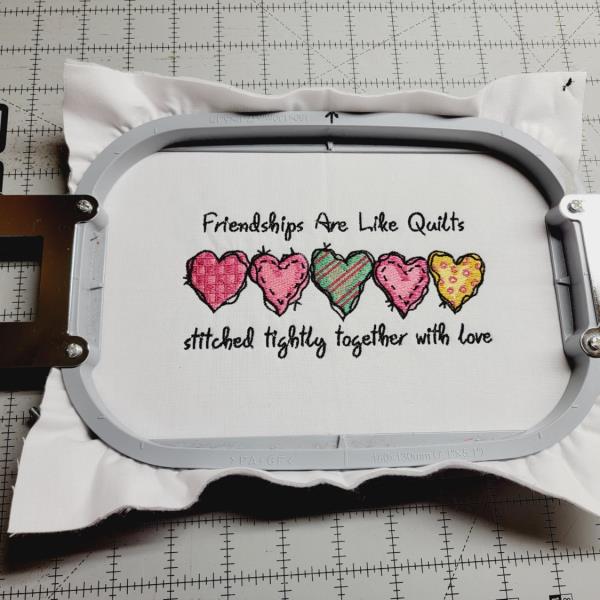
Load the design on the machine and stitch the design following the color sequence.
(Click Image to Enlarge)
Step 8:
Lightly mark the cross marks from the the hoop on the outer edges of the fabric to aid in aligning the pattern to the embroidery.
(Click Image to Enlarge)
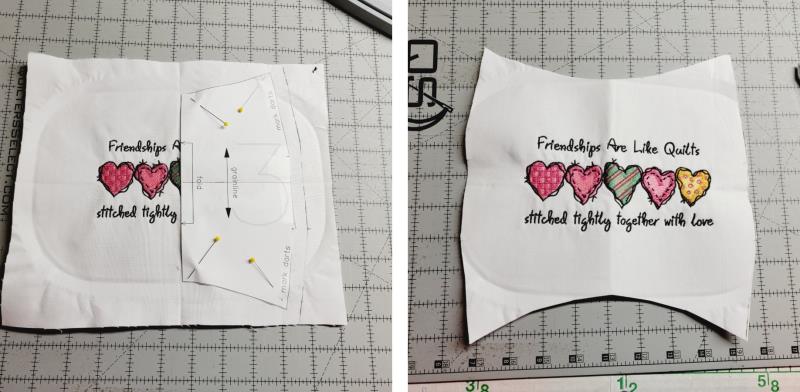
Step 9:
Place the fold line along the vertical tick marks, with the center horizontal line of the pattern to the horizontal tick marks. Pin the pattern to the fabric, fold the fabric in half along the fold line and cut out the pattern.
(Click Image to Enlarge)
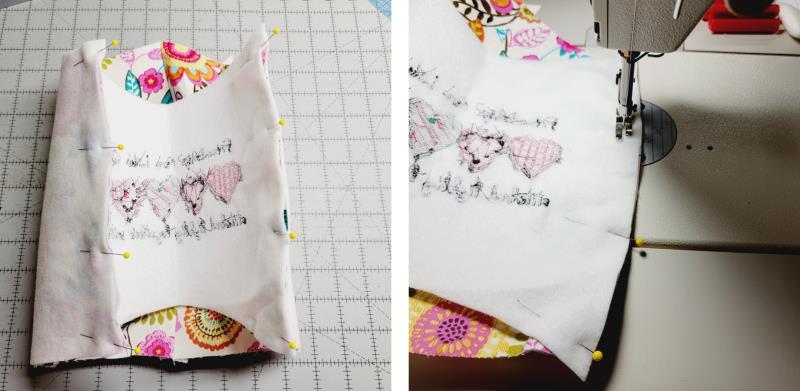
Step 10:
Stitch center front embroidered panel to the printed fabric, matching the match marks.
(Click Image to Enlarge)
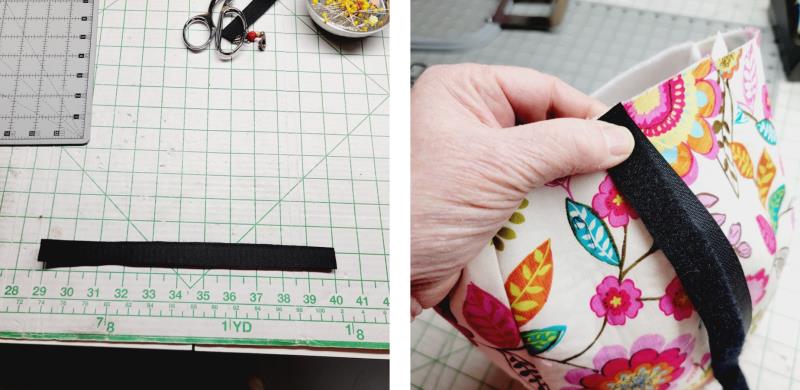
Step 11:
Instead of sewing a fabric hanger, two pieces of hook and loop tape were cut to fit around the longarm pole . Position cut edges to the top of the center back seam.
(Click Image to Enlarge)
Step 12:
Baste the pieces to the top.
(Click Image to Enlarge)
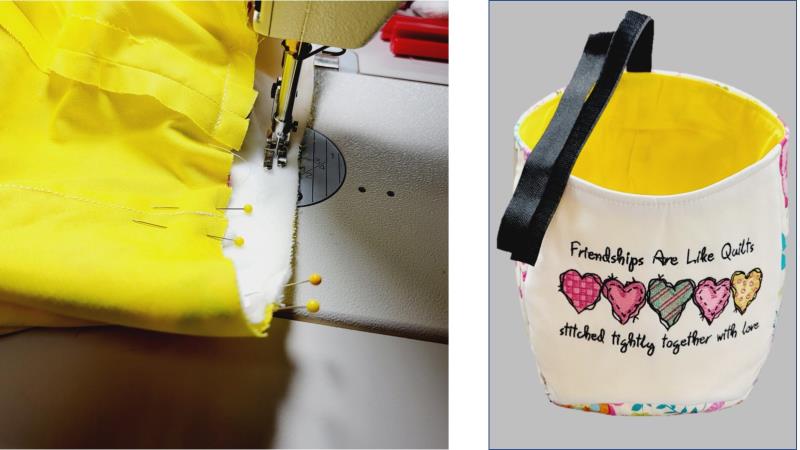
Step 13:
Continue sewing the bag according to the pattern instructions.
(Click Image to Enlarge)
Step 14:
Wrap the hook and loop tape over the pole of the longarm.
(Click Image to Enlarge)
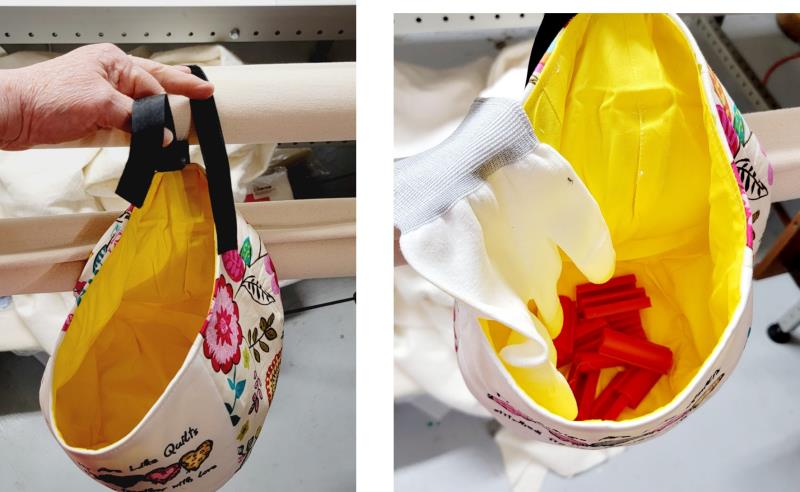
Step 15:
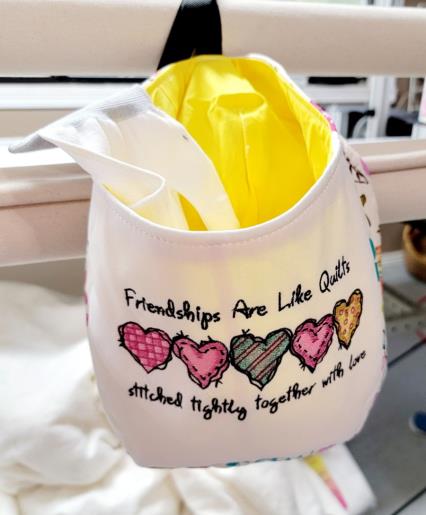
Thank you for purchasing the bag pattern and embroidery design! Use the bag to hold whatever tools you like to keep handy for your quilting day.
Ramona Baird has been in the embroidery industry for over 23 years. She and her husband owned a commercial and retail embroidery store in Arizona for many years. She is an experienced digitizer having been mentored by award-winners Pat Williams and Lindee Goodall. Ramona is a contributor to “Creative Machine Embroidery” magazine having 5 covers to her credit. Ramona has worked for Wilcom America and served many years as Education Director for the American Sewing Guild. With a degree in fashion design, she is able to design and execute patterns which Pat Williams says are “out of the box” in creativity and application. Ramona likes to challenge the boundaries of embroidery and bring new and exciting designs, ideas, and projects to EmbroideryDesigns.com. She wants embroiderers of all levels to increase their skills and enjoyment in using their embroidery machine for gift-making and personal pleasure.