Border OptionsHugging border, circle, square, or rectangle — with a 3mm satin stitch.
Backing OptionsAvailable with iron-on, sew-on, or velcro backing.
Fast ShippingShipped quickly from the USA.
Free Online Tools
Powerful embroidery utilities that save time and prevent costly mistakes.
Stitch AssistantRECOMMENDED
Get the exact stabilizer, machine settings, needle, and thread color sequence for every embroidery design you purchase — based on that design's stitch density, dimensions, and color count.
¼ yard of second accent border fabric-outside border
1 yard backing fabric (Optional choice—different fabric or choose one of the theme earth tone prints used for the nine patch centers).
½ yard each brown and tan flannel fabric
Quilting safety pins
Water soluble marking pen or pencil
Preface:
This lap quilt contains 12 different earth tone fabrics. Measurements
for this quilt are given for a consistent ¼” seam allowance.
Step 1:
(Click Image to Enlarge)
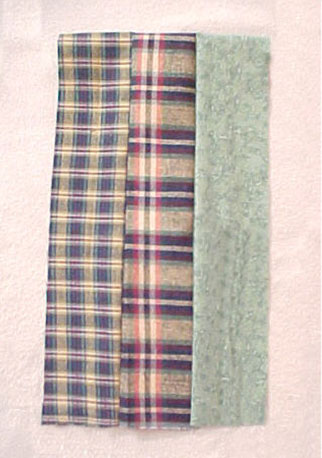
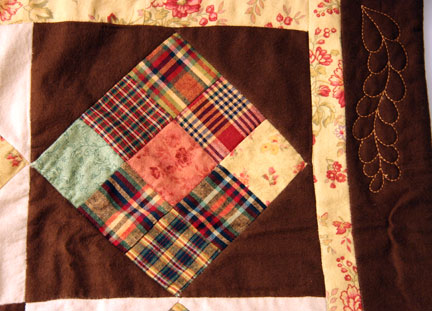
Choose 9 fabrics for the nine patch quilt block.
Cut each fabric 2 ½” by the width of the fabric
Sew three strips together to make a strip set. Sew the
remaining fabric strips the same way. Remember to press each step as you
go.
Step 2:
(Click Image to Enlarge)
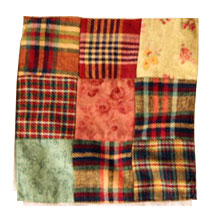
After all three strip sets have been sewn, cut each set into 2 ½” segments. You will need 24 segments to make a quilt.
Sew together 3 segments, one from each of the strip sets created earlier, to form a nine patch.
Step 3:
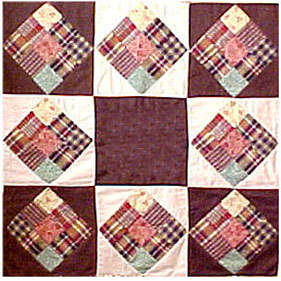
Choose 2 fabrics for the background of the nine patch. Brown and tan were chosen for this particular quilt.
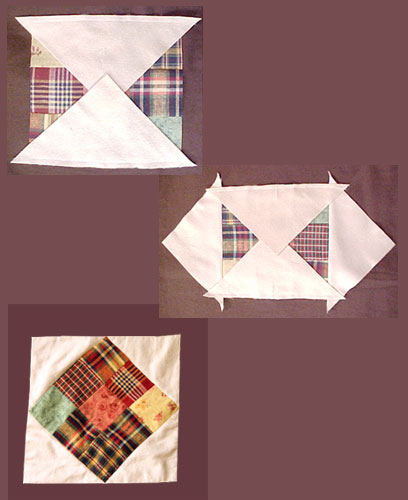
Cut these fabrics into 5 ¾” squares. You will need 8
squares of each of the brown and tan fabric. Cut the squares diagonally
to form triangles.
Begin by sewing triangles to each side of the nine patch.
Repeat for the top and bottom. You will need 4 finished blocks of each
of the brown and tan to complete the quilt top.
Step 4:
(Click Image to Enlarge)
Choose one color of the background fabrics for the center block.
Cut this fabric 9 ½” by 9 ½”.
Sew your blocks together in rows of three, alternating
the brown and tan blocks. A solid brown square is used for the center
block.
Sew Row 1 to Row 2. Continue in the same manner with Row 3.
Step 5:
If you are using a consistent ¼” seam, cut 2 inside border strips from
the accent fabric 2” by 27”, or measure the height of the quilt and cut
according to that measurement. Sew these strips to the left and right
side of the quilt.
Step 6:
Cut two more strips of the accent fabric 2” by 31 ½”, or measure the
width of the quilt and cut that measurement. Sew these strips to the top
and bottom of the quilt.
Step 7:
Cut two strips from the second accent outside border fabric 3 ½” by 29”,
sew to the left and right sides of the quilt top. Cut the two remaining
strips 3 ½” by 35” or by the height and width of the quilt as in the
step before. Sew these strips to the top and bottom of the quilt top.
Step 8:
Cut the batting 35” by 35” or cut according to the height and the width of the finished quilt top.
Place the quilt top on the batting, pin in place, stitch in the ditch around the blocks and borders if desired.
Step 9:
Choose one of the 12 fabrics for the back of the quilt. Cut the
backing fabric 35” by 35” or again cut according to the height and width
of the quilt top.
With right sides together, place the back fabric on the
quilt top. Stitch entirely around the quilt leaving a 4” opening for
turning right side out.
Clip all four corners and turn right side out.
Hand stitch the opening close or machine stitch around the entire quilt top ¼” from the edge.
Step 10:
(Click Image to Enlarge)
Quilting the layers together
When all three layers have been sewn together, completed, and pressed. complete the following steps:
Pin the entire quilt with safety pins, 6 inches apart to secure all three layers, leaving the center free of pins.
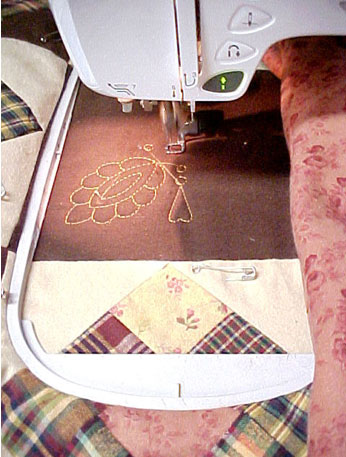
Install the embroidery arm, embroidery foot, and embroidery needle on the machine.
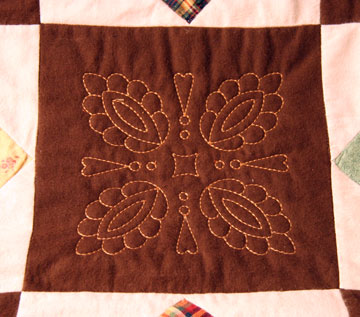
Insert the embroidery card and choose a motif for the center square.
Thread the machine with embroidery thread. Be sure to use matching thread in the bobbin.
Using the template for the chosen motif, mark the center square for placement of the design.
Hoop your quilt, removing and repositioning pins if necessary.
Without using stabilizer, embroider the center square.
Step 11:
(Click Image to Enlarge)
The quilt will be embroidered on both sides and can be reversible
Step 12:
To embroider the edges of the quilt, choose a motif to fit the outside border.
Follow the steps above for positioning and marking.
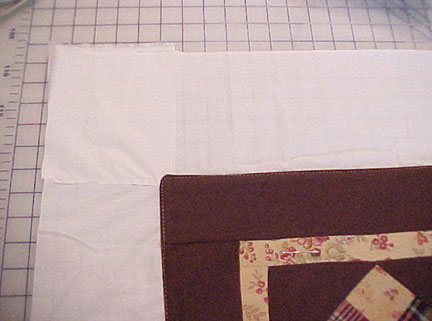
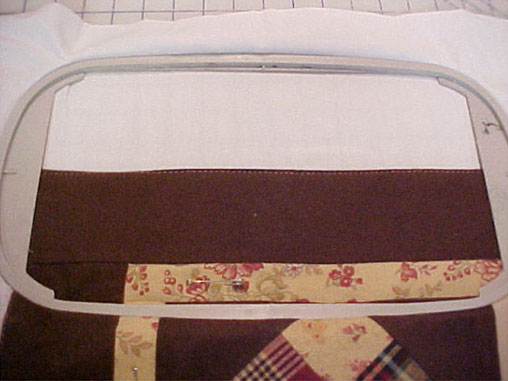
To be able to hoop the quilt for the edge design, you
will need to cut two rectangle scrap pieces of fabric the 4 inches wider
than the width of the hoop by approximately 6 inches.
Hand baste or machine baste the scrap pieces to the edge of the corner of the quilt as shown here.
Step 13:
Hoop the corner as though it was an extension of the quilt top.