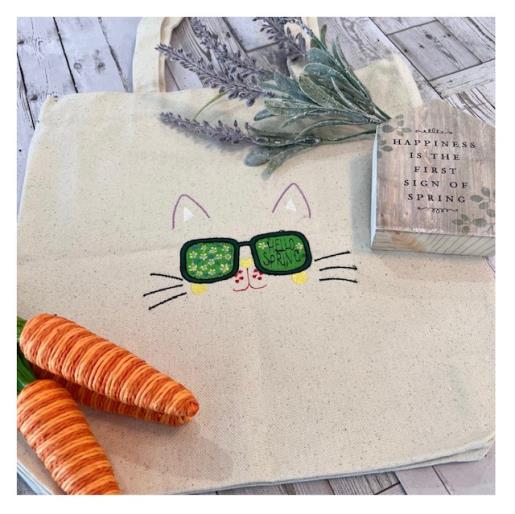
Easy to follow tutorial for the beginner/some experience machine embroiderer in mind with basic sewing skills. Purchase a blank canvas tote bag and remove one side seam for easier hooping. Hoop and embroider design. Restitch side seam and you will be ready for some spring shopping! This sweet embroidery design is from the Toy Box Collection. Size used 6"w x 3.53"h.
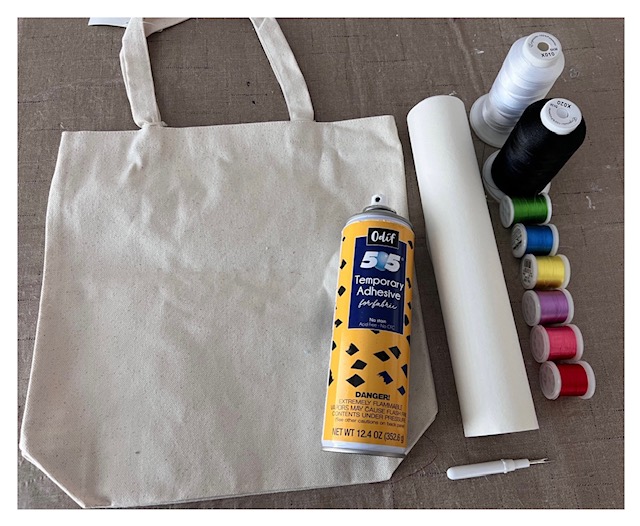
Step 1:
Gather all supplies and review instructions before beginning.
(Click Image to Enlarge)
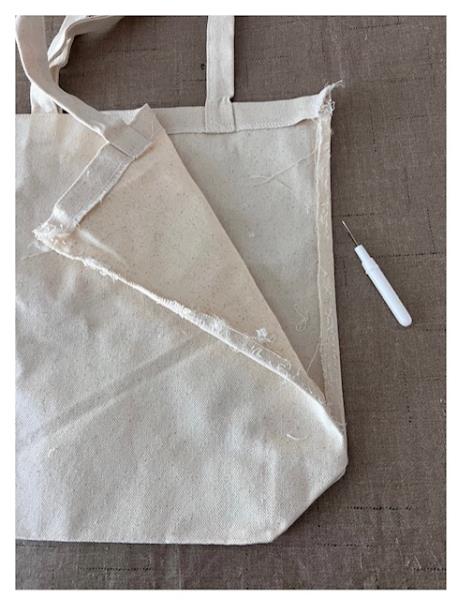
Step 2:
Carefully rip out one side seam of your tote bag as this will allow for easier hooping
(Click Image to Enlarge)
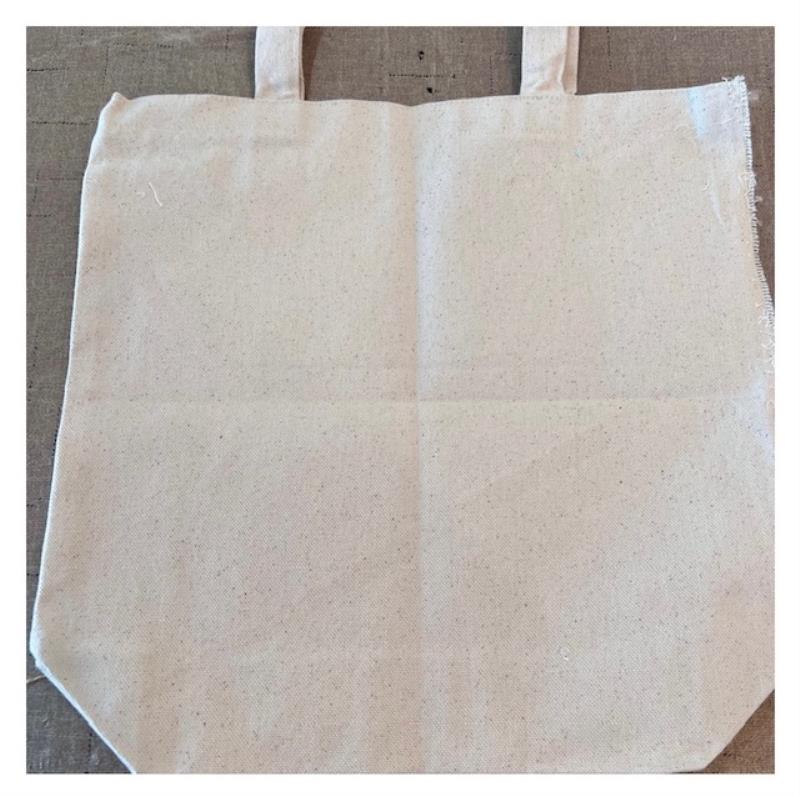
Step 3:
Find center front of tote bag by quarter folding. Fold in half. Fold in half again. Finger tip press or iron press to form crease to create a creased crosshair.
(Click Image to Enlarge)
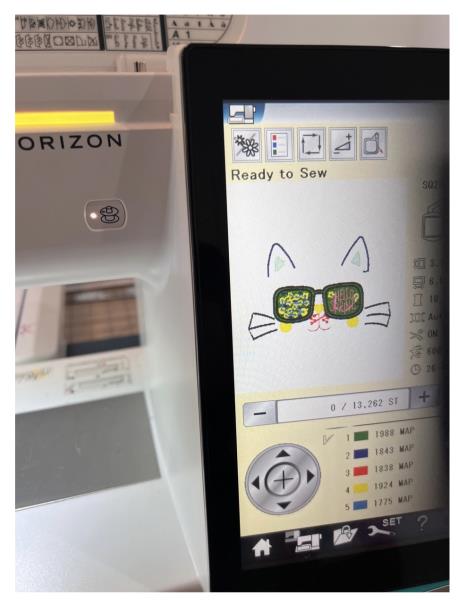
Step 4:
Load design file into your machine.
(Click Image to Enlarge)
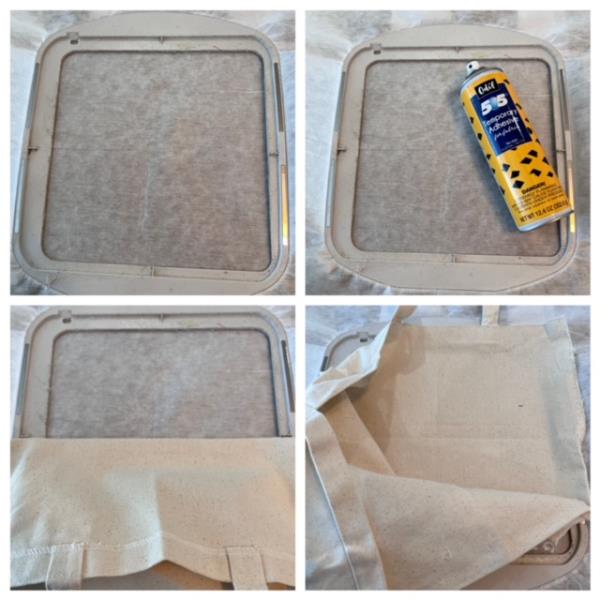
Step 5:
Hoop stabilizer. Spray temporary adhesive spray directly onto stabilizer. Turn tote bag inside out. Center tote matching up the creased axis markings from the crosshair to your hoop's built in registration axis marks.
(Click Image to Enlarge)
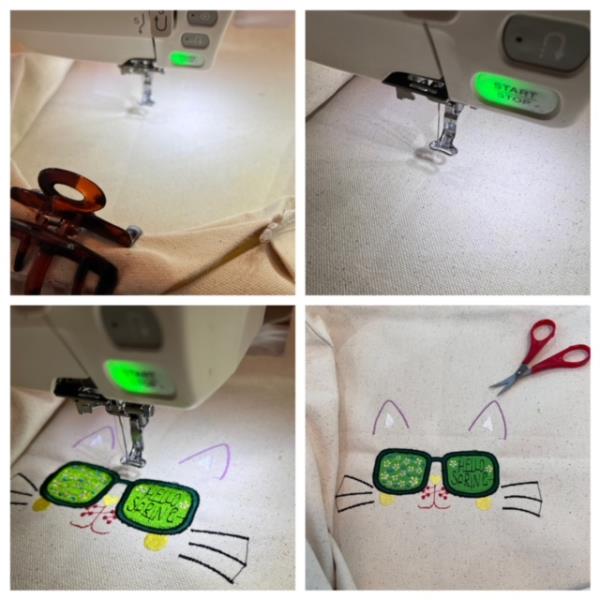
Step 6:
Attach hoop to machine. Use clips to keep excess fabric out of stitch out area. Confirm center needle placement. Make any necessary adjustments. Refer to design file thread color chart. Begin stitch out process. Stitch out complete. Detach hoop. Cut/Trim all jump stitches and loos thread ends. Remove stabilizer.
(Click Image to Enlarge)
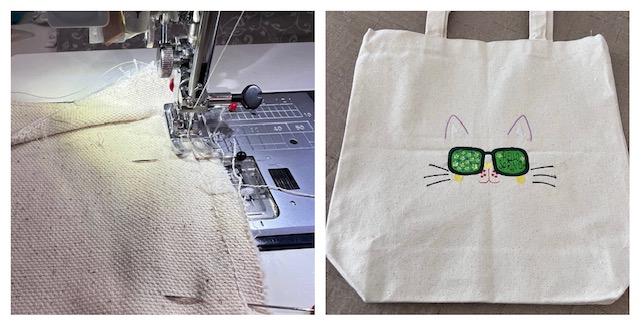
Step 7:
Re stitch the side seam of tote using matching thread color. Serge or zig zag raw edge to reduce fraying. Turn right side out. Iron press and you are done! Great job!