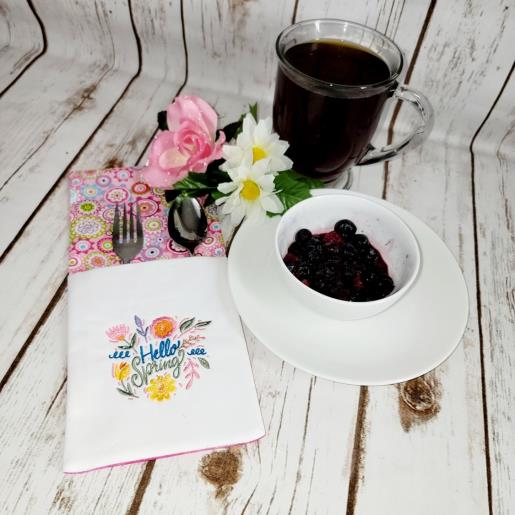
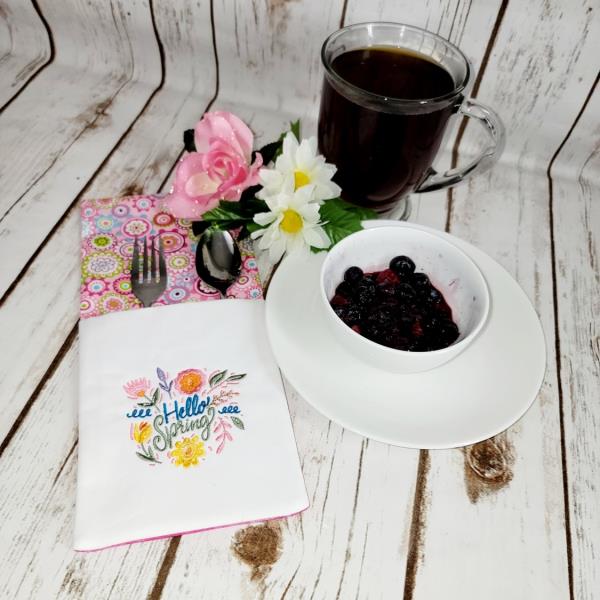
Quick to do and fun to make, you’ll find the “Aloha Sewing Company” pattern and “Moxie Embroidery” design is a wonderful way to use up leftover fabric to create a useful project.
The instruction included in the pattern are very good. This tutorial will show you how to add embroidery before constructing the utensil holder.
Step 1:
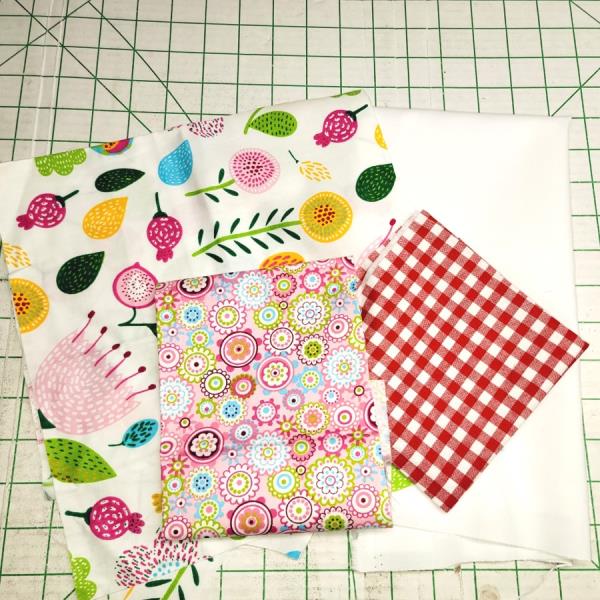
Read through the instructions thoroughly before beginning and assemble all the materials needed to complete the project. Be sure to read and follow the manufacturers directions for any products used. Choose embroidery thread colors to coordinate with the fabric chosen. This project doesn’t take much fabric at all, so use up the scraps in your fabric stash. Print out and tape together the pattern as instructed.
(Click Image to Enlarge)
Step 2:
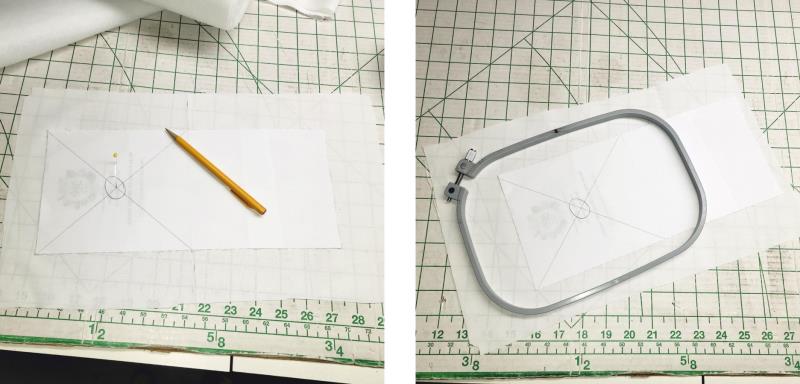
For the pattern piece that is the pocket, fold it in half lengthwise. Draw a line from corner to corner; where the lines intersect is the center where the embroidery design will be aligned.
(Click Image to Enlarge)
Step 3:
Cut the pocket fabric larger than needed so it will fit in the hoop. Trace around the outline of the fabric on the pattern—be sure to position the pattern on the fabric so that the center mark of the pattern, once on the fabric, will center in the hoop.
(Click Image to Enlarge)
Step 4:
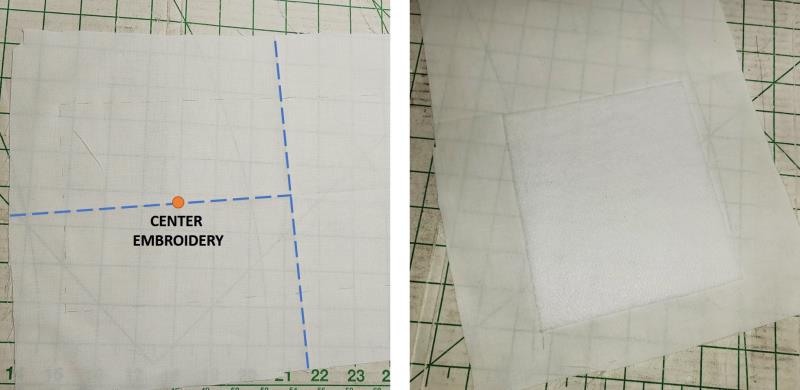
Matching the pattern outline, fold the pocket fabric in half crosswise to define the fold for the top of the pocket. Transfer the center mark for the embroidery placement from the pattern to the fabric. As instructed in the pattern, fuse the batting to the back of the pocket where the embroidery will be.
(Click Image to Enlarge)
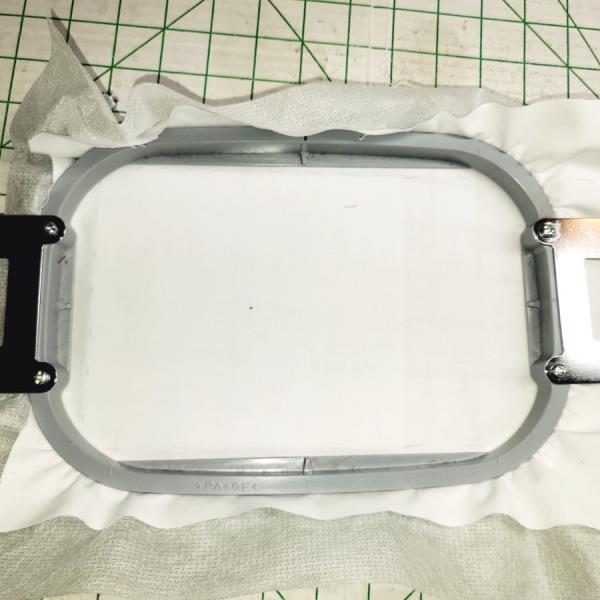
Step 5:
Hoop the fabric with a piece of poly mesh stabilizer.
(Click Image to Enlarge)
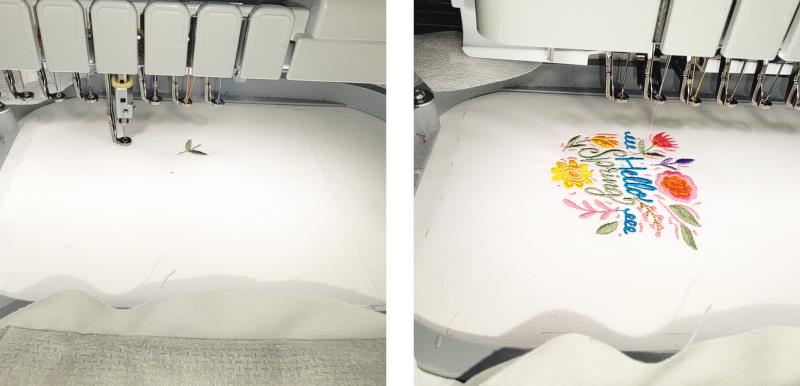
Step 6:
Load the embroidery design on the machine. Rotate the design if it’s needed to fit in the hoop in the proper direction to the pocket. Choose the embroidery thread colors that will coordinate with the fabric. Align the machine needle with the center position on the fabric.
(Click Image to Enlarge)
Step 7:
Stitch the design.
(Click Image to Enlarge)
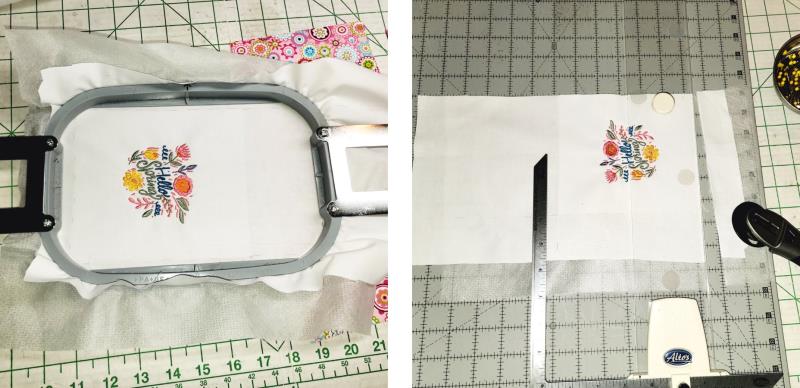
Step 8:
Remove the fabric from the hoop and trim the excess stabilizer. Cut the fabric along the pattern outline. Follow the pattern directions to construct the project.
(Click Image to Enlarge)
Step 9:
Do you know someone who lives alone or perhaps is in a nursing home? Think about using your fabric scraps and create several of these to brighten the breakfast or lunch service. It is amazing what a thoughtful little gift will do to brighten their day. Do these in sets of six or eight to sell at craft fairs and bazaars using holiday fabrics and designs. By doing several in one sitting, you can get several done in an afternoon of stitching. Thank you for purchasing the pattern and design. Please share what you’ve made on our website!
Ramona Baird has been in the embroidery industry for over 23 years. She and her husband owned a commercial and retail embroidery store in Arizona for many years. She is an experienced digitizer having been mentored by award-winners Pat Williams and Lindee Goodall. Ramona is a contributor to “Creative Machine Embroidery” magazine having 5 covers to her credit. Ramona has worked for Wilcom America and served many years as Education Director for the American Sewing Guild. With a degree in fashion design, she is able to design and execute patterns which Pat Williams says are “out of the box” in creativity and application. Ramona likes to challenge the boundaries of embroidery and bring new and exciting designs, ideas, and projects to EmbroideryDesigns.com. She wants embroiderers of all levels to increase their skills and enjoyment in using their embroidery machine for gift-making and personal pleasure.