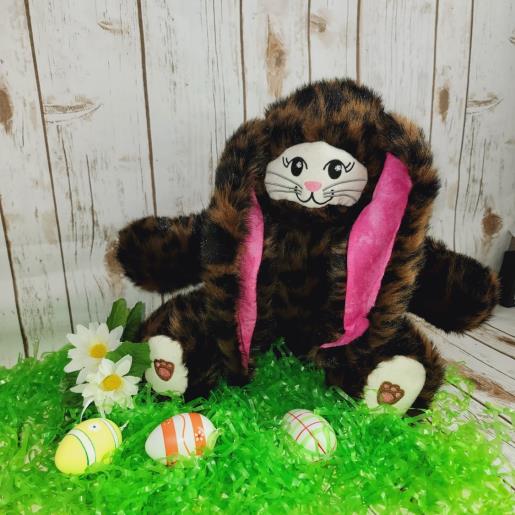
| Preface: | The pattern and instructions are wonderful, but to get more use out of the pattern, tips and tricks on how to sew with faux fur and how to add embroidery will be shown in this tutorial. If you’ve never sewn with fur, you will find it is actually very easy, but it does take just a bit more time. Once you learn the few tricks, you’ll want to create several of these bunnies to gift for Easter. |
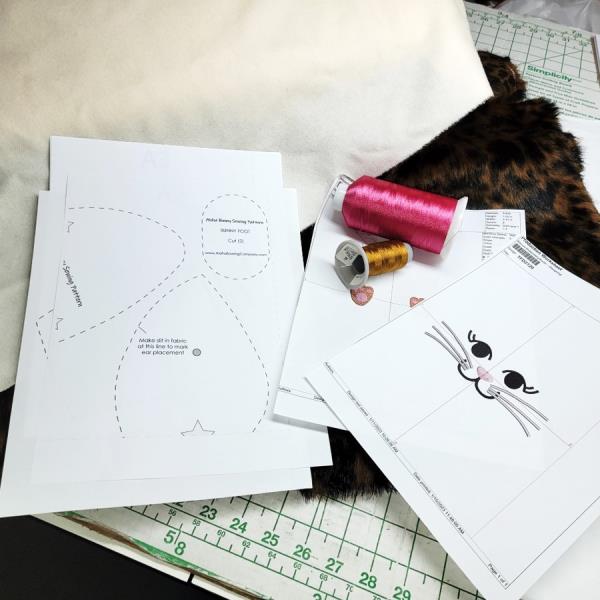
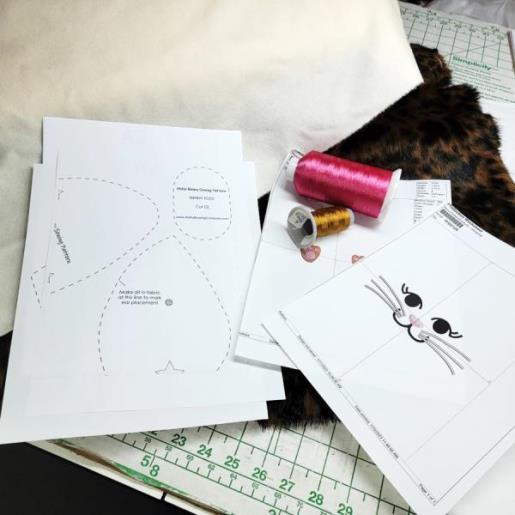
Step 1: | - Read through the instructions thoroughly before beginning and assemble all the materials needed to complete the project. Read and follow all the instructions for the materials being used and how to print and assemble the pattern pieces. Print actual size paper templates of the embroidery designs. Here is what will be shown that is different than the pattern instructions:
- Tips for cutting and sewing faux fur which is used instead of fabric for the bunny body
- Stuffing from the bottom instead of the center back seam
- Aligning the foot embroidery design to the foot pattern piece
- Editing and using an embroidery design for the face instead of safety eyes and nose
- How to use stabilizer to create a smooth embroidered face to stitch on the bunny
|  (Click Image to Enlarge) |
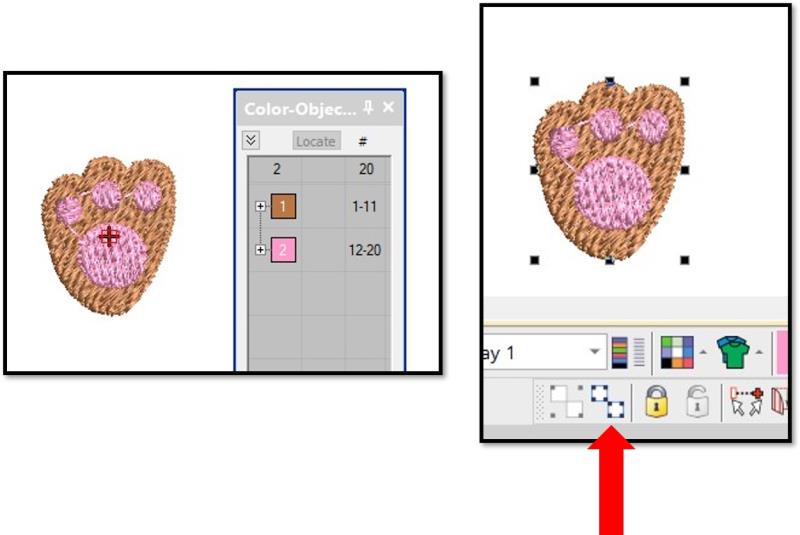
Step 2: | Begin in embroidery editing software. Note: most of the steps may be completed at the embroidery machine, on most machines. Group the foot pieces by selecting and then grouping the foot. Resize it up 10%. Save the file as a new design file, which will preserve the original file. | 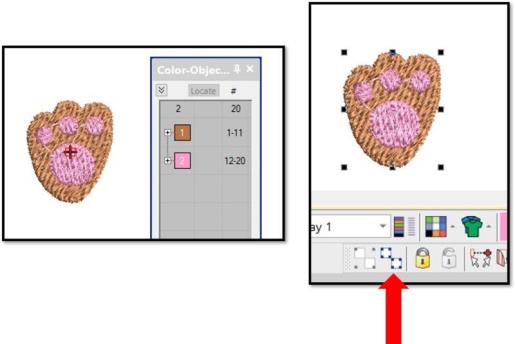 (Click Image to Enlarge) |
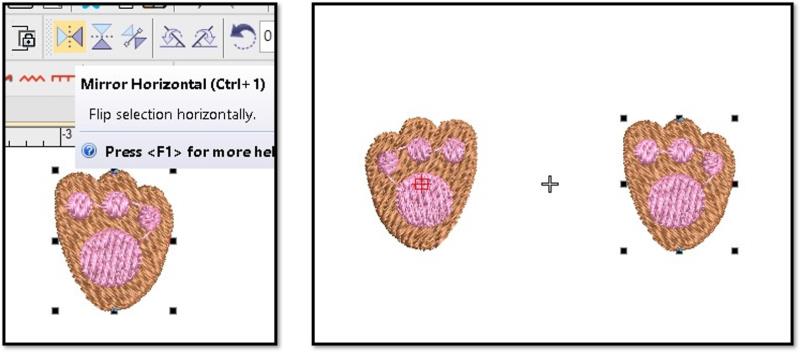
Step 3: | Select the foot and mirror it so there is a left and right foot. Save each foot as a new file and then export in the machine file format needed. Each foot needs to be aligned at the machine as you will see in a future step. | 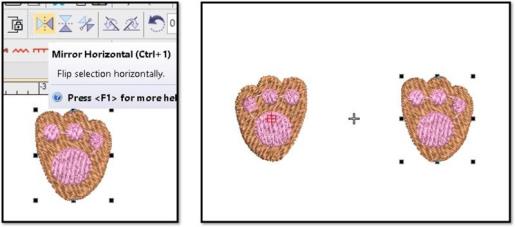 (Click Image to Enlarge) |
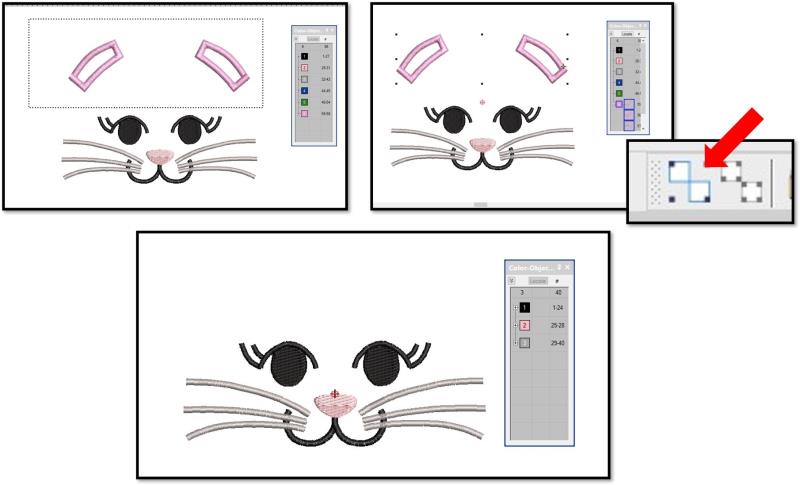
Step 4: | For the bunny face, the top rectangles were omitted. If you don’t have software, just by-pass that color step at the machine. If using software, select the rectangles and group. Delete the rectangles. Save the file with a new name. | 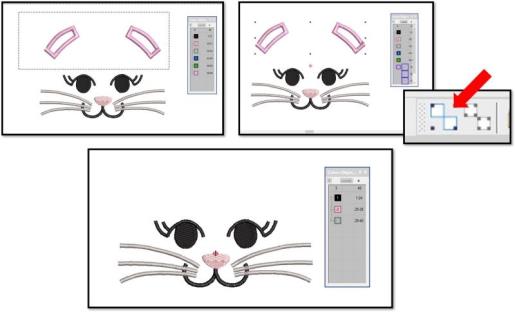 (Click Image to Enlarge) |
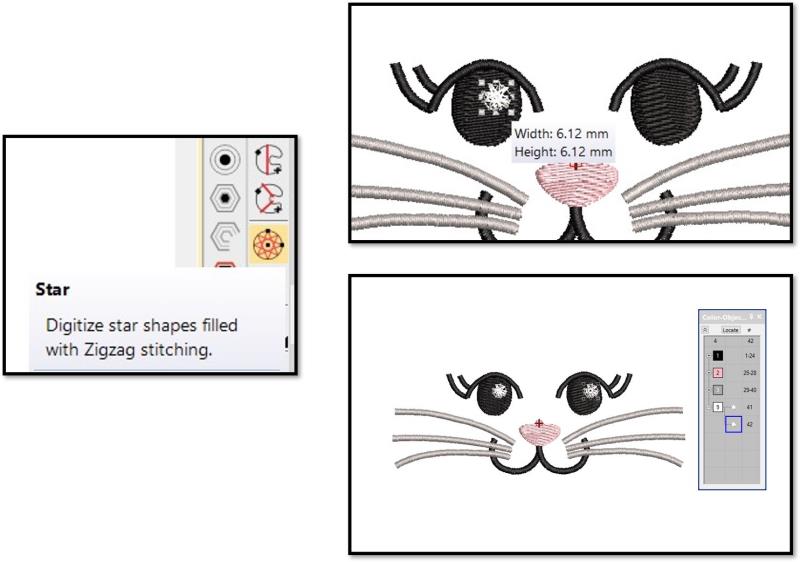
Step 5: | If your software is capable, add a little more character to the face by adding highlights in the eyes. Choose the star tool and create one star about 6mm. If you are satisfied, copy and paste another one in the other eye, positioning as shown. Save the file and export it for stitching. | 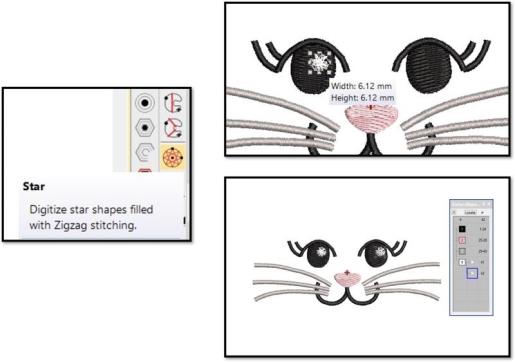 (Click Image to Enlarge) |
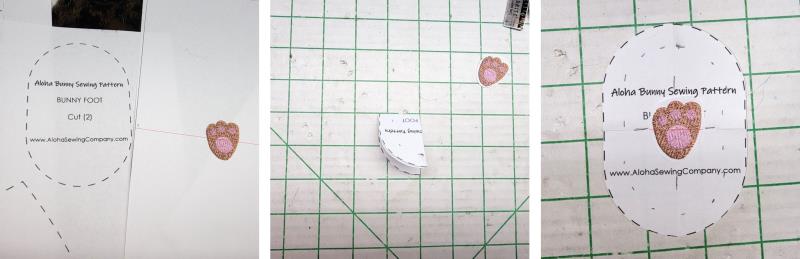
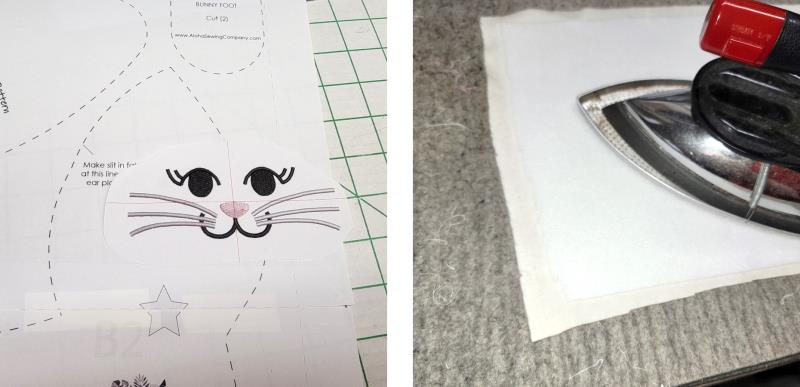
Step 6: | Cut out the foot shape from the pattern and quarter fold it, marking the center. Cut out the paper embroidery foot, folding it to find its center, and place on top of the pattern. This is how it will look stitched out. | 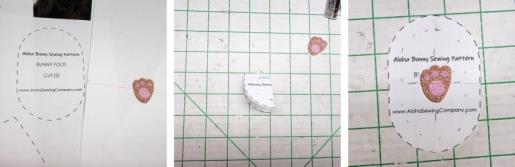 (Click Image to Enlarge) |
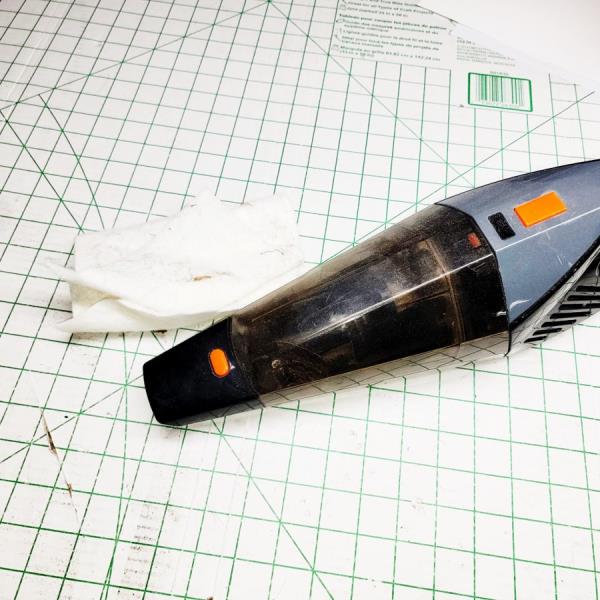
Step 7: | Something you may wish to have on hand before starting to work with the fur is a dust buster or small vacuum and pieces of batting that can be used to clean up the stray bits of fur that are inevitable when working with faux fur. | 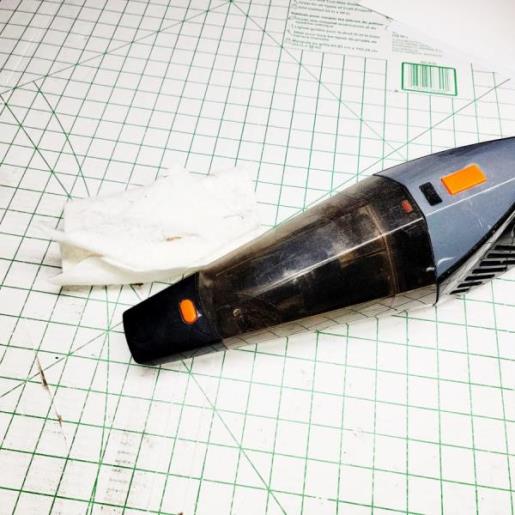 (Click Image to Enlarge) |
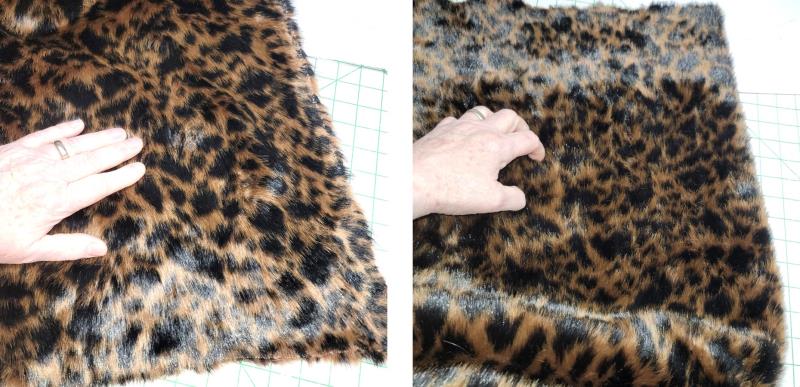
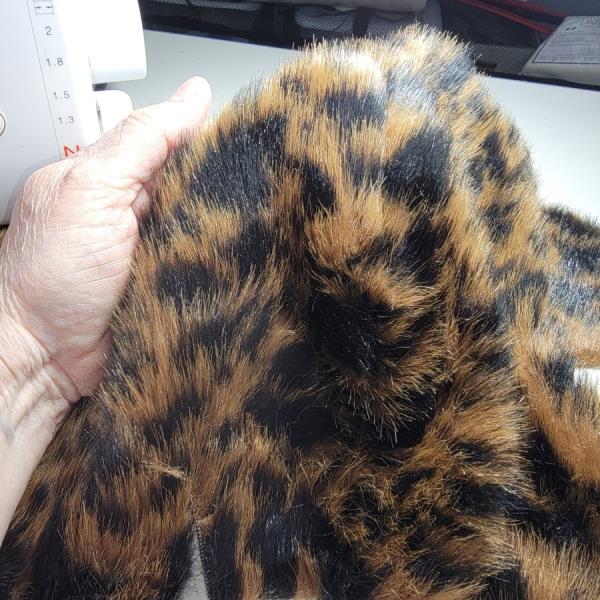
Step 8: | When working with faux fur, just like with animals, there is a smooth side when “petting” it which usually creates a shiny side, but when turned around and smoothing the fur it turns “darker” because it goes against the pile. Decide which look you like better. For this tutorial, the darker look is used (going against the pile). | 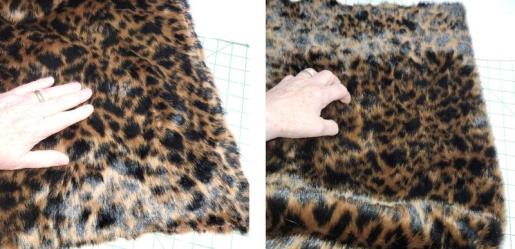 (Click Image to Enlarge) |
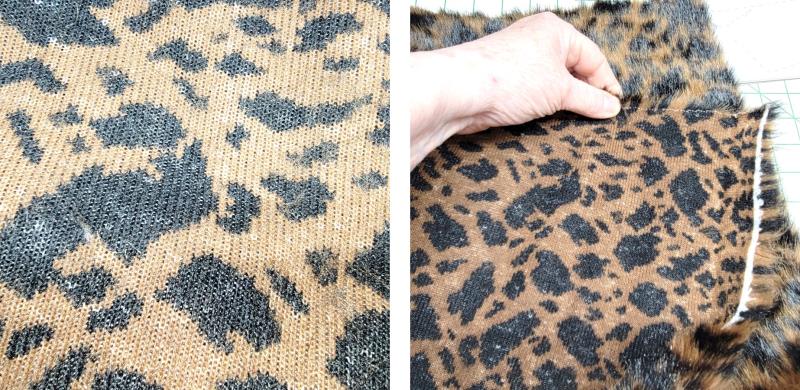
Step 9: | Faux fur actually has a knit backing which makes for wonderful cutting with minimal mess. Be sure to grab the fur and pull gently on it both in the lengthwise and crosswise grains to see how much stretch there is to the fabric. Too much stretch and the shape of the animal, when stuffed, will be distorted. If the fur you choose has a lot of stretch, back it with a lightweight stable fabric like muslin. This fabric had minimal stretch so was used as is. | 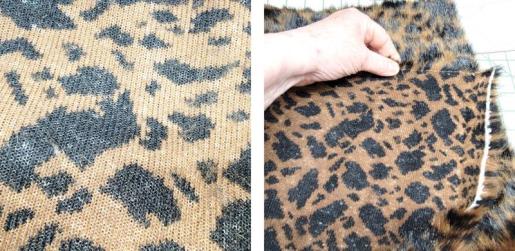 (Click Image to Enlarge) |
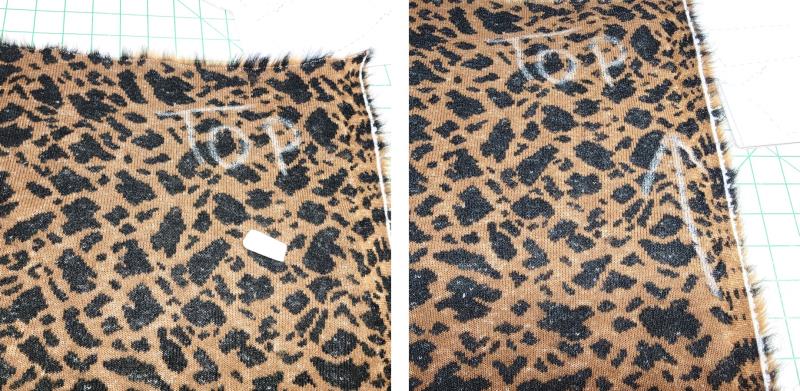
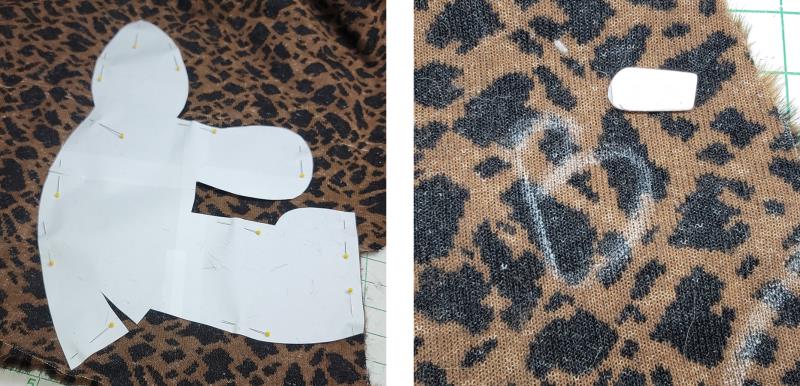
Step 10: | The bunny front and back need to have the pile of the fabric going in the same direction. To keep it accurate, mark the top and/or use arrows along the selvage edge as shown. This means the TOP of the pattern piece goes toward the top of the fabric. | 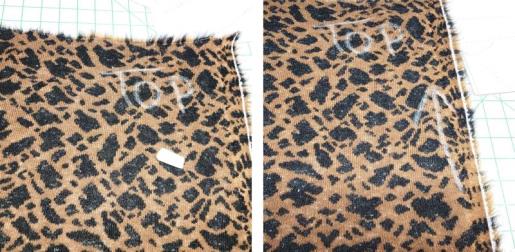 (Click Image to Enlarge) |
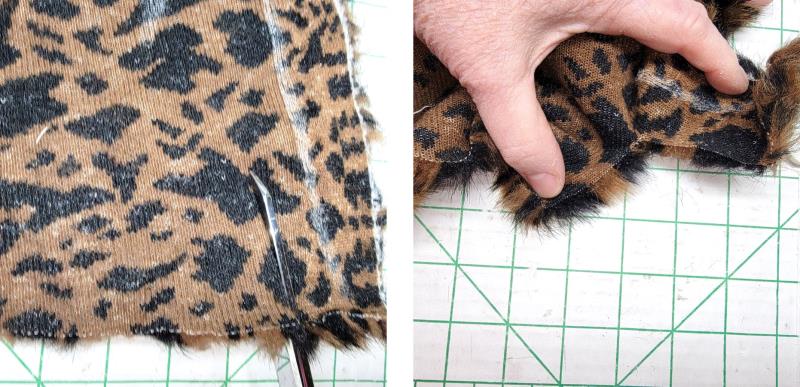
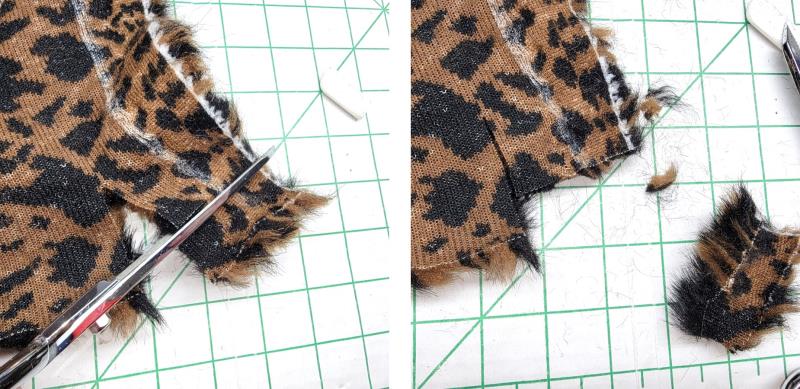
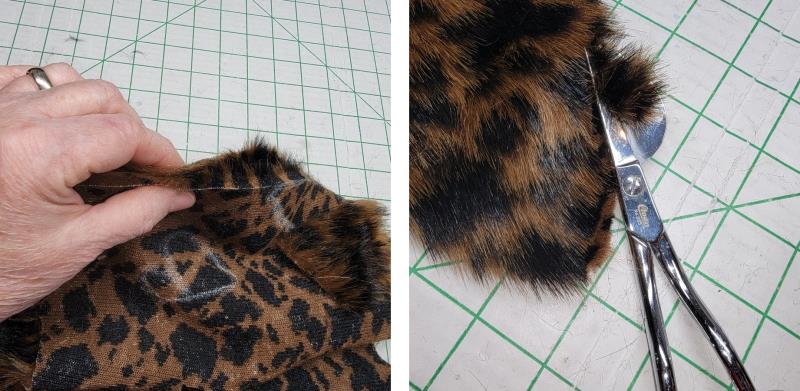
Step 11: | When cutting faux fur, slide the blade of the scissors just under the knit. It is hard to tell in the photo, but the blade is just under the knit backing. When the backing is cut and pulled apart, the fur separates cleanly. All pattern pieces should be cut out in this way. | 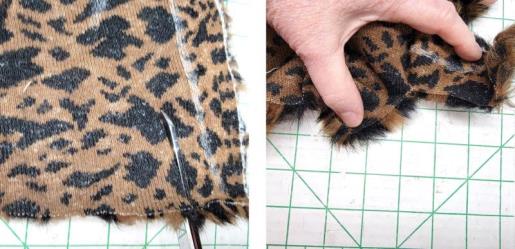 (Click Image to Enlarge) |
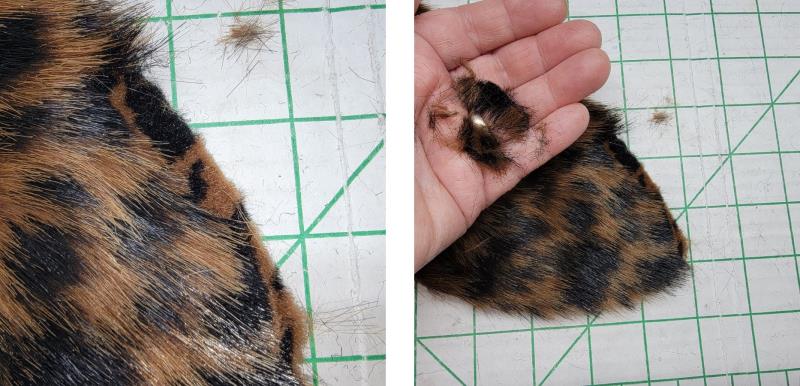
Step 12: | If the fur were to be cut in long strokes like with regular fabric, there will be fur all over the place and the pile is also cut along with the knit backing. If you forget, get out the dust buster! | 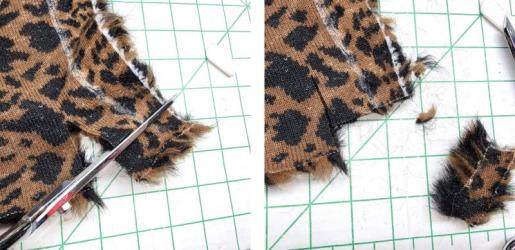 (Click Image to Enlarge) |
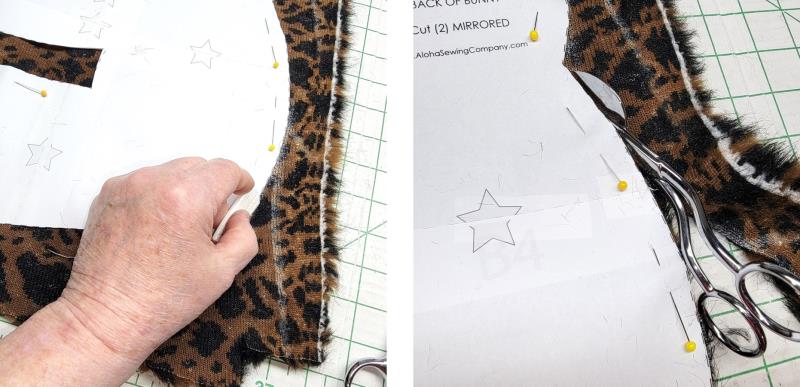
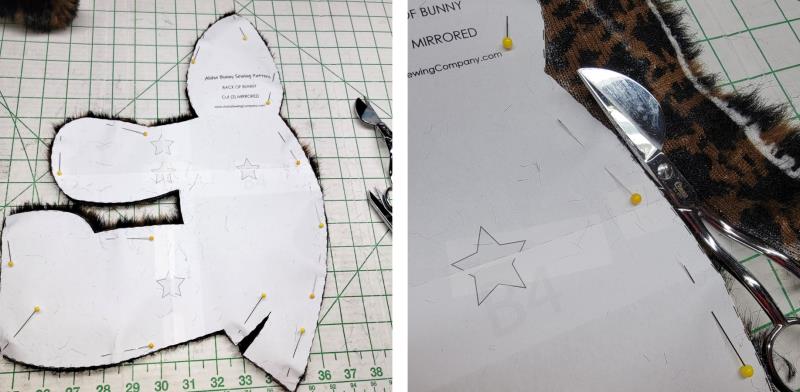
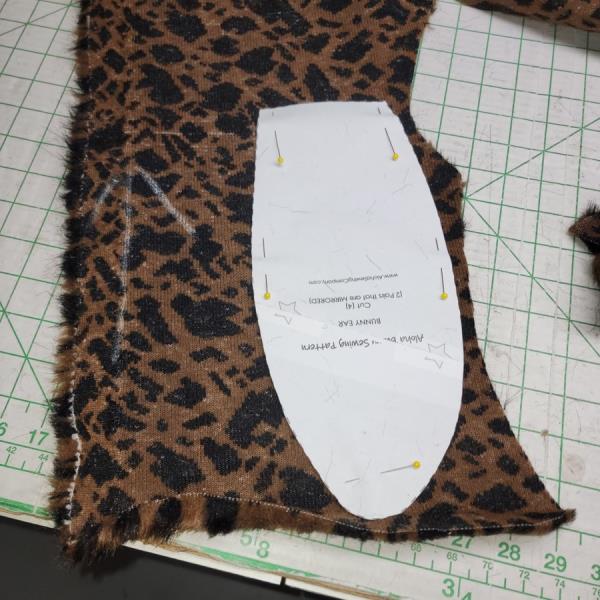
Step 13: | Lay the pattern pieces, using the markings on the fabric to make sure the top of the pattern piece is the direction it needs to be. Cut one pattern piece at a time. You can draw around the pattern piece and then cut, or just cut along the pattern piece. | 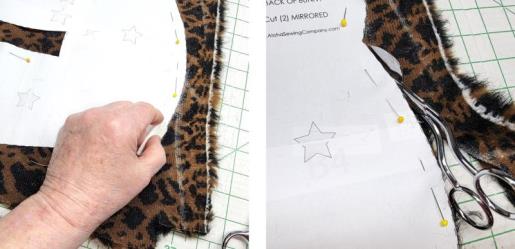 (Click Image to Enlarge) |
Step 14: | I find that using very sharp applique scissors, with the blade under the knit makes the cutting go quickly and the knit backing is cut cleanly. | 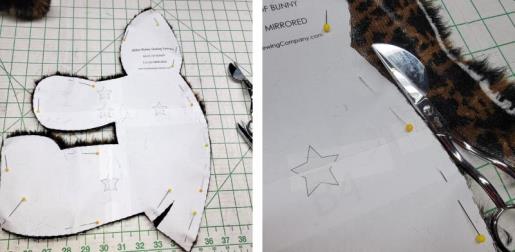 (Click Image to Enlarge) |
Step 15: | Flip the pattern piece over and cut the 2nd side of the pattern. Mark the pieces with a B so you know they are back pieces. Repeat the steps for cutting and marking the front pieces; mark with an F for front. | 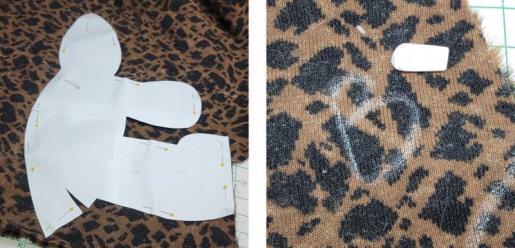 (Click Image to Enlarge) |
Step 16: | Because the ears will flip down when sewn and the pile needs to go the same way as the front and back, the ears need to be cut in the opposite direction on the fabric. Mark and cut them just like the other pieces. | 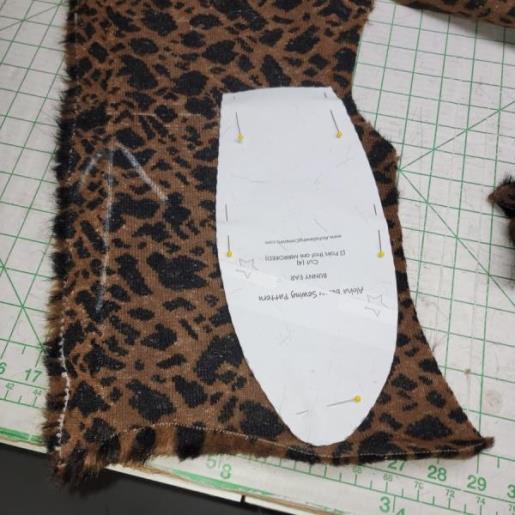 (Click Image to Enlarge) |
Step 17: | When sewing fur, if seam are just put together two things happen. First, the cut edges may not match up exactly for sewing, and second the fur gets caught in the seam so that the seam on the finished project is seen. When finished, the seams should not be visible when finished. There are a couple different ways to handle this. First is actually to cut away the fur within the seam allowance. | 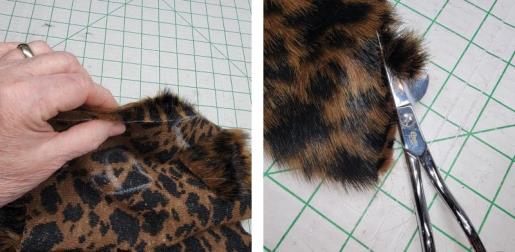 (Click Image to Enlarge) |
Step 18: | Do not trim the fur beyond the seam allowance edge. It can be cut pretty short. Again, this will make quite a mess and should any alteration in the sewing or pattern be needed within the seam allowance area during construction, the fur will have been cut away and the area would be very noticeable in the finished project. I rarely use this method. | 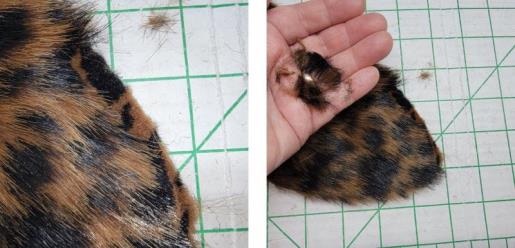 (Click Image to Enlarge) |
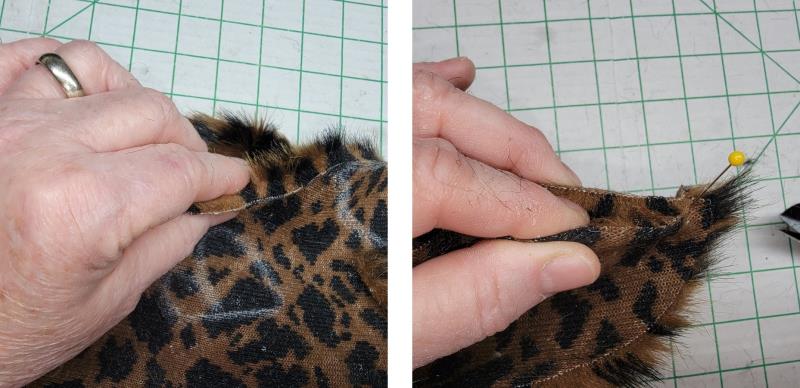
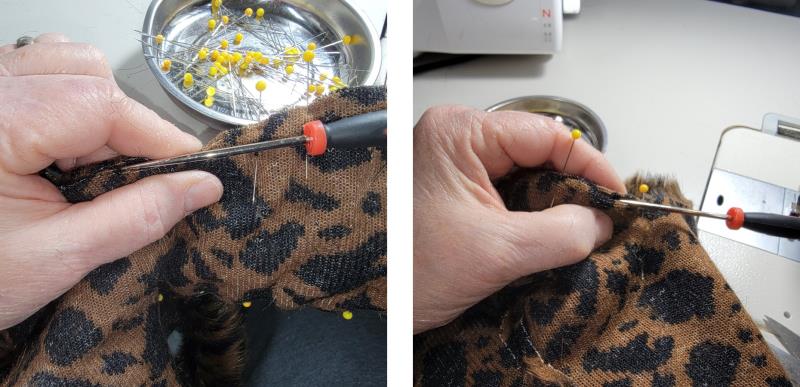
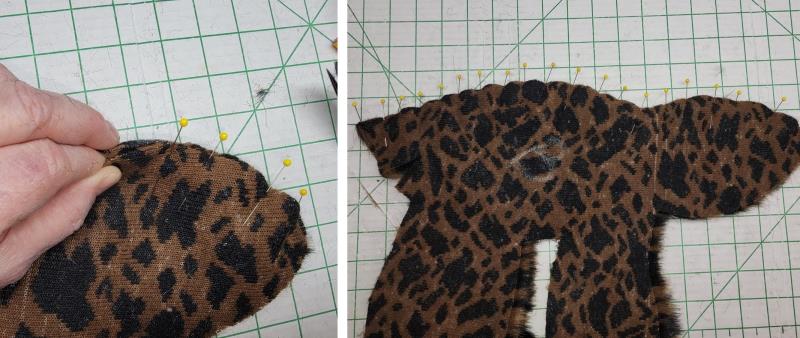
Step 19: | The best way is to smooth the fur away from the cut edges and pinch it inside the seam allowance. Work in small sections, using the index finger to push and smooth the fur down, and then pin. | 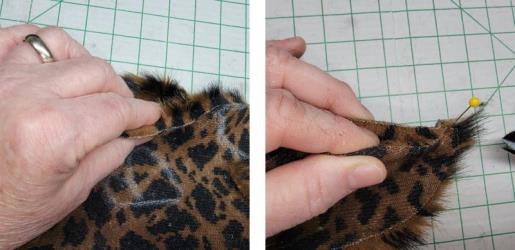 (Click Image to Enlarge) |
Step 20: | An awl or similar tool can be used in the same manner. Just smooth the fur inside, straight down, and then pin the cut edges together. | 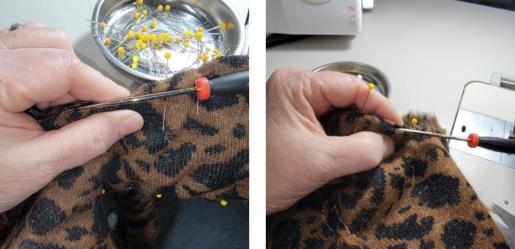 (Click Image to Enlarge) |
Step 21: | I start by pinning both ends and any matching marks. Then starting at one end, smooth and pin, smooth and pin. That way any matching marks will align in the seam. | 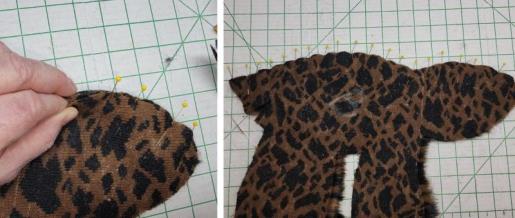 (Click Image to Enlarge) |
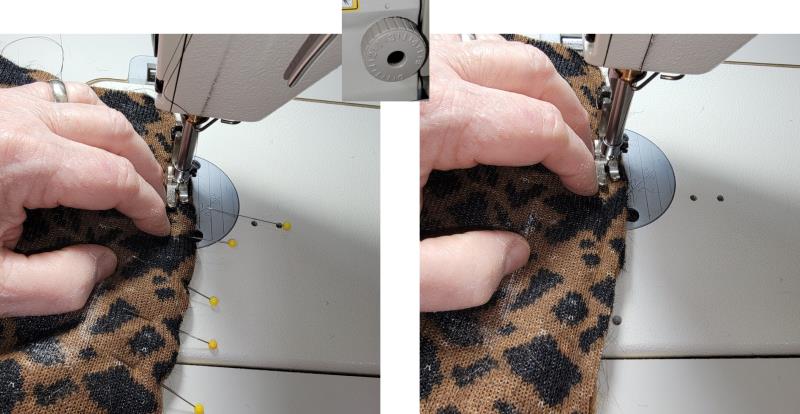
Step 22: | Use a longer stitch length when sewing fur so the fabric doesn’t bind up under the foot of the machine. As you stitch, hold your fingers close to the foot, pressing down on the fabric and removing pins as you stitch. This will hold the fur in position until the seam is stitched. After the seam is finished, go back and stitch right over the first stitching again. This makes the seam strong so it won’t come apart when the child is playing with the toy. | 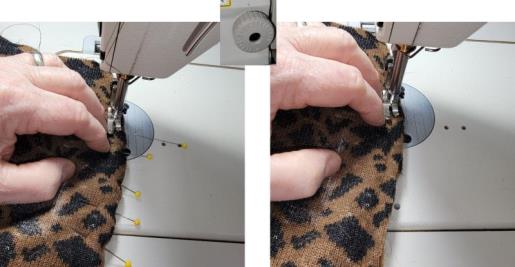 (Click Image to Enlarge) |
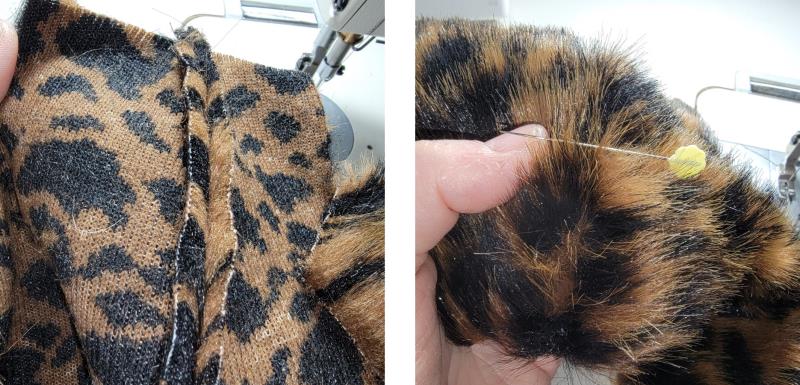
Step 23: | This is how the fur looks after the seam is stitched. The fur will be flat and upright on the outside of the seam. As each seam is sewn, go through the seam and pull out any trapped fur with the awl or a pin. | 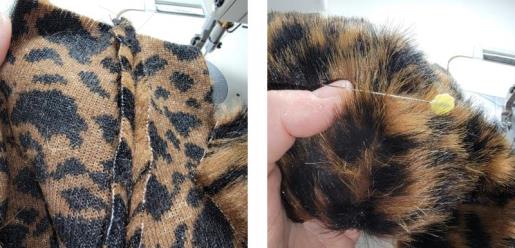 (Click Image to Enlarge) |
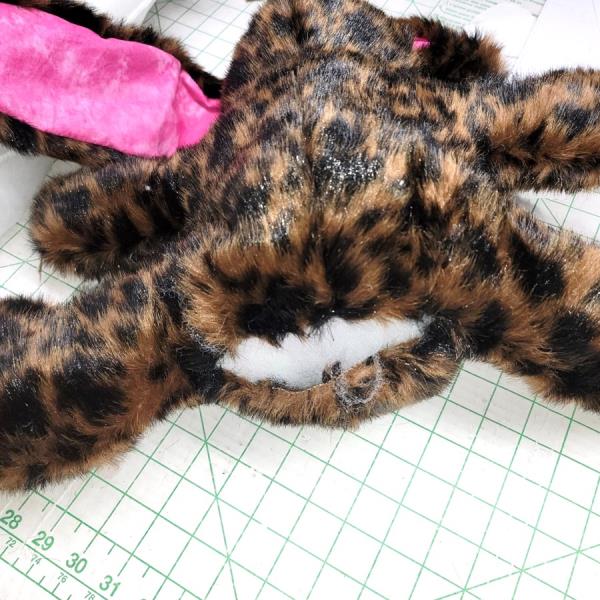
Step 24: | After this is done the seam should be virtually invisible. Follow the pattern instructions for assembling the bunny up to the ears. Instead of leaving a back seam open for stuffing and turning, I left the bottom seam open. | 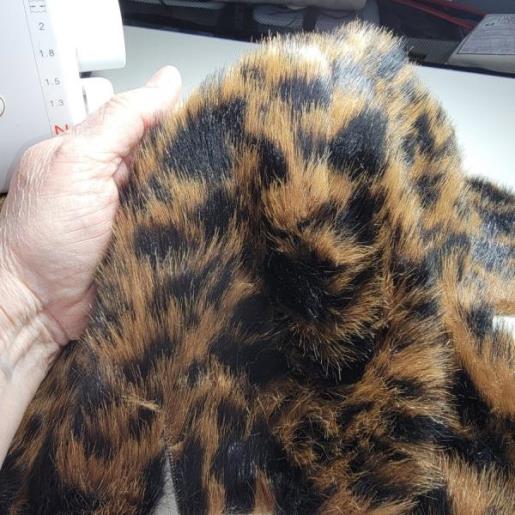 (Click Image to Enlarge) |
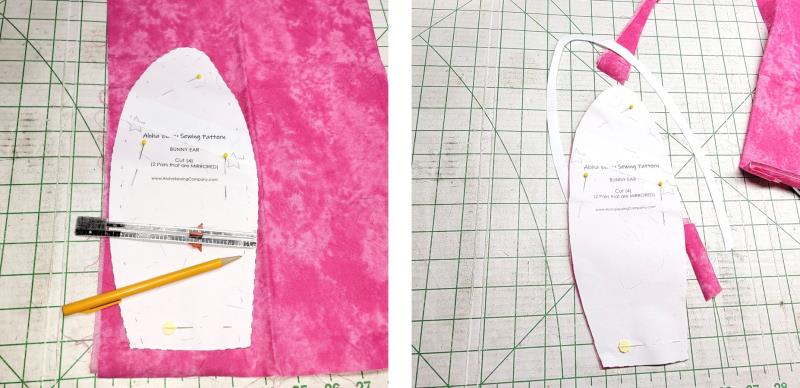
Step 25: | For the face, a separate piece of fabric is used. If found some winter white wool in my stash so that is what I used for the face and feet. Each piece was cut to fit a 5” x 7” hoop and backed with fusible batting to stabilize it. | 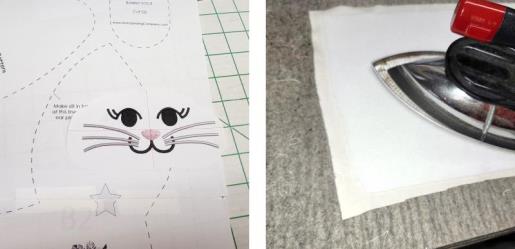 (Click Image to Enlarge) |
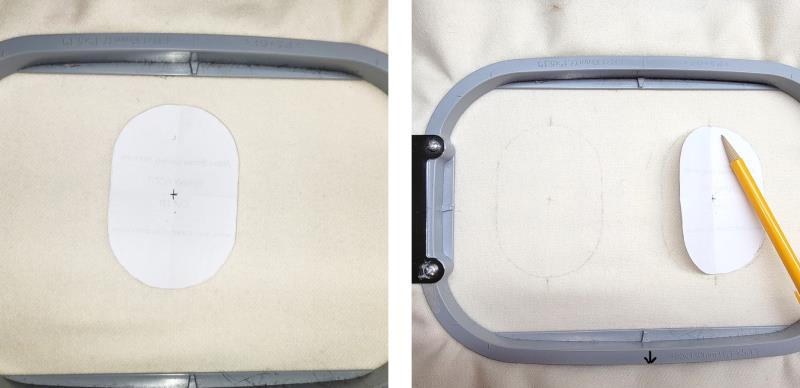
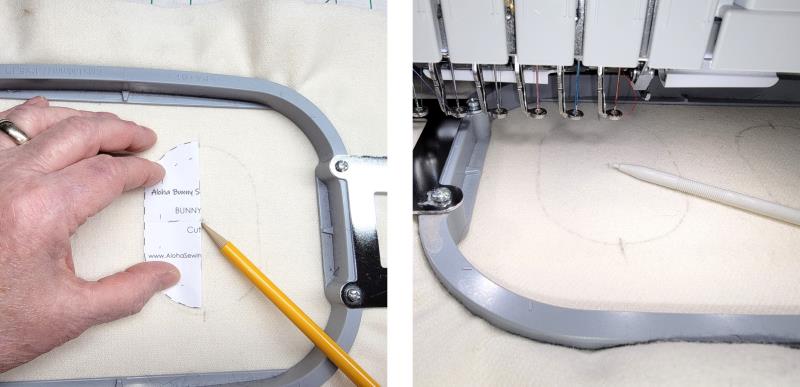
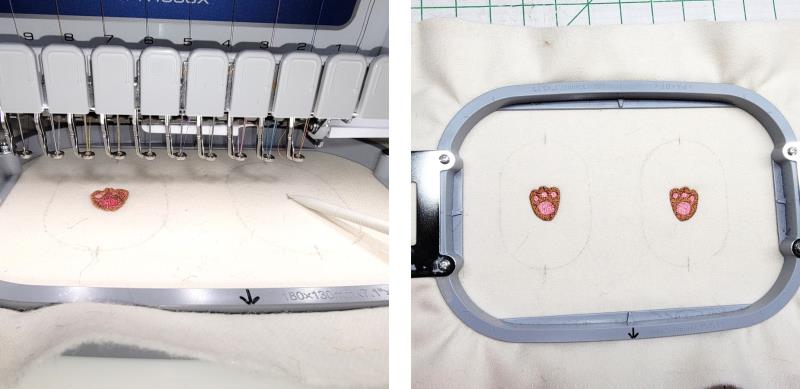
Step 26: | The feet are sewn first. Hoop the fabric (no stabilizer needed when it is fused with the batting). Draw around the foot pattern piece for each foot. | 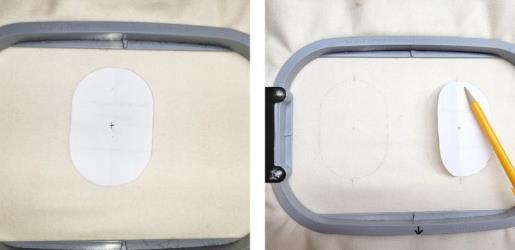 (Click Image to Enlarge) |
Step 27: | Mark the center position for the embroidery and also mark the top and bottom as those are how the foot pad is aligned when sewn to the body of the bunny. | 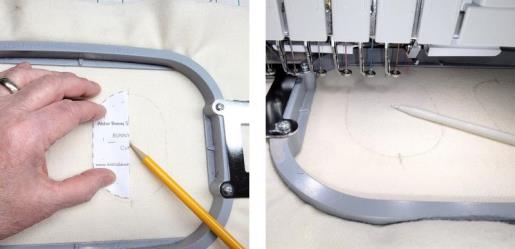 (Click Image to Enlarge) |
Step 28: | Load the left foot design on the machine, align it to the center of the left foot position and stitch. Mirror (if a right foot was not created in software), align and stitch a second foot on the right position. | 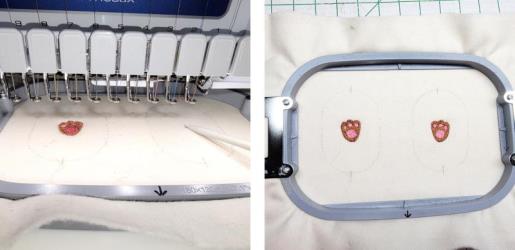 (Click Image to Enlarge) |
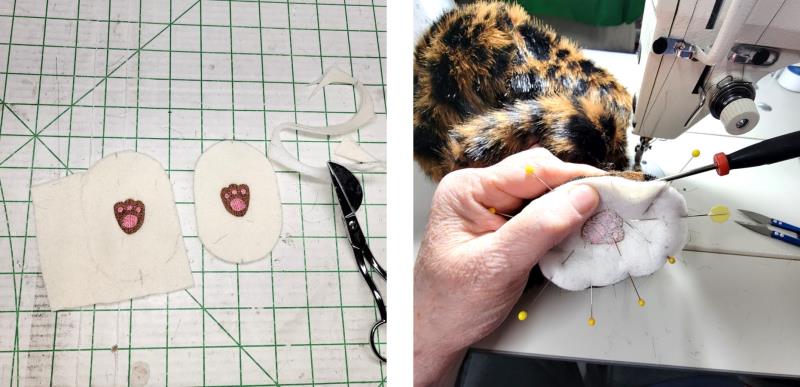
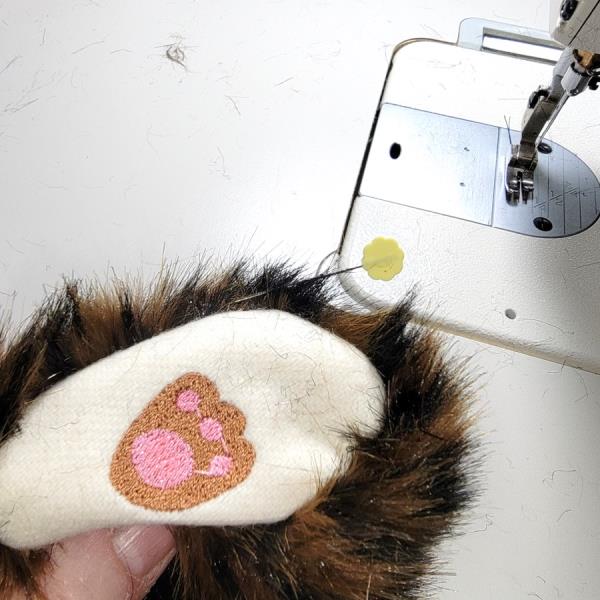
Step 29: | Cut around the pattern outline. Place each foot, right sides together at the bottom of the leg (be sure to get the left foot on the left leg and right foot on the right leg). Align the top and bottom marks to the seams. | 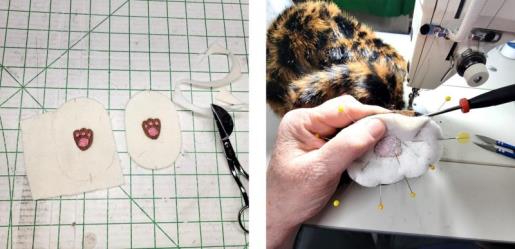 (Click Image to Enlarge) |
Step 30: | Pin and stitch the foot on. | 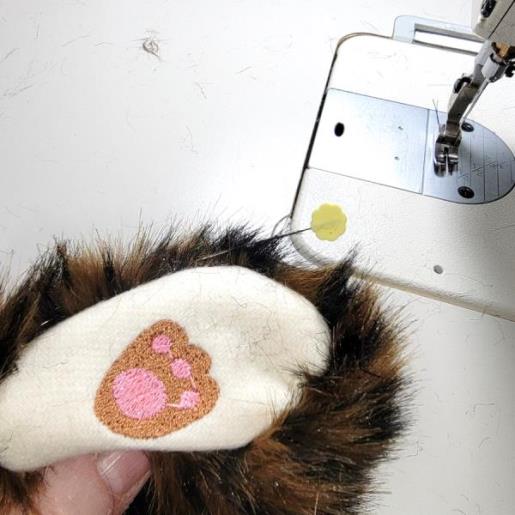 (Click Image to Enlarge) |
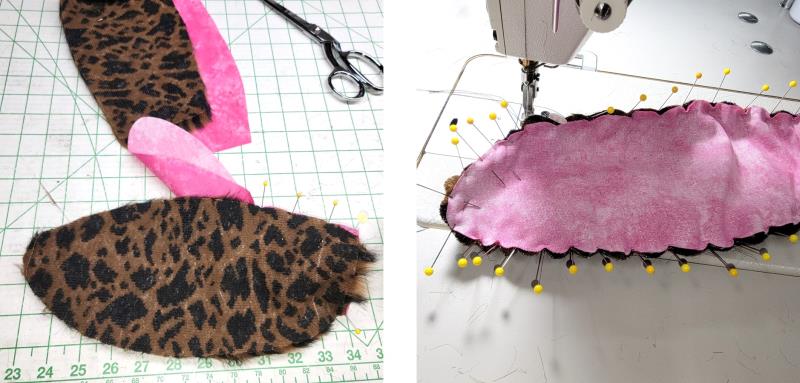
Step 31: | The ear was done slightly different. The fur has already been cut. Cut the inner ear of the chosen fabric. Using the pattern, mark inside the cut line 3/8”; this is the new cutting line—but do not do this on the straight bottom line of the pattern. What this does is causes the fur of the ear to roll toward the inside of the ear after the pieces are sewn together. | 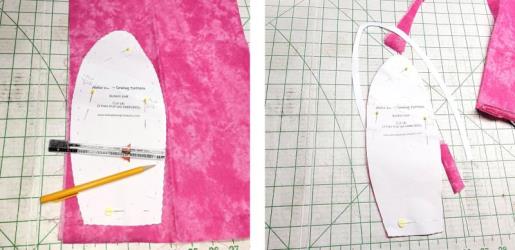 (Click Image to Enlarge) |
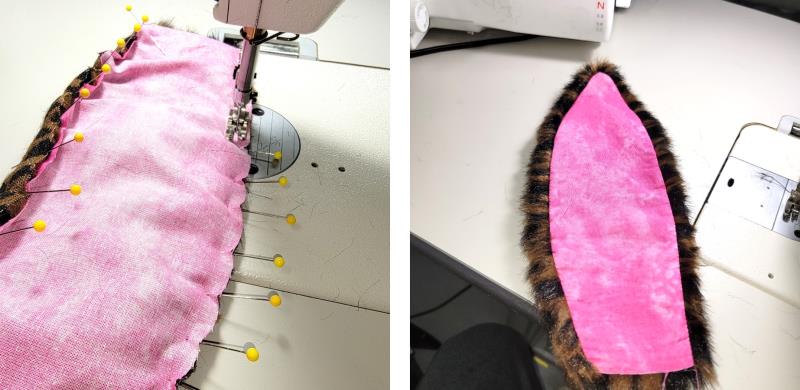
Step 32: | Placing right sides together, pin the ear sections together, matching the cut bottom edges and then pinning around the ear. You’ll find the fur needs to be eased in which is easy since the backing is knit. Be sure when pinning that the fur is being tucked to the inside of the seam like was done when sewing the body pieces together. | 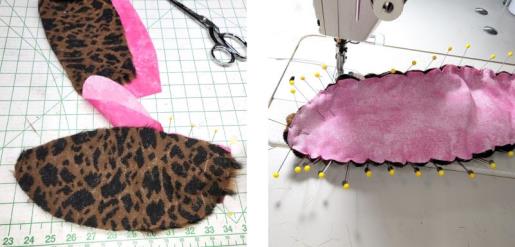 (Click Image to Enlarge) |
Step 33: | Sew the seam like was done for the body. Turn the ear right side out, pulling fur out of the seam. By cutting the inner ear smaller, the fur wraps around to the inside, framing the inner ear area. | 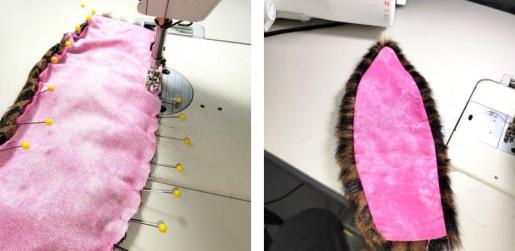 (Click Image to Enlarge) |
Step 34: | Sew the ears to the body as instructed. Stuff the bear and use a ladder stitch to sew the bottom seam. | 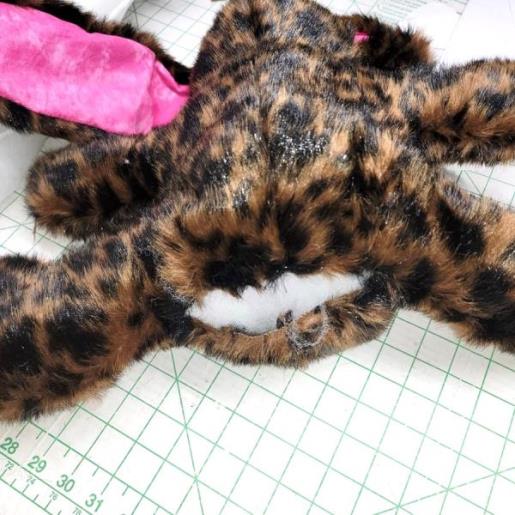 (Click Image to Enlarge) |
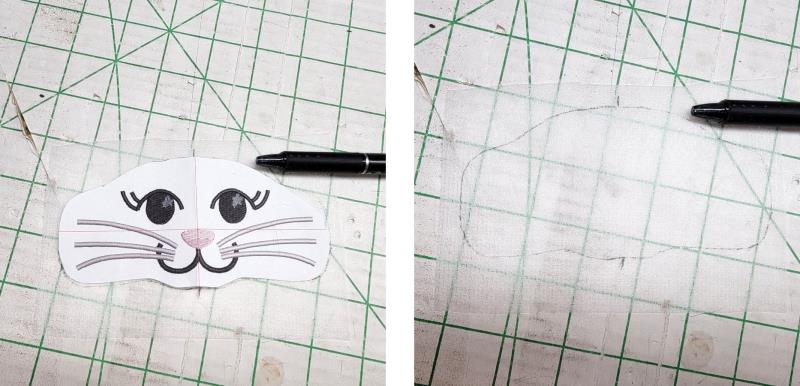
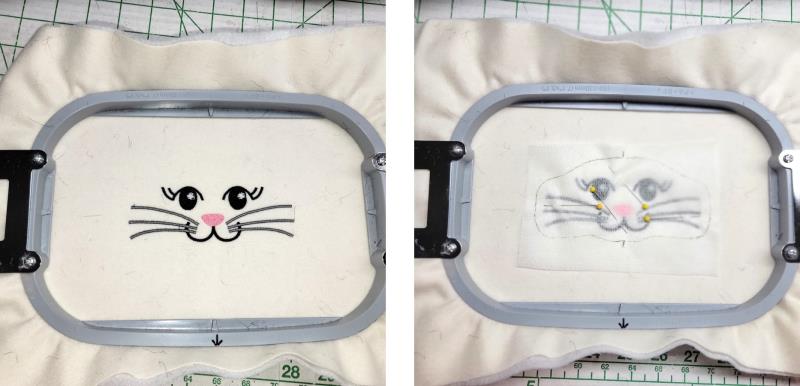
Step 35: | For the face, cut out how you’d like the face shape from the paper embroidery design. Trace around the shape on the poly mesh stabilizer. Mark the center top and bottom; these will be used to align the face to the front seam. | 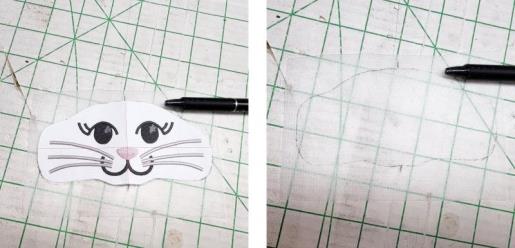 (Click Image to Enlarge) |
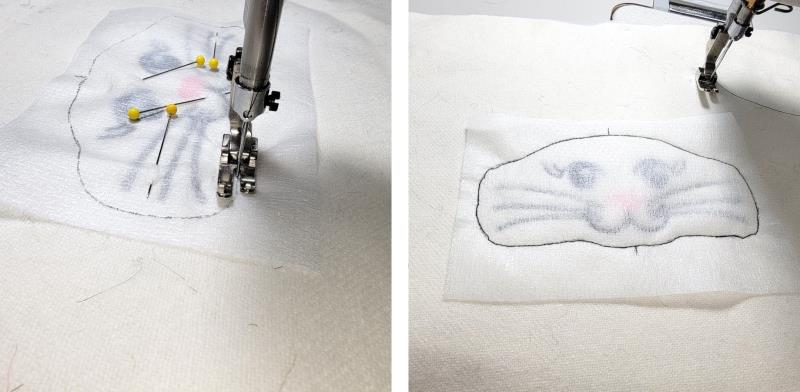
Step 36: | Hoop the fabric and stitch the face. Align the stabilizer outline to the face while it is still the hoop and pin it in place, and then remove the fabric from the hoop. | 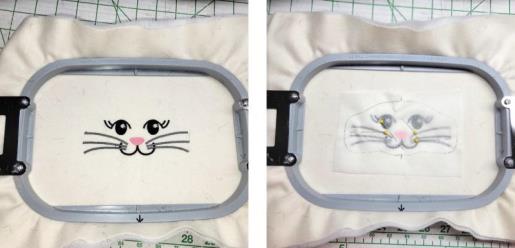 (Click Image to Enlarge) |
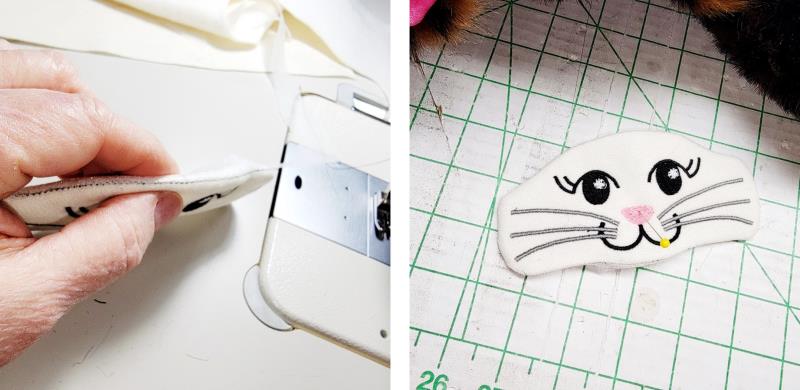
Step 37: | Using a 2mm stitch length, stitch directly on the traced line through all layers. | 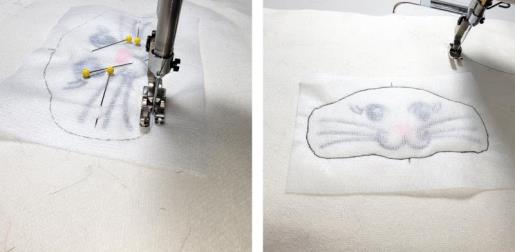 (Click Image to Enlarge) |
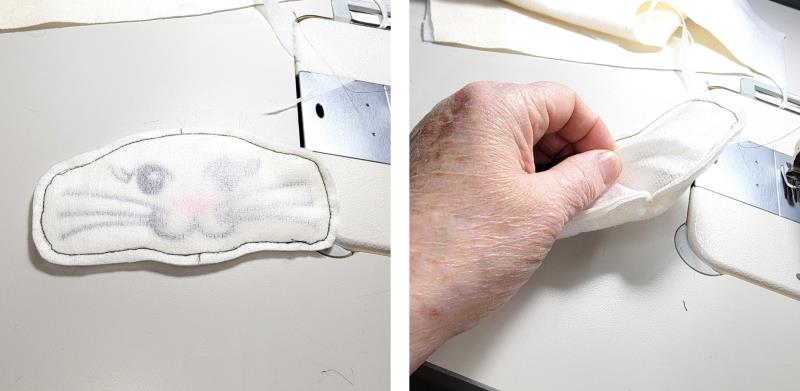
Step 38: | Trim outside the stitching line leaving about a ¼” seam allowance. Clip around the seam allowance. Pinch the stabilizer to separate it from the fabric. | 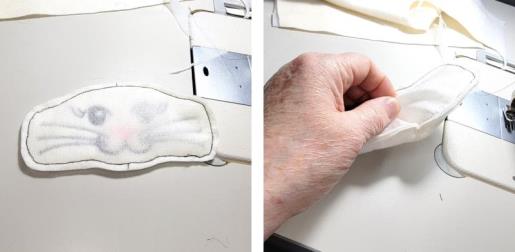 (Click Image to Enlarge) |
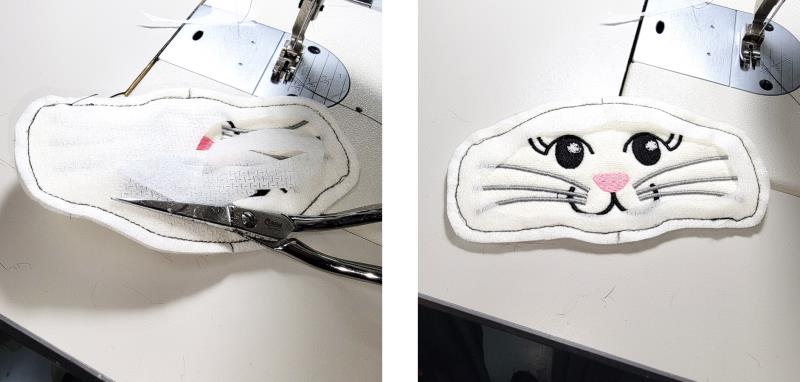
Step 39: | Insert the scissors into the slit and then cut the stabilizer inside the face leaving about 3/8” all around. | 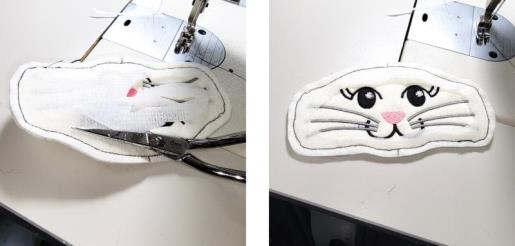 (Click Image to Enlarge) |
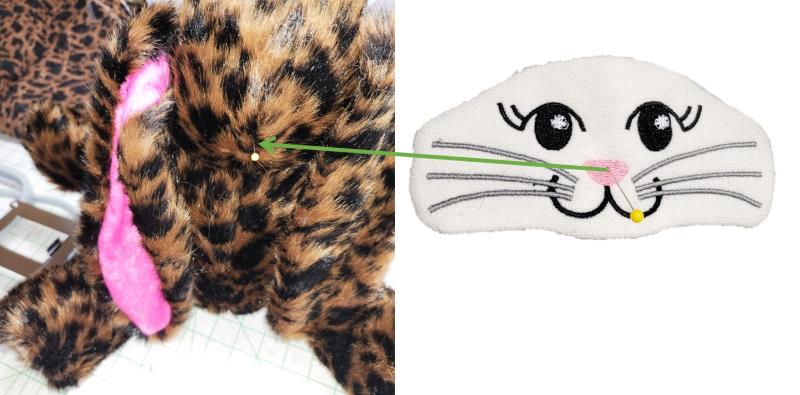
Step 40: | Turn stabilizer to the back side of the face and smooth out around the stitching line; press. Find the center of the nose and place a pin. | 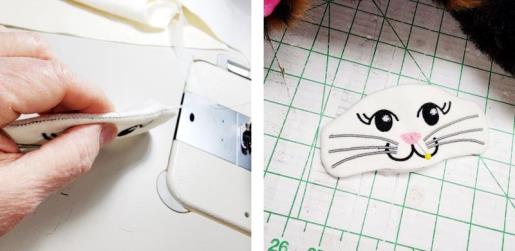 (Click Image to Enlarge) |
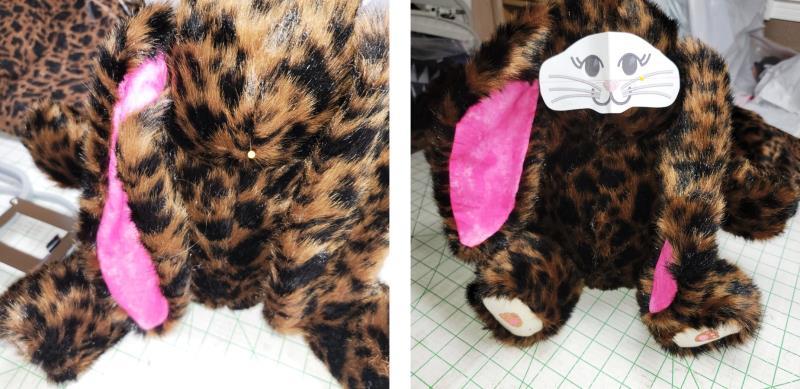
Step 41: | Find the nose position on the stuffed bunning—use the paper template as a guide. Place a pin at the seam through the nose. | 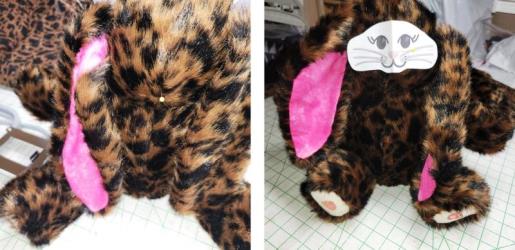 (Click Image to Enlarge) |
Step 42: | Align the stitched face to the bunny front, aligning the pins at the nose and the top and bottom centers to the seam line on the bunny front. | 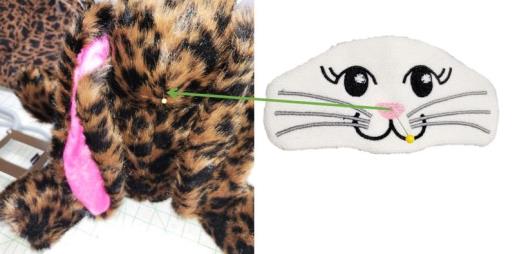 (Click Image to Enlarge) |
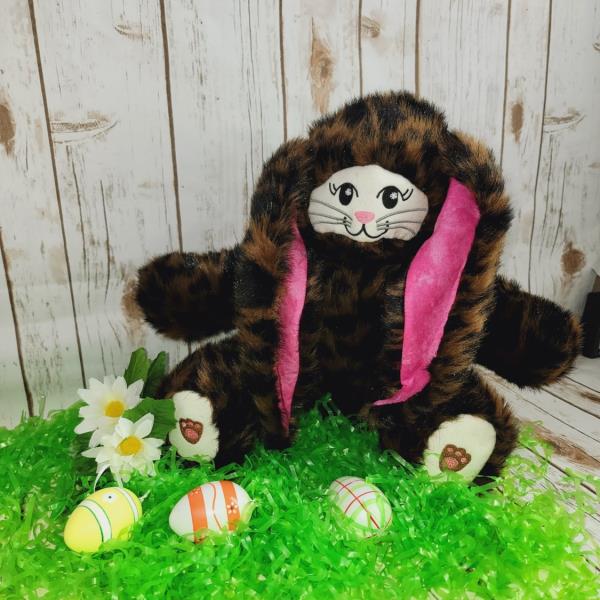
Step 43: | What a FUN project! Whoever gets this bunny will love it forever. Congratulations on completing the project and I hope you learned some tips and tricks working with fur so that you’ll go on to create more stuffed animals using pdf patterns and embroidery designs; it’s a great combination to create new friends for little ones you know. Thank you for purchasing the pattern and the designs. | 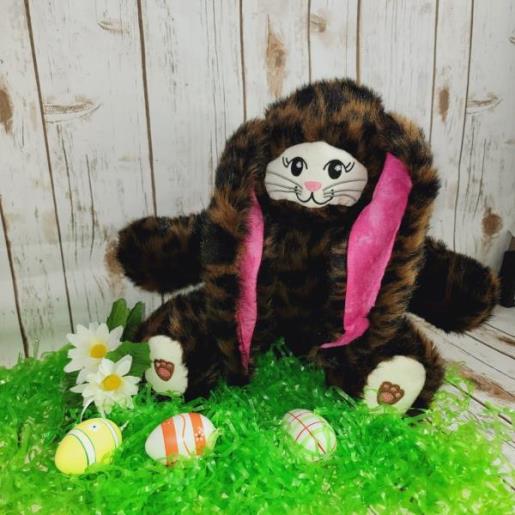 (Click Image to Enlarge) |
|