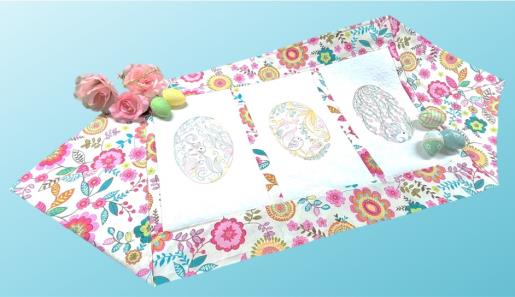
Using Redwork-style embroidery designs by Kinship Creations and a quick-to-sew table runner from AlohaSewing, you’ll create a beautiful table runner for spring time decorating.
Carefully choose the size of the table runner and then determine the amount of fabric needed.
The embroidery designs come in different sizes, so choose the size appropriate for the project you are creating.
Add fabric for the center panel with embroidery designs.
Step 1:
Read through the instructions thoroughly before beginning and assemble all the materials needed to complete the project. Do coordinate the embroidery thread colors to the chosen fabric. To add a little more interest, though it will take more time, another option is to choose a secondary fabric as an accent for piping or a small border.
(Click Image to Enlarge)
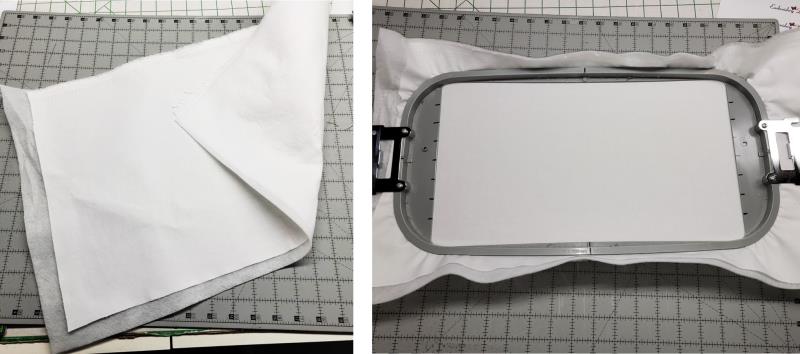
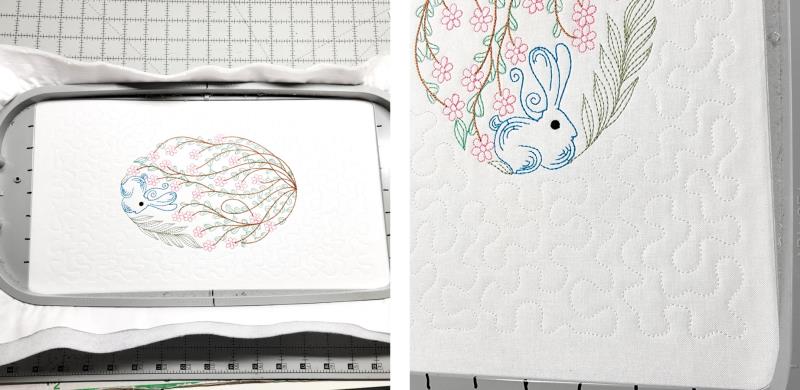
Step 2:
For this project, the largest embroidery size was chosen and cut large enough to fit the appropriate hoop size for stitching the design. Fusible batting was applied to the back of the white Kona cotton and the fabric is hooped.
(Click Image to Enlarge)
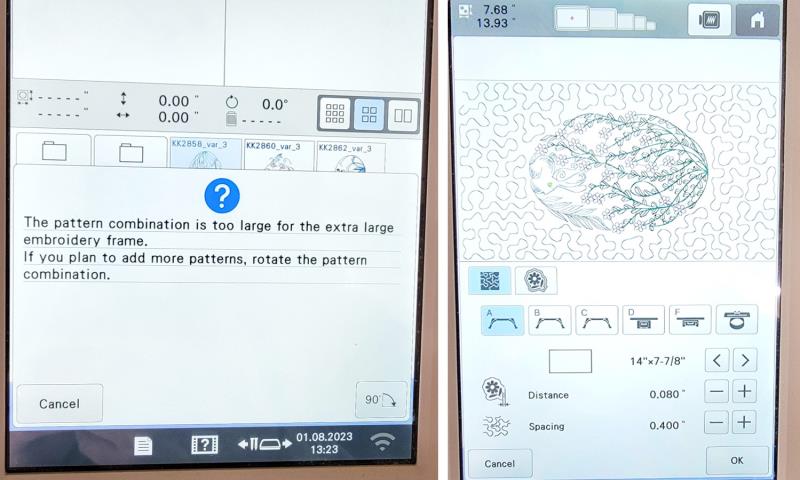
Step 3:
Load the design on the machine, rotating it if needed. At the machine, a stippling stitch was added. The distance away from the outer edge of the design was programmed .808” with the spacing at .4”. Adjust this for your machine as desired. If you don’t have a stippling stitch on your machine, the batting may be omitted and the design just sewn; or batting added and quilting as desired done.
(Click Image to Enlarge)
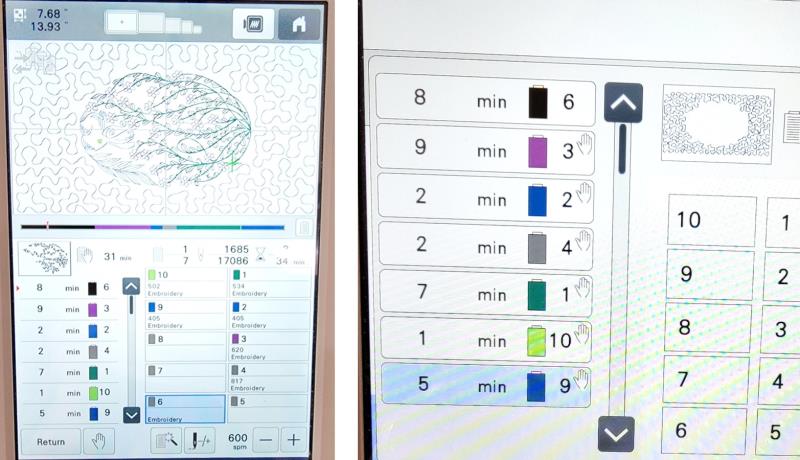
Step 4:
Load the chosen embroidery thread colors. As stated in the embroidery color sheet, the designs have jump threads, so if you’ve got a multi-needle machine, program stops after each color to allow trimming the jump threads after each color is sewn.
(Click Image to Enlarge)
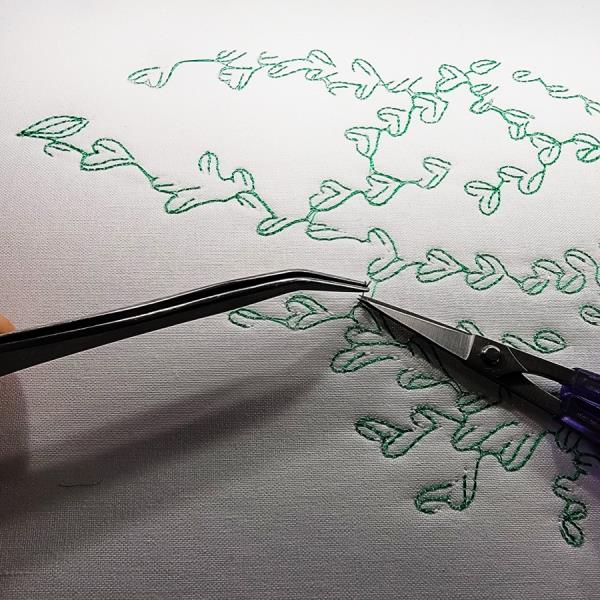
Step 5:
To trim the jump threads, remove the hoop from the machine but do not remove the fabric from the hoop. It is easy to remove jump stitches if tweezers are used to hold the threads and then the thread snipped with the tip of a sharp little scissors.
(Click Image to Enlarge)
Step 6:
Stitch the design, sewing the stipple stitching last.
(Click Image to Enlarge)
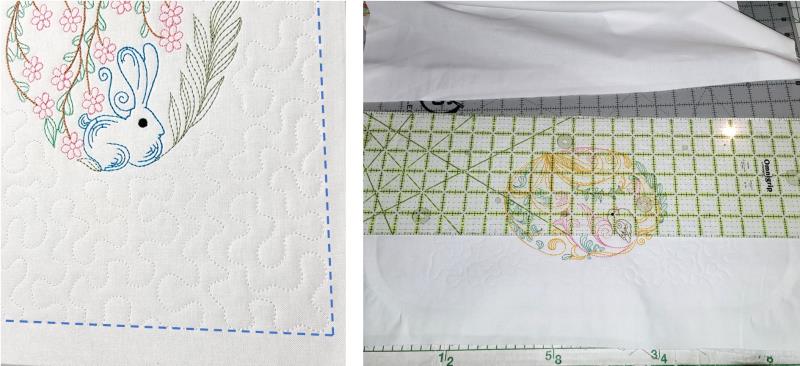
Step 7:
For this project, the embroidered pieces were trimmed with the ¼” mark on the ruler aligned with the outer most edges of the stippling line. While doing this, make sure to keep the piece squared up.
(Click Image to Enlarge)
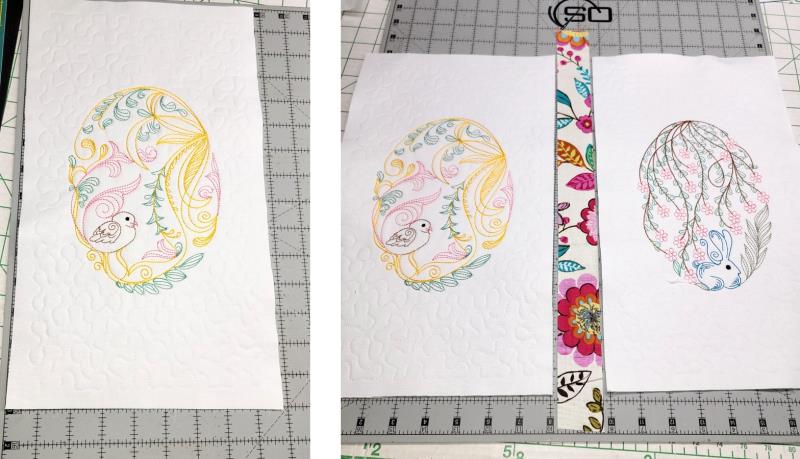
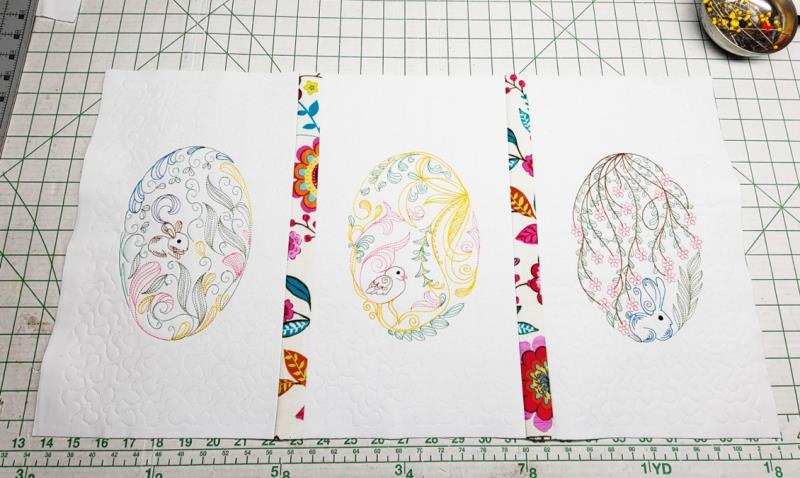
Step 8:
After all the pieces are trimmed, cut 1 ½” strips of fabric to sew between the embroidered fabric.
(Click Image to Enlarge)
Step 9:
Place the long edges of the strip to the right side of the embroidered fabric and sew with a ¼” seam. Press the seam allowances toward the strip.
(Click Image to Enlarge)
Step 10:
Repeat sewing the remaining strips.
(Click Image to Enlarge)
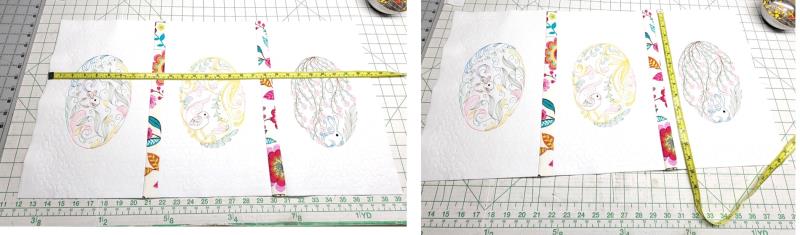
Step 11:
Measure the piece as shown and determine how much fabric needs to be added to each end to get the required length of the table runner as determined in the beginning.
(Click Image to Enlarge)
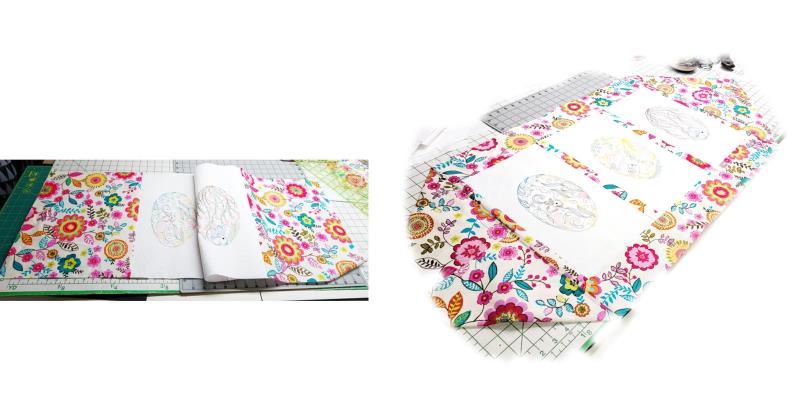
Step 12:
Cut the fabric adding seam allowances and finish the table runner as shown in the pattern instructions.
(Click Image to Enlarge)
Step 13:
Congratulations on creating your spring table runner and thank you for purchasing the table runner pattern and embroidery designs. This table runner sews up so fast after the embroidery is completed, you’ll want to create other for special gifts for holidays, craft fairs, and thoughtful housewarming gifts.
Ramona Baird has been in the embroidery industry for over 23 years. She and her husband owned a commercial and retail embroidery store in Arizona for many years. She is an experienced digitizer having been mentored by award-winners Pat Williams and Lindee Goodall. Ramona is a contributor to “Creative Machine Embroidery” magazine having 5 covers to her credit. Ramona has worked for Wilcom America and served many years as Education Director for the American Sewing Guild. With a degree in fashion design, she is able to design and execute patterns which Pat Williams says are “out of the box” in creativity and application. Ramona likes to challenge the boundaries of embroidery and bring new and exciting designs, ideas, and projects to EmbroideryDesigns.com. She wants embroiderers of all levels to increase their skills and enjoyment in using their embroidery machine for gift-making and personal pleasure.