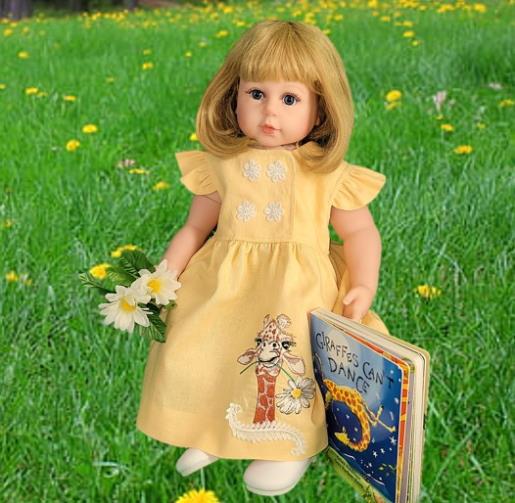
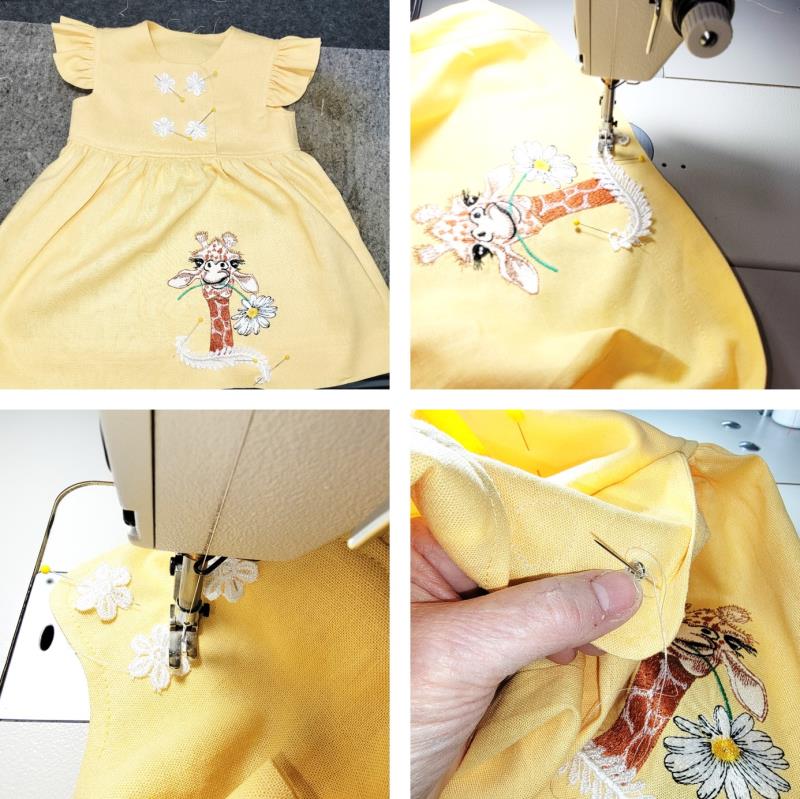
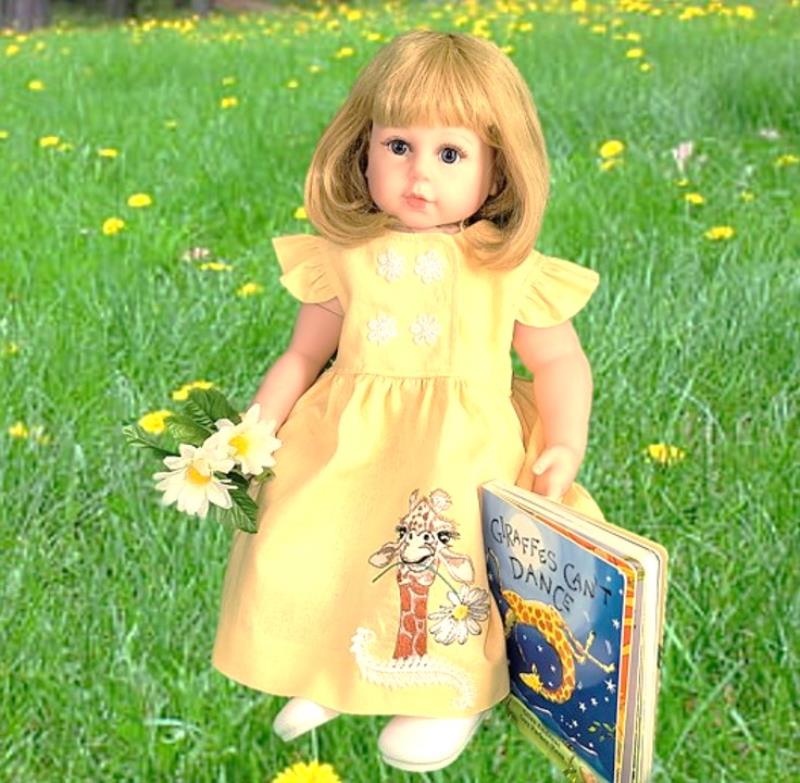
The directions in the pattern are wonderful. This tutorial will show you an optional way of constructing the bodice, and a creative tip when an embroidery design registration is off.
Step 1:
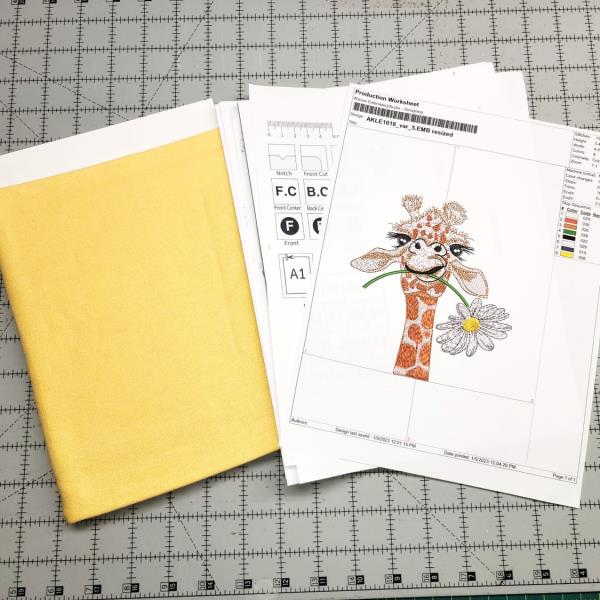
Read through the instructions thoroughly before beginning and assemble all the materials needed to complete the project. Print out the pattern in the size needed and select the fabric and embroidery thread colors. Print out a paper template of the embroidery design at actual size. For this project, a size 2T pattern was used. The design was decreased in size by 10%.
(Click Image to Enlarge)
Step 2:
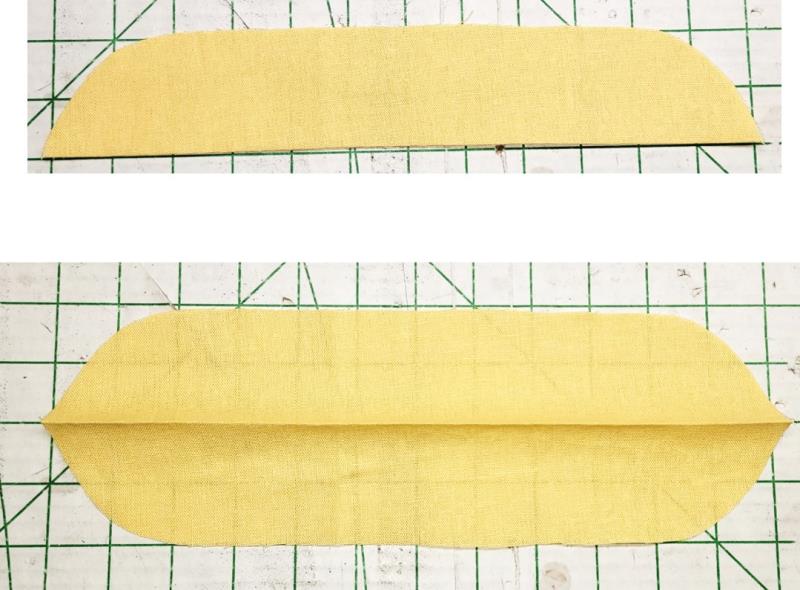
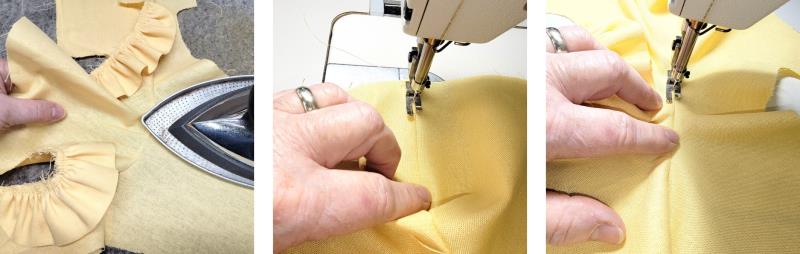
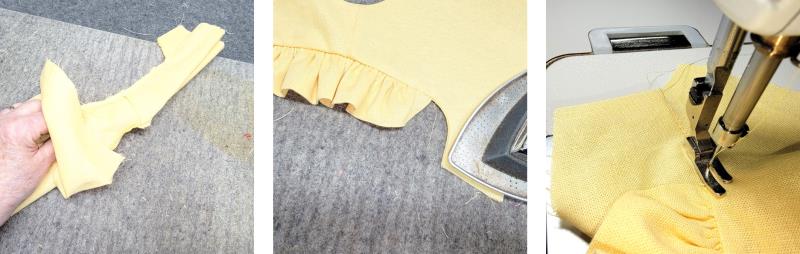
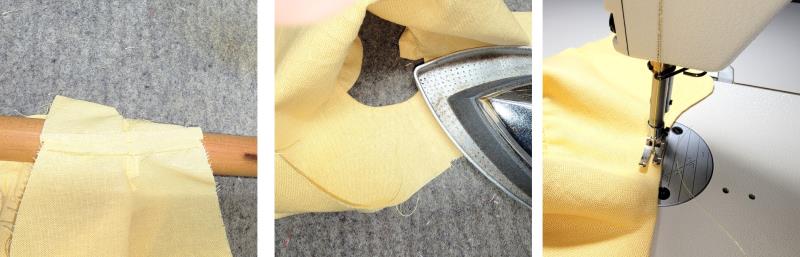
Instead of hemming the ruffles, the edge was laid on the fold of the fabric and 2 were cut. Fold the ruffle in half and press.
(Click Image to Enlarge)
Step 3:
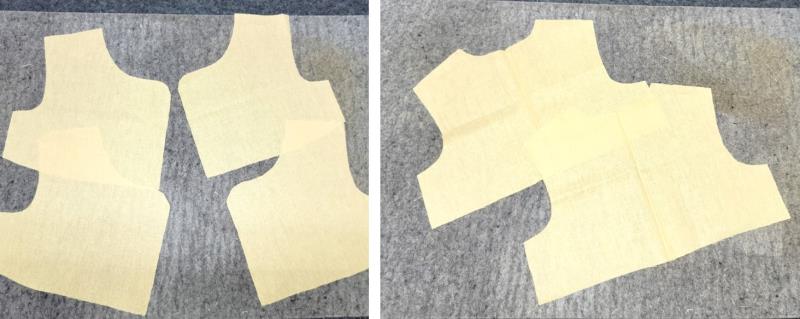
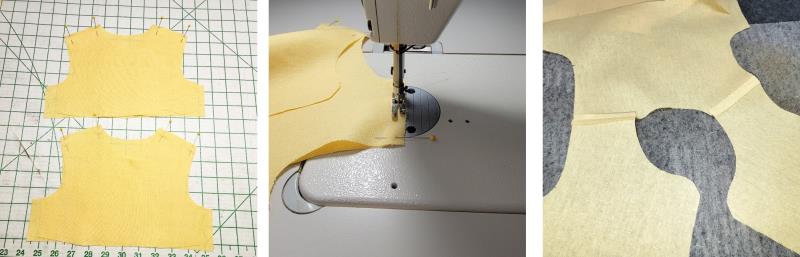
Cut out the remaining pattern pieces. Instead of facing the bodice, in this tutorial a bodice lining will be created. To do this, cut four bodice front pieces and two bodice back pieces on the fold. Cut out the skirt pieces.
(Click Image to Enlarge)
Step 4:
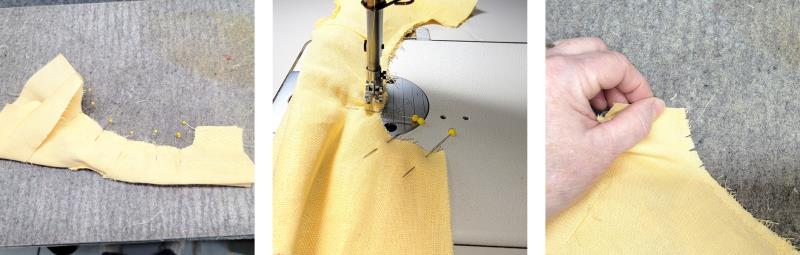
Place the right sides of the bodice front pieces to each of the bodice back pieces and pin at the shoulders. Stitch the shoulder seams and press open.
(Click Image to Enlarge)
Step 5:
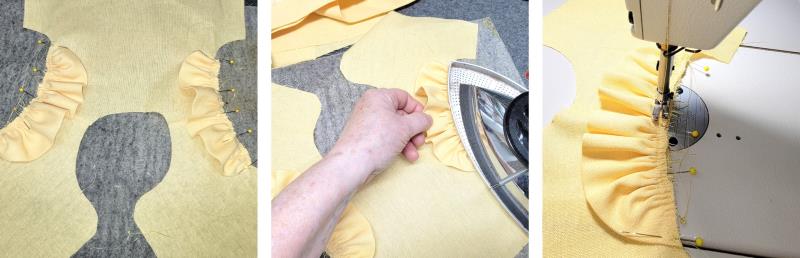
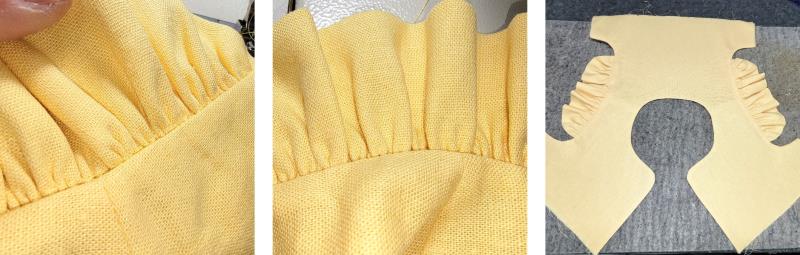
Gather each ruffle. Pin in place as indicated on the pattern. Tip: press the ruffle within the seam allowance, gently forming the ruffle. Baste the ruffle in place. Repeat for the other ruffle.
(Click Image to Enlarge)
Step 6:
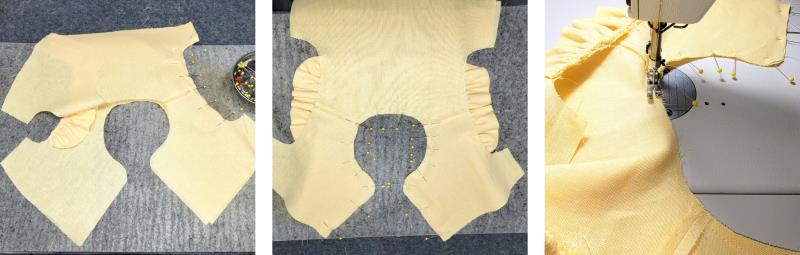
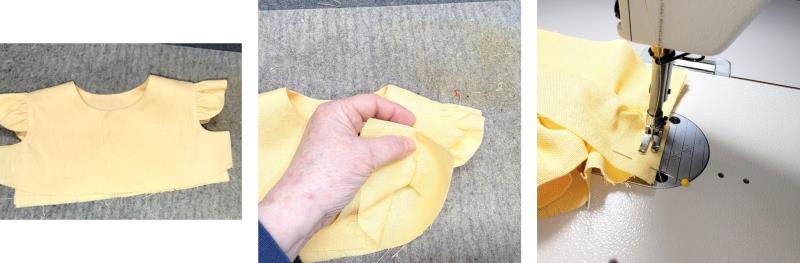
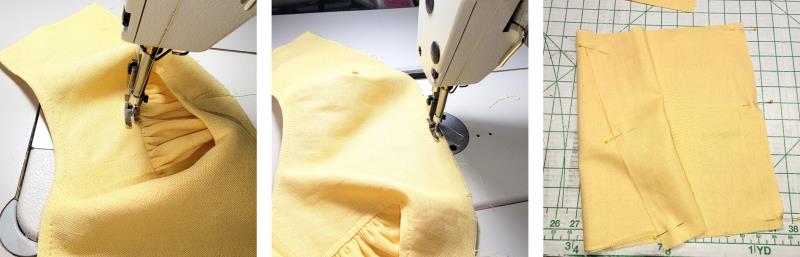
Place the bodice lining, right sides together over the bodice, matching shoulder seams and all cut edges. Pin around the neck edge and front. Sew around the neck edge and front edges.
(Click Image to Enlarge)
Step 7:
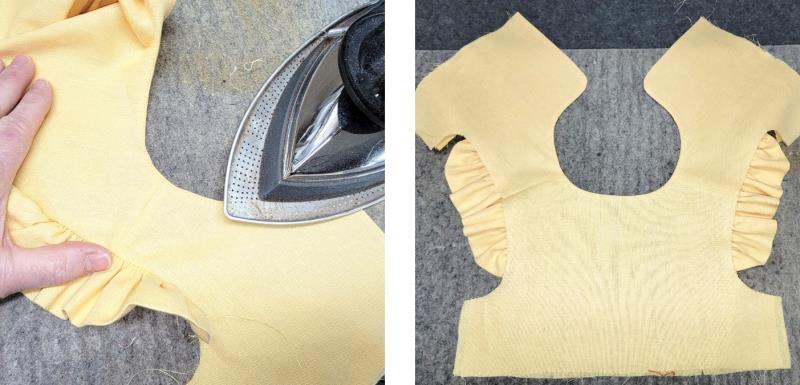
Tip: when going around the curves at the center front edge, shorten the stitch length and try and sew smoothly around the curve without stopping. Clip the curves.
(Click Image to Enlarge)
Step 8:
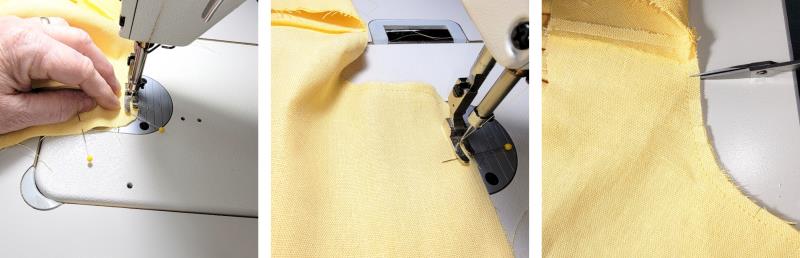
Press the seam allowance toward the lining and understitch. Go as far as you can into the curve with the Understitching.
(Click Image to Enlarge)
Step 9:
Press the front edge. Next, the “burrito method” will be used to sew the armholes to encase the seam allowance.
(Click Image to Enlarge)
Step 10:
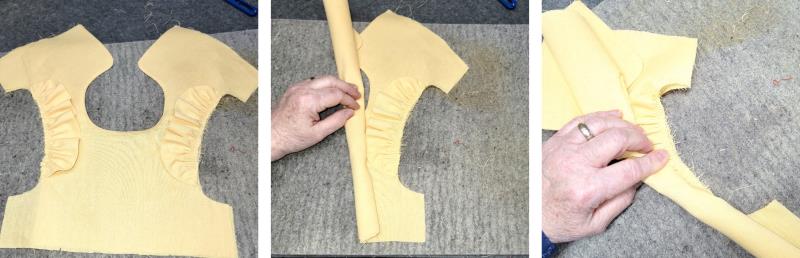
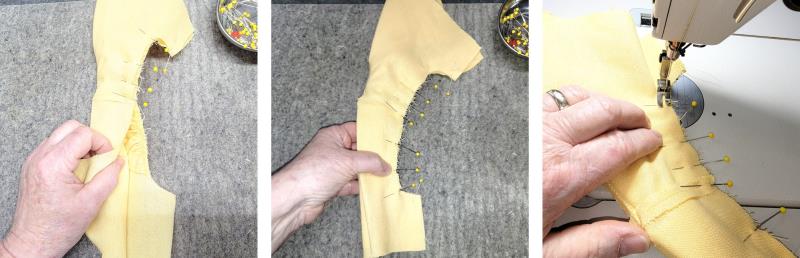
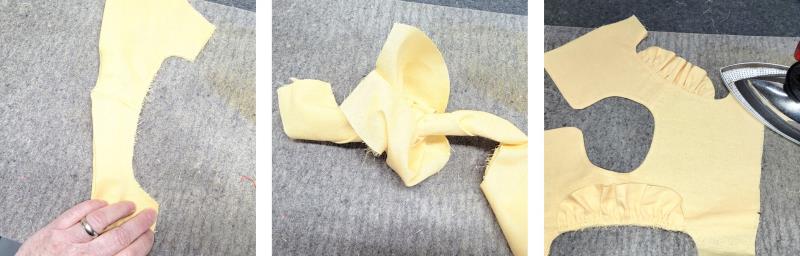
Place the bodice as shown on a flat surface. Beginning at the left side, snuggly roll all the layers to the armhole on the right. Pick up the top layer of the armhole on the right with the portion rolled.
(Click Image to Enlarge)
Step 11:
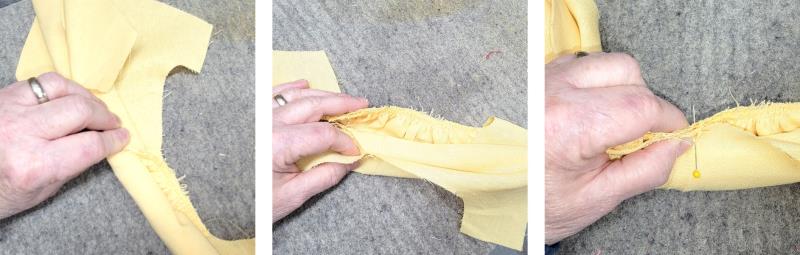
The under fabric will be rolled around under the burrito, around the burrito, and matched to the armhole. Match the shoulder seams and pin.
(Click Image to Enlarge)
Step 12:
Continue matching cut edges and pinning the armhole. Sew the seam.
(Click Image to Enlarge)
Step 13:
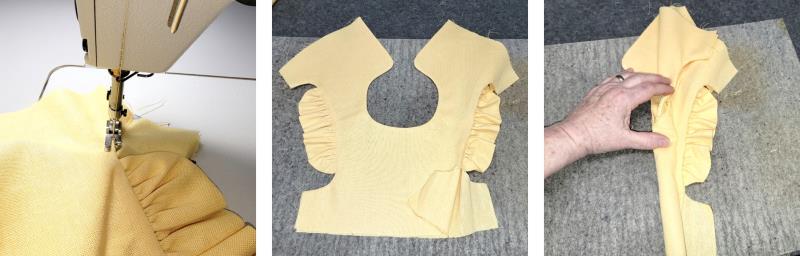
Clip the curves. Now reach in through the bottom and pull the fabric out through the shoulder seam. For smaller sizes, this will be a little tricky, but for larger sizes where the shoulder length is longer it is easy. Press the seam—be careful not to press the ruffled area—just the seam.
(Click Image to Enlarge)
Step 14:
Understitch the seam to the lining as far as you can. For smaller sizes, that won’t be very far. Begin at one underarm area and stitch as far as you can toward the shoulder, then turn the piece around and start at the other underarm and understitch from the other side.
(Click Image to Enlarge)
Step 15:
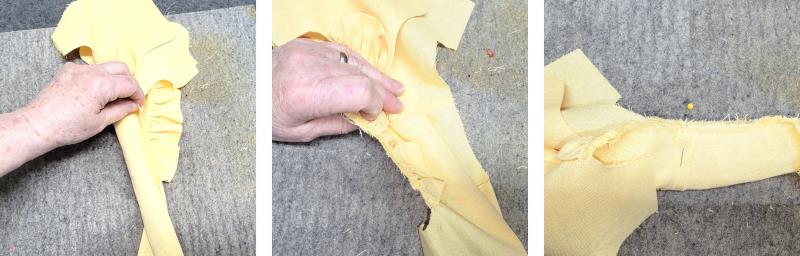
Now turn the piece around so the stitched armhole is on the left, snuggly roll toward the unstitched armhole, hold the top unstitched armhole with the burrito. Reach under the burrito and bring the bottom armhole area up and around the top of the burrito matching the shoulder seams and pin.
(Click Image to Enlarge)
Step 16:
Pin the armhole bodice and lining together, stitch, and clip.
(Click Image to Enlarge)
Step 17:
Turn right side out, press, and understitch.
(Click Image to Enlarge)
Step 18:
If any of the gathering threads show, be sure to remove them. Press the bodice.
(Click Image to Enlarge)
Step 19:
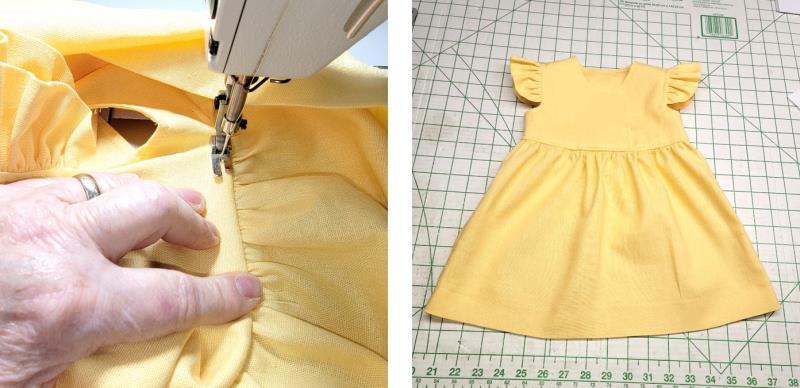
Press the bodice. Bring the side seams on each side together and stitch.
(Click Image to Enlarge)
Step 20:
Press the side seams open and then bring the lower cut edges together and press. Top stitch around the bodice front and back neck edges if desired.
(Click Image to Enlarge)
Step 21:
Topstitch around the armholes, too, if desired. Baste together the lower bodice edge. Construct the skirt and stitch it to the bodice following the pattern directions.
(Click Image to Enlarge)
Step 22:
If desired, press the waist seam up and topstitch it in place. Hem the dress.
(Click Image to Enlarge)
Step 23:
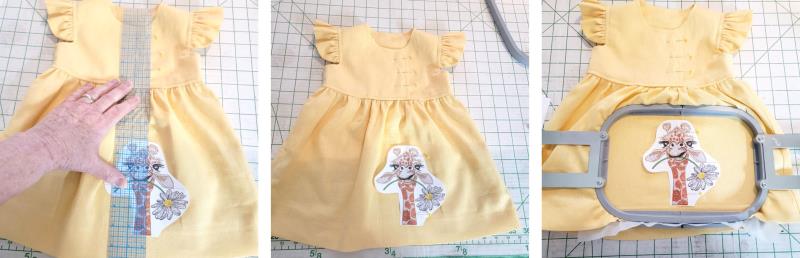
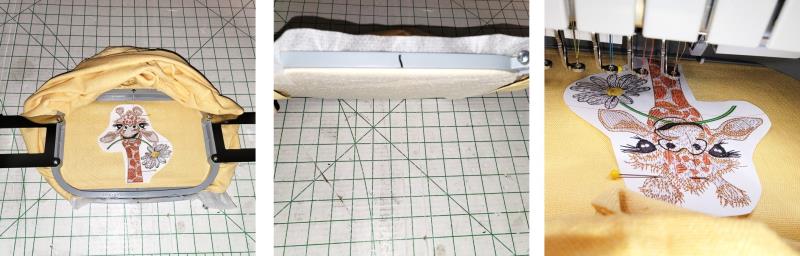
Cut out the paper embroidery design and determine where you would like it placed. For the project, the bottom of the neck edge was placed at the topstitching of the hem and the center of the design was aligned to the edge of the bodice overlap. Hoop the fabric with the chosen stabilizer.
(Click Image to Enlarge)
Step 24:
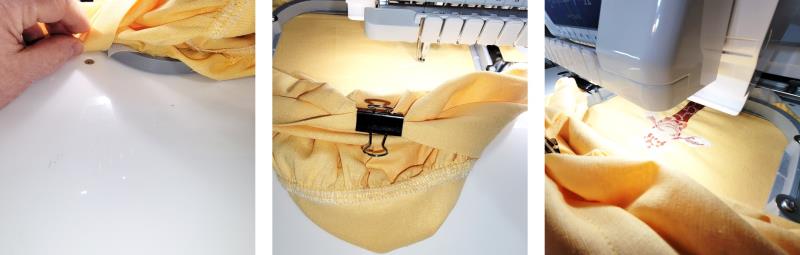
Especially with a smaller garment size, it is important to make sure that none of the excess fabric gets caught under the hoop. Place the hoop on the machine and align the needle to the center of the paper template.
(Click Image to Enlarge)
Step 25:
Before starting to stitch, double check to make sure none of the fabric is caught underneath the hoop; you may wish to clip the excess fabric out of the way. Stitch the design.
(Click Image to Enlarge)
Step 26:
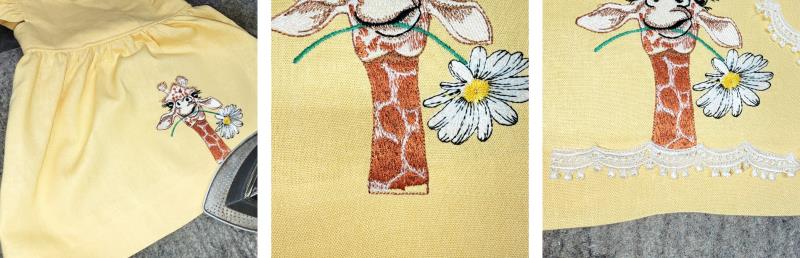
Remove the design from the hoop. For this particular fabric which is linen, the bottom registration was out of alignment. Tip: this is a “design opportunity!” I have a lot of lace pieces in my stash, so I pulled out some to see what might work to cover up this area. I liked the scallop trim but I didn’t have enough to trim the bottom of the skirt.
(Click Image to Enlarge)
Step 27:
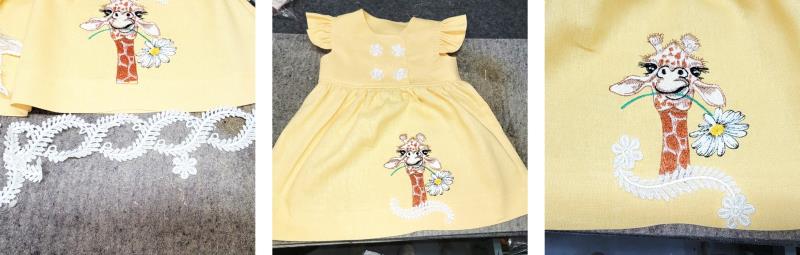
Another piece of lace trim had daisies I could cut out, and scallops that could be cut apart. Daisies were cut out and one scallop to put over the bottom of the giraffe.
(Click Image to Enlarge)
Step 28:
If doing this, be sure to securely stitch on the lace pieces. Instead of buttons and buttonholes, snaps were used.
(Click Image to Enlarge)
Step 29:
This pattern fits well and is so sweet. Use different fabrics and embroidery designs to create several for spring. Thank you for purchasing the pattern and embroidery design.
Ramona Baird has been in the embroidery industry for over 23 years. She and her husband owned a commercial and retail embroidery store in Arizona for many years. She is an experienced digitizer having been mentored by award-winners Pat Williams and Lindee Goodall. Ramona is a contributor to “Creative Machine Embroidery” magazine having 5 covers to her credit. Ramona has worked for Wilcom America and served many years as Education Director for the American Sewing Guild. With a degree in fashion design, she is able to design and execute patterns which Pat Williams says are “out of the box” in creativity and application. Ramona likes to challenge the boundaries of embroidery and bring new and exciting designs, ideas, and projects to EmbroideryDesigns.com. She wants embroiderers of all levels to increase their skills and enjoyment in using their embroidery machine for gift-making and personal pleasure.