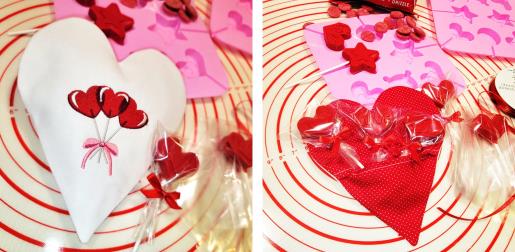
This project presents a twist on the “Easy Heart Fabric Pouch” by Aloha Sewing Company and an embroidery design from Hopscotch. It’s a great way to get more use out of your pattern and use up some scraps of fabric, too.
Step 1:
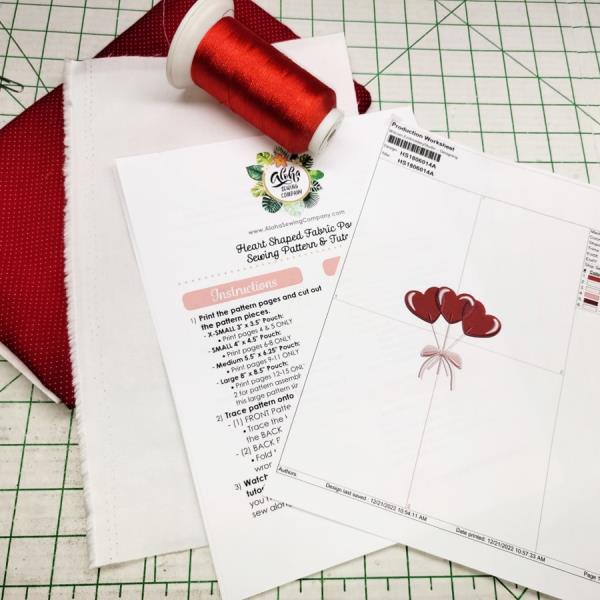
Read through the instructions thoroughly before beginning and assemble all the materials needed to complete the project. Instead of a patterned fabric for the front as stated in the PDF pattern instructions, choose a plain fabric that can be embroidered. Cut the fabric large enough for the pattern and also so it will fit in the hoop. Choose embroidery thread colors that will coordinate with the fabric back colors. Print a template of the embroidery design at actual size. Use the instructions provided in the PDF pattern for printing, cutting, and assembly.
(Click Image to Enlarge)
Step 2:
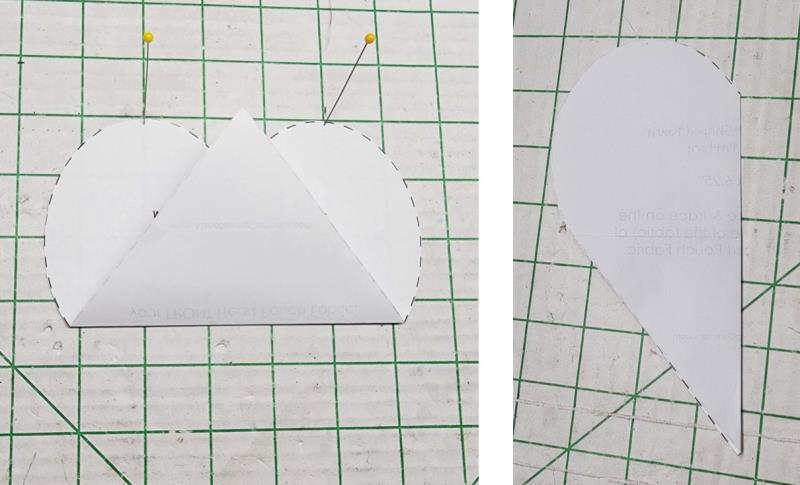
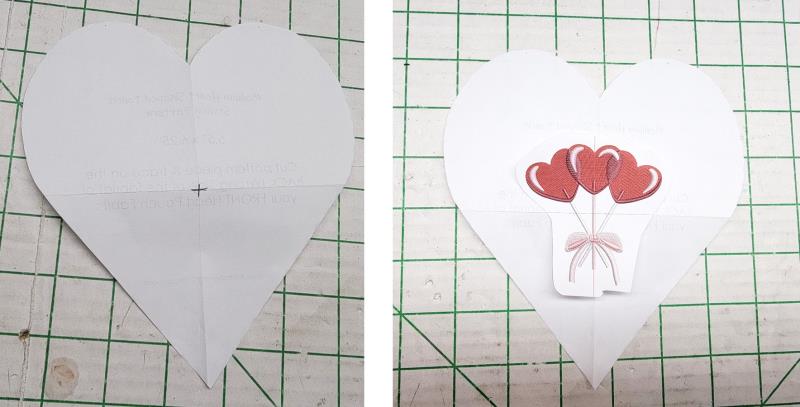
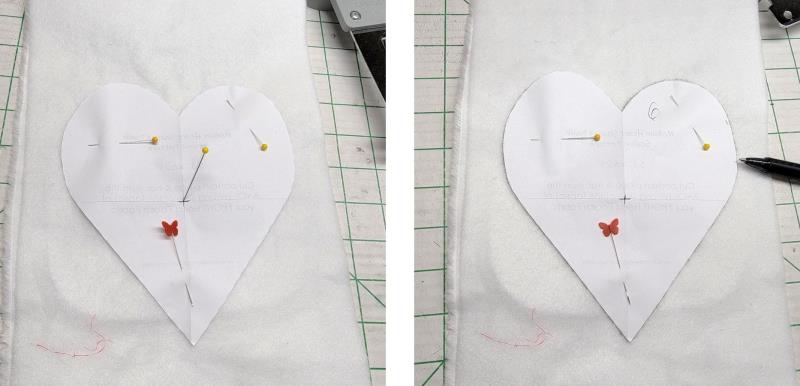
Find the center of the pattern front by folding it in half lengthwise and width wise.
(Click Image to Enlarge)
Step 3:
Mark the center where the fold lines intersect. Cut out around the embroidery paper template. After the embroidery is done, the center of the embroidery will align at the center of the heart.
(Click Image to Enlarge)
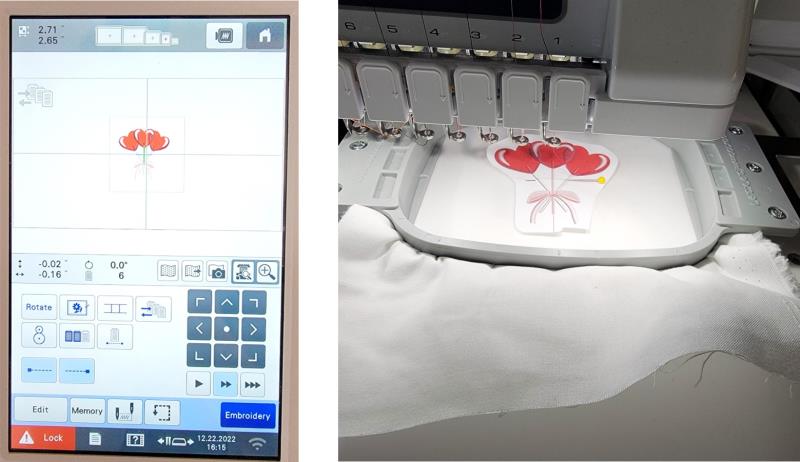
Step 4:
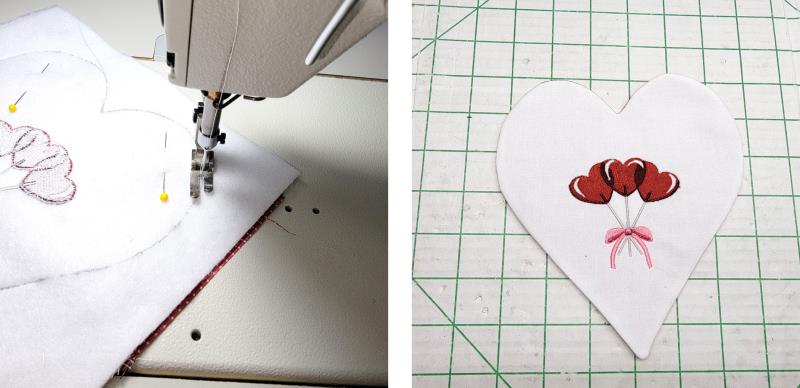
Place the embroidery design on the machine Hoop the fabric front with stabilizer.
(Click Image to Enlarge)
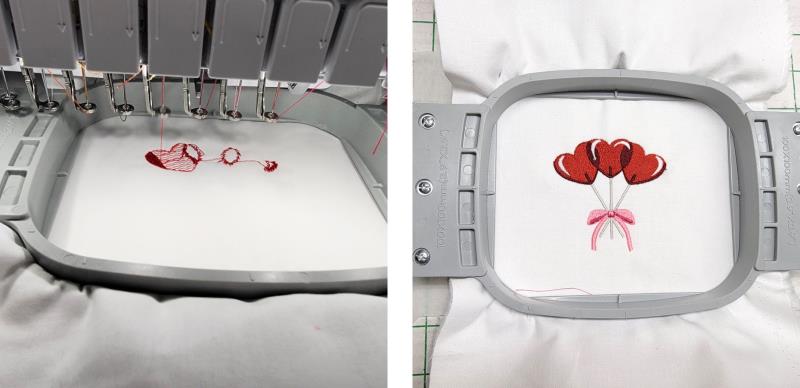
Step 5:
Stitch the design with the chosen thread colors.
(Click Image to Enlarge)
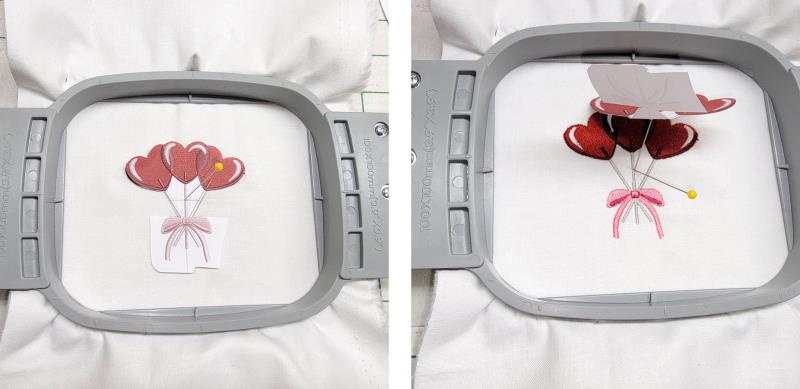
Step 6:
Find the center mark of the embroidery by placing the template over the top; mark the center with a pin. Gently lift the paper and place another pin right at the point of the first pin and remove the fabric from the hoop.
(Click Image to Enlarge)
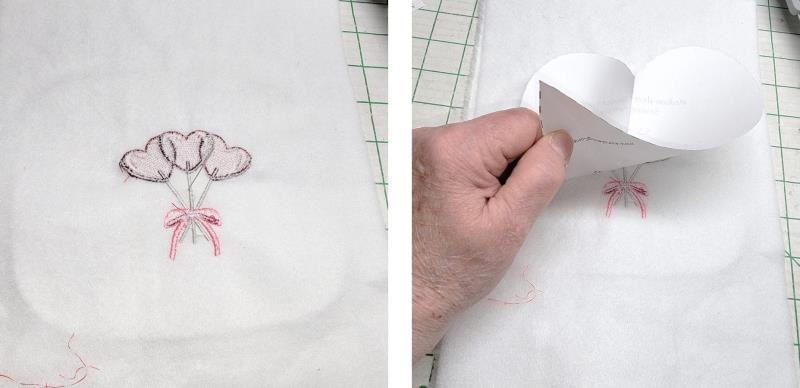
Step 7:
Keeping the pin in place at the center, flip the embroidered fabric over. Align the center point of the heart on the pin.
(Click Image to Enlarge)
Step 8:
Follow the PDF pattern instructions for tracing the pattern
(Click Image to Enlarge)
Step 9:
and stitching. Tip: use a 2mm stitch length to create smooth edges for the heart.
(Click Image to Enlarge)
Step 10:
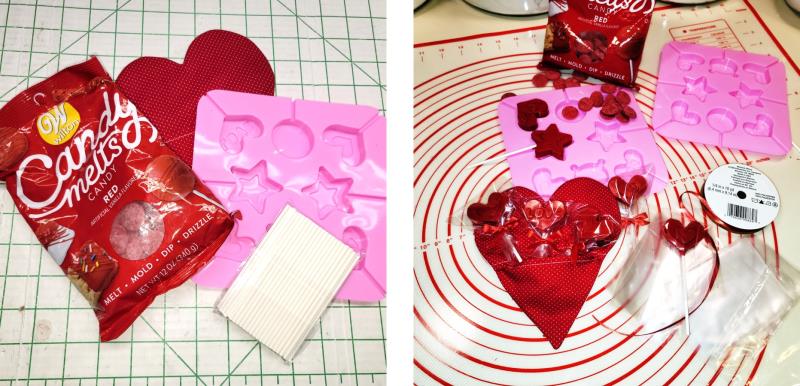
Purchase candy for the heart or make your own with silicone molds and candy melts.
(Click Image to Enlarge)
Step 11:
What a wonderful gift for teachers, grandparents, children, co-workers, or anyone! Thank you for purchasing the pattern and embroidery design. Enjoy creating several of these candy pouches and Happy Valentine’s Day!
Ramona Baird has been in the embroidery industry for over 23 years. She and her husband owned a commercial and retail embroidery store in Arizona for many years. She is an experienced digitizer having been mentored by award-winners Pat Williams and Lindee Goodall. Ramona is a contributor to “Creative Machine Embroidery” magazine having 5 covers to her credit. Ramona has worked for Wilcom America and served many years as Education Director for the American Sewing Guild. With a degree in fashion design, she is able to design and execute patterns which Pat Williams says are “out of the box” in creativity and application. Ramona likes to challenge the boundaries of embroidery and bring new and exciting designs, ideas, and projects to EmbroideryDesigns.com. She wants embroiderers of all levels to increase their skills and enjoyment in using their embroidery machine for gift-making and personal pleasure.