A beautiful sentimental pot holder is created using the “Snow Bird Pot Holder” downloadable PDF pattern and “Concord Collections Baked with Love” embroidery Design.
There are wonderful instructions in the Pot Holder pattern. These project instructions show how to add an embroidery design and a couple of tips adding a twist on construction.
Step 1:
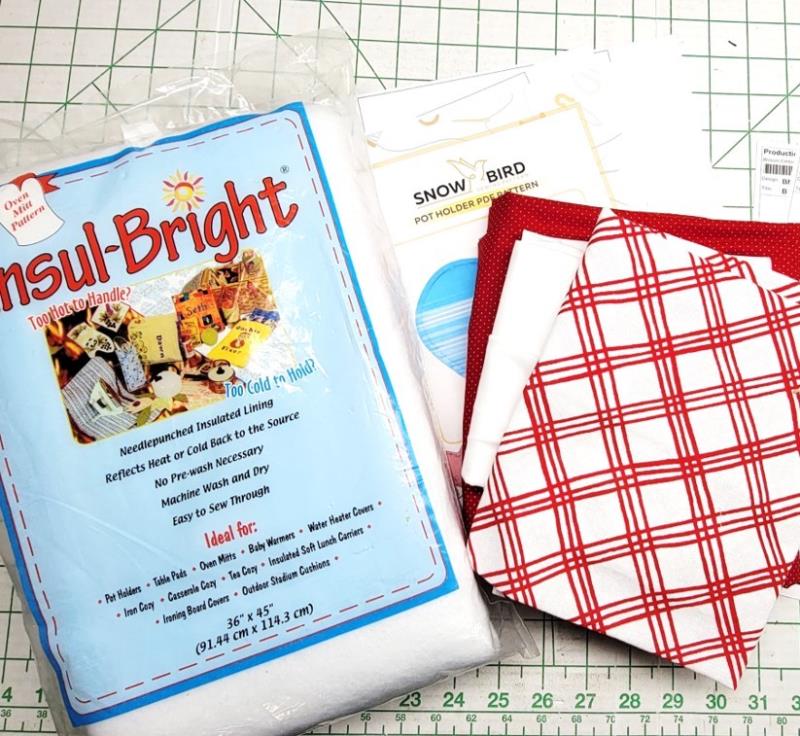
Read through the instructions thoroughly before beginning and assemble all the materials needed to complete the project. Print out the instructions for the Pot Holder pattern, and also print out the embroidery design at actual size.
(Click Image to Enlarge)
Step 2:
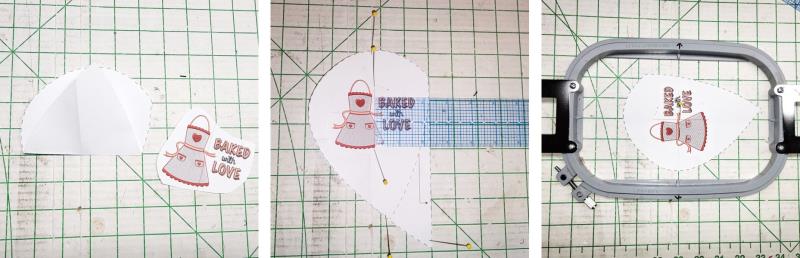
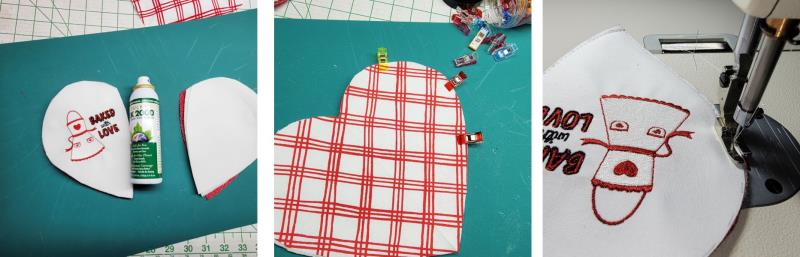
After cutting out the pattern pieces, cut around the embroidery design printed on the paper. Place the paper pieces together as they will be sewn. Place the printed embroidery design on the half heart pattern piece, centering it to fit. Remove the pattern piece for the full heart. Determine the smallest hoop to embroider the design.
(Click Image to Enlarge)
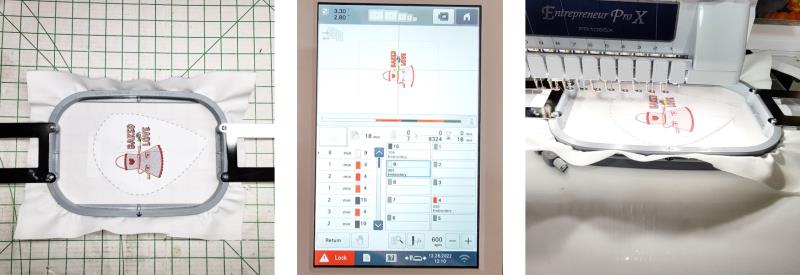
Step 3:
Hoop a piece of fabric with a piece of tearaway stabilizer, center the paper template in the center of the hoop and tape it down at the top and bottom. Load the design on the machine, rotating it if needed. Place the hoop on the machine and align the needle to the center point of the paper design. After aligning, do not move the hoop.
(Click Image to Enlarge)
Step 4:
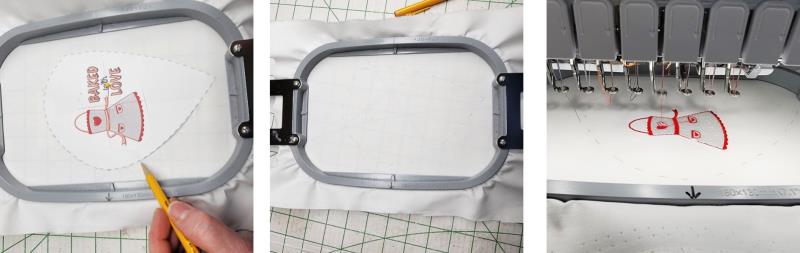
Remove the hoop from the machine. With a pencil, lightly mark around the left half heart template. Remove the paper patterns, and the heart outline remains. Stitch the design.
(Click Image to Enlarge)
Step 5:
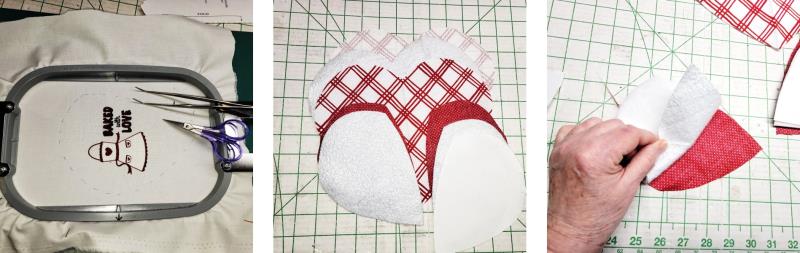
If there are any jump threads, clip them at this time. Cut out the remaining fabrics and follow the Pot Holder pattern instructions for construction. Read the back of the package for the Insul-Bright.
(Click Image to Enlarge)
Step 6:
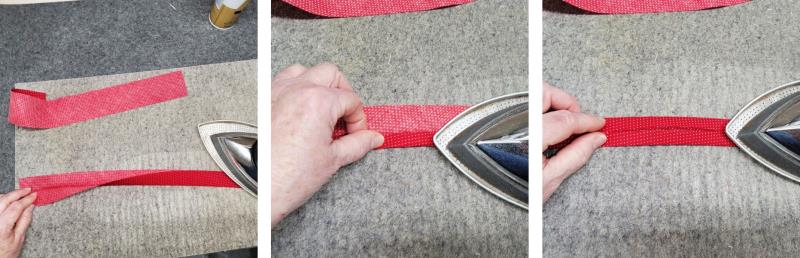
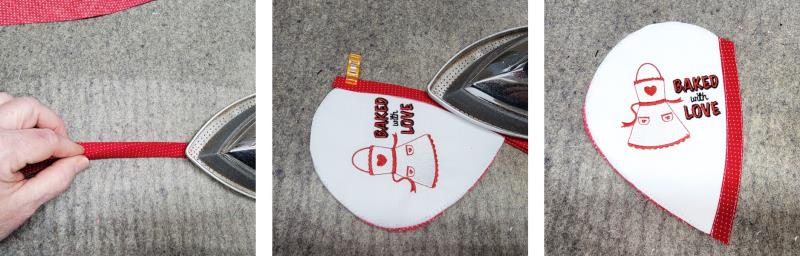
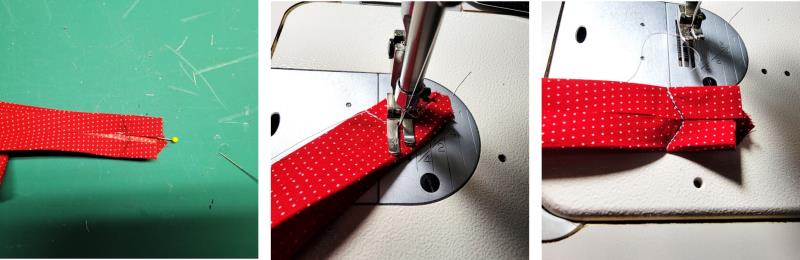
Instead of purchased binding, 4- 18” long bias strips were cut 2.5” wide. The strips were pressed in half lengthwise, opened up, and then the cut edges pressed to the fold, and then the strips pressed along the original fold again.
(Click Image to Enlarge)
Step 7:
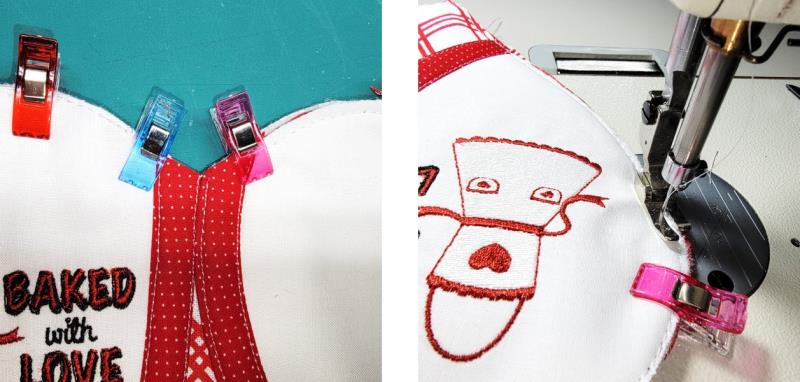
There are many options for holding the fabrics together such as pins, temporary spray adhesive, and clips. Basting pieces together also helps before the binding is attached.
(Click Image to Enlarge)
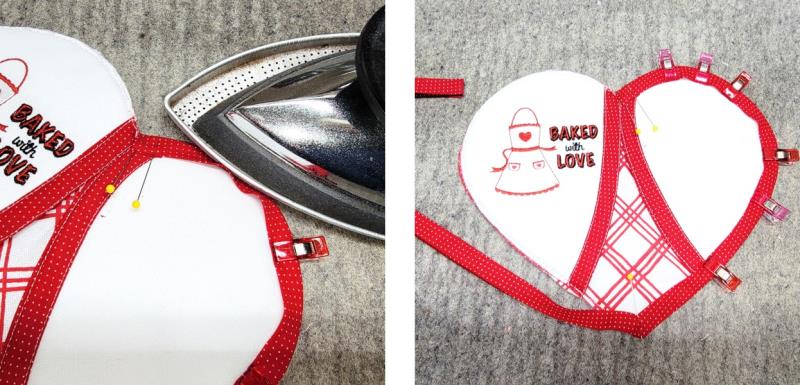
Step 8:
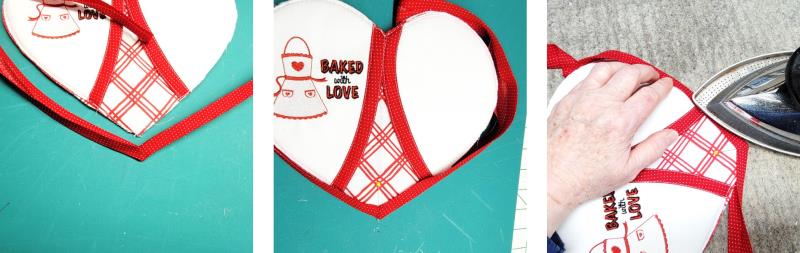
Before stitching on the bias strips to the half hearts, place the inside edge of the half heart inside the bias strip, use a clip or pin to hold it in place at the top, and then press and shape the bias tape to mold it to the inside curved shape of the heart. Sew the tape in place and repeat for the other half heart.
(Click Image to Enlarge)
Step 9:
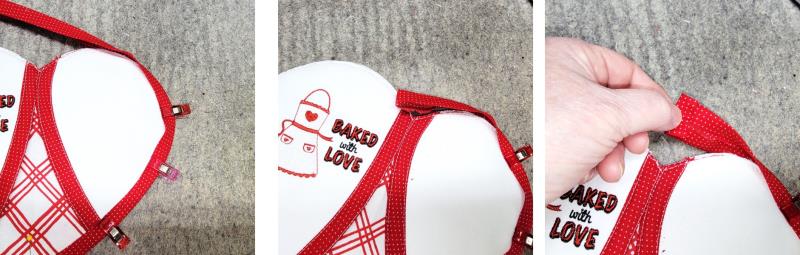
The top of the hearts should just kiss at the top. Baste the half hearts to the bottom heart.
(Click Image to Enlarge)
Step 10:
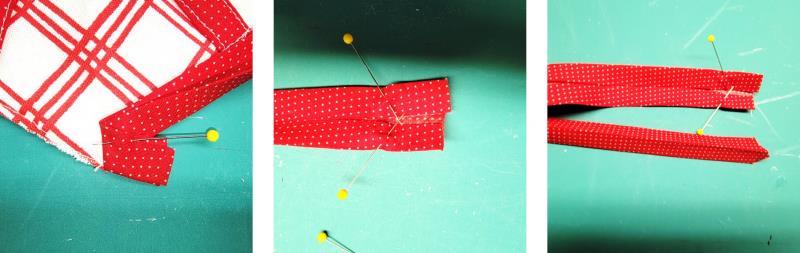
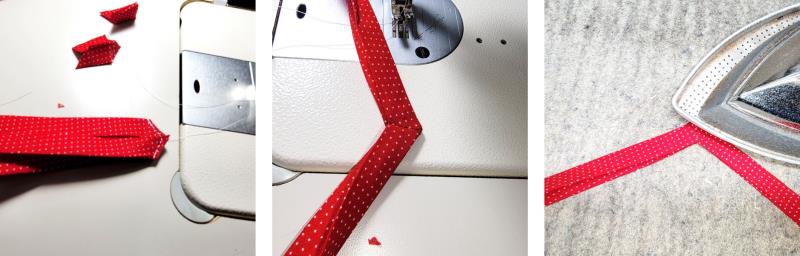
The binding instructions in the pattern are great, but here is another way to do it. Take one of the two remaining 18” binding strips. Lay the folded edge of the binding right along the cut edge of the lower part of the pot holder, extending the cut edge of the binding about 1” beyond the point. Keeping the folded edge of the binding right at the point of the heart, fold back the binding on itself so the fold goes straight up from the point and pin. Press the fold well. Open up the binding and you’ll see the fold marks which are noted with the pins in the photo. Open up the last 18” strip of binding and place it right sides together with the first binding. You’ll want the edges to match exactly.
(Click Image to Enlarge)
Step 11:
If you cannot see the folds easily, mark them—these will be the stitching lines. Backstitching at each end, start at the edge and stitch to the center, pivot at the center, and stitch to the other side.
(Click Image to Enlarge)
Step 12:
Trim the seam to about 1/8”. Turn the corner right side out and press well.
(Click Image to Enlarge)
Step 13:
The point of the binding now matches the point of the heart shape! Insert the outer cut edge of the potholder into the folded edge of the binding. Begin at the point and use the iron to mold and shape the binding to the heart shape, easing in the inner edge of the binding.
(Click Image to Enlarge)
Step 14:
Cut off the binding at the top of the heart leaving about ½” for turning back.
(Click Image to Enlarge)
Step 15:
Turn back the edge, pin in place, and continue molding the binding into shape. Use pins or clips to hold the binding in place to let it cool. Repeat for the other side.
(Click Image to Enlarge)
Step 16:
For this project instead of machine stitching, hand stitching was done to further control the easing in the binding. After both sides of the binding were stitched on, the binding was given a final press.
(Click Image to Enlarge)
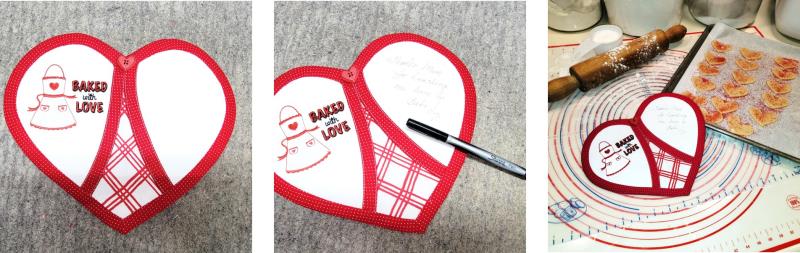
Step 17:
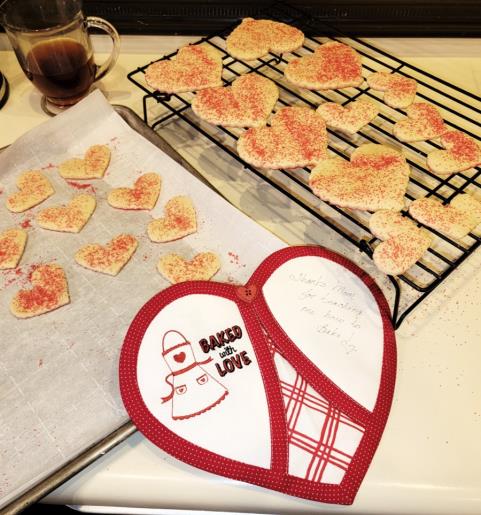
The button was added and using a permanent fabric pen, a sentiment was written on the other side of the pot holder front. Bake heart shaped cookies using your favorite sugar cookie recipe.
(Click Image to Enlarge)
Step 18:
Whether Mom, Aunt, Grandma, or another, gift a package of home baked cookies and a pot holder with a beautiful embroidery and hand-written sentiment. Thank you for purchasing the pattern and embroidery design.
Ramona Baird has been in the embroidery industry for over 23 years. She and her husband owned a commercial and retail embroidery store in Arizona for many years. She is an experienced digitizer having been mentored by award-winners Pat Williams and Lindee Goodall. Ramona is a contributor to “Creative Machine Embroidery” magazine having 5 covers to her credit. Ramona has worked for Wilcom America and served many years as Education Director for the American Sewing Guild. With a degree in fashion design, she is able to design and execute patterns which Pat Williams says are “out of the box” in creativity and application. Ramona likes to challenge the boundaries of embroidery and bring new and exciting designs, ideas, and projects to EmbroideryDesigns.com. She wants embroiderers of all levels to increase their skills and enjoyment in using their embroidery machine for gift-making and personal pleasure.