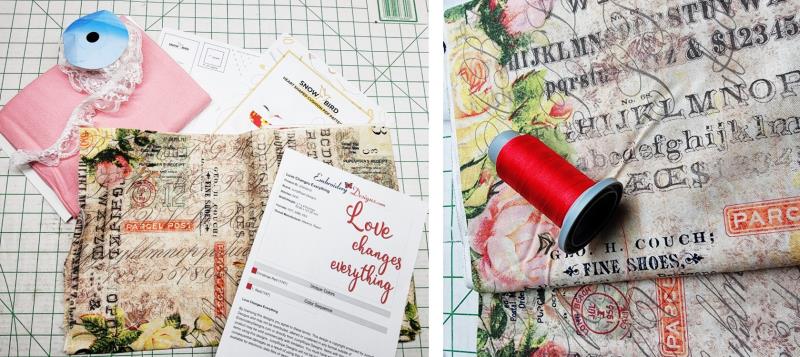
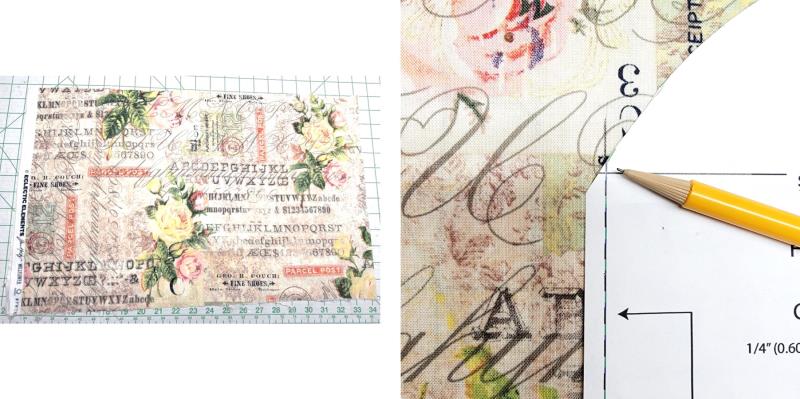
The amount of materials will vary depending upon the size pillow which is made. The Snowbird “Heart Pillows” PDF pattern contains three different sizes. The smallest size was used for this project.
For the pillow, use the materials list of the PDF pattern
1” Pre-gathered lace ace to trim the pillow
Plain fabric to coordinate with the print fabric, lining, and interfacing for the pocket
Sewing instructions are included in the PDF pattern by Snow Bird. Additional instructions are given in this project to add embroidery by JumpRope Designs on a lined pocket and lace trim.
Step 1:
Read through the instructions thoroughly before beginning and assemble all the materials needed to complete the project. There are sewing instruction in the pattern, but for this project, a different way of sewing the pillow is shown so that a lined pocket and lace trim can be added, giving another use of this wonderful pattern! Choose a print fabric for the pillow front, back, and pocket lining. Use a coordinating fabric color for the pocket. Choose an embroidery thread color that will coordinate with all the fabric colors. Print the pattern and instructions.
(Click Image to Enlarge)
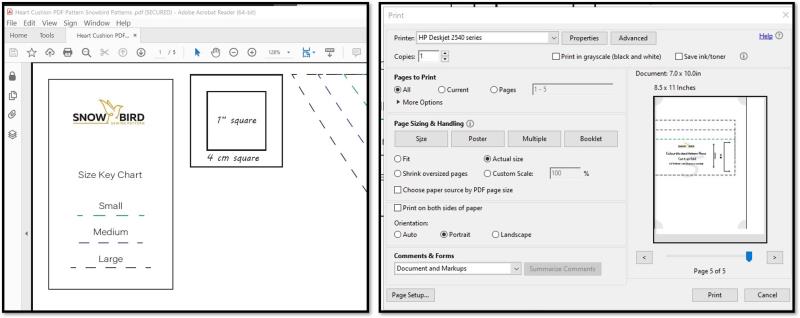
Step 2:
Be sure to follow the PDF instructions for printing the pattern at actual size. There is key in the pattern when cutting out the pattern for a small, medium or large pillow The small pillow was used in this project.
(Click Image to Enlarge)
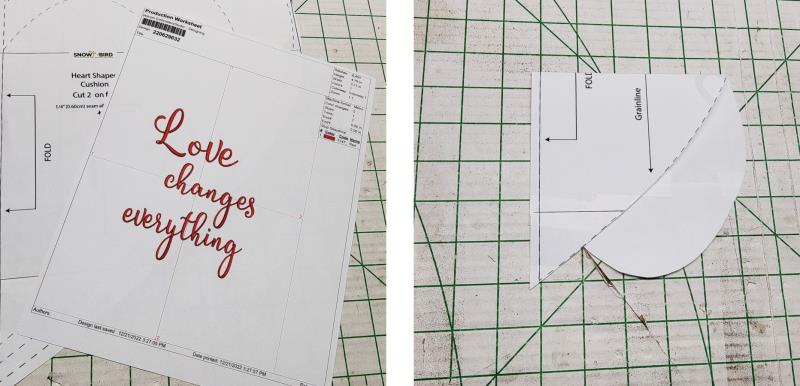
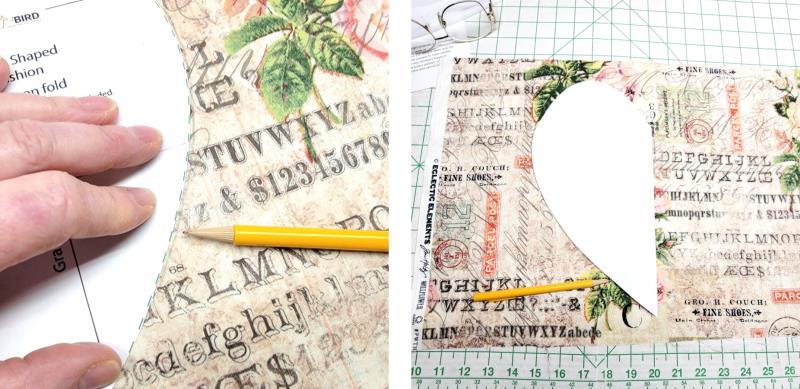
Step 3:
Print out a template of the design at actual size. Put together the pattern as instructed and then cut out the size needed. Fold the heart pattern in half as shown with the tip and top of the pattern even—a gridded board is ideal for this.
(Click Image to Enlarge)
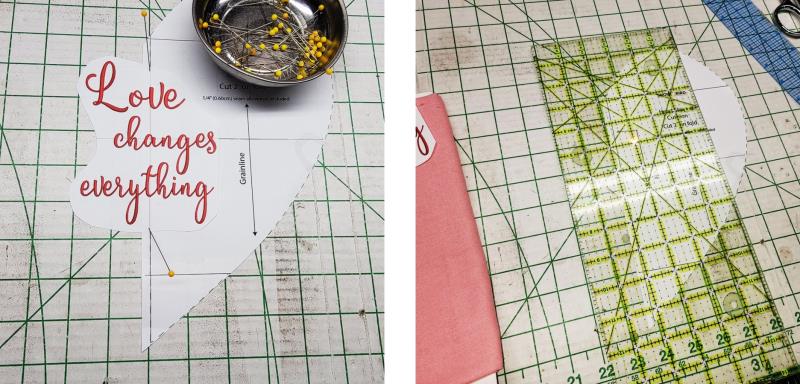
Step 4:
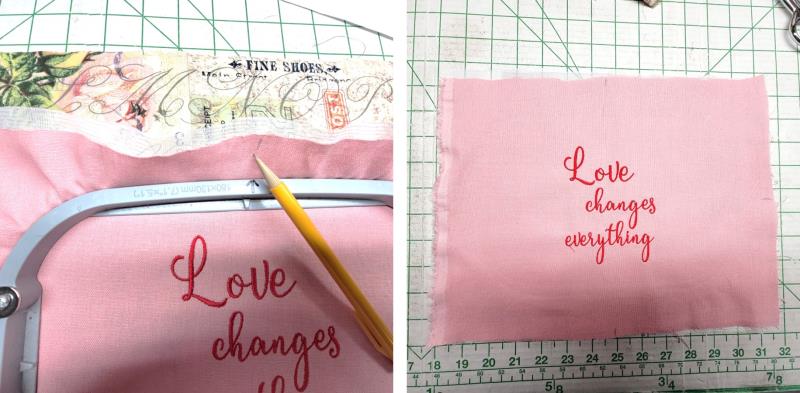
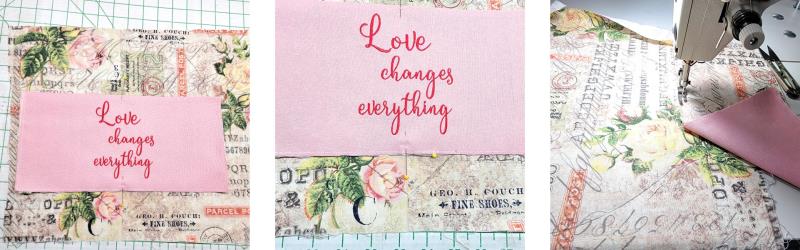
Cut around the embroidery design template and determine where you’d like it to be on the pattern. This will give you an idea of where the pocket will be. Measure the pattern for the amount of fabric to be cut for the pocket. The fabric for the project was cut 13” wide by 8” high so it would fit into the embroidery hoop and accommodate the width of the heart.
(Click Image to Enlarge)
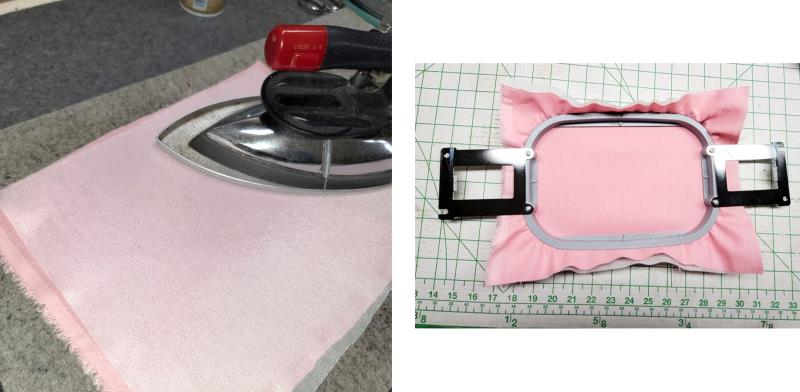
Step 5:
Cut a piece of interfacing the same measurements and fuse it to the back of the pocket fabric. Center and hoop the pocket fabric with a piece of poly mesh stabilizer.
(Click Image to Enlarge)
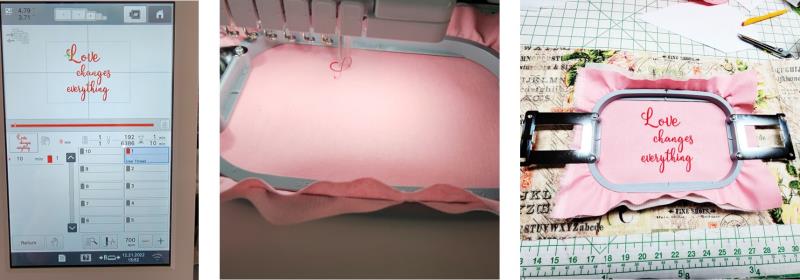
Step 6:
Load the design on the machine, place the hoop on the machine and embroider the design.
(Click Image to Enlarge)
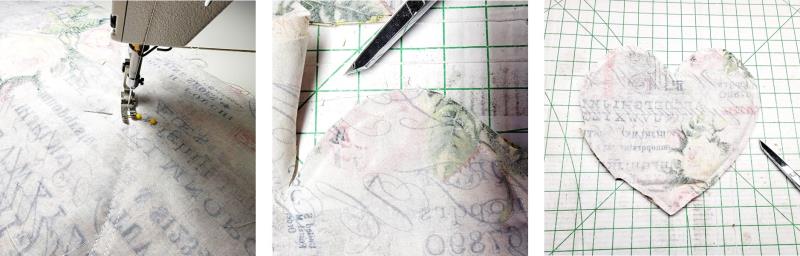
Step 7:
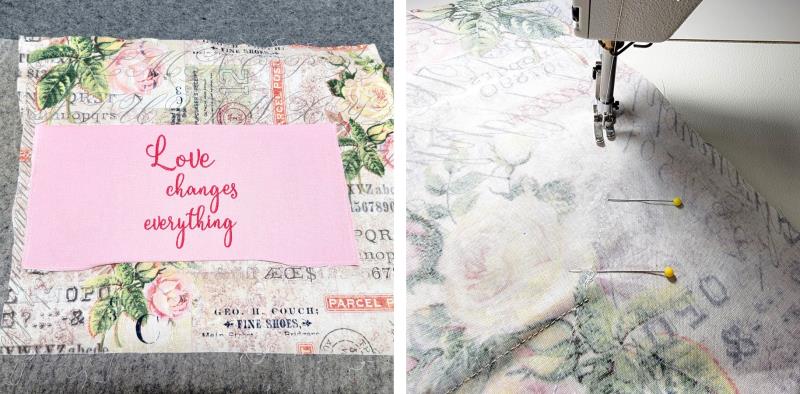
Instead of cutting around the heart, when doing a project like this, it is easier to draw around the pattern on a larger piece of fabric, stitch everything, and then trim in the end. Measure the heart width, double it, and measure the heart pattern height. Add at least 2” around all edges; this will make the fabric easier to handle during construction. Find the center of the fabric and place the heart pattern on the fabric. Make a tick mark on the fabric at the fold line at the top center and bottom center of the heart.
(Click Image to Enlarge)
Step 8:
Using a pencil trace around first one side of the heart pattern, flip the pattern over, align the fold line to the marks made on the fabric, and trace around the heart pattern on the other side of the fabric.
(Click Image to Enlarge)
Step 9:
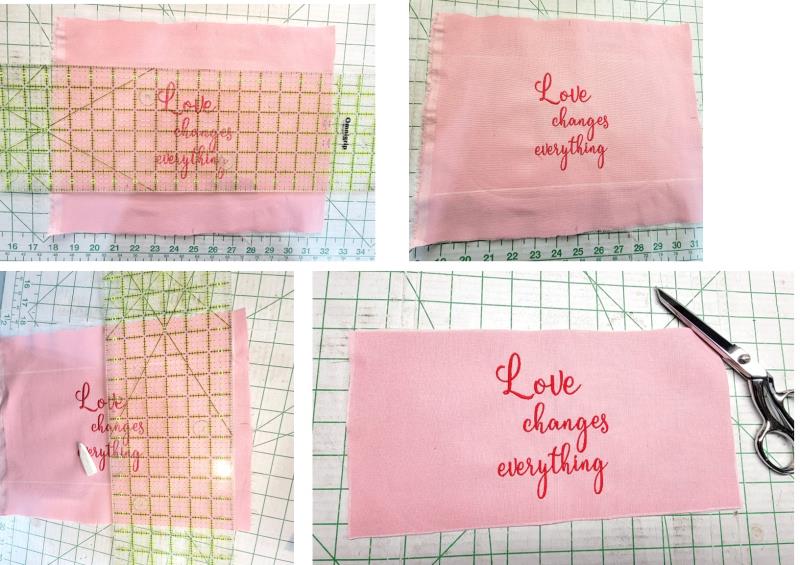
While the pocket fabric is still in the hoop, make tick marks around all four sides of the fabric using the marks on the hoop as guides.
(Click Image to Enlarge)
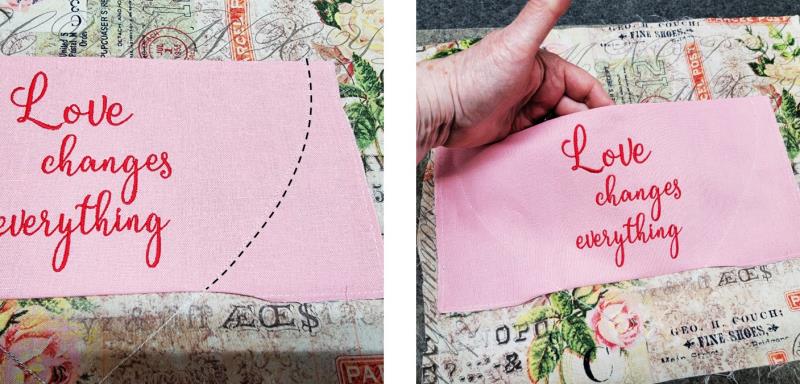
Step 10:
Using the tick marks, align a gridded ruler so that the pocket measures 6” high, and mark the fabric at the top and bottom. Continuing to use the gridded ruler and tick marks, measure the width so it is 12” long (6” from the center of the design on each side). Cut out the pocket along the marks.
(Click Image to Enlarge)
Step 11:
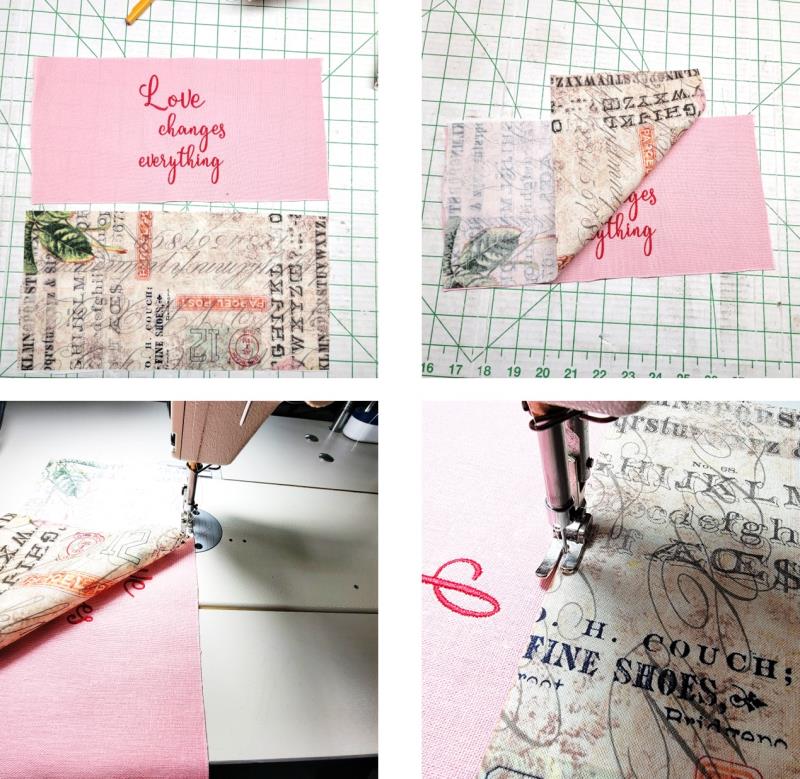
Cut a piece of lining fabric the same size as the pocket. With right sides together, sew a ¼” seam across the top of the pocket. Press the seam allowance toward the lining and then understitch the lining down.
(Click Image to Enlarge)
Step 12:
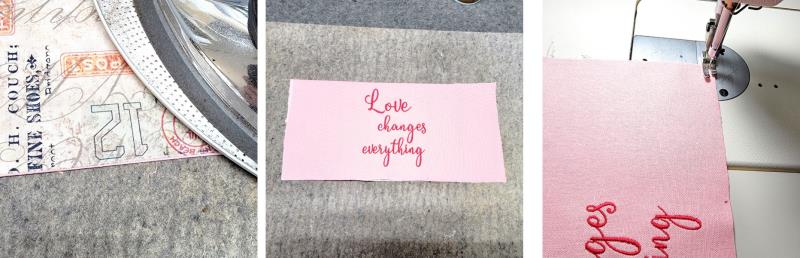
Press the pocket. Baste the pocket along the sides and bottom.
(Click Image to Enlarge)
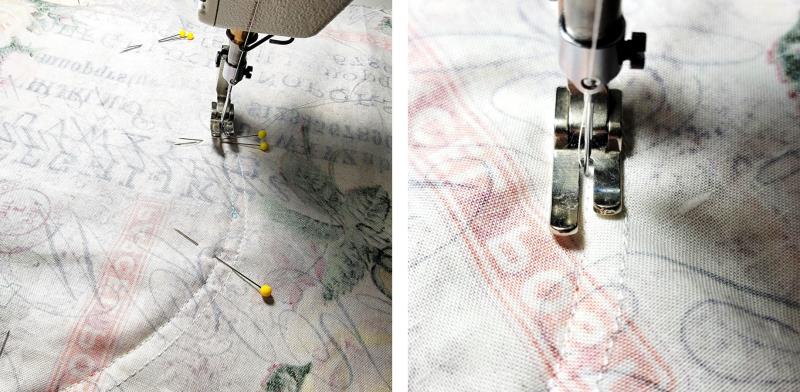
Step 13:
For demonstration purposes, a black pen was used over the pencil line of the drawn heart so it would show up better in these instructions. You should be able to see the pencil line on your fabric. Some of the sewing will be done on the back side of the fabric and some on the front. To aid in aligning the lace and stitching from the back, with a 2.5mm stitch length, stitch right over the tracing line that was drawn on the fabric.
(Click Image to Enlarge)
Step 14:
You’ll easily see the stitching lines on your fabric. Find the center of the fabric top and bottom. Align the pocket centers with the center top and bottom of the heart shape, and the pocket bottom about 2” up from the tip of the heart shape; adjust as desired. Mark the bottom placement line with pins. Flip the pocket down, keep the center aligned, and stitch across the pocket bottom from the heart stitching line across to the other edge, using a ¼” seam.
(Click Image to Enlarge)
Step 15:
Flip the pocket back up. From the wrong side, pin the pocket left and right sides in place and stitch the pocket edges in place using the first stitching line as a guide.
(Click Image to Enlarge)
Step 16:
The left and right sides of the pockets will be stitched down and the top will be open forming the pocket.
(Click Image to Enlarge)
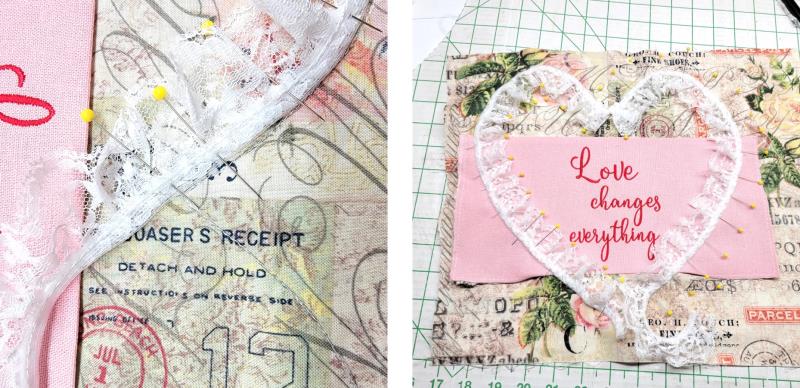
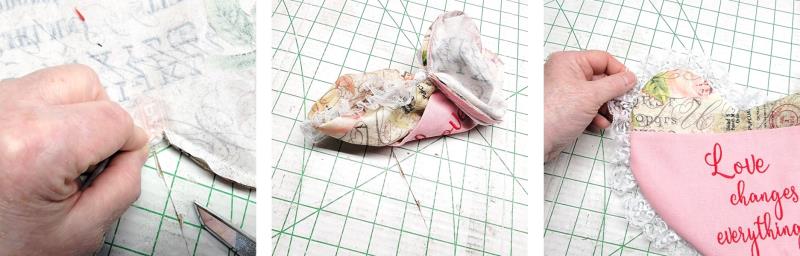
Step 17:
Next pin the lace in place. Pin the outside edge of the lace along the pattern stitching line. The top edge of the lace should be toward the inside of the heart.
(Click Image to Enlarge)
Step 18:
At the top of the pillow, cut the lace off about 1” beyond the top center. Fold back the lace right at the center mark. Repeat for the other side. At the bottom, do the same, except fold the lace back ¼” or so before the point as shown. Pin in place.
(Click Image to Enlarge)
Step 19:
Using the gathering stitch on the lace as a guide, stitch the lace in place right along that stitching line.
(Click Image to Enlarge)
Step 20:
Cut the pillow back the same size as the pillow front was cut. With right sides together, pin the layers together from the wrong side, using the stitching line as a guide. Be sure the top edge of the lace does not get caught where the seaming will be. Place double pins at one of the outside pocket edges as a reminder to leave an opening between those sets of pins for turning and stuffing the pillow.
(Click Image to Enlarge)
Step 21:
Use a 2mm stitch length to produce a smooth edge once the pillow is turned right side out. From the wrong side, begin at the first set of double pins, remove them, back stitch, and then stitch along the inside stitching line.
(Click Image to Enlarge)
Step 22:
Continue stitching all the way around the pillow to the second set of double pins, backstitch. Trim the fabrics just outside of the outer most stitching line—this will leave a ¼” seam allowance.
(Click Image to Enlarge)
Step 23:
Clip at the top middle point. Turn the piece right side out through the opening, forming the point well and gently pulling on the lace to help form the outer edge of the pillow.
(Click Image to Enlarge)
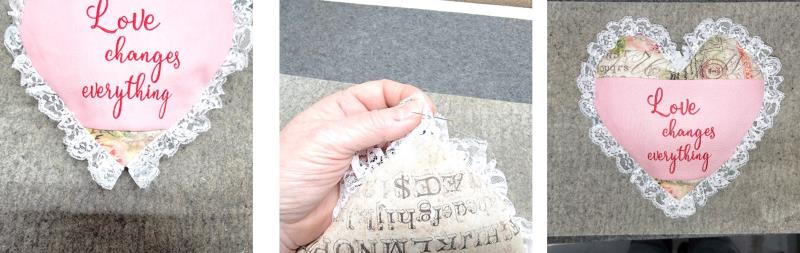
Step 24:
Lightly stuff the pillow. Turn in the edges of the seam allowance at the opening. Pin and then hand stitch the opening closed.
Step 25:
At the bottom point of the lace, from the wrong side bring the folded edges together and slip stitch. The pillow is complete.
(Click Image to Enlarge)
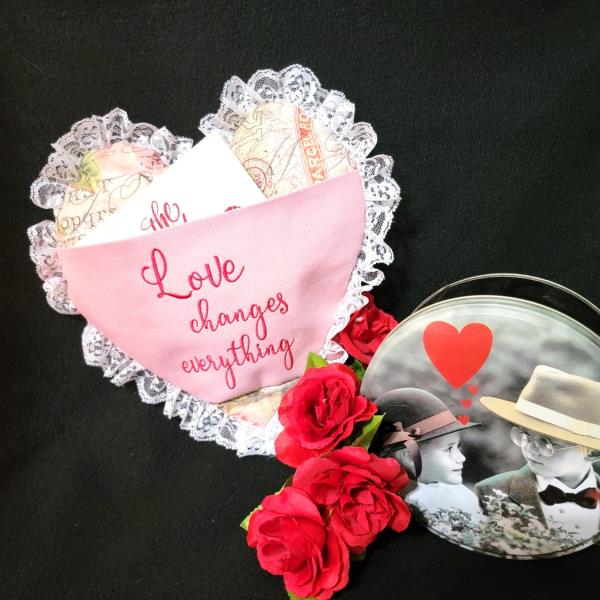
Step 26:
This would be a wonderful gift for your Valentine with a special love note or card tucked in the pocket, as a gift at a bridal shower or wedding, too. Just choose fabrics that will work for the gift being given. Congratulations and thank you for purchasing the embroidery design and PDF Pillow pattern.
Ramona Baird has been in the embroidery industry for over 23 years. She and her husband owned a commercial and retail embroidery store in Arizona for many years. She is an experienced digitizer having been mentored by award-winners Pat Williams and Lindee Goodall. Ramona is a contributor to “Creative Machine Embroidery” magazine having 5 covers to her credit. Ramona has worked for Wilcom America and served many years as Education Director for the American Sewing Guild. With a degree in fashion design, she is able to design and execute patterns which Pat Williams says are “out of the box” in creativity and application. Ramona likes to challenge the boundaries of embroidery and bring new and exciting designs, ideas, and projects to EmbroideryDesigns.com. She wants embroiderers of all levels to increase their skills and enjoyment in using their embroidery machine for gift-making and personal pleasure.