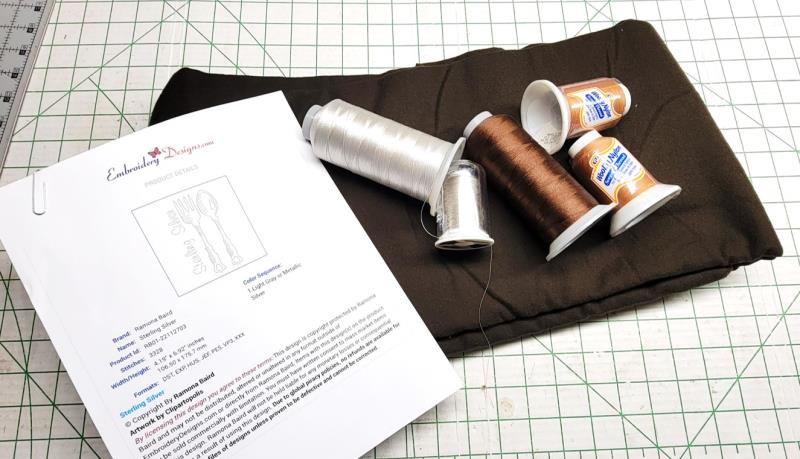
Read through the instructions thoroughly before beginning and assemble all the materials needed to complete the project. Thread the serger with stretchable nylon thread in the upper and lower loopers--such as Wooly Nylon--and a coordinating thread in the needle. Thread the sewing machine with a sewing thread in the top and bobbin to match the fabric color. Note: threads chosen for the project were just slightly lighter so that the threads would show up in the photos. Choose a metallic silver or silver-gray thread for the embroidery. Ribbon to tie the bag can be silver or a color to match the fabric. The stitching time for the design is approximately 8 minutes. The rest of the time is construction time. Use 3/8” seams for sewing the bag sides and bottom.
(Click Image to Enlarge)
Step 2:
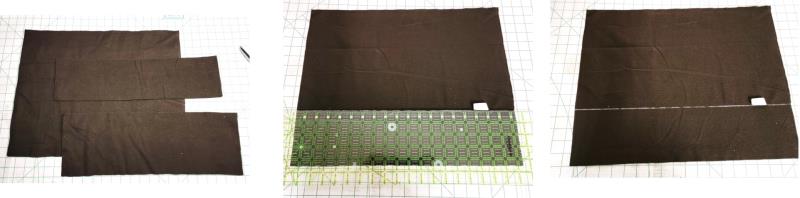
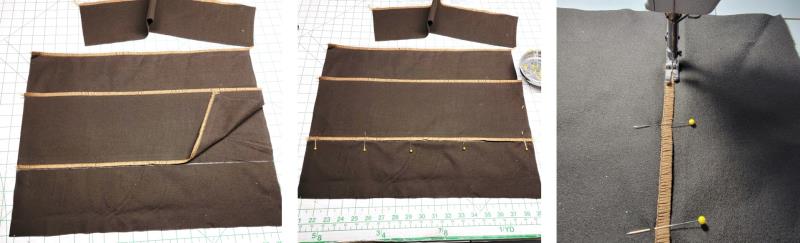
Measure, mark, and cut the anti-tarnish fabric as noted in the materials list. Beginning with the 19” w x 15” high, mark a line up from the bottom 4 ¾”.
(Click Image to Enlarge)
Step 3:
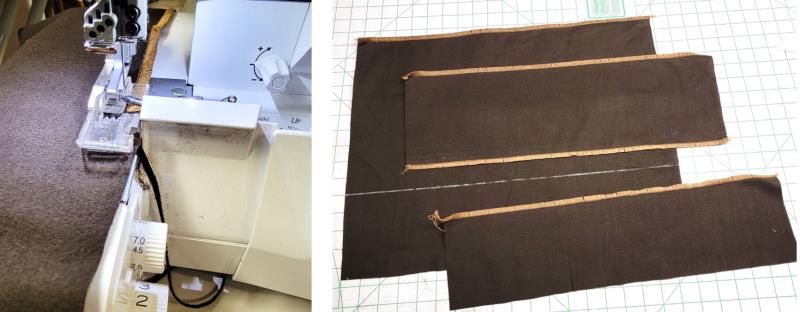
Serge the top of pieces 1, 2, and 3. Also serge the bottom of piece 2.
(Click Image to Enlarge)
Step 4:
Place the bottom serged edge of Piece 2 so it aligns to the mark on Piece 1 as shown; pin in place. At the machine, stitch along the lower edge of Piece 2, removing the pins as you go.
(Click Image to Enlarge)
Step 5:
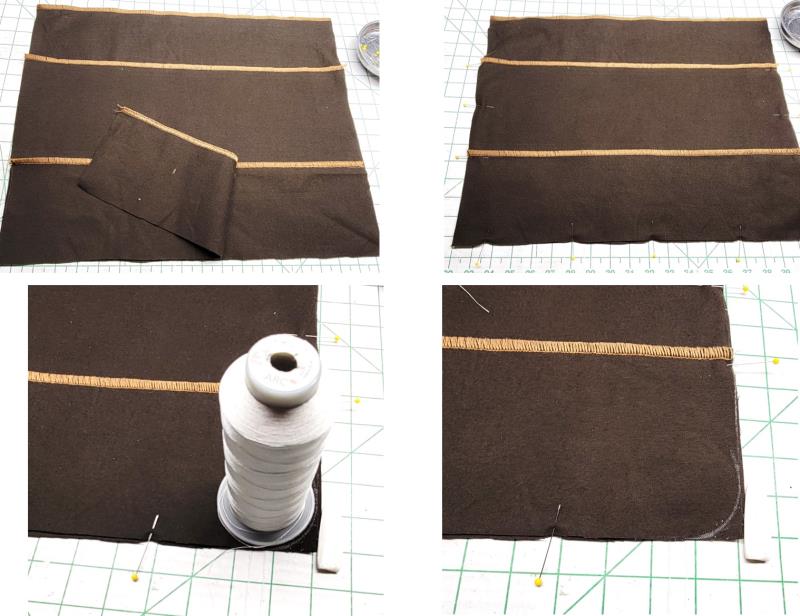
Place Piece 3 on top of Piece 1, aligning the lower cut edges. Pin Pieces 2 and 3 to Piece 1 along the sides. Using a spool of thread, mark the lower right and left corners as shown
(Click Image to Enlarge)
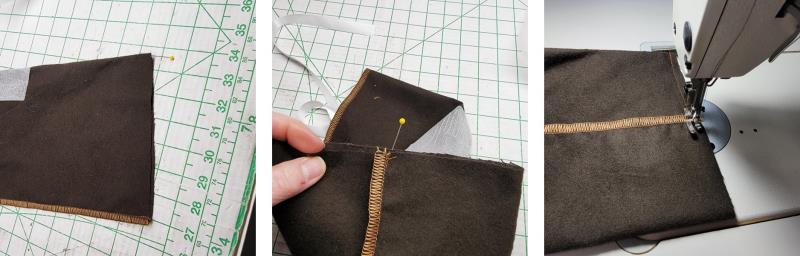
Step 6:
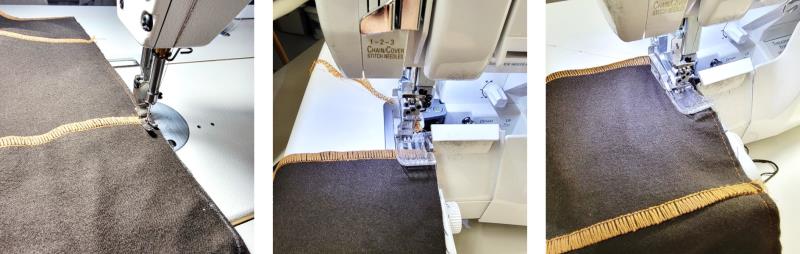
Baste along the right, bottom and left edges, removing the pins as you go. Now serge along the right, bottom, and left edges leaving a long tail of thread at the beginning and end.
(Click Image to Enlarge)
Step 7:
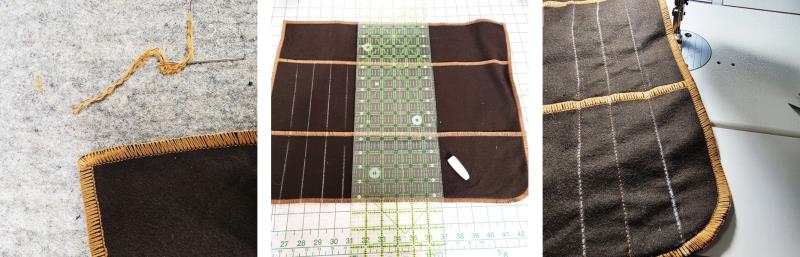
Thread the large eye needle with the left thread tail and slide the needle and thread tail under the serged edge for about an inch.
(Click Image to Enlarge)
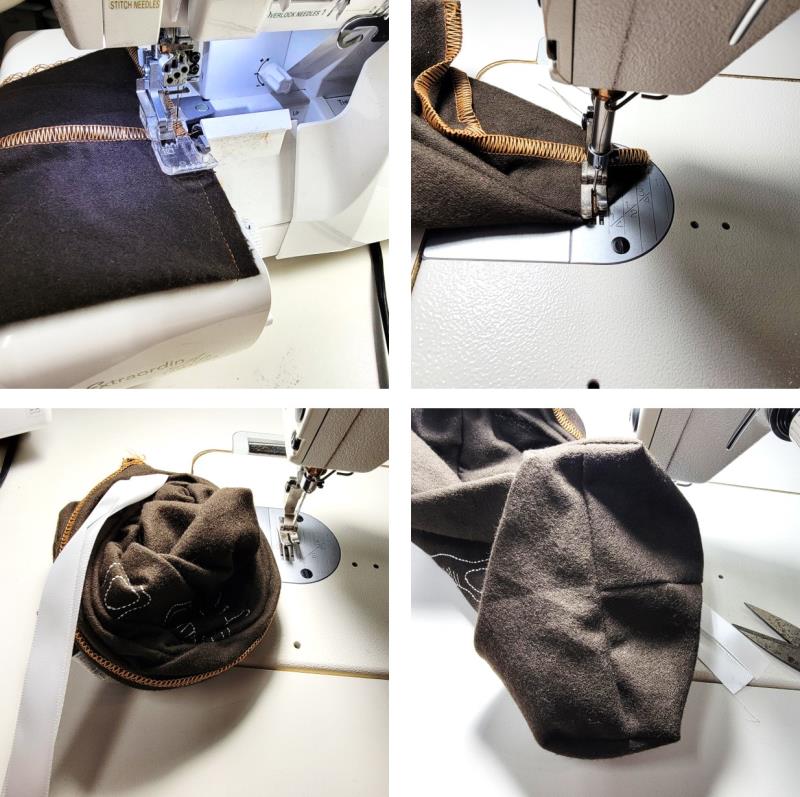
Step 8:
Pull out the needle and clip the thread tail. Repeat for the other thread tail. Lay the piece on a flat surface. Draw lines 1 1/8” apart from the top to bottom as shown. Stitch along the lines through all the layers, backstitching at the top and bottom of each row of stitching.
(Click Image to Enlarge)
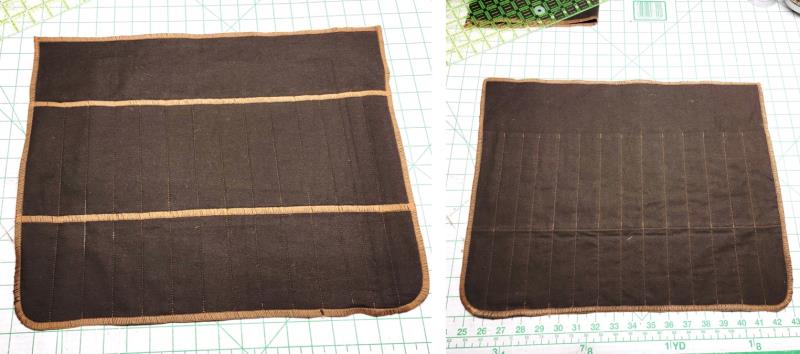
Step 9:
This is how the piece looks from the front and back.
(Click Image to Enlarge)
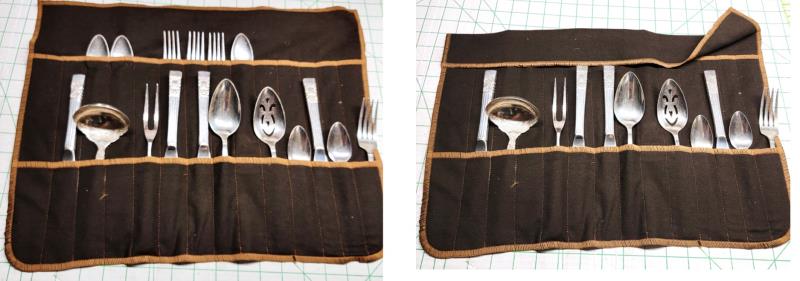
Step 10:
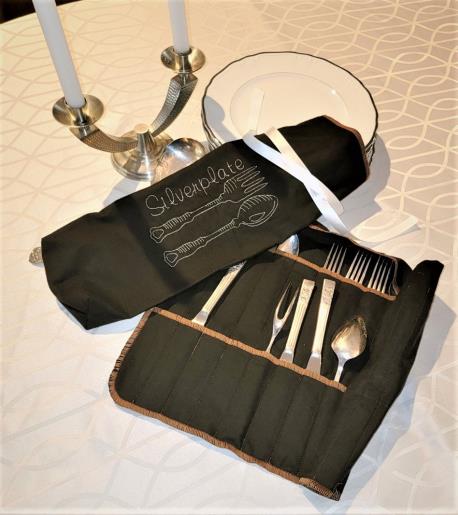
The piece is now ready to hold your treasured silverware pieces. The top will fold down to help further protect the pieces.
(Click Image to Enlarge)
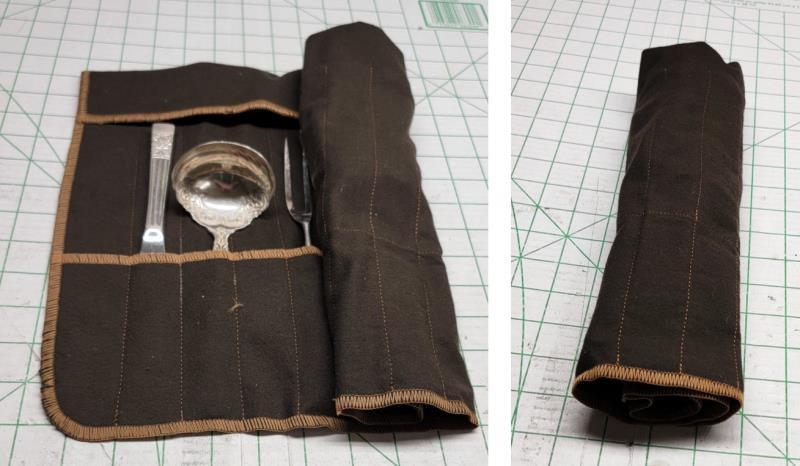
Step 11:
Roll up the piece enclosing all the silverware.
(Click Image to Enlarge)
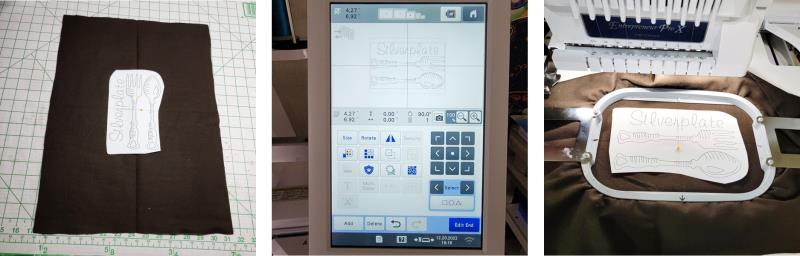
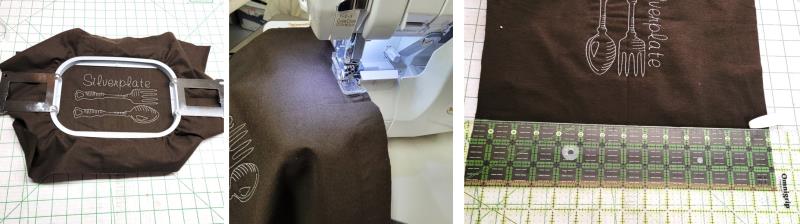
Step 12:
To make the bag, mark the center of fabric Piece 4. Load the chosen design on the machine. Hoop the fabric with a piece of poly mesh stabilizer.
(Click Image to Enlarge)
Step 13:
Place the hoop on the machine and stitch the design. Trim away the excess stabilizer. Serge the top edge of the fabric. Measure and mark down from the top edge 3” along one side.
(Click Image to Enlarge)
Step 14:
Fold the ribbon in half and place the folded edge along the bag cut edge, centered on the mark. Place the bag edges, right sides together and stitch; serge the seam (be sure not to catch the tails of the ribbons while sewing and serging).
(Click Image to Enlarge)
Step 15:
Place a pin at the bottom of the center fold. Meet the pin to the seam and stitch across the bottom of the bag.
(Click Image to Enlarge)
Step 16:
Serge the bottom seam. Box the corners of the bag bottom. Turn the bag right side out, forming the corners well.
(Click Image to Enlarge)
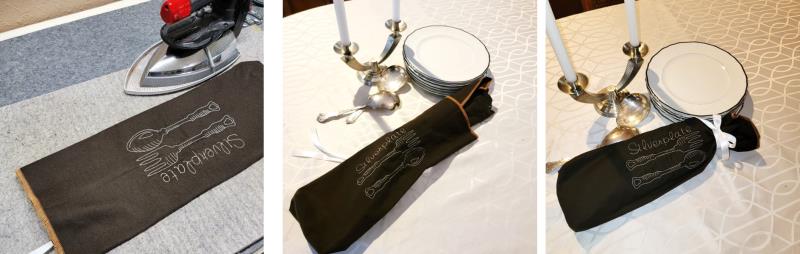
Step 17:
Steam the bag. Place the silverware roll inside the bag and tie the bag with the ribbon.
(Click Image to Enlarge)
Step 18:
You will be amazed at how well the silverware roll and bag keep silver and silver plate from tarnishing between uses. Make more bags and rolls, adjusting the roll depths and stitching lines on the rolls, for larger serving pieces. If you are fortunate to have both silverplate and sterling silver pieces, make rolls and bags for each. The bags will help you easily identify the contents. Congratulations on creating your project and thank you for purchasing the designs.
Ramona Baird has been in the embroidery industry for over 23 years. She and her husband owned a commercial and retail embroidery store in Arizona for many years. She is an experienced digitizer having been mentored by award-winners Pat Williams and Lindee Goodall. Ramona is a contributor to “Creative Machine Embroidery” magazine having 5 covers to her credit. Ramona has worked for Wilcom America and served many years as Education Director for the American Sewing Guild. With a degree in fashion design, she is able to design and execute patterns which Pat Williams says are “out of the box” in creativity and application. Ramona likes to challenge the boundaries of embroidery and bring new and exciting designs, ideas, and projects to EmbroideryDesigns.com. She wants embroiderers of all levels to increase their skills and enjoyment in using their embroidery machine for gift-making and personal pleasure.