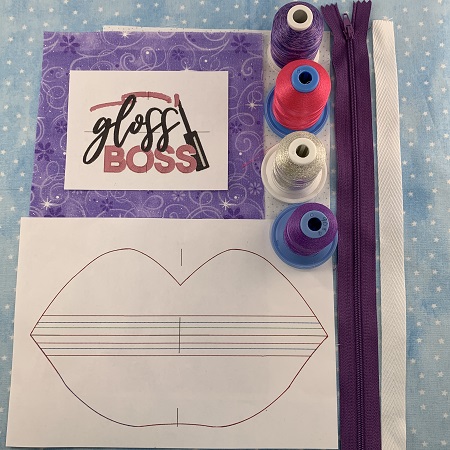
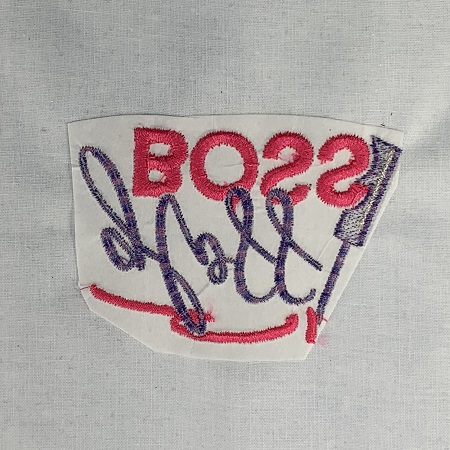
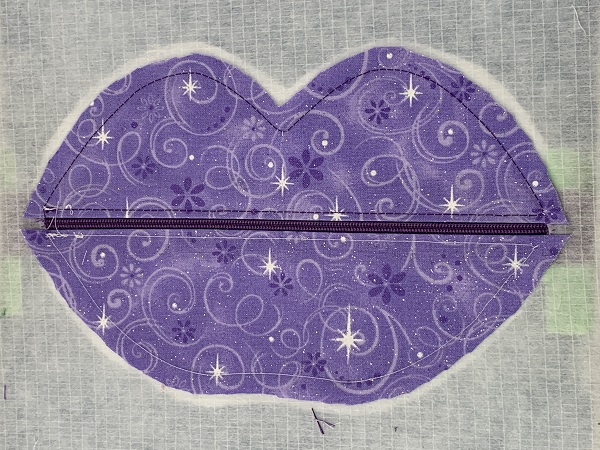
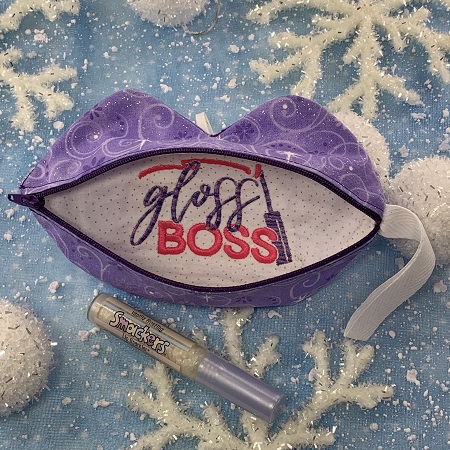
Have some LIP SMACKING fun! ITH Lip Makeup Bag with 'Gloss Boss' embroidered on the lining. Add some makeup to the bag to make a great stocking stuffer.
Have some LIP SMACKING fun! ITH Lip Makeup Bag lined with 'Gloss Boss' design on the inside of the bag. This project has two parts and uses a different design for each part. You will use two different size hoops to make this project. PARTONE uses the 'Gloss Boss' design for the lining on the inside of the bag. You must embroider 'Gloss Boss' design first so that you can use it with PART TWO.
Step 1:
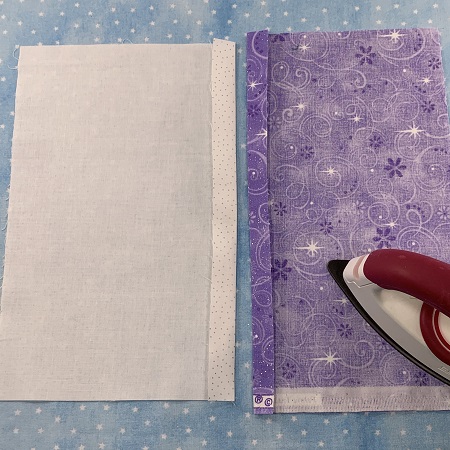
Read the directions carefully before beginning the project. Gather and prepare the materials you need to make the bag. Iron the fabric that you are using for the project.
Step 2:
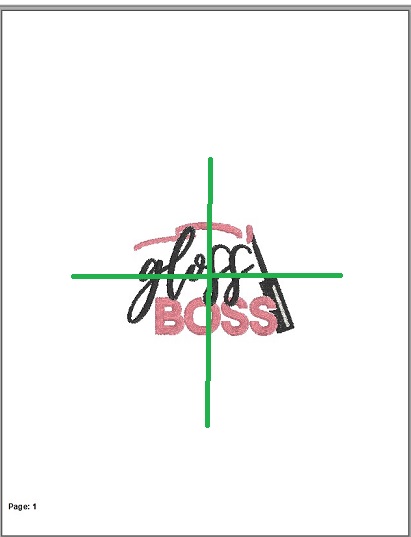
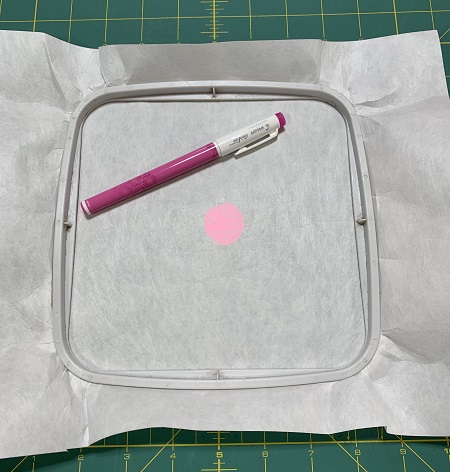
An essential tool for embroidery position and placement is a design template. A design template is a printout of the actual size of the design. It has the center of the design identified, as well as the horizontal and vertical axis lines. An embroidery program can print a template of any design. (Embrilliance Essentials embroidery software program was used to print the design template). Print the 'Gloss Boss' design template.NOTE: If you are not using a design template, a ruler and fabric pen can be used to mark placement for the design.
(Click Image to Enlarge)
Step 3:
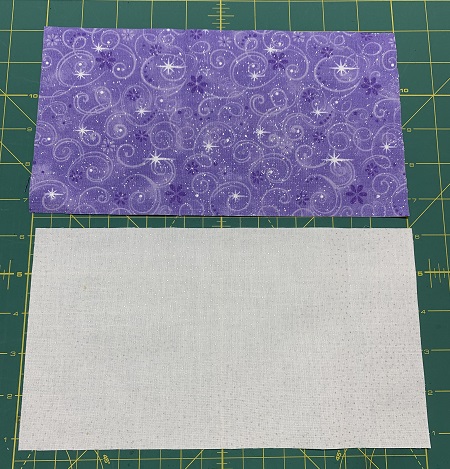
Cut three 10"x5.5" pieces from Fabric A for the outside of makeup bag. Cut three 10"x5.5" pieces from Fabric B for the inside of makeup bag.
Step 4:
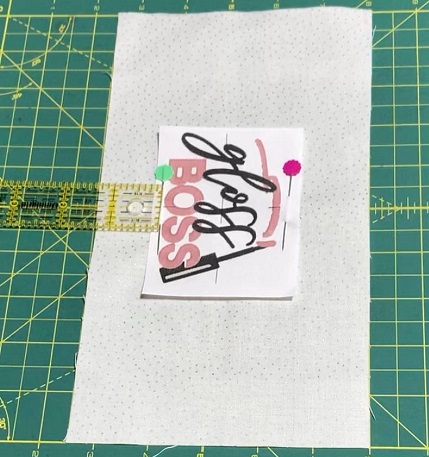
PART ONE: Lay one 10"x5.5" piece of Fabric B (lining/inside) on a flat surface with RIGHT side facing up. Center the design template 1 1/4" from the bottom edge of the fabric. Pin the design template to the fabric. If using a ruler and fabric pen, find and mark the center point on all sides. Lightly draw a line from side to side so that the lines cross in the middle. The place where the lines cross is the centerpoint on the fabric.
Step 5:
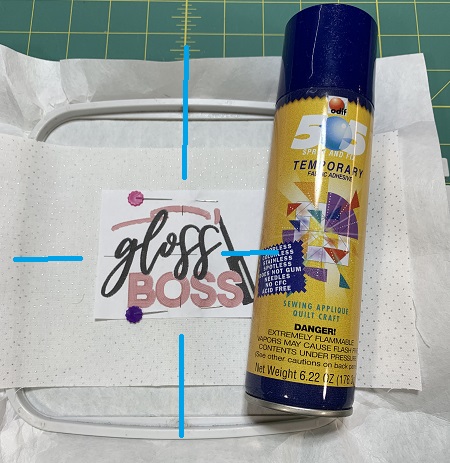
Hoop one piece of light weight (2.0) cutaway stabilizer in a 4"x4" or larger embroidery hoop. Use a fabric pen to mark the center point in the hoop.
Step 6:
Float the piece of Fabric B with the design template or placement marks on top of the stabilizer. Match the centerpoints on the stabilizer to the center on the fabric. Lightly mist the stabilizer with temporary adhesive spray to secure the fabric to the stabilizer. Gently press the fabric onto the stabilizer. The surface must be smooth and wrinkle free.
Step 7:
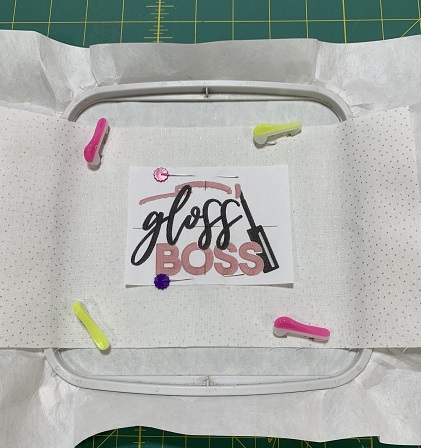
Use pins to secure the fabric to the stabilizer.
Step 8:
Attach the embroidery hoop to the machine. Load the 'Gloss Boss' embroidery design on the machine. A 75/11 embroidery needle is recommended to embroider this project. Load a full bobbin on your machine. If needed, clear the area around your workspace. Follow the stitching/color guide to embroider the design.
Step 9:
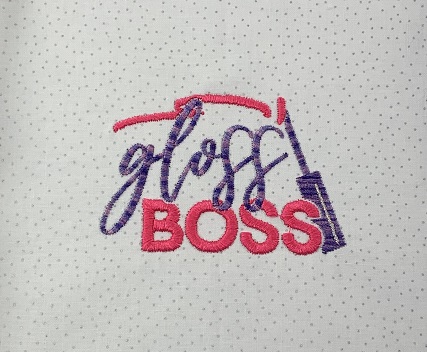
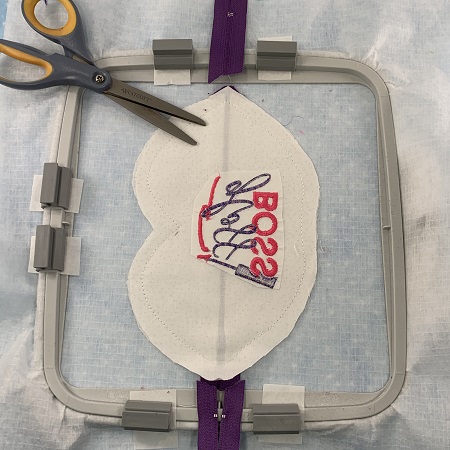
After the design has completed stitching, remove the hoop from the machine. Remove the fabric from the hoop. Turn the stitched fabric so that the WRONG side is facing you. Trim excess stabilizer from around the design leaving about a 1/2" margin being careful not to cut the fabric. You have completed PART ONEof the ITH Lip Makeup Bag.
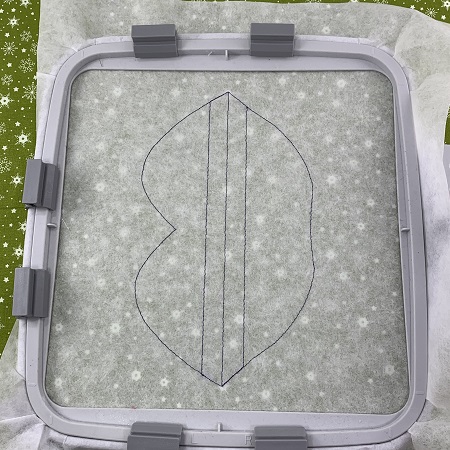
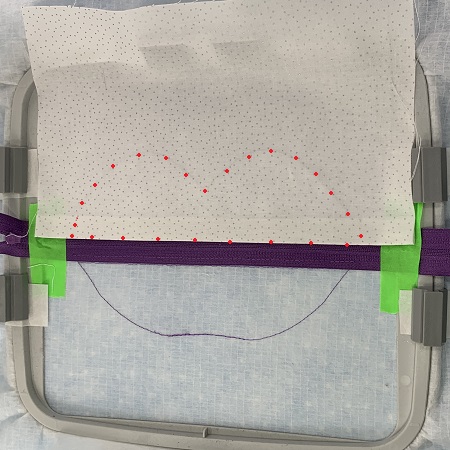
Step 10:
PART TWO of the ITH Lip Makeup Bag: Hoop one piece of No Show Poly Mesh cutaway stabilizer in an 8"x8" or larger frame. Load the 'ITH Lip Makeup Bag' design onto the machine. Use the color guide for each step. Stitch STEP 1. STEP 1 stitches placement stitches directly onto the stabilizer.
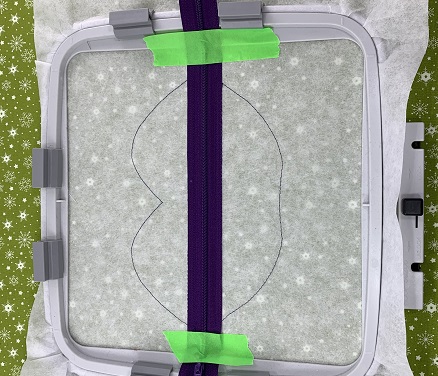
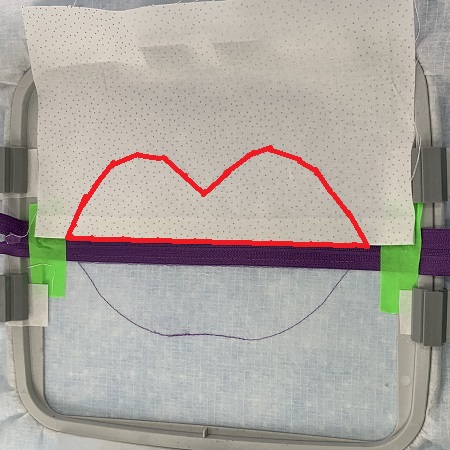
Step 11:
Center the zipper on the midline of the design. The zipper must be RIGHT SIDE DOWN. Extend the ends of the zipper at least 1" on each side of the design edge. Use masking tape or fabric glue to hold the zipper in place. Stitch STEP 2. STEP 2 will sew the zipper onto the stabilizer.
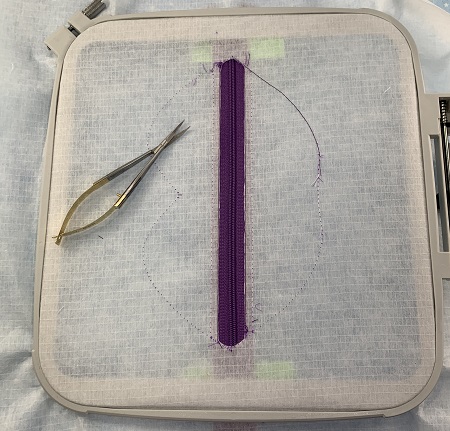
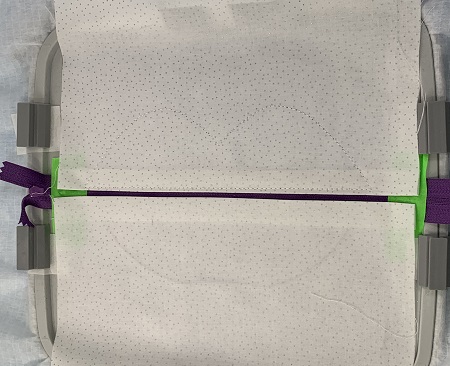
Step 12:
Remove the hoop from the machine, but DO NOT remove anything from the hoop. Turn the hoop over so that the back of the hoop is facing you. Cut out the small section of stabilizer from the center of the zipper using the seam line as a guide.
Step 13:
Place two 10"x5.5" pieces each of Fabric A and Fabric B on a flat surface with the WRONG side of the fabric facing you. Use a fabric pen to draw a line 1/2" from the fabric edge on one of the 10" sides on each piece of fabric. .
Fold on the line toward the wrong side of the fabric on each piece. Use your fingers to press the fabric along the fold. Then, use an iron to press a crease line along the folded edge.
When finished, you will have two pieces of Fabric A and two pieces of Fabric B with one 10" side folded & pressed down 1/2" toward the wrong side of the fabric.
Step 14:
Lightly mist temporary adhesive spray along the top lip section on the stabilizer. Using one piece of Fabric B (lining/inside) on the stabilizer with the RIGHT SIDE of the fabric facing you, place the folded edge to the midline along the top lip section. Gently press the fabric onto the stabilizer. Fabric surface should be smooth and wrinkle free.
Step 15:
Turn the hoop over so that the back of the hoop is facing you. Lightly mist temporary adhesive spray on the top lip section on the stabilizer. Using one piece of Fabric A on the stabilizer with the right side of the fabric facing you, place the folded edge to the midline along the top lip section. This fabric will be the outside of the bag. Gently press the fabric onto the stabilizer. Fabric surface should be smooth and wrinkle free.
Step 16:
Stitch STEP 3. Step 3 will stitch the two pieces together on the top lip section.
Step 17:
Lightly mist temporary adhesive spray on the bottom lip section on the stabilizer. Place the folded edge of one piece of Fabric B (light colored) on the stabilizer with the right side of the fabric facing you. Gently press the fabric onto the stabilizer. Fabric surface should be smooth and wrinkle free.
Turn the hoop over so that the back of the hoop is facing you. Lightly mist temporary adhesive spray on the bottom lip section on the stabilizer. Place the folded edge of one piece of Fabric A (outside fabric) on the stabilizer with the right side of the fabric facing you. Gently press the fabric onto the stabilizer. The fabric surface should be smooth and wrinkle free.
Step 18:
Stitch STEP 4. Step 4 stitches the pieces together on the stabilizer on the bottom lip section.
Step 19:
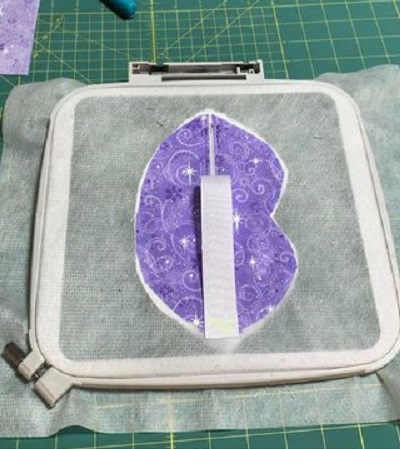
Remove the hoop from the machine, but DO NOT REMOVE the project from the hoop. Carefully trim the excess fabric from around the design leaving about a 1/2" margin. Be careful not to cut the stabilizer.
(Click Image to Enlarge)
Step 20:
Turn the hoop over so that the WRONG SIDE of the hoop is facing you. Trim the excess fabric from around the design leaving about a 1/2" margin. Be careful not to cut the stabilizer.
(Click Image to Enlarge)
Step 21:
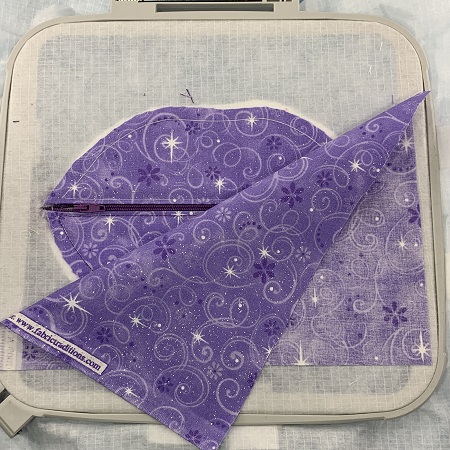
Place the embroidery hoop on a flat surface. Place the 'Gloss Boss' embroidered fabric piece RIGHT SIDE DOWN onto the ITH Lip Makeup Bag design. Make sure that the design is centered on the bag and not in the stitching path. Tape or pin the fabric to the stabilizer.
Stitch STEP 5. Remove the hoop from the machine but DO NOT remove the project from the hoop. Trim excess fabric from around the design leaving a 1/2" margin.
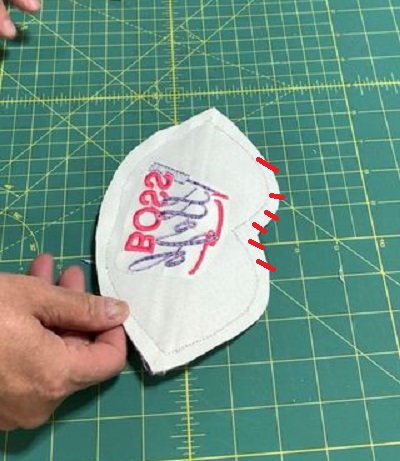
Step 22:
Pull the zipper tab to the middle of the bag. You may need to clip a thread so that you can move the zipper tab. Trim the excess zipper leaving about 1/2" overlap on each end of the bag.
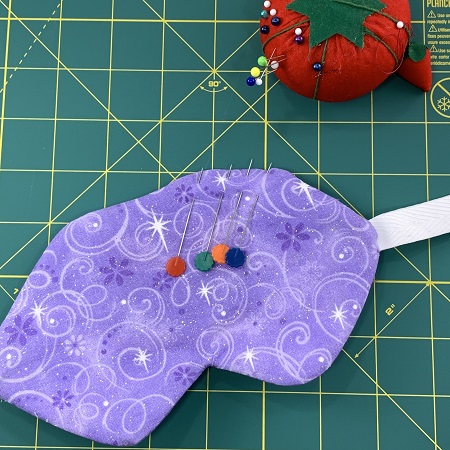
Step 23:
Turn the hoop over so the back of the hoop is facing you. Fold the ribbon in half. Use the zipper to center the ribbon on the bag. The ribbon fold will be in the middle of the bag. Overlap the ribbon edges 1/2" in the seamline. Use a dab of fabric glue to hold the ribbon in place.
Step 24:
Place one piece of Fabric A with the RIGHT SIDE down over the design. Lightly mist 505 Temporary Adhesive spray around the edges of the stabilizer to hold the fabric in place.
Stitch STEP 6. A small section will be left open on this step. Repeat stitching STEP 6 to make the bag more durable. The opening will be used to turn the lip bag right side out.
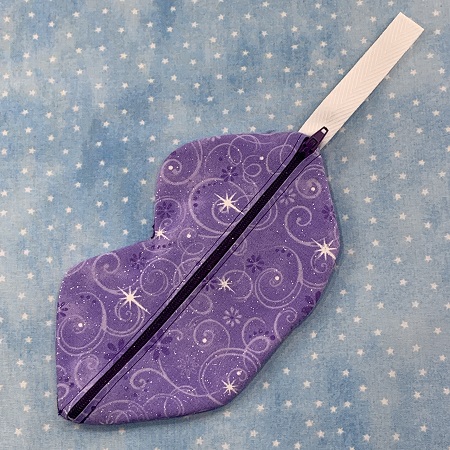
Step 25:
Remove the fabric from the hoop. Trim excess fabric and stabilizer leaving about a 1/2" margin around the design. Next, clip straight, small slits around the lip bag so that the seams and shape will lay smoother.
Step 26:
Use the small opening in the seam to turn the bag right side out. Press the bag with an iron. Turn the fabric edges at the open seam toward the inside. Pin the edges together. Use a needle and thread to sew the edges together.
Step 27:
You have completed an 'ITH Lip Makeup Bag'. Great job!
Marisa Littleton is a retired educator with a love for teaching and learning. Interests include machine embroidery, hand embroidery, quilting, cooking, and antiques.