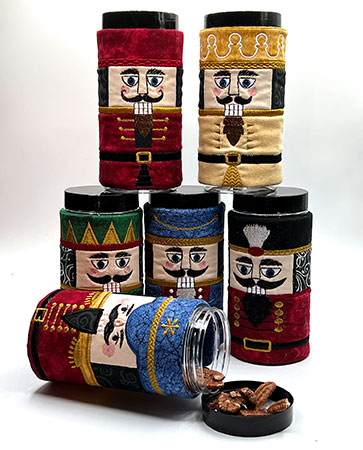
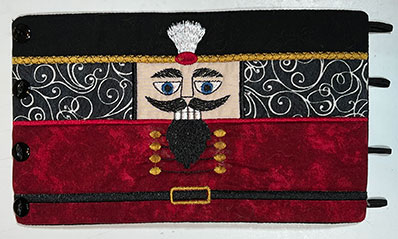
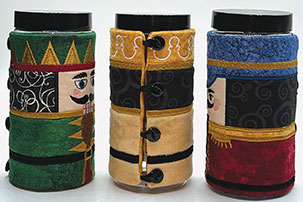
Adorable in-the-hoop holiday nutcracker-themed container wraps. Requires minimum 160x260mm hoop and minimal extra finishing. Features appliqué with details provided by embroidery.
ITH Nutcracker Container Wraps from LindeeG Embroidery
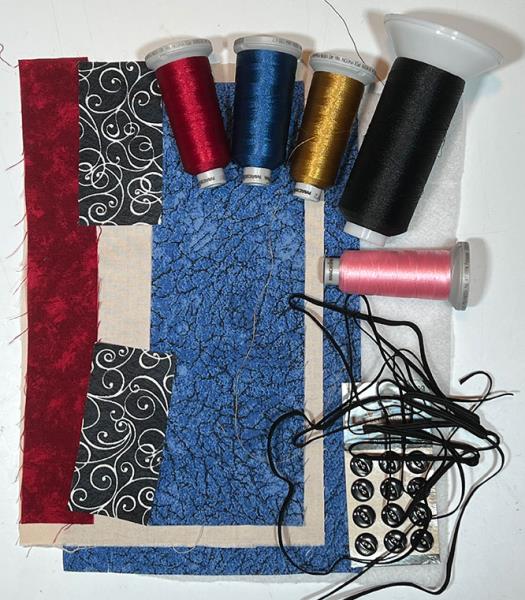
Front fabric: 6.5” x 10.5” in the color you want for the face
Backing fabric: 6.5” x 10.5” in a coordinating color
Fleece or thin batting: 6.5” x 10.5”
Fabrics for appliqués: refer to patterns in the download for sizes, colors of your choice
Elastic: 1/8” wide or narrow round, four 2” strips (I used black)
Buttons: 4 small (1/2” or 13mm or smaller) (mine are plain back but a holiday theme could be fun)
Stabilizer: I used medium-weight cutaway
Painter’s tape or similar
Fabric glue to secure elastic raw ends
Clips to hold elastic while drying
Embroidery threads to coordinate with your fabrics
Fusible web for appliqué; I used Steam-a-Seam 2
Optional: Temporary embroidery spray adhesive (TESA): I used KK2000 to secure fabrics if desired
Containers: these designs are sized for 16oz straight-sided containers that are approximately 6” tall with a diameter of 2.77”. I used these: https://amzn.to/3VQH2w5
This set includes 6 different nutcrackers. Most use the same front appliqué pieces to make them easier to stitch. Due to the density of the stitches, these designs are not intended for use with vinyl.
Worksheets with sewing tips, applique patterns, SVG cutter files , and PDF instructions are included. Since all the pieces are rectangular, it's easy just to use a rotary cutter and ruler to cut them.
The containers I used are these: https://amzn.to/3Wza0Ba but a container with similar dimensions should work just fine.
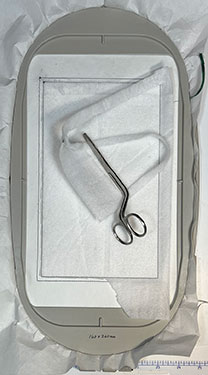
Step 1:
Decide on your fabrics, and cut and organize your supplies. Print your worksheet so you know when to place the appliqués.
(Click Image to Enlarge)
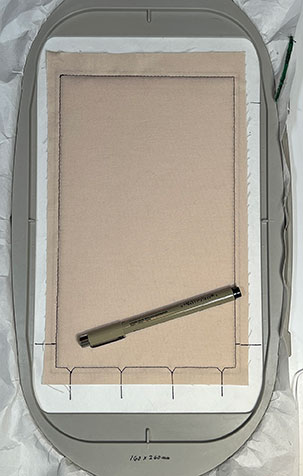
Step 2:
(Click Image to Enlarge)
Hoop the stabilizer and sew color 1. Place the fleece over this reference and sew color 2 to attach it. Trim off the excess batting close to the stitching line. This will minimize the bulk in the seam allowances.
Step 3:
(Click Image to Enlarge)
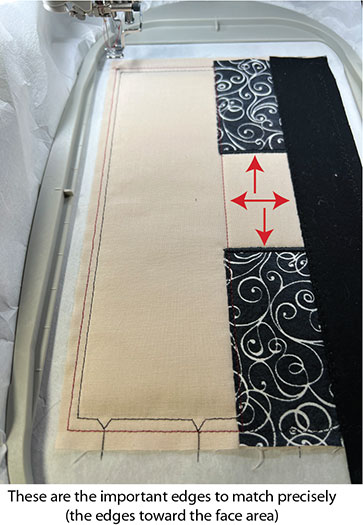
Smooth the front fabric over this area, extending it slightly over the side and bottom placement guides and extending more at the top. This fabric provides a smooth surface for the other appliqués that will be attached over it.
Sew color 3 to attach the front fabric. This tack down includes some extra placement notations for aligning the elastic loops. These stitches will be covered later so it’s a good idea to extend these lines onto the stabilizer.
Step 4:
(Click Image to Enlarge)
Now simply follow the worksheet reference to stitch up to the next to last color. The appliques for the front will be placed first. A placement line for each will be stitched, you’ll align the fabric, and the tackdown will sewn. Each applique is placed one at a time. The order is as follows.
The “hair” appliqués will be placed first, followed by the hat, and then the jacket. For the hair, make sure the cut edge aligns precisely next to the exposed area of the face.
Step 5:
(Click Image to Enlarge)
For the hat, make sure the long straight edge aligns accurately along the appliqué’s left edge
For Nutcracker 1, align the thin rectangle along its right edge
For the larger jacket/body appliqué, align it along its right edge
TIP: Notice that the edge that is aligned is the one closest to the face. The other edges can meet or even overlap their placement lines. In other words, previous layers and underlap as long as their color won’t bleed through the top layer.
Step 6:
(Click Image to Enlarge)
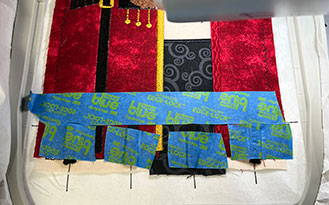
Placing the elastic button loops: The next-to-last color secures the elastic hoops. The reference lines you extended onto the stabilizer are the placement guides.
Optional: Add a strip of tape across the project at the two marks on the sides. This guide is the top edge of your loops (the closed end).
Note: You may need to adjust the placement line if you use a different size button, loop, or container.
The 4 lines across the bottom mark the vertical center for each button loop. Align the cut ends of each loop at the bottom and the closed end along the guide. Temporarily secure in place with tape.
Step 7:
(Click Image to Enlarge)
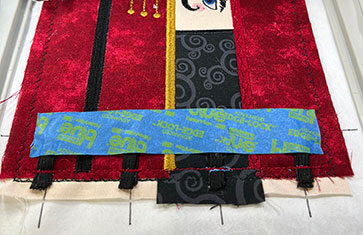
Sew this color to attach the loops. Remove tape.
Optional (but recommended!): tape down the loops to flatten them; keep the tape out of the seam allowance.
Step 8:
(Click Image to Enlarge)
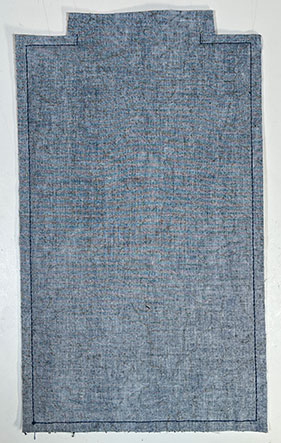
Smooth the back fabric, face down, over the front of the hoop aligning it with the front fabric and stitch the last color. Remove the project from the hoop. Trim seam allowances on the long sides and the bottom edge (end where the loops are) to 1/4”. Trim the top edge first to 3/4” then down to 1/4” only next to the stitching line. (See below.)
Then clip corners to minimize bulk. Turn right side out, tuck in seam allowance at the opening, press well.
Step 9:
(Click Image to Enlarge)
Close the opening (machine edge stitch, hand stitch, or fuse).
Stitch buttons along edge matching the alignment of the button loops.
Step 10:
(Click Image to Enlarge)
Secure elastic loops over the buttons and then slide onto container.
Lindee Goodall is the founder and former owner of Cactus Punch in Tucson, Arizona and currently owns Lindee G Embroidery (http://lindeegembroidery.com). She has been digitizing since 1994, sewing since a small child, and has a degree in art. A frequent guest on PBS sewing shows, Lindee is an international instructor, 1997 Digitizer of Distinction, and winner of the Creativity Award in the 2002 Stitch Off. Lindee is also the author of Anatomy of a Design: How to Think Like a Digitizer & Become a Better Embroiderer.