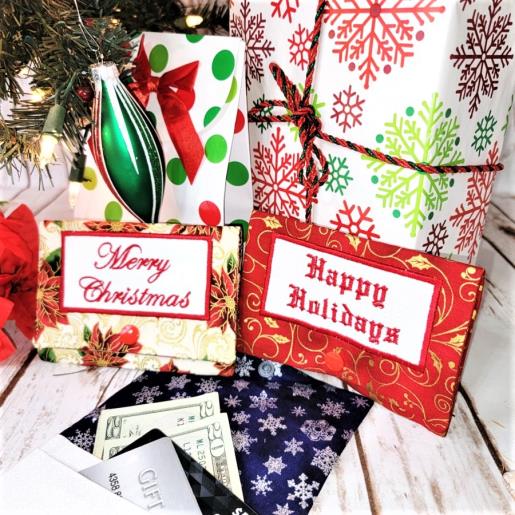
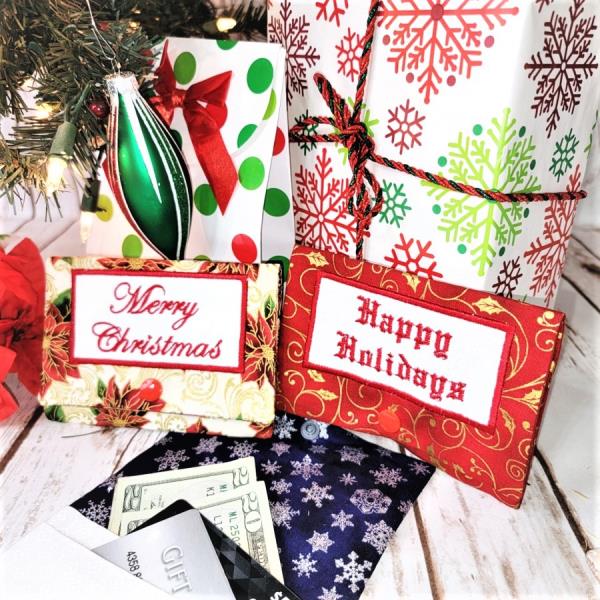
Fast and so easy, create gift card wallets for the gift giving season. There is even a choice of a “blank” so it can be personalized. Everything is done in the hoop, except for adding the snap!
Project Preview Video
Materials
For each wallet:
Hoop to fit the project
1- 6” x 19” cotton fabric for wallet inside
1- 6” x 8” cotton fabric for wallet outside
1- 2” x 4” cotton fabric for text area
Embroidery thread to coordinate with fabrics
Awl
1- KAM snap set in color to coordinate with fabric
The first wallet done may take a little more time, but once you’ve done one, the others go very quickly. These are a great stash-busting project; the inside and outside fabrics may be mixed and matched as desired.
Step 1:
Read through the instructions thoroughly before beginning and assemble all the materials needed to complete the project. There are various designs to choose from. Vary the fabrics and each wallet will be unique. For the blank wallet, personalize with a name or another sentiment to fit the occasion such as graduation or wedding.
(Click Image to Enlarge)
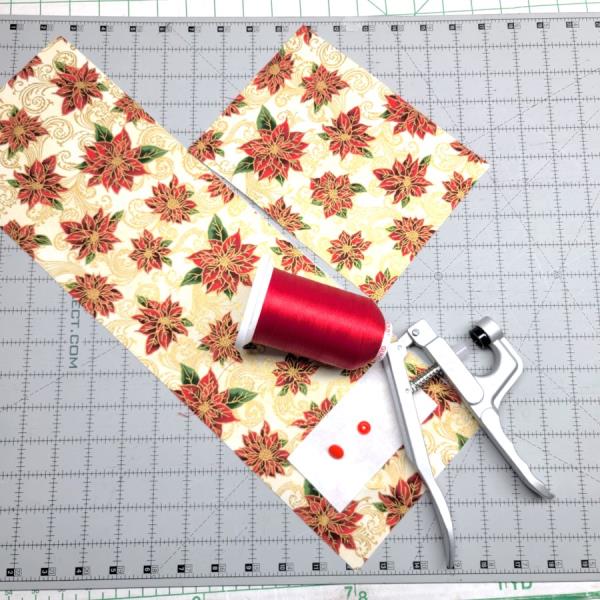
Step 2:
Press the fabrics well with starch and cut them to size. Choose the KAM snap set and thread to coordinate with the fabrics.
(Click Image to Enlarge)
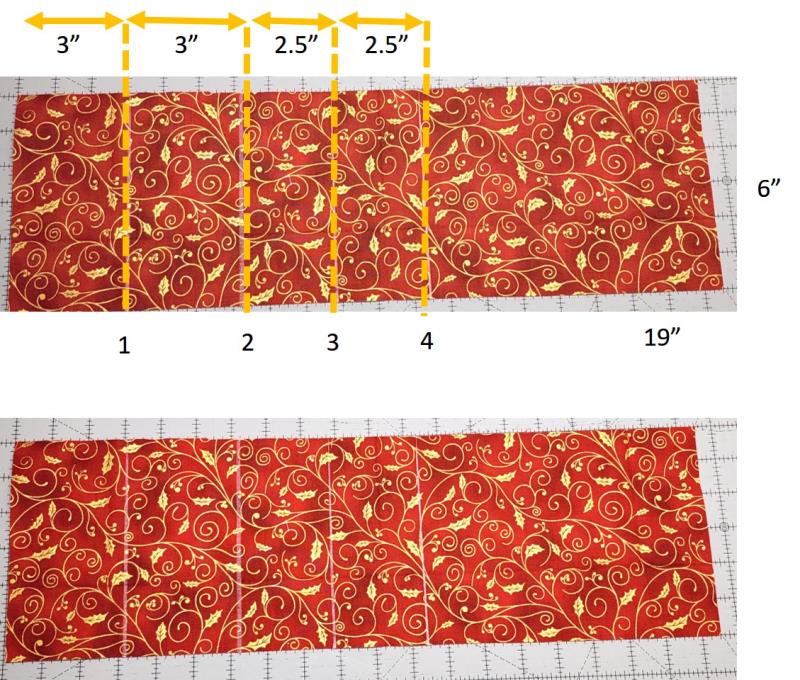
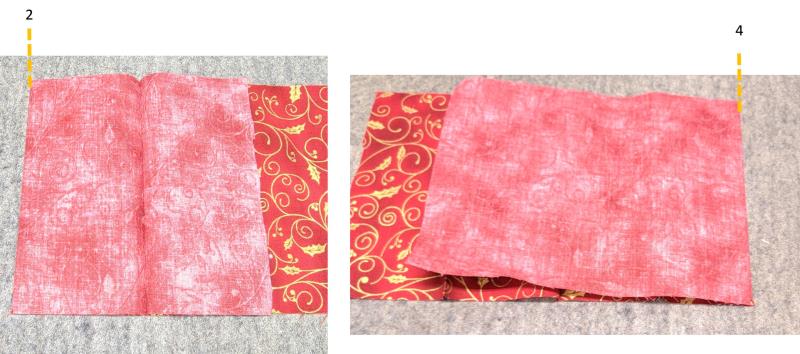
Step 3:
Mark the fabric pressing lines. Lay the fabric as shown. From the left edge measure 3”, from that measurement mark another 3” to the right. Now measure 2.5” to the right of the last line, and from that line 2.5” to the right. The marked lines are shown on the bottom photo with the lines and dimensions shown on the top photo.
(Click Image to Enlarge)
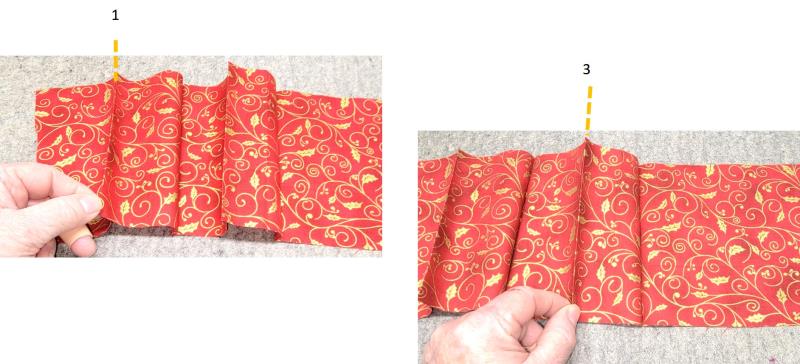
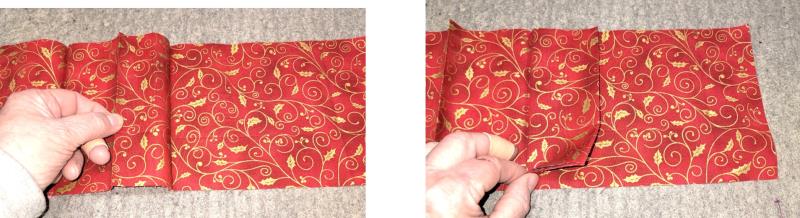
Step 4:
With wrong sides together, fold and press along line 1. With wrong sides together fold and press along line 3.
(Click Image to Enlarge)
Step 5:
With right sides together, fold and press along line 2. With right sides together fold and press along line 4.
(Click Image to Enlarge)
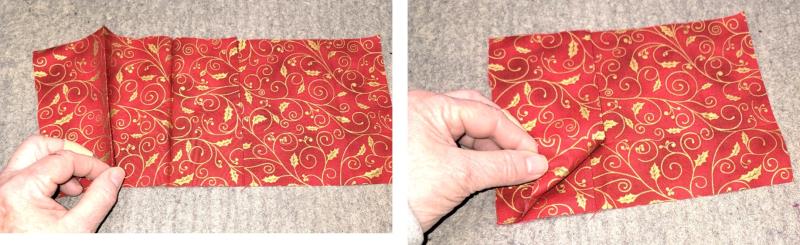
Step 6:
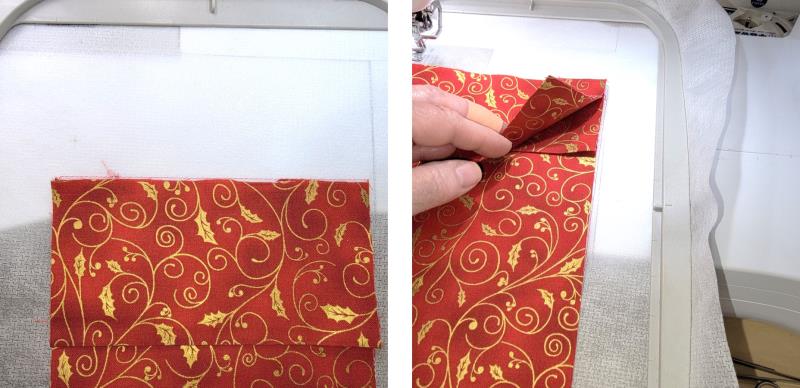
Now the “pockets” will be folded in place, like accordion folding. Pick up line 3 and fold it to the right to form the smaller inside pocket.
(Click Image to Enlarge)
Step 7:
Pick up line 1 and fold it to the right over the smaller pocket.
(Click Image to Enlarge)
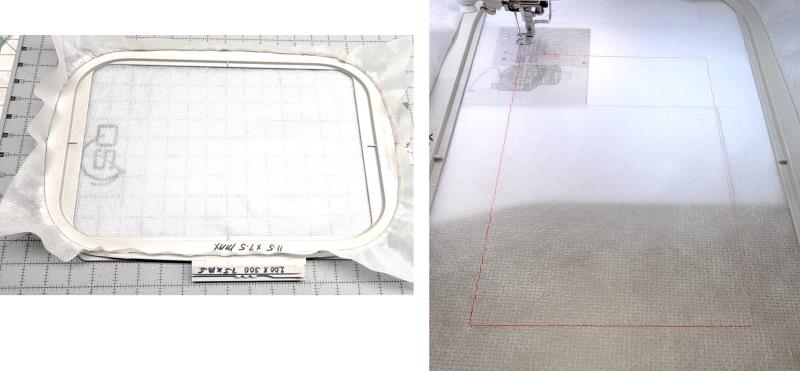
Step 8:
Load the chosen design on the machine. Hoop a layer of poly mesh stabilizer. Place the hoop on the machine. Stitch color 1, the placement line.
(Click Image to Enlarge)
Step 9:
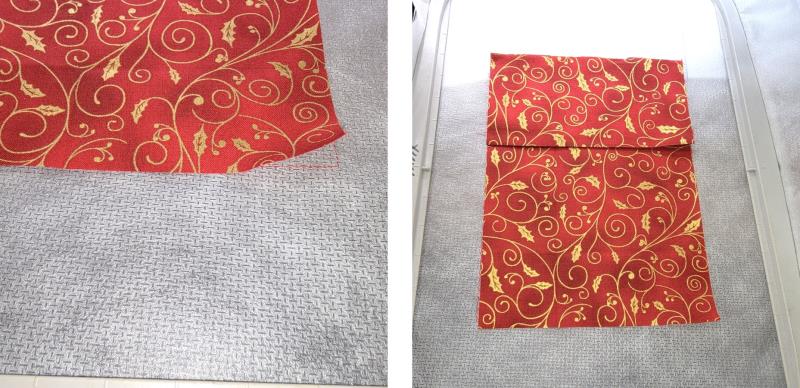
Align the pressed and folded inside fabric in the placement line. The bottom of the pocket should be at the top of the placement line.
(Click Image to Enlarge)
Step 10:
The front of the fabric will go slightly over the placement line.
(Click Image to Enlarge)
Step 11:
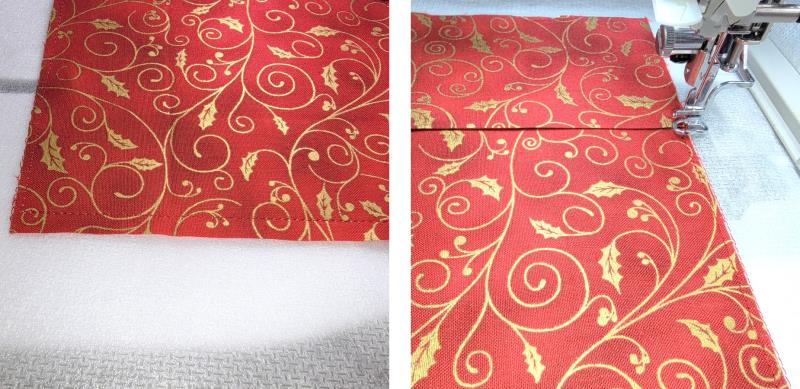
Stitch color 2 to tack down the fabric. Slow the machine down if needed.
(Click Image to Enlarge)
Step 12:
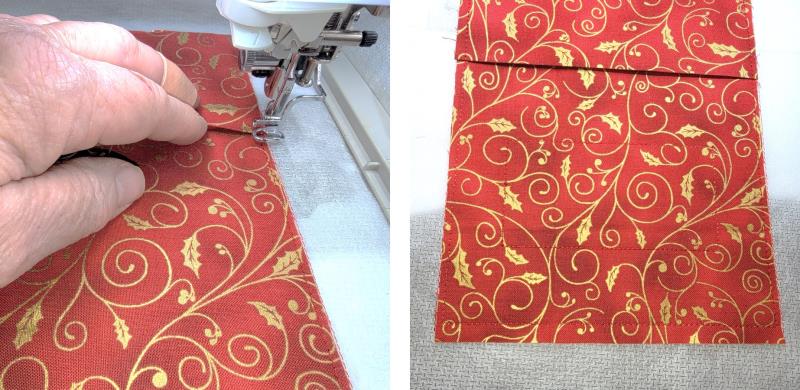
You may need to stop the machine, hold down the fold of the pocket, and start the machine again so the foot doesn’t get caught on the pocket. Stitch color 3, the placement for the text fabric.
(Click Image to Enlarge)
Step 13:
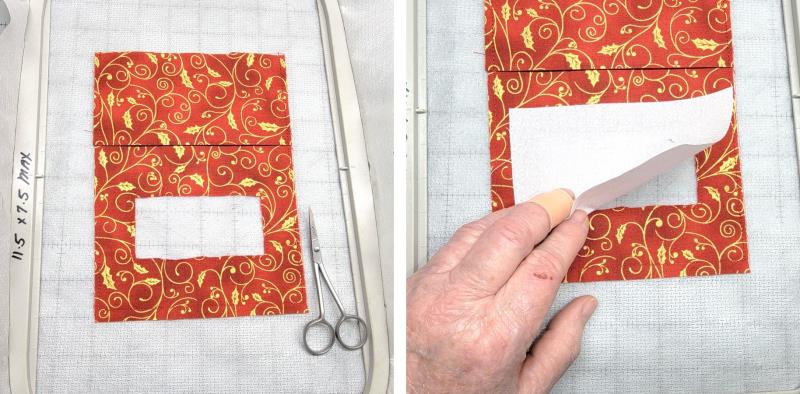
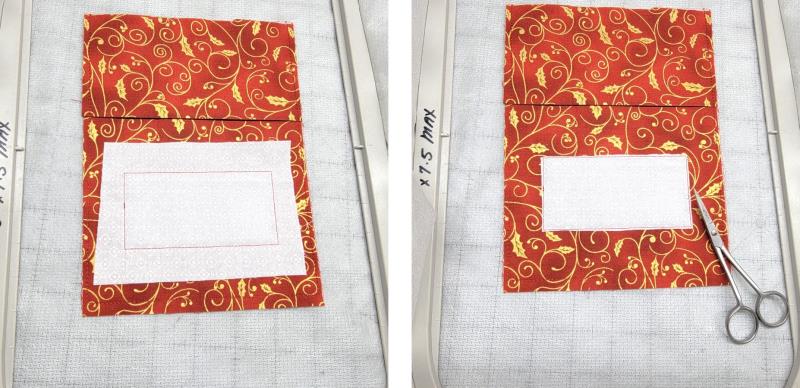
Trim out the fabric inside the placement line—be careful not to cut into the stabilizer. Place the white 2” x 4” fabric over the placement line.
(Click Image to Enlarge)
Step 14:
Stitch color 4 to tack down the fabric. Trim away the excess fabric outside the stitching line.
(Click Image to Enlarge)
Step 15:
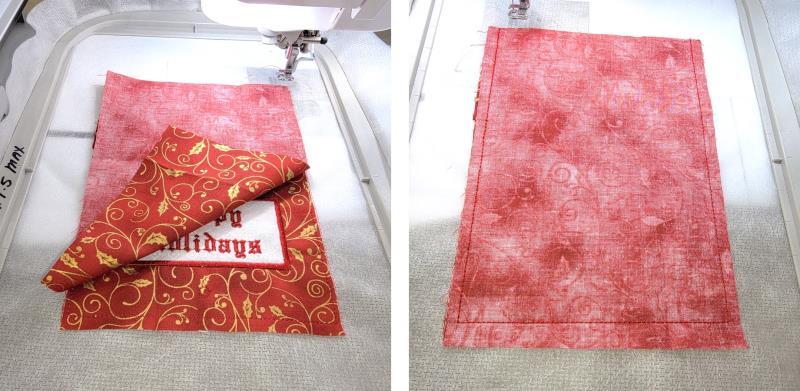
Stitch color 5, the satin border. Stitch color 6 the text and the placement line for the snap. If you are stitching the “blank” wallet, this step is where the personalized text would be added.
(Click Image to Enlarge)
Step 16:
Place the remaining piece of fabric, right side down aligning cut edges. Stitch color 6 to sew the two pieces of fabric together.
(Click Image to Enlarge)
Step 17:
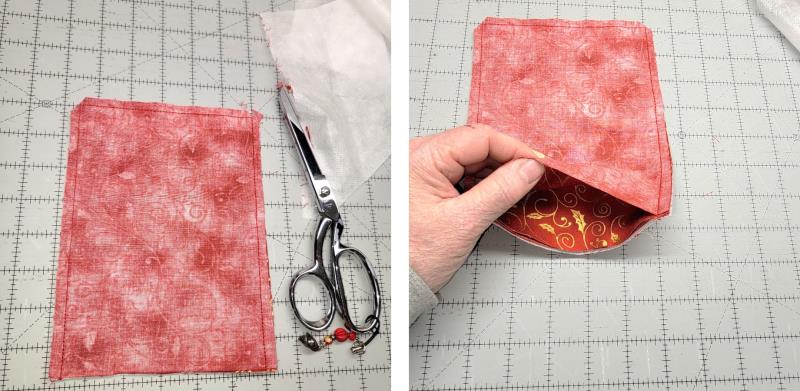
Remove the piece from the hoop. Trim leaving ¼” seam allowances. Lift up the single piece of fabric
(Click Image to Enlarge)
Step 18:
and reach inside. Turn the piece right side out.
(Click Image to Enlarge)
Step 19:
Form the corners well and roll the seam lines with your fingers and press.
(Click Image to Enlarge)
Step 20:
Locate the snap placement line.
(Click Image to Enlarge)
Step 21:
Using the awl, poke a hole through both layers. Follow the instructions for the KAM snap set. Insert the top snap through the hole.
(Click Image to Enlarge)
Step 22:
Apply the appropriate under section and use the tool to secure them together.
(Click Image to Enlarge)
Step 23:
Locate the pocket sections and hold them together.
(Click Image to Enlarge)
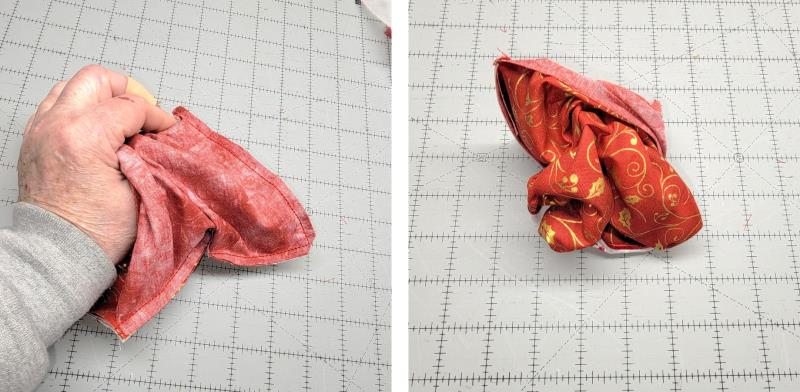
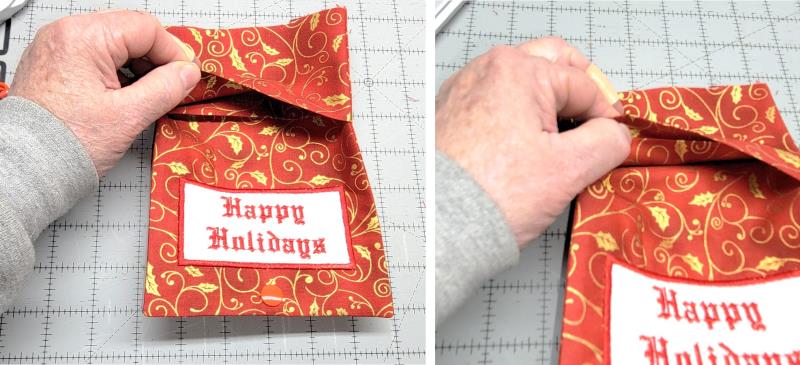
Step 24:
Reach in (under both pocket sections) and pull out the corners; this will flip the pocket sections to the inside.
(Click Image to Enlarge)
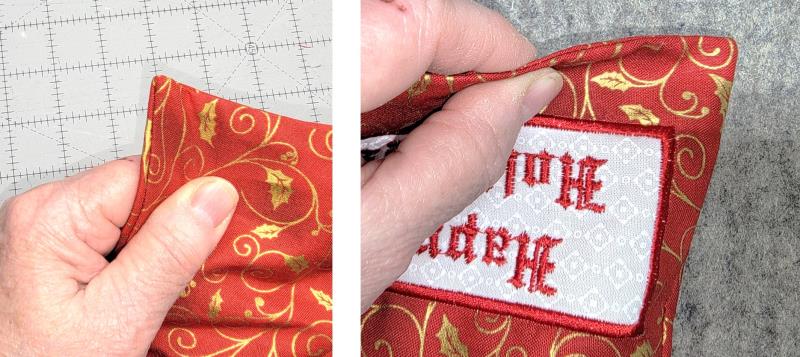
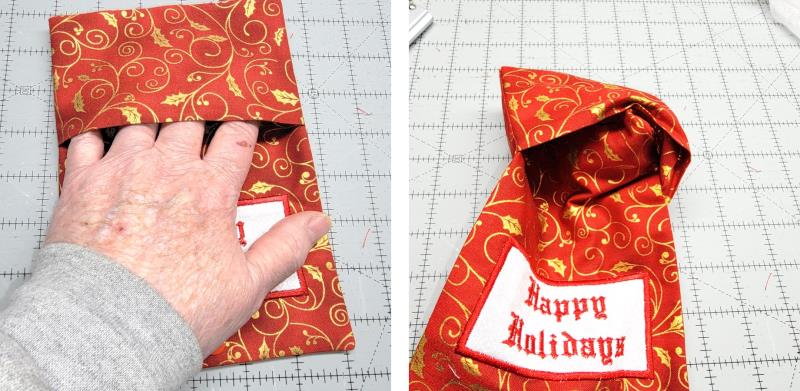
Step 25:
Form out the pockets, roll out the seams and press the wallet well.
(Click Image to Enlarge)
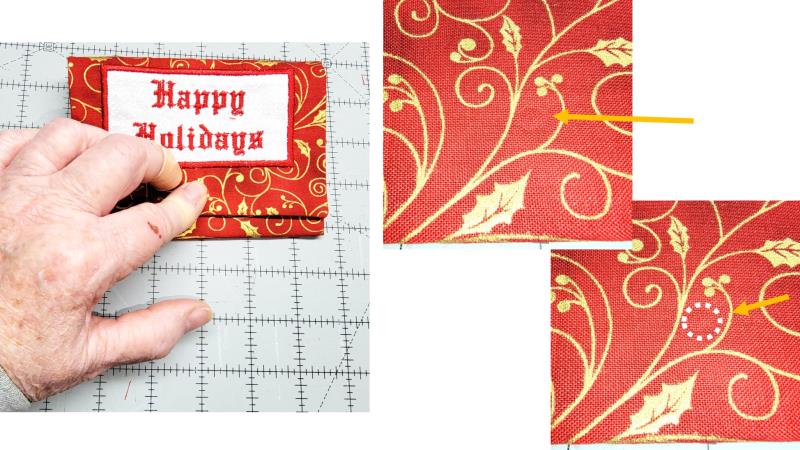
Step 26:
Fold the wallet front down over the pockets as shown. Press down on the top snap so it leaves an indent on the pocket fabric.
(Click Image to Enlarge)
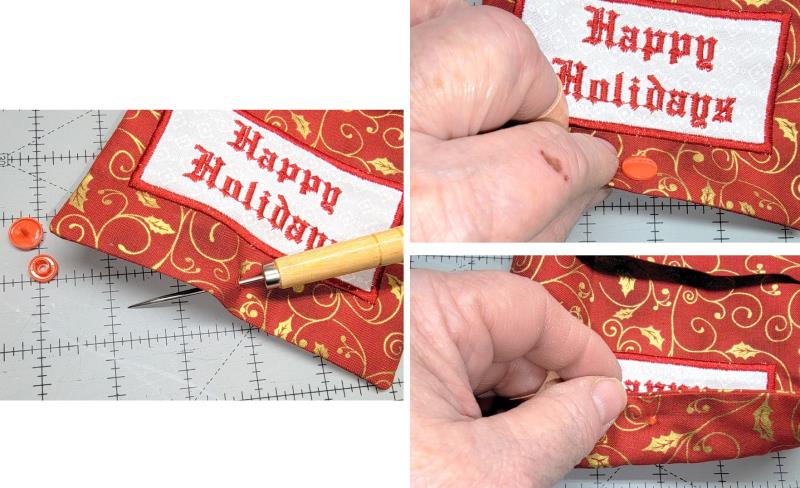
Step 27:
Poke the awl through this mark on smaller pocket, catching both layers of that pocket only..
(Click Image to Enlarge)
Step 28:
From the inside of the small pocket, insert the snap through the hole and apply the remaining snap section.
(Click Image to Enlarge)
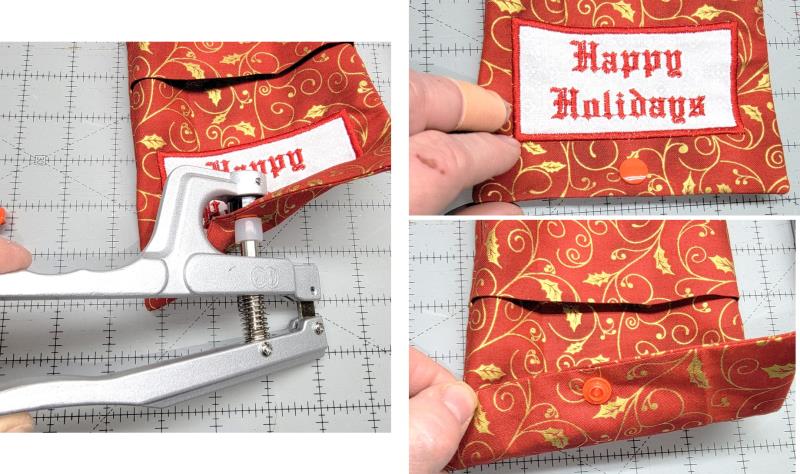
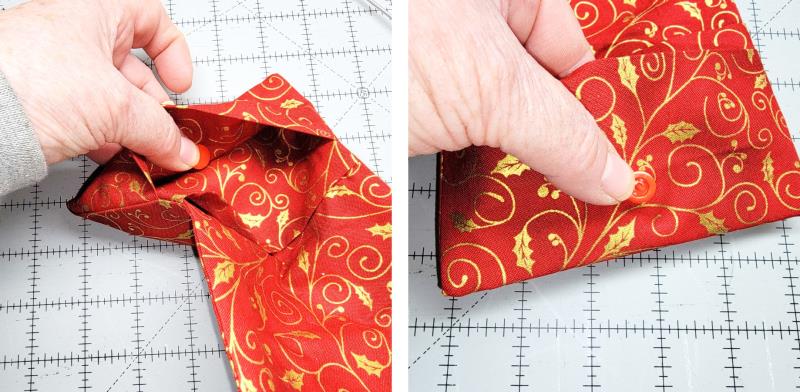
Step 29:
Use the tool to set the sections together. The two pockets are separate.
(Click Image to Enlarge)
Step 30:
Insert gift cards and dollar bills as you’d like, and snap the wallet closed.
(Click Image to Enlarge)
Step 31:
Congratulations! In an afternoon you can make several of these ITH Gift Wallets. These would be great sellers for church bazaars and craft fairs, too!
Ramona Baird has been in the embroidery industry for over 23 years. She and her husband owned a commercial and retail embroidery store in Arizona for many years. She is an experienced digitizer having been mentored by award-winners Pat Williams and Lindee Goodall. Ramona is a contributor to “Creative Machine Embroidery” magazine having 5 covers to her credit. Ramona has worked for Wilcom America and served many years as Education Director for the American Sewing Guild. With a degree in fashion design, she is able to design and execute patterns which Pat Williams says are “out of the box” in creativity and application. Ramona likes to challenge the boundaries of embroidery and bring new and exciting designs, ideas, and projects to EmbroideryDesigns.com. She wants embroiderers of all levels to increase their skills and enjoyment in using their embroidery machine for gift-making and personal pleasure.