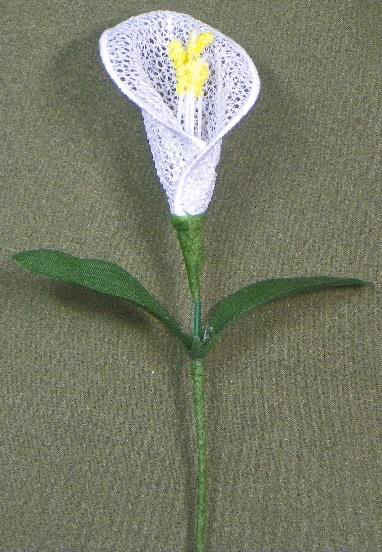
This project is by Nancy and is in collaboration with Holly and Artsy Knots
Step 1:
(Click Image to Enlarge)
To obtain the “hardware” (or plastic parts) of the various flower centers and stems, I purchased silk flowers and removed parts for my FSL Flowers. It is important to purchase the type of silk flower you plan to create so it mimics the real flower type-stem and leaves.
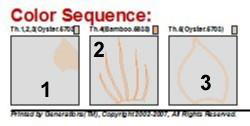
See Color sequence image below
Step 2:
(Click Image to Enlarge)
Hoop water-soluble stabilizer in a 4 x 4 hoop.
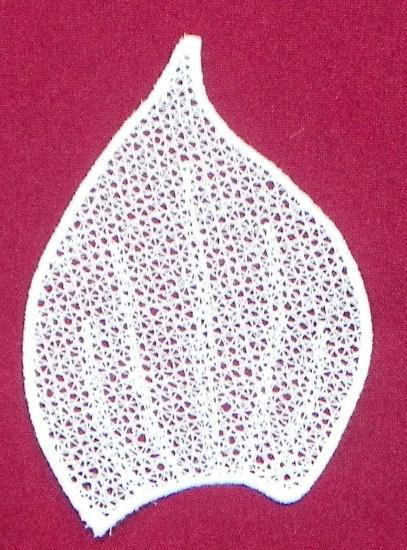
Step 3:
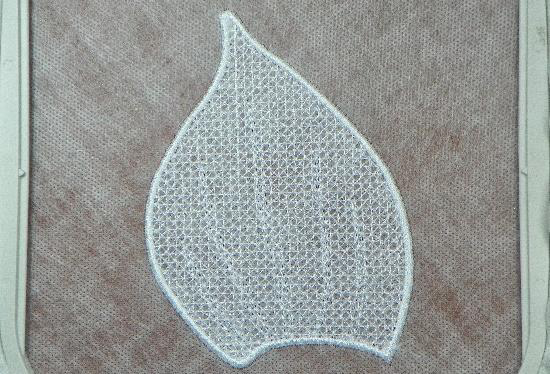
Sew 1-3 in the Color Sequence Chart. These stitches will create the Calla Lily petal.
(Click Image to Enlarge)
Step 4:
Remove hoop from machine and design from hoop.
Step 5:
Cut away excess stabilizer, leaving about 1⁄4 inch around the outside.
Step 6:
Hold under running water until outside 1⁄4 inch of stabilizer falls away.
Step 7:
Place wet petal between a paper towel and press to remove most of the water.
(Click Image to Enlarge)
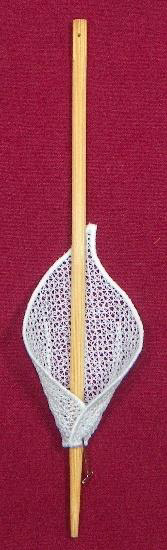
Step 8:
(Click Image to Enlarge)
While still damp, wrap the petal around a chop stick, pencil, or sturdy straw and pin in place.
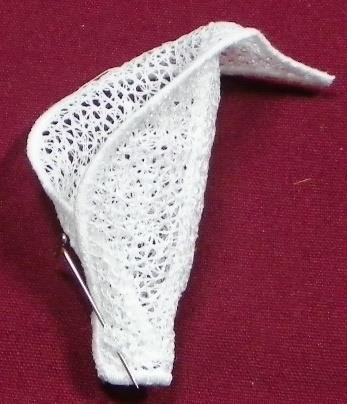
Step 9:
(Click Image to Enlarge)
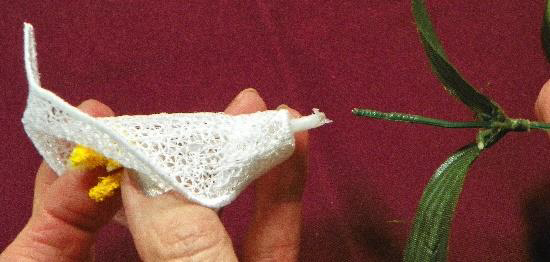
Remove from chop stick and fold the petal into the desired shape
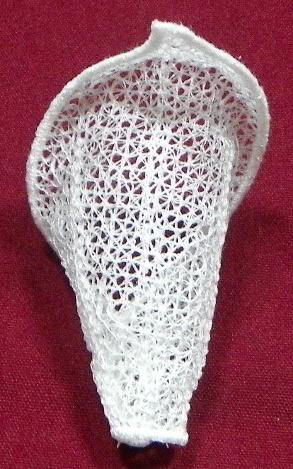
Step 10:
(Click Image to Enlarge)
Role the edges as shown in diagram
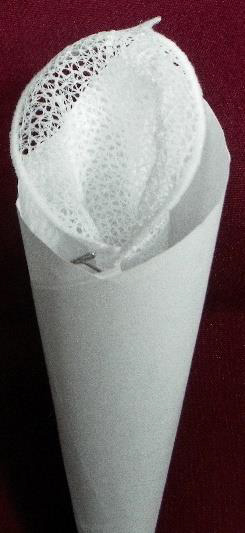
Step 11:
(Click Image to Enlarge)
Create a paper funnel “gently” hold the lily petal until it dries. The funnel can be placed in a glass or cup to hold it upright during the drying process.
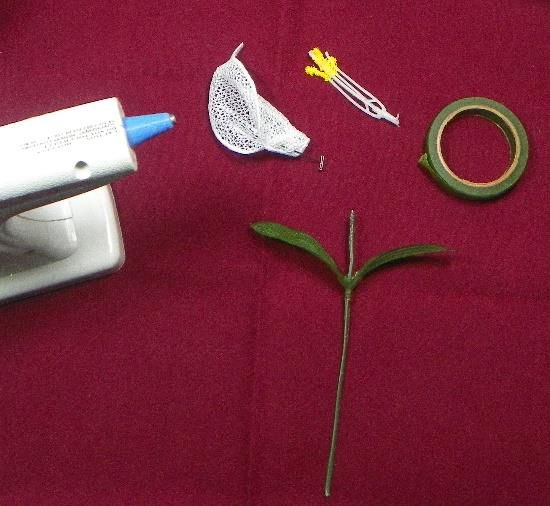
Step 12:
Assemble the following:
a. Hot glue gun
b. Dry Calla Lily petal
c. Flower stamen (taken from a purchased flower stem)
d. Floral tape
e. Stem and leaves (taken from a purchased flower stem)
(Click Image to Enlarge)
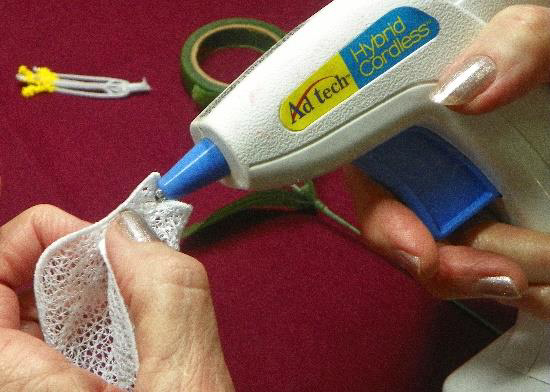
Step 13:
Place a drop of hot glue on the base of the petal to secure the wrap.
(Click Image to Enlarge)
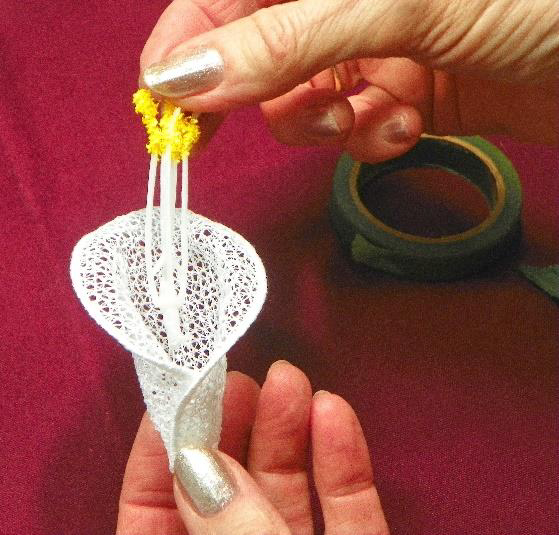
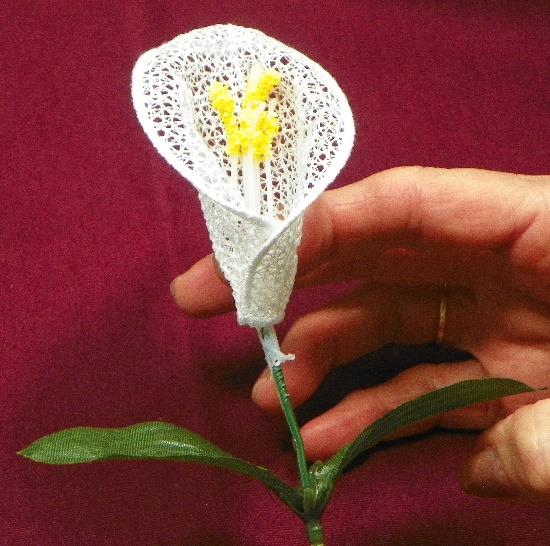
Step 14:
Insert the flower stamen into the flower center and pull through until the base sticks out the bottom.
(Click Image to Enlarge)
Step 15:
Insert the stem into the base of the Stamen.
(Click Image to Enlarge)
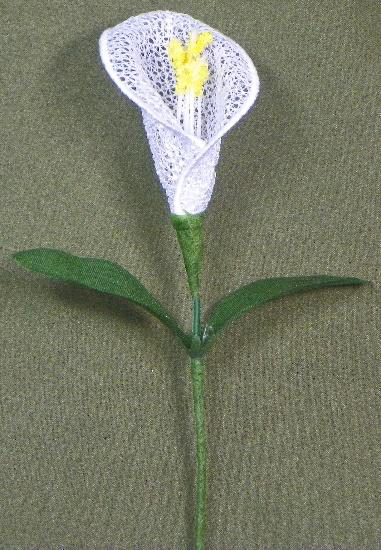
Step 16:
Place a dot of hot glue at the base of the flower to help hold it upright on the stem (You may need to use two dots of glue).
(Click Image to Enlarge)
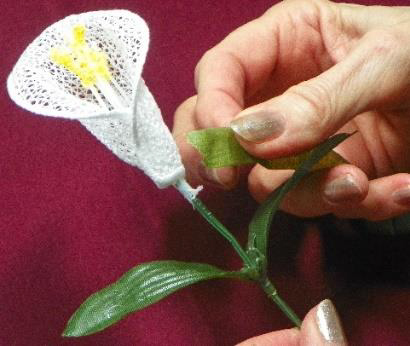
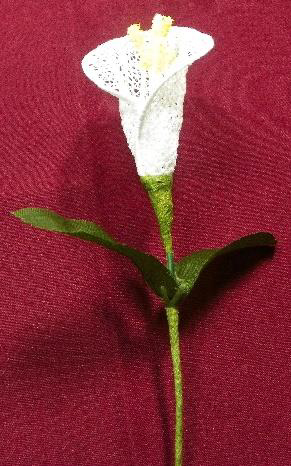
Step 17:
Carefully wrap the base of the flower with floral tape, making sure it is very snug and shapes the base of the lily.
Step 18:
(Click Image to Enlarge)
.
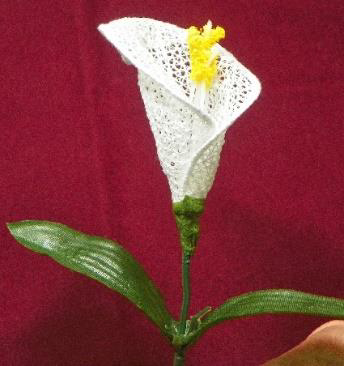
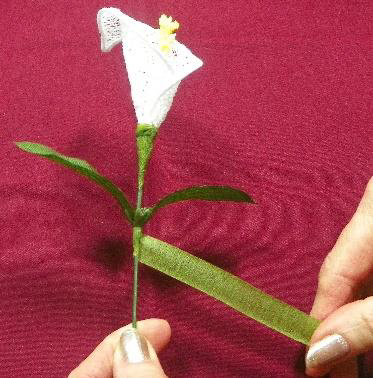
Step 19:
(Click Image to Enlarge)
Wrap the bottom of the stem with floral tape to complete the flower.