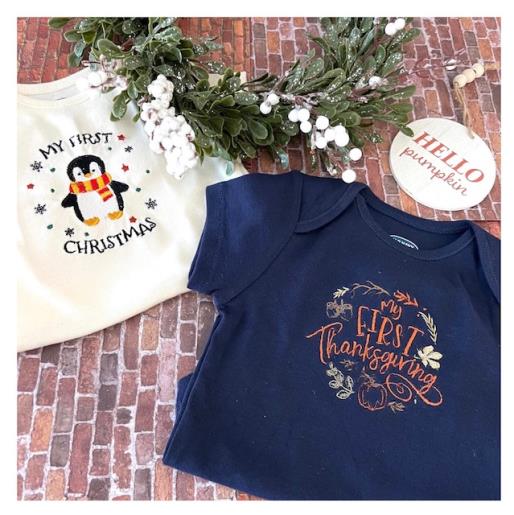
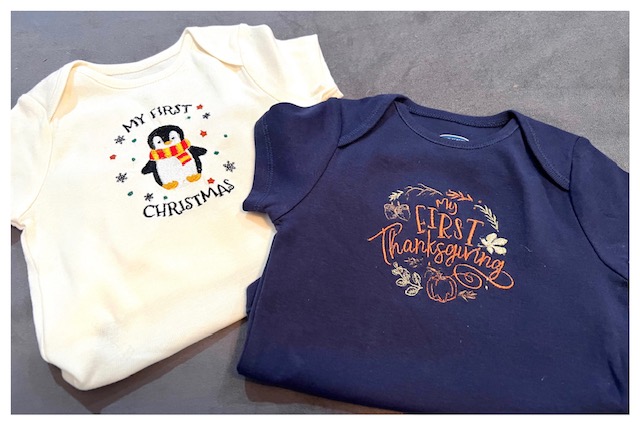
With the many embroidery designs on the Embroidery Design website you can create your own unique set of onesies whether for holidays, babies’ milestones, or baby shower gifts. The two embroidery designs used in this tutorial are from the Maya Creations and Artsy Knots collection. Water soluble stabilizer is used on the front onesie top as it supports the stitches and keeps them from sinking in the fabric. Time stated of 1h30m is for completion of both onesies. Design size files used for this tutorial 3.44" x 3.87" First Christmas, 3.91" x 3.43" My First Thanksgiving
Step 1:
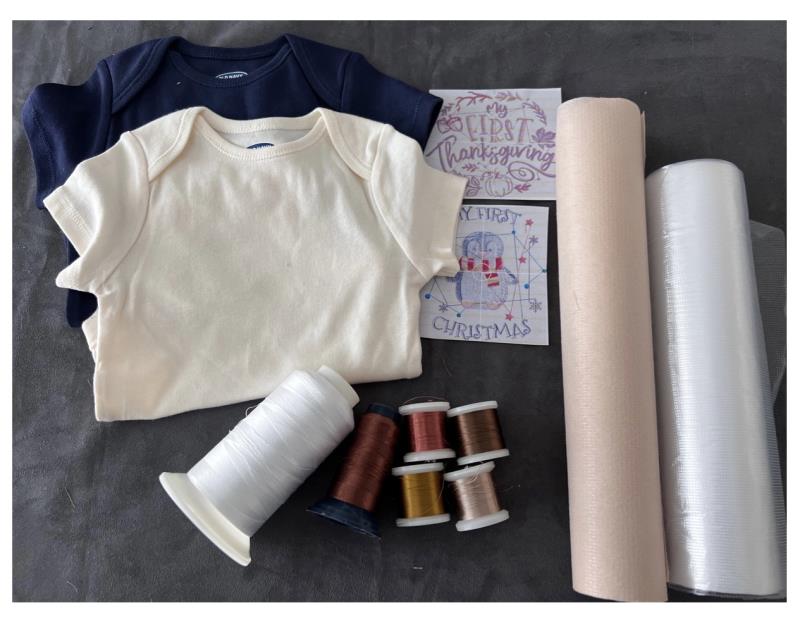
Gather all supplies and review instructions before beginning. Print out paper template of embroidery design.
(Click Image to Enlarge)
Step 2:
(Click Image to Enlarge)
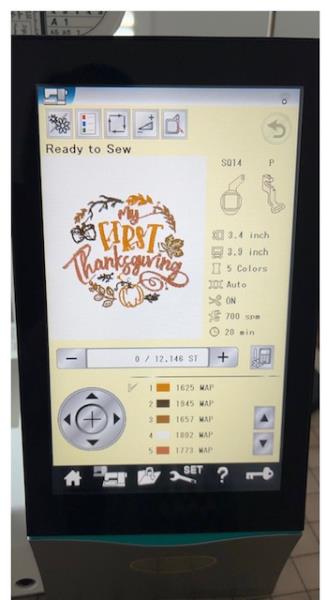
Load embroidery design file into your machine.
Step 3:
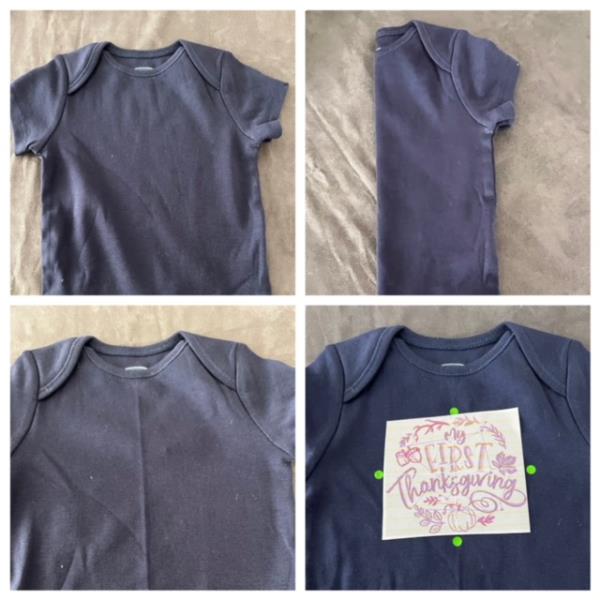
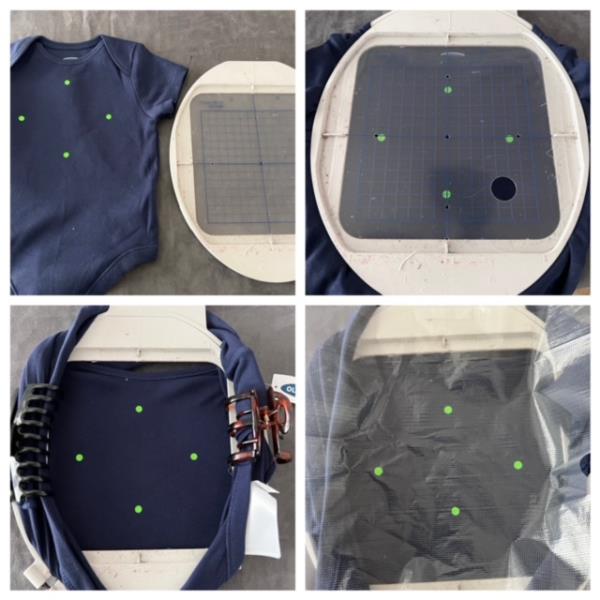
Fold onesie in half lengthwise to find body center. Iron press to form a creased center line. Center design template. Mark axis points using a fabric air erase pen.
(Click Image to Enlarge)
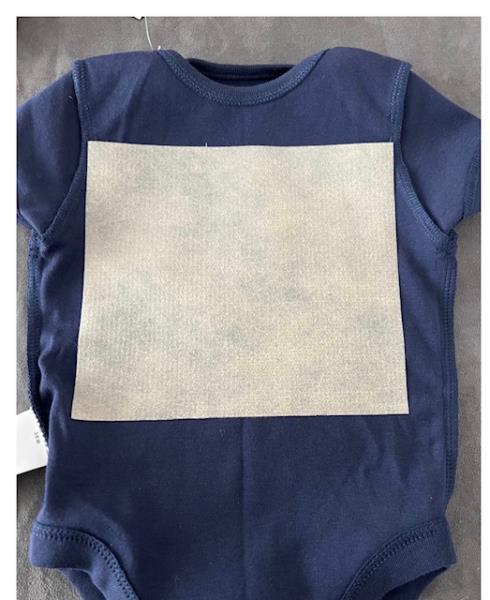
Step 4:
Turn onesie inside out . Fuse a cut piece of iron on no show mesh stabilizer to the inside back front of the onesie to cover the embroidering area of design. . Refer to manufacturer’s instruction. Turn onesie back right side out.
(Click Image to Enlarge)
Step 5:
Using your correct size hoop center onesie and hoop by using your hoop’s built in markings to match your marked axis points. Use your hoop grid to help guide. Take the back of the onesie and pull it over and around the hoop. Secure your excess fabric out of the embroidering area. Use fabric clamps, hair clips, tape, etc. Place water soluble stabilizer atop and secure.
(Click Image to Enlarge)
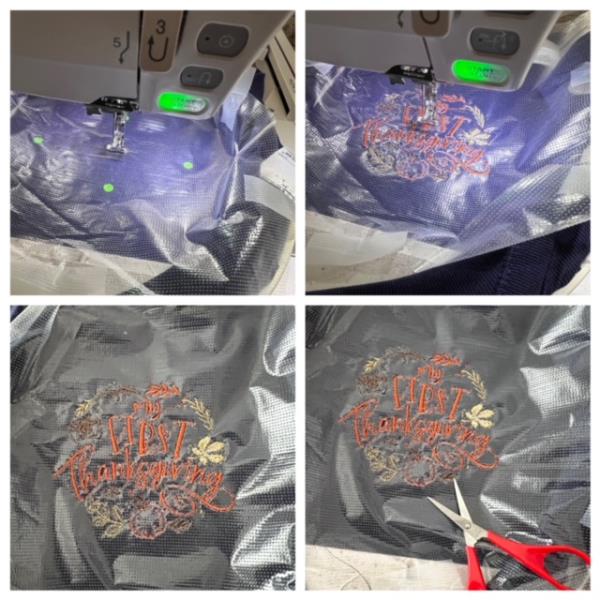
Step 6:
Attach your hoop to your machine. Confirm center needle placement. Make any needed adjustments. Begin the design stitch out process. Stitch out complete. Detach hoop. Cut and trim all jump stitches and loose thread ends front and back. Remove water soluble stabilizer. Turn onesie inside out and trim excess stabilizer away from stitched design. Optional: Place an iron on layer of soft backing on the inside of the onesie covering the stitched design. This will cover the rough stitches.
(Click Image to Enlarge)
Step 7:
Turn right side out. Iron press and your are done! Way to go! Repeat steps for second design file.