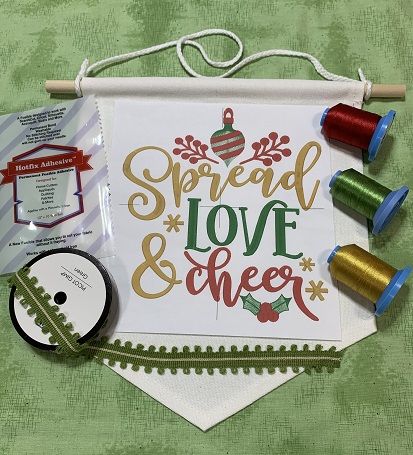
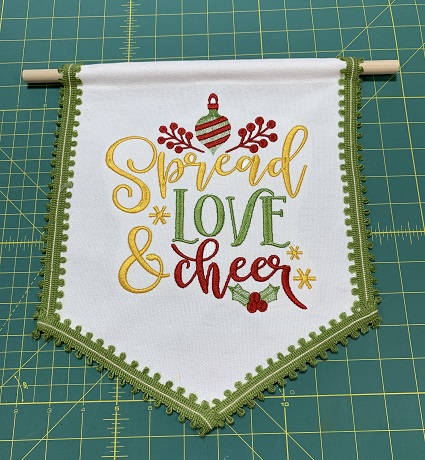
'Spread Love & Cheer' makes a colorful Christmas Banner. A commercial canvas banner (10"x12") from Amazon was used for this project. The project time may vary. The stitch count is 25,568. I usually stitch slower at 600 stitches per minute to get a better stitch quality which means a longer stitch time.
Step 1:
Read the directions before you begin the project. Gather & prepare the materials needed for the project. Iron and lightly starch the fabric. The banner in this sample has a dowel rod and string for hanging. If your banner is similar, remove the rod and string before beginning your project.
Step 2:
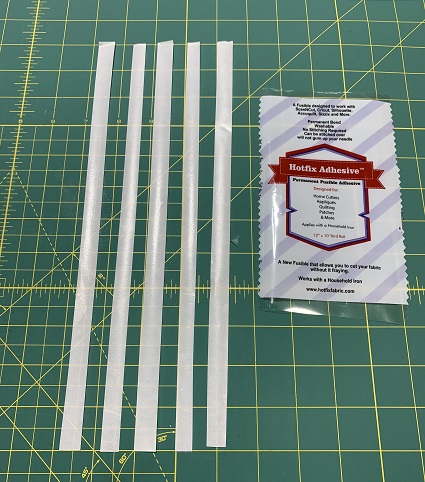
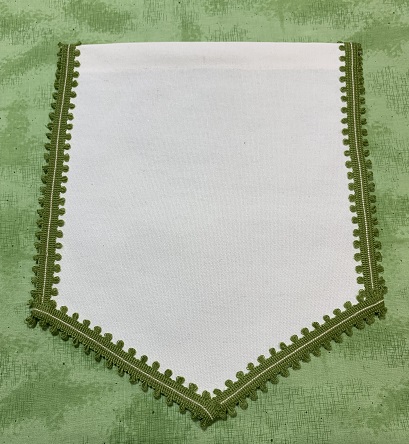
Trim the banner with ribbon to add color to the project. Hotfix, a fusible adhesive, was bonded to the back of the ribbon. Heat n Bond lite is a fusible adhesive that can be used instead of the Hotfix.
Measure the sides of your banner. Add 3" to each measurement. Cut the ribbon the length of the measurements. Measure the width of the ribbon. Cut strips of the fusible adhesive the width and length of the measurements.
Step 3:
Bond the Hotfix to the back or wrong side of the ribbon.
Step 4:
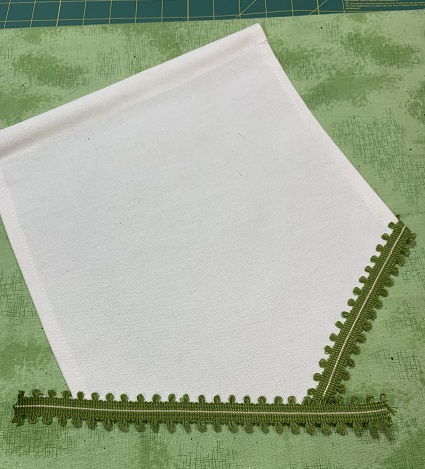
Follow package directions to bond the ribbon to the banner. Overlap the edges of the ribbon by about 1" on each end of the sides. Bond the ends of the ribbon to the back of the banner. Trim the ribbon ends to about 1" if needed before bonding it to the back of the banner.
Step 5:
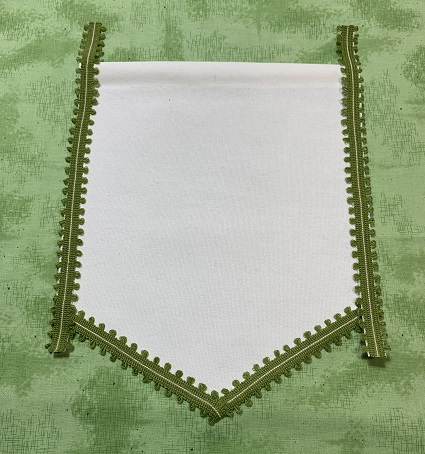
Bond the ribbon to the sides of the banner.
Step 6:
The ribbon is bonded to the banner. The ribbon adds a finishing touch to the banner.
Step 7:
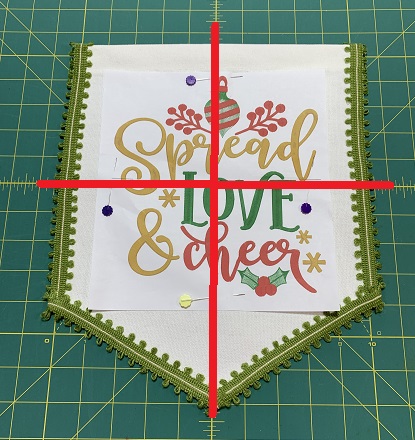
Decide where to place the embroidery design on the banner. Use a ruler and fabric pen or a design template to determine the placement. A design template was used for this project.
An essential tool for embroidery position and placement is a design template. A design template is a printout of the actual size of the design. It has the center of the design identified, as well as the horizontal and vertical axis lines. An embroidery program can print a template of any design. (Embrilliance Essentials embroidery software program was used to print the design template).
Step 8:
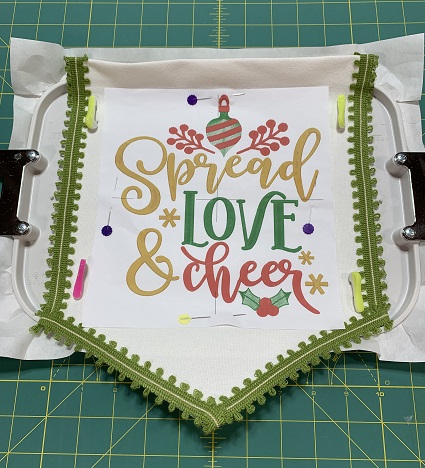
Hoop one piece of medium weight (2.5 oz.) cut away stabilizer. Center the fabric in the hoop. Use a light mist of 505 Temporary Adhesive spray on the stabilizer. Gently press the banner onto the stabilizer. Smooth the fabric surface. Use wonder pins to secure the fabric to the stabilizer.
Step 9:
Load the design on the machine. Place one piece of water-soluble topping over the stitching field. Tape the topping to the banner to keep it from moving while stitching. The topping was used to keep the stitches from sinking into the canvas fabric. A 75/11 size embroidery needle is suggested for this project. Attach the hoop to the machine. Check the stitching field area to make sure there is nothing in the way. Use the color guide to stitch the design.
Step 10:
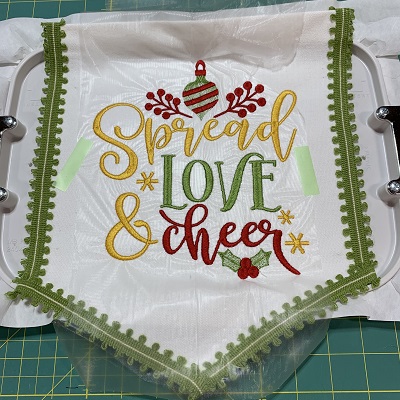
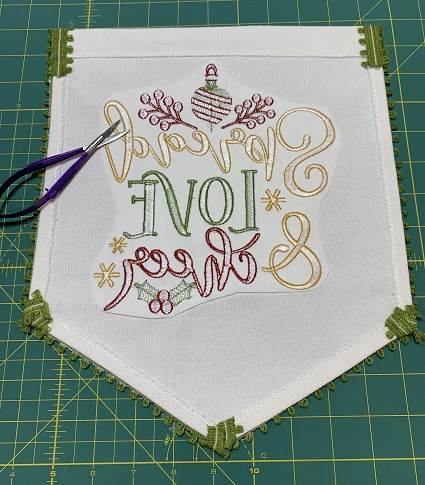
Once the design has completed stitching, remove the hoop from the machine. Remove the fabric from the hoop. Trim excess stabilizer from around the design leaving about a 1/2" margin. Trim long thread from the back of the design if needed.
Gently tear away the water-soluble topping from around the embroidery design. NO water is needed to remove the topping from the banner. Tweezers work great to remove any remaining topping pieces. Another way is to gently rub the remaining topping with a clean pencil eraser or the honeycomb shaped, rubber tip from a Seam Fix seam ripper. It's a quick and easy way to remove the topping.
Step 11:
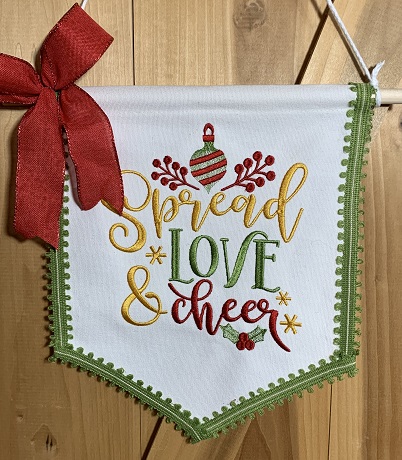
Insert the dowel rod into the slit at the top of the banner. Tie a string or ribbon on each end of the rod.
Marisa Littleton is a retired educator with a love for teaching and learning. Interests include machine embroidery, hand embroidery, quilting, cooking, and antiques.