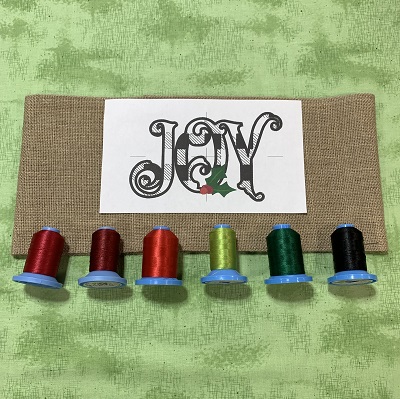
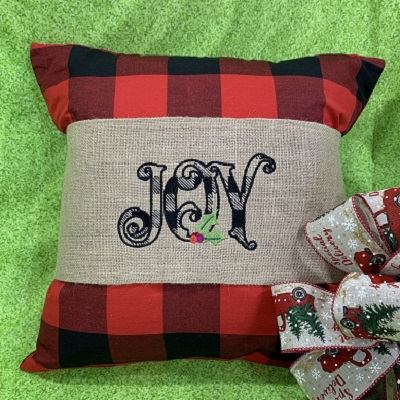
A 'Joy' embroidery design stitched on a commercial pillow wrap. If you can't find a commercial pillow wrap, you can make one yourself with the notes in this tutorial.
Step 1:
Read all the directions before beginning the project. Gather and prepare all the materials needed to make the pillow wrap. An essential tool for embroidery position and placement is a design template. A design template is a printout of the actual size of the design. It has the center of the design identified, as well as the horizontal and vertical axis lines. An embroidery program can print a template of any design. (Embrilliance Essentials embroidery software program was used to print the design template). Print the design template. A ruler and fabric pen works if you are not using a design template.
Step 2:
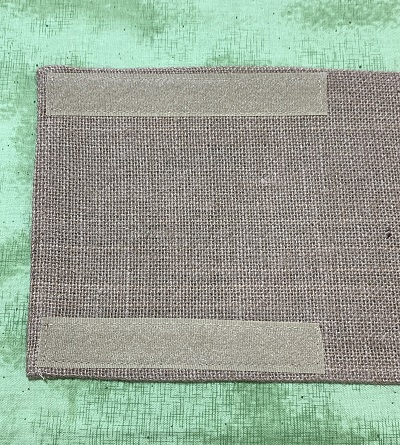
If you can't find a commercial pillow wrap, it would be easy to make one. Use one piece 12"x38" of canvas/duck cloth fabric. The canvas/duck cloth has a heavier weight. Fold the edges down 1/2" and then fold over again. Press the fold line with an iron. If using quilter's cotton, use two 10"x37" fabric pieces. Place the two pieces with right sides together. Sew a 1/4" seam around three sides leaving a 10" side open. Turn the fabric right sides out. Tuck the fabric edges inside at the open end of the wrap. Pin the edges together. Sew a 1/4" seam around ALL edges of the wrap. Sew 5" pieces of Velcro onto the ends of the wrap.
Step 3:
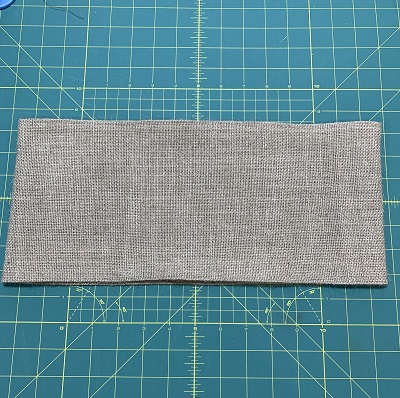
Starch and iron the pillow wrap. Center the closing on the back of the pillow wrap.
Step 4:
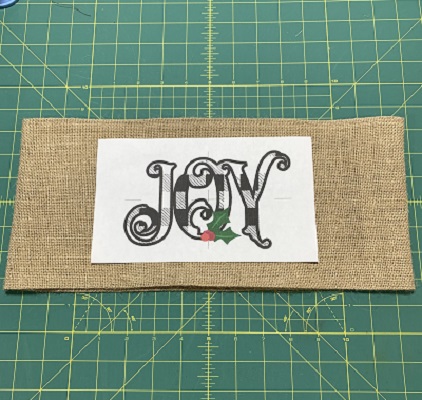
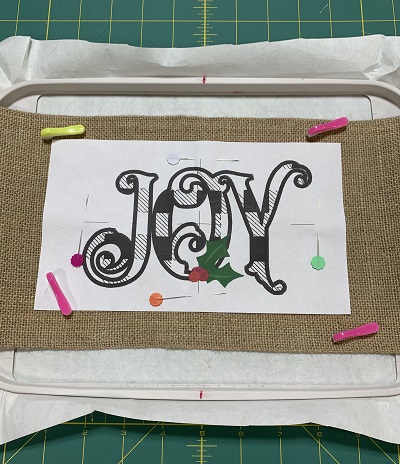
Use a cutting mat as a placement guide. Center the pillow wrap on the cutting mat. Center the design template on the pillow wrap. Pin the design template to the pillow wrap.
Step 5:
Hoop one piece of medium weight cut away stabilizer. Center the pillow wrap and the design template in the hoop. Lightly mist the stabilizer with 505 Temporary Adhesive spray. Use Wonder Pins to secure the wrap to the stabilizer.
Step 6:
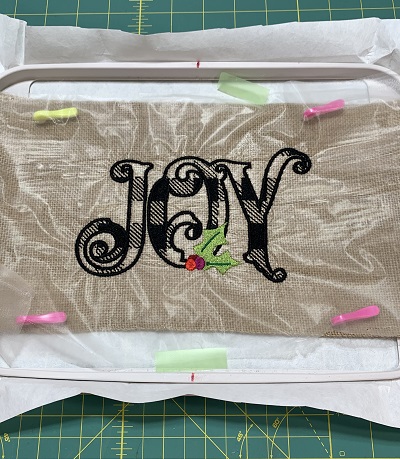
Load the design on the machine. A 75/11 size embroidery needle is suggested for this project. Attach the hoop to the machine. Check the stitching field area to make sure there is nothing in the way. Use the color guide to stitch the design.
Step 7:
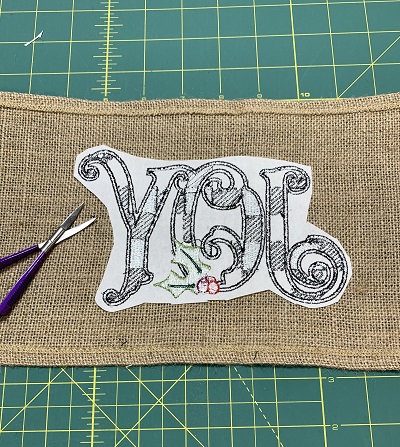
Once the design has completed stitching, remove the hoop from the machine. Remove the fabric from the hoop. Trim excess stabilizer from around the design leaving about a 1/2" margin. If needed, trim long threads from the back of the design.
Step 8:
You have completed a 'Joy' pillow wrap. Although made for an 18"x18" pillow, the wrap should fit a 16"x16" to 20"x20" pillow.
Marisa Littleton is a retired educator with a love for teaching and learning. Interests include machine embroidery, hand embroidery, quilting, cooking, and antiques.